
When upgrading your motorcycle’s braking system, finding a reliable 2pot caliper bracket 260mm setup requires focusing on precise mechanical compatibility rather than a brand logo alone. In the Philippines, where daily commutes involve navigating dense traffic, sudden downpours, and varied road surfaces, brake reliability is a non-negotiable safety requirement. Well-known aftermarket brands like Racing Boy (RCB), Nissin, and specialized CNC manufacturers like Mutarru or JRP are popular choices, but their reliability is entirely conditional on matching your motorcycle’s specific fork leg dimensions, mounting hole spacing, and your chosen 2-pot caliper.
Your motorcycle’s braking system is a life-critical assembly. Compromising on bracket quality or attempting to force an improper fitment risks catastrophic failure, including caliper detachment or front-wheel lockup at high speeds. Because local shop inventories and online marketplace availability fluctuate, this guide establishes a clear evaluation framework. By understanding the structural, material, and dimensional requirements of a caliper bracket, you can confidently select a high-quality component that ensures your safety on the road.
Critical Fitment Specs: What Makes a 2pot Caliper Bracket 260mm Setup Compatible?
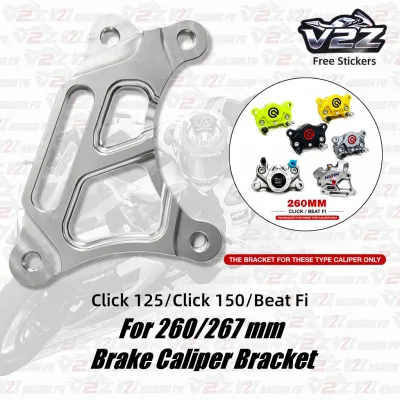
Upgrading to a 260mm rotor—which is significantly larger than the standard 190mm to 220mm discs found on most underbone motorcycles and scooters—requires a bracket that provides the exact radial offset. This offset positions the 2-pot caliper further outward so that the brake pads align perfectly with the rotor’s swept area. If the caliper sits too high, the pads will hang off the outer edge of the disc, creating an uneven wear lip. If it sits too low, the caliper body may rub against the rotor, causing severe thermal stress, scoring, and reduced stopping power.
Products mentioned in this guide
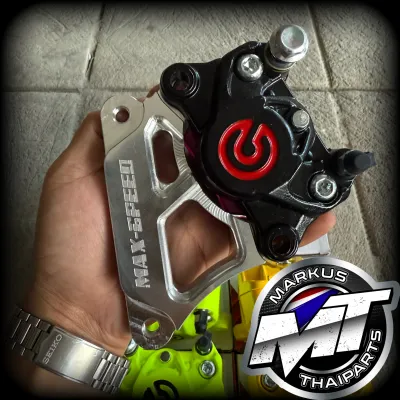
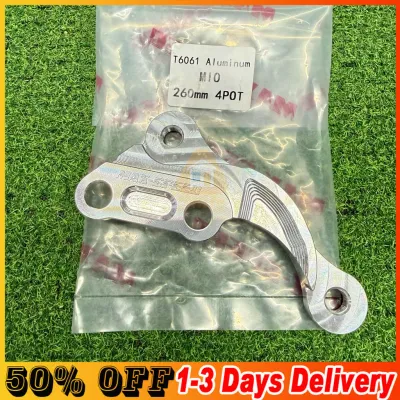
Prices are valid at publication and may change. Please refer to the product page for the latest price.
The bracket must also match your motorcycle’s front fork lower legs. You must verify the mounting hole spacing, often referred to as the mounting pitch. Common axial mounts on smaller displacement motorcycles use specific spacings (such as 80mm, 90mm, or 100mm center-to-center) that must align perfectly with the fork’s caliper lugs. Additionally, the bracket must provide adequate clearance so that it does not contact the fork tube or wheel speed sensors, even under full suspension compression.
Furthermore, the bracket’s caliper-side mounting standard must match your specific 2-pot caliper. For example, a bracket designed for a Brembo 2-piston “butterfly” caliper typically features an 84mm mounting pitch, whereas a Nissin Samurai or RCB 2-pot caliper may use entirely different bolt configurations. A bracket is only as reliable as its dual compatibility with both your specific fork legs and your selected caliper model.
Before purchasing any bracket, always use a digital caliper to measure your fork’s mounting bolt spacing and the caliper’s mounting pitch. Cross-reference these dimensions with your motorcycle’s factory service manual and the bracket manufacturer’s specifications. Never attempt to grind, drill, or modify a bracket to force a fitment, as this severely compromises its structural integrity.
Key Dimensions for Comparing Caliper Bracket Brands
When evaluating different bracket brands, the material and manufacturing process are the most critical indicators of long-term durability. High-quality aftermarket brackets are CNC-machined from solid billets of aircraft-grade aluminum alloys, such as 6061-T6 or 7075-T6. This process ensures high tensile strength and resistance to fatigue. In contrast, cheap, unbranded brackets are often made of cast aluminum or low-grade pot metals, which can contain internal air pockets and are highly susceptible to cracking under the sudden, immense shear forces of emergency braking.

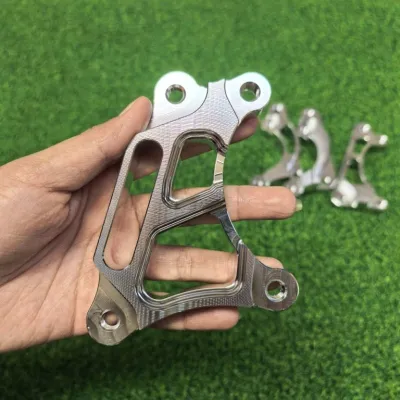
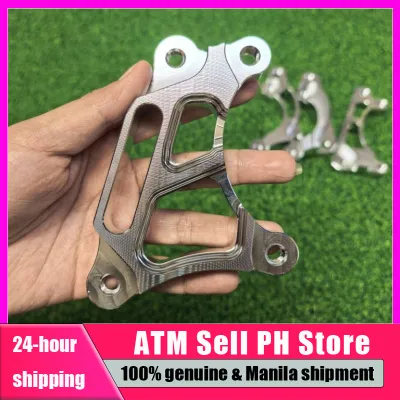
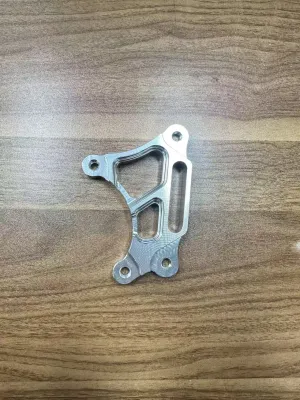
To evaluate physical quality, inspect the bracket for clean, precise machining lines and a uniform thickness. The load-bearing areas around the mounting holes should be robust, typically measuring at least 8mm to 10mm in thickness. Avoid brackets that show rough casting seams, uneven surfaces, or tool marks, as these indicate poor quality control and potential stress concentration points.
Structural design is another key differentiator. A reliable bracket is engineered to resist torsional flex when the caliper clamps down on the spinning 260mm rotor. Look for brackets that incorporate structural ribbing or gussets around the mounting ears. This design distributes the braking torque evenly across the bracket, preventing the caliper from twisting. A flexing bracket causes uneven pad wear, a spongy brake lever feel, and a dangerous loss of hydraulic efficiency.
Pay close attention to the included mounting hardware. Reputable brands package their brackets with high-tensile steel fasteners (such as Grade 8.8 or 10.9 bolts) and precision-machined spacers. Lower-tier options often include soft steel bolts that are easily stripped during installation or can shear under load. Ensure the bolts feature the correct thread pitch for your caliper and fork lugs.
The quality of the surface finish is especially important in tropical climates like the Philippines, where high humidity, heavy monsoon rains, and coastal salt air accelerate corrosion. Premium brackets feature a hard-anodized finish that penetrates the metal surface, providing a durable barrier against rust and chemical degradation from spilled brake fluid. Painted or bare metal brackets will quickly chip, oxidize, and degrade structurally.
When choosing between brands, use this decision framework:
- Choose Premium CNC Billet Brands (such as RCB or established custom CNC specialists) if you ride daily in heavy stop-and-go traffic, carry heavy pillion loads, or participate in weekend track days where thermal loads and braking forces are consistently high.
- Choose Reputable OEM-Equivalent Brackets if you are restoring or maintaining a daily commuter bike for moderate city riding, provided the manufacturer offers verified material certifications and clear compatibility documentation.
How to Verify Brand Reliability and Avoid Counterfeits
The Philippine motorcycle parts market contains a wide variety of replica and counterfeit components. Buying a counterfeit brake bracket is an immense safety risk, as these imitation parts bypass quality control and use inferior scrap metals. To protect yourself, always buy critical safety components from authorized physical dealerships, recognized flagship online stores, or specialized motorcycle service centers with a proven reputation.
Spotting a counterfeit requires a close physical inspection of the product and packaging. Genuine brackets from established brands typically feature clean, laser-etched logos, distinct part numbers, and high-quality packaging complete with holographic authenticity seals. Counterfeits often have misspelled brand names, blurry printed labels, or are sold in plain plastic bags without any documentation or origin markings.
Be highly suspicious of prices that seem too good to be true. High-precision CNC machining, material testing, and quality control require significant manufacturing investment. If a bracket is priced significantly lower than the average market rate for established brands, it is almost certainly a counterfeit or a substandard cast replica. Saving a few hundred pesos is never worth risking a brake system failure.
Before purchasing, cross-reference the seller’s listed part number with the manufacturer’s official digital catalog. If you are purchasing through an online marketplace, thoroughly read the customer reviews, focusing specifically on fitment feedback and structural complaints. Do not hesitate to ask the seller for proof of their official dealership status or product authorization before finalizing your order.
Installation Safety and Professional Verification
Installing a caliper bracket is a high-precision task that directly affects your physical safety. An improperly installed bracket can result in loose fasteners, causing the caliper to shift and collide with the wheel spokes. This can lock the front wheel instantly, leading to an immediate crash. Conversely, over-tightening can strip the aluminum threads on the bracket or your motorcycle’s fork legs, ruining the components.
Always use a calibrated torque wrench to tighten all bracket and caliper mounting bolts. Refer to your motorcycle’s service manual and the caliper manufacturer’s instructions for the exact torque specifications (usually expressed in Newton-meters or foot-pounds). Never rely on hand-tightening or guessing the torque, as aluminum threads are highly sensitive to over-stressing.
Apply a medium-strength thread-locking compound (typically blue threadlocker) to the clean threads of the mounting bolts before installation. This compound prevents the fasteners from backing out due to the high-frequency engine and road vibrations common to motorcycle riding. Ensure the threads are completely free of grease, oil, or old adhesive before application.
Once the installation is complete, perform these mandatory safety checks:
- Wheel Rotation: Elevate the front wheel and spin it by hand. Verify that the wheel rotates freely without any binding, dragging, or unusual noise from the rotor and caliper.
- Hose Clearance: Turn the handlebars fully from lock to lock and compress the front suspension. Ensure the brake hose is not stretched, pinched, or rubbing against the tire, fender, or fork legs.
- Hydraulic Pressure: If you opened the hydraulic system, bleed the brakes thoroughly to remove all air bubbles. Confirm that the brake lever feels firm and responsive.
- Bedding-In: Perform several low-speed test stops (at 15 to 20 km/h) in a safe, empty parking lot or quiet side street to bed in the brake pads to the new 260mm rotor before entering public roads.
If you do not own a calibrated torque wrench, lack experience with hydraulic brake systems, or notice any alignment issues during a dry fit, do not attempt to ride the motorcycle. Stop immediately and have the installation performed or inspected by a qualified professional motorcycle mechanic. Professional installation ensures your braking system operates exactly as engineered.
Frequently Asked Questions (FAQ)
Can I use a 2-pot bracket designed for a 220mm disc on a 260mm disc?
No. A bracket designed for a 220mm disc is engineered with a shorter radial offset. If you attempt to mount a 260mm disc using a 220mm bracket, the caliper will physically collide with the outer circumference of the larger rotor, preventing the wheel from turning. You must use a bracket that is explicitly designed, measured, and labeled for a 260mm disc to ensure the caliper is positioned at the correct height and distance.
Do I need to change my brake hose when installing a new caliper bracket?
It depends on your motorcycle’s stock hose length and the final position of the new caliper. Upgrading to a larger 260mm disc moves the caliper further outward and upward from its original position. This change can stretch a stock rubber hose to its physical limit or cause sharp kinks when the front forks extend. Inspect the hose tension at full suspension extension and steering lock. If there is any tension, rubbing, or pinching, you must replace the stock hose with a longer, high-quality braided stainless steel brake line to ensure consistent hydraulic pressure and safety.
Community discussion
Share your experience or ask a question. Comments are reviewed before publication.