
Finding the right sticker design for your Yamaha Aerox V3 is about balancing personal expression with the scooter’s aggressive, angular geometry. Because the Aerox V3 features sharp body panels, prominent side fairings, and a sporty stance, your choice of decals can either accentuate these dynamic lines or completely transform the motorcycle’s character. Whether you navigate daily city traffic or showcase your ride at local meets, selecting a design that aligns with your riding style ensures your scooter stands out while preserving its aesthetic value.
Customizing a motorcycle with decals is more than a cosmetic upgrade; it is a practical way to protect the underlying paint from minor scratches and road debris. However, because the Aerox V3 has a highly contoured chassis, choosing the wrong material or an incorrect template can lead to peeling edges, bubbles, and an untidy finish. By understanding the available design themes, evaluating material specifications, and following proper application techniques, you can achieve a professional-grade look that matches your personal riding persona.
Matching Sticker Themes to Your Riding Style
Your riding style and daily environment play a significant role in determining which visual theme best suits your Aerox V3. The scooter’s design is naturally sporty, but it serves as a highly versatile canvas that can accommodate a wide range of aesthetics, from high-octane track patterns to understated, stealthy finishes.
Products mentioned in this guide

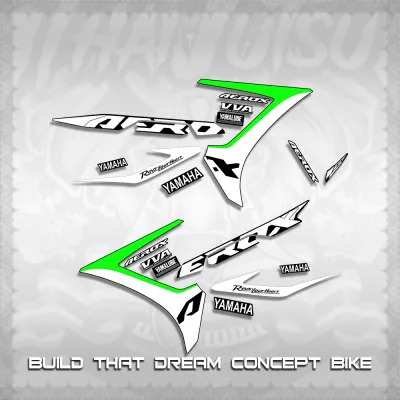
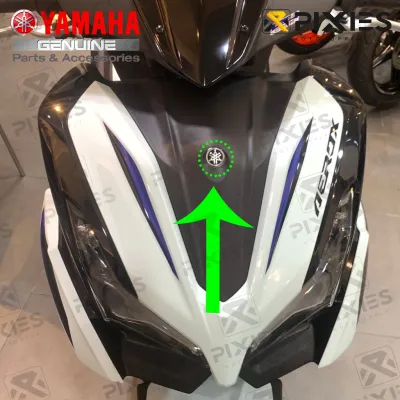
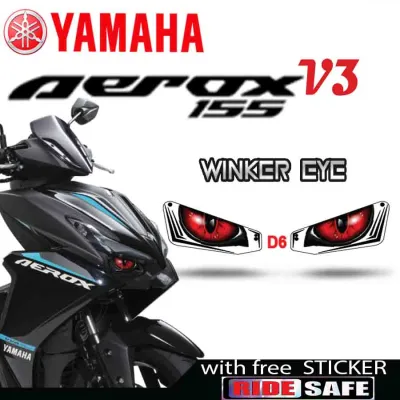
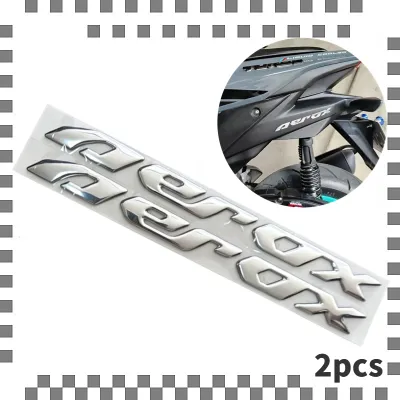
Prices are valid at publication and may change. Please refer to the product page for the latest price.
Racing and Track-Inspired Motifs
For riders who love the thrill of the track and want to emphasize the sporty heritage of the Aerox V3, racing-inspired designs are an excellent choice. These layouts typically feature sharp, aerodynamic lines that follow the natural contours of the front cowl and side panels, creating an illusion of forward motion even when the scooter is parked. High-contrast color blocking—such as pairing vivid blues, bright reds, or neon yellows with deep blacks or whites—helps the graphics pop.
Sponsor-style layouts are a staple of this theme. These designs incorporate mock or replica logos of performance parts, oil brands, and racing teams along the lower fairings and front fender. When choosing a racing motif, look for designs that utilize diagonal stripes and tapered graphics, as these elements complement the aggressive forward lean of the V3 chassis. This style is highly visible and perfect for riders who participate in club events, weekend group rides, or simply appreciate a high-energy, motorsport-inspired aesthetic.
Minimalist and Stealth Aesthetics
If you prefer a clean, sophisticated look that enhances the scooter’s premium feel without drawing excessive attention, minimalist and stealth designs are highly suitable. This aesthetic focuses on simplicity, utilizing matte finishes, satin textures, and tone-on-tone accents. Instead of busy patterns and bright contrasting colors, minimalist decals often use shades that closely match or subtly contrast with the factory paint, such as matte black graphics on a gloss black body, or dark gray accents on a silver chassis.
Subtle pinstripes along the wheel rims, the edges of the front cowl, or the rear grab bar area can add a touch of refinement without cluttering the overall design. Minimalist themes are highly favored by daily commuters and professionals who want their Aerox V3 to look sleek, modern, and factory-plus. This approach preserves the original design language of the motorcycle while adding a personalized layer of protection and style that remains understated.
Street and Urban Graphics
Urban riders who navigate busy city streets often look for designs that reflect modern street culture and maximize visibility. Street and urban graphics incorporate bold typography, graffiti-inspired elements, abstract geometric patterns, and vibrant color schemes. This style allows for a high degree of creativity, often blending contrasting neon colors with dark backgrounds to make the scooter highly noticeable in low-light city environments.
Camouflage patterns, digital glitch effects, and stylized urban art are popular choices within this category. These designs work exceptionally well on the Aerox V3 because the multi-layered panel layout of the scooter allows different graphic elements to overlap naturally across the fairings. Choosing a street-inspired design not only showcases your personal style but also serves a practical safety purpose by increasing your visual presence to other motorists in dense urban traffic.
Custom and Personalized Wraps
For the ultimate level of personalization, custom full-body wraps and bespoke illustrations offer limitless possibilities. This theme is ideal for riders who want to tell a specific story or showcase a highly detailed theme, such as futuristic cyberpunk patterns, intricate anime character graphics, or custom color-shifting vinyl that changes hue depending on the viewing angle and lighting conditions.
Unlike partial decal kits, a full-body wrap covers almost every visible painted surface of the Aerox V3. This requires a comprehensive design plan where the graphics are precisely mapped to the complex three-dimensional curves of the scooter’s panels. While custom wraps require a higher level of planning and investment, they offer a truly unique statement that ensures your motorcycle is one of a kind at any show or gathering.
Evaluating Material Quality and Paint Safety
Selecting a sticker design is only half the battle; the longevity of the look and the safety of your scooter’s original paint depend entirely on the quality of the vinyl material. In tropical climates like the Philippines, where motorcycles are subjected to intense sunlight, high humidity, and sudden heavy downpours, choosing substandard materials can lead to rapid degradation.

Verifying UV Resistance and Weatherproofing
Before purchasing any sticker kit, it is crucial to check the manufacturer’s material specifications rather than assuming quality based on the price tag. Look for labels that explicitly state the vinyl is UV-stabilized or features a protective over-laminate. The intense tropical sun can quickly fade printed inks, turning vibrant reds and blues into dull, washed-out colors within a few months.
Weatherproofing is equally important to withstand heavy monsoon rains and road grime. High-quality decals utilize polymeric or cast vinyl, which are designed to resist water penetration and chemical exposure from road salt and mild cleaning detergents. Checking product descriptions for these specific material ratings ensures your design remains vibrant and intact through changing seasonal conditions.
Assessing Adhesive Types and Paint Safety
To protect your Aerox V3’s original factory paint, you must verify the type of adhesive used on the decals. High-grade motorcycle graphics utilize pressure-activated, semi-permanent acrylic adhesives. These adhesives are designed to form a strong bond over time while remaining clean and removable without damaging the underlying clear coat.
Avoid cheap sticker kits that use aggressive, industrial-grade glues. These low-quality adhesives can react chemically with the motorcycle’s plastic panels and clear coat, leading to permanent discoloration, bubbling, or adhesive transfer that is incredibly difficult to clean. A quality adhesive should allow you to reposition the sticker during the installation process and leave minimal to no residue when it is eventually peeled off.
Checking Vinyl Thickness and Flexibility
The Aerox V3 chassis is characterized by sharp angles, deep recesses, and complex curves, particularly around the front headlight cowl and the side fairings. Standard flat vinyl sheets are often too rigid to conform to these shapes, leading to tension buildup that eventually causes the edges of the sticker to lift and collect dirt.
When evaluating decal kits, look for materials that offer a balance of thickness and flexibility. Cast vinyl is generally thinner and highly conformable, making it the preferred choice for wrapping complex curves. Polymeric calendered vinyl is also highly durable and suitable for flatter panels. Ensure the product specifications indicate that the material is designed for automotive or motorcycle applications, as these are formulated to stretch slightly under controlled heat to hug the sharp contours of the V3 panels perfectly.
Sourcing and Verifying Fitment for the Aerox V3
Because the Aerox V3 has distinct body panel dimensions compared to previous generations (such as the V1 or V2), sourcing a kit that is precisely templated for the V3 is essential to avoid alignment issues and unnecessary modifications.
Navigating Specialized Shops and E-Commerce Platforms
When searching for sticker kits, look for specialized motorcycle accessory shops and reputable sellers on e-commerce platforms. Compare kit prices in ₱, keeping in mind that prices will vary depending on whether you are buying a simple accent decal set, a pre-cut partial kit, or a premium full-body wrap.
Be cautious of listings that use generic titles. Always search specifically for “Aerox V3” templates and avoid listings that group multiple model generations together without clear selection options. Specialized local shops often provide the added benefit of offering installation services or direct support if a specific panel piece needs replacement.
Cross-Referencing Dimensions and Buyer Proofs
Before finalizing your purchase, take the time to cross-reference the panel dimensions and layout shown in the product listing with your actual vehicle. Check the seller’s feedback section for buyer photos and real-world proofs. Seeing how the decals look on an actual Aerox V3 parked in real-world conditions provides valuable insight into the accuracy of the cuts, the vibrancy of the colors, and how well the graphics align across adjacent panels.
Pay close attention to reviews that mention the fitment around the front signal lights, the keyless ignition console, and the rear grab bar area. If buyers report that the decals required significant trimming or did not line up correctly, it is a strong indication that the template used by the manufacturer is inaccurate.
Identifying Red Flags in Product Listings
One of the most common pitfalls is purchasing kits advertised as “universal fit” or “semi-universal.” The complex, multi-layered bodywork of the Aerox V3 does not accommodate universal graphics well. These kits often require excessive cutting with utility knives during installation, which increases the risk of accidentally scratching your scooter’s factory paint.
Other red flags include listings that lack detailed photos of the uninstalled sticker sheet, sellers who cannot specify the brand or type of vinyl used, and prices that seem unusually low for a full-body kit. Investing in a precisely cut, model-specific template saves time, reduces installation frustration, and ensures a seamless, professional finish.
Preparation and Application Best Practices
Achieving a flawless, bubble-free sticker application requires careful preparation and a patient, methodical approach. Even the highest-quality decals will fail to adhere properly if the installation surface is not prepared correctly.
Thorough Cleaning and Degreasing
Before beginning the application process, the scooter’s body panels must be meticulously cleaned. Wash the entire motorcycle with a wax-free car shampoo to remove loose dirt and road grime. Once dry, you must remove any remaining wax, polish, silicone-based protectants, or oil residues, as these substances prevent the sticker adhesive from bonding.
Use a dedicated paint-safe degreaser or isopropyl alcohol to prep the surfaces. Always read the cleaning product’s label to verify it is safe for use on motorcycle plastics and clear coats, and test it on a small, inconspicuous area first. Wipe the panels down with a clean, lint-free microfiber cloth and ensure the workspace is free of dust and wind that could blow debris onto the exposed adhesive.
Layout Planning and Controlled Heat Application
Before peeling off the backing paper, temporarily position the decals on the scooter using masking tape. This allows you to step back, evaluate the alignment across different panels, and make necessary adjustments. Once you are satisfied with the layout, peel a small section of the backing paper and begin applying the sticker from one edge, using a soft felt-tipped squeegee to smooth out air bubbles as you go.
For complex curves and recessed areas, use mild, controlled heat from a hairdryer or a heat gun on a low setting to make the vinyl more pliable. Gently warm the vinyl to help it conform to the sharp edges of the Aerox V3 panels without overstretching. Overstretching the material can distort the printed design and weaken the adhesive, causing it to pull back over time. Once the sticker is fully applied, go over the entire graphic with light heat and firm squeegee pressure to lock the adhesive’s memory.
Safety Boundaries and Professional Installation
When applying decals, always respect the safety boundaries of your vehicle. Never apply stickers over headlights, taillights, turn signals, or safety reflectors, as this compromises your visibility and road safety. Additionally, ensure that critical identification plates, such as the chassis number, and manufacturer warning labels remain completely uncovered and legible.
If you have purchased a complex, full-body wrap kit, or if your Aerox V3’s original paint is already chipped, cracked, or compromised, it is highly recommended to seek the assistance of a qualified professional wrap installer. Professional installers have the specialized tools, dust-free environments, and experience required to handle intricate installations, ensuring your investment is protected and the final result is flawless.
Frequently Asked Questions (FAQ)
Will applying stickers void the Yamaha warranty?
Cosmetic stickers and vinyl wraps typically do not void the manufacturer’s mechanical or electrical warranty for your Aerox V3. However, you must ensure that the decals do not cover vital components, such as cooling vents, sensors, warning labels, or vehicle identification plates. Always check with your local authorized dealer regarding their specific policies before making major cosmetic modifications, and ensure that no electrical wiring or mechanical parts are altered during the installation process.
How do I safely remove old decals without damaging the paint?
To safely remove old stickers, use a hairdryer or a heat gun on a low setting to gently warm the vinyl and soften the adhesive. Once warm, carefully peel the sticker back at a shallow, 180-degree angle rather than pulling straight up, which minimizes stress on the clear coat. Use a plastic scraper or a microfiber cloth saturated with a mild, paint-safe adhesive remover to clean up any leftover residue. If the original paint or clear coat shows signs of cracking, peeling, or degradation, stop immediately and consult a professional to prevent further damage.
Community discussion
Share your experience or ask a question. Comments are reviewed before publication.