
Finding the right brake shoe for your Yamaha Mio i 125 is essential for navigating the demanding traffic conditions, sudden downpours, and steep routes common in the Philippines. The ideal brake shoe brand for your scooter depends on your daily riding environment, payload requirements, and maintenance preferences. While there is no single “best” brand for every rider, choosing between original equipment manufacturer (OEM) parts and high-quality aftermarket alternatives allows you to tailor your braking performance to your specific daily needs.
Choose OEM (Yamaha Genuine Parts) if: You prioritize a highly predictable, progressive braking feel, guaranteed factory fitment, and a balanced wear rate that protects your rear wheel hub from premature wear. Original parts require minimal bedding-in and are optimized for standard daily commuting on relatively flat, urban roads.
Choose Reputable Aftermarket Brands if: You frequently carry heavy loads, ride with a pillion passenger, or regularly traverse steep terrains, such as the hills of Antipolo or Tagaytay. High-quality aftermarket brands, such as Bendix or Elig, offer specialized ceramic or semi-metallic compounds that provide a sharper initial bite and superior resistance to heat fade under heavy, repeated braking.
Products mentioned in this guide
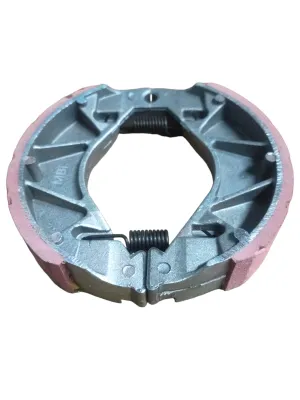
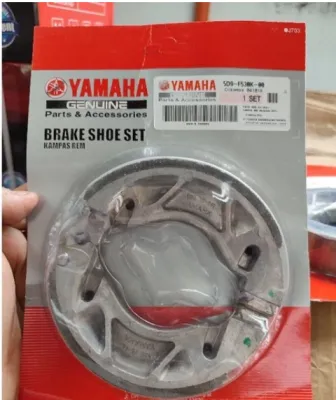
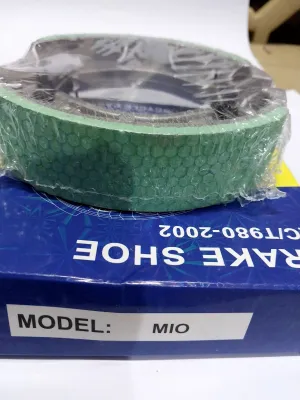
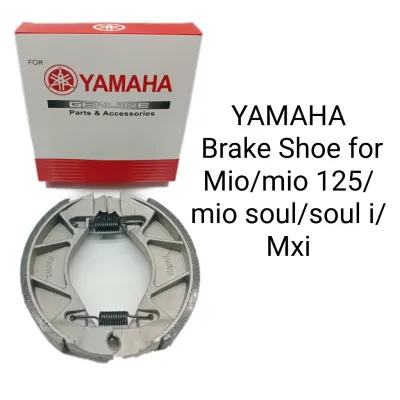
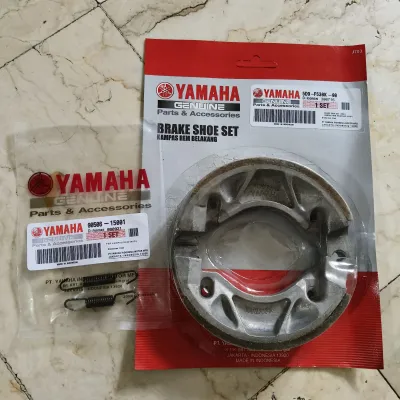
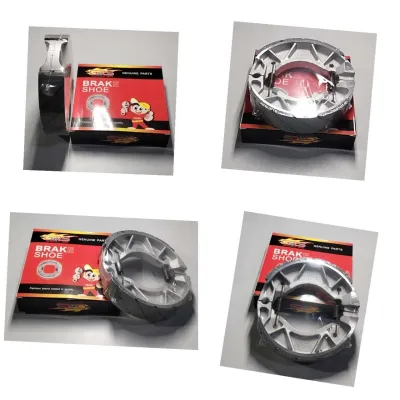
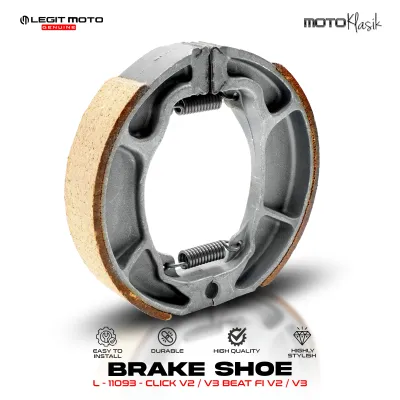
Prices are valid at publication and may change. Please refer to the product page for the latest price.
Verify first if: You are considering budget-friendly or lesser-known aftermarket options. Always inspect the friction material composition, check for manufacturing certifications, and confirm the exact model compatibility for the Mio i 125 before making a purchase. Opting for unbranded or suspiciously cheap alternatives can compromise your safety on the road.
Key Factors That Determine Stopping Power and Durability
To make an informed decision when purchasing a brake shoe for your Mio i 125, it is crucial to understand the technical elements that govern rear drum brake performance. Unlike front disc brakes, which are exposed to the open air, rear drum brakes are fully enclosed systems, making them highly sensitive to material quality and environmental conditions.
Friction Material Composition The compound bonded to the brake shoe is the single most important factor in determining how quickly your scooter stops and how long the shoes will last. Most standard brake shoes utilize organic compounds, often referred to as Non-Asbestos Organic (NAO). These materials consist of fibers such as glass, rubber, and carbon, bound together with high-temperature resins. Organic shoes are generally quiet, smooth, and gentle on the brake drum, making them ideal for light, daily urban commuting. However, they tend to wear out faster under heavy loads or wet conditions.
In contrast, semi-metallic or advanced ceramic-carbon aftermarket compounds incorporate fine metallic fibers or ceramic particles into the friction matrix. These materials offer a much higher friction coefficient, resulting in a stronger, more immediate stopping force. They also withstand much higher temperatures before losing their grip. The trade-off is that these harder compounds can be noisier, especially in humid environments, and they can accelerate the wear of the inner lining of your scooter’s aluminum wheel hub.
Heat Dissipation and Fade Resistance Because drum brakes are enclosed within the rear wheel hub, they trap heat generated by friction during braking. In the tropical climate of the Philippines, where ambient temperatures frequently exceed 30°C, managing this heat is a major challenge. When you ride down long descents or navigate stop-and-go traffic along congested highways, the temperature inside the drum can skyrocket.
If the friction material cannot handle this heat, it undergoes a phenomenon known as brake fade. During brake fade, the binding resins in the friction compound begin to outgas, creating a thin, slippery layer of gas between the shoe and the drum. This drastically reduces the friction level, making the brake lever feel spongy and significantly increasing your stopping distance. High-quality brake shoe brands use advanced, thermally stable resins that resist outgassing, ensuring consistent stopping power even when the drum runs hot.
Shoe-to-Drum Contact Area For a drum brake to work efficiently, the curved surface of the brake shoe must match the inner circumference of the brake drum perfectly. Precision manufacturing is critical here. If a brake shoe is molded with even a slight deviation in its radius, only a fraction of the friction material will make contact with the drum when you pull the lever.
This reduced contact patch concentrates all the braking force and heat onto a small area, leading to rapid, uneven wear, localized overheating, and weak overall braking performance. Reputable brands invest in high-precision casting and machining to ensure their shoes match the exact 130mm standard drum diameter of the Mio i 125, providing maximum contact from the very first ride.
Spring and Hardware Quality The performance of your rear brake does not rely solely on the friction material; the return springs play an equally vital role. These springs are responsible for pulling the brake shoes away from the drum wall the moment you release the brake lever.
If a brand includes weak, low-tension springs, or if you reuse old, fatigued springs, the brake shoes may fail to retract fully. This causes the shoes to drag continuously against the spinning drum. Constant brake drag generates excessive heat, glazes the friction material, accelerates wear, and increases rolling resistance, which ultimately hurts your scooter’s fuel economy. Premium brake shoe kits often include high-tension, heat-resistant return springs to prevent this issue.
OEM vs. Aftermarket Brake Shoes: Comparing Your Options
When shopping for a replacement brake shoe for your Mio i 125, your choices will generally fall into two main categories: Yamaha Genuine Parts (OEM) and reputable aftermarket alternatives. Understanding the design philosophy and trade-offs of each category will help you select the option that best matches your riding style.

Yamaha Genuine Parts (OEM)
Yamaha Genuine Parts are engineered specifically for the Mio i 125, taking into account the scooter’s weight, engine output, and factory suspension characteristics. These parts are designed to deliver a balanced, reliable performance under a wide variety of standard operating conditions.
Performance Profile OEM brake shoes utilize a high-quality organic compound that provides a highly linear and predictable braking feel. When you pull the rear brake lever, the stopping force increases smoothly in direct proportion to the pressure you apply. This progressive modulation is particularly forgiving on wet, slippery roads, as it helps prevent sudden rear-wheel lockups that can lead to a skid.
Durability Yamaha’s engineering team prioritizes a balance between the lifespan of the brake shoe and the lifespan of the brake drum. Because the inner drum liner is integrated into the rear wheel hub, replacing a worn-out drum requires replacing or rebuilding the entire rear wheel assembly, which is highly expensive. OEM shoes are designed to be sacrificeable; they wear down gradually over time while preserving the relatively soft metal of the brake drum.
Best For This option is ideal for riders who use their Mio i 125 for standard daily commuting, value a smooth and predictable factory feel, and want a straightforward replacement process with absolutely no compatibility or fitment guesswork.
Reputable Aftermarket Alternatives
The aftermarket segment offers a diverse range of products designed to cater to specific performance needs, environmental challenges, or budget considerations. Established aftermarket brands modify the friction formulas to enhance certain characteristics beyond factory standards.
Performance Profile Many reputable aftermarket brands focus on providing a stronger initial bite and higher thermal limits. For instance, brands that utilize ceramic-carbon or semi-metallic formulations offer a much sharper braking response. This means you do not have to squeeze the brake lever as hard to achieve the same stopping power as OEM shoes, which can reduce hand fatigue during long rides through heavy traffic.
Durability High-quality aftermarket brake shoes can offer exceptional longevity, particularly in demanding conditions. For delivery riders or those who carry heavy cargo daily, these specialized compounds resist wear much better than standard organic shoes. However, it is important to note that highly aggressive, high-friction compounds can cause faster wear on your rear wheel hub’s drum liner.
Best For Aftermarket shoes are highly suited for riders who require enhanced stopping power for carrying heavy loads, those who frequently ride in hilly or mountainous regions, and budget-conscious commuters looking for reliable, certified alternatives from trusted manufacturers. Typical price bands for these alternatives run between ₱150 and ₱500, offering competitive value.
Crucial Caveat When exploring the aftermarket, you must strictly stick to well-known, certified brands. The market is flooded with unbranded, ultra-cheap brake shoes that carry no safety certifications. These low-grade products often use poor-quality adhesives to bond the friction material to the aluminum backing plate. Under the high heat of continuous braking, this bond can fail, causing the friction lining to delaminate and jam inside the drum. This can instantly lock your rear wheel, presenting an extreme safety hazard.
How to Evaluate Brand Reliability and Spot Counterfeits
With the high volume of motorcycle parts available in physical shops and online marketplaces in the Philippines, distinguishing genuine, reliable products from low-quality counterfeits is critical for your safety. Taking a systematic approach to verifying your parts ensures that you install only dependable components on your Mio i 125.
Checking Certifications and Standards Legitimate brake manufacturers subject their products to rigorous safety testing and quality control. Look for clear indications of manufacturing standards on the product packaging. Certifications such as ISO 9001 (for quality management), QS 9000, or compliance with international friction material standards demonstrate that the brand adheres to strict safety protocols. Reliable brands are transparent about these certifications, often printing their registration numbers directly on the box.
Packaging and Build Quality A close physical inspection of the product and its packaging can reveal a lot about its authenticity. Genuine products are shipped in high-quality packaging with crisp, clear printing, accurate brand logos, and specific part numbers that correspond directly to the Mio i 125. Many premium brands also include holographic security stickers or scratch-off verification codes on their boxes.
When inspecting the brake shoe itself, examine the contact point where the friction material meets the aluminum backing plate. The bonding should be perfectly clean, uniform, and free of gaps, cracks, or excess adhesive overflow. The friction material should have a consistent texture without loose metal chunks, deep voids, or crumbling edges. The aluminum backing plate should be cleanly cast with no rough, sharp edges or structural defects.
Verifying Authorized Dealers To minimize the risk of purchasing counterfeit parts, always source your brake shoes from authorized channels. For OEM parts, purchase directly from authorized Yamaha 3S shops or certified parts distributors. If you prefer aftermarket brands, buy from their official flagship stores on reputable e-commerce platforms or from well-established local motorcycle supply shops with a proven track record. Be highly skeptical of listings that offer “genuine” parts at prices that are significantly lower than the standard market rate.
Analyzing User Feedback When shopping online, look beyond the overall star rating and delve into the written reviews. Filter out generic, low-effort reviews that only praise fast shipping or packaging. Instead, look for detailed, long-term feedback from actual Mio i 125 owners. Pay close attention to comments discussing how the brakes perform in wet weather, whether they emit squealing noises, how easy they were to fit, and how many kilometers they lasted before requiring adjustment or replacement.
Installation, Bedding-In, and Critical Safety Checks
Replacing the rear brake shoes on your Mio i 125 is a straightforward mechanical task, but it requires precision and a strict adherence to safety protocols. Proper installation and post-installation care are just as important as the quality of the brake shoes themselves in ensuring reliable stopping power.
Pre-Installation Drum Inspection Before fitting your new brake shoes, you must thoroughly inspect the condition of the rear wheel hub’s brake drum. Over time, road grit, water, and worn friction material accumulate inside the drum, forming a layer of fine black dust. This dust must be cleaned out completely using a dedicated, label-authorized brake cleaner. Avoid using petrol or oil-based solvents, as they leave a slippery residue that will ruin your new brake shoes.
Inspect the inner metal wall of the drum for deep grooves, scoring, or uneven wear patterns. If the drum surface is highly grooved, installing new brake shoes will result in poor contact and rapid wear, as the flat shoes cannot conform to the uneven surface. Use a vernier caliper to measure the inner diameter of the drum. If the diameter exceeds the maximum wear limit specified in your Yamaha service manual, the drum is worn out, and you must replace the rear wheel hub or wheel assembly to ensure safe operation.
The Bedding-In (Burnishing) Process New brake shoes do not achieve their full stopping potential immediately out of the box. They must undergo a process called bedding-in or burnishing. This process allows the microscopic high spots on the new friction material to wear down gradually, shaping the shoe to match the exact contour of your brake drum.
To bed in your new brakes, find a safe, quiet, and flat road with minimal traffic. Accelerate your Mio i 125 to about 30 to 40 km/h, then gently and progressively apply the rear brake to slow the scooter down to a walking pace. Release the brake and ride for a short distance to allow the system to cool down. Repeat this controlled stopping procedure 20 to 30 times.
Avoid hard, emergency braking or holding the rear brake lever down continuously over long distances during the first 50 kilometers of riding. Subjecting new, unbedded shoes to extreme heat can cause the friction material to glaze. Glazing creates a hard, glassy surface on the shoe that permanently reduces its friction level, resulting in weak stopping power and persistent squealing noises.
Adjustment and Free Play Once the new shoes are installed, you must adjust the rear brake cable to ensure correct operation. Locate the adjusting nut on the brake arm at the rear wheel hub. Tighten or loosen the nut so that the rear brake lever on your handlebar has the manufacturer-recommended free play, which is typically between 10 and 20 mm of travel before you feel the brakes begin to engage.
If you adjust the cable too tightly, the brake shoes will remain in constant contact with the drum, causing severe brake drag, extreme heat buildup, and premature wear. If the cable is too loose, you will have to pull the handlebar lever almost all the way to the grip to get any stopping power, leaving you with insufficient lever travel to stop safely in an emergency.
Safety Boundary Your motorcycle’s braking system is a critical safety component that directly impacts your survival on the road. If you do not possess the proper tools (such as a torque wrench to tighten the rear axle nut to factory specifications), do not have access to a clean workspace, or lack the mechanical confidence to inspect the drum and adjust the cable correctly, do not attempt a DIY installation. Stop immediately and have the brake shoes installed, inspected, and adjusted by a qualified, professional motorcycle mechanic at a registered service center.
Frequently Asked Questions (FAQ)
Managing the maintenance of your Mio i 125’s rear drum brake involves addressing specific practical questions regarding wear cycles and component compatibility.
How often should I replace the brake shoes on my Mio i 125?
There is no fixed mileage interval for replacing brake shoes, as wear rates depend heavily on your riding style, the payload you carry, and your daily route. For example, a delivery rider operating in heavy urban traffic will wear out their brakes much faster than a solo commuter riding on open provincial highways.
Instead of relying on mileage, monitor the wear indicator pointer located on the rear brake cam arm at the wheel hub. When you fully squeeze the rear brake lever, observe where the pointer aligns. If the pointer reaches or aligns with the wear limit mark embossed on the engine casing, the friction material has worn down to its limit. Additionally, during routine tire changes or maintenance, inspect the actual thickness of the friction material; if it measures less than 2.0 mm, replace the shoes immediately.
Are brake shoes from other Mio models compatible with the Mio i 125?
You should never assume that brake shoes are interchangeable across different Yamaha Mio models. While many scooters in the Mio lineup share similar engine components or body styles, their chassis, wheel hub designs, and drum diameters can vary significantly.
For instance, older models like the Mio Sporty, Mio Soul, or different generations of the Mio Soul i may utilize different rear hub dimensions or brake shoe widths. Installing incorrect brake shoes can result in a loose fit, insufficient contact area, or severe mechanical interference that could cause the rear brake to fail or lock up unexpectedly. Always verify the exact part number (such as Yamaha’s 5MX-F530K-00 or the specific aftermarket equivalent labeled explicitly for the Mio i 125) before purchasing to ensure a safe, precise fit.
Community discussion
Share your experience or ask a question. Comments are reviewed before publication.