
The Yamaha Aerox V2 is a highly popular sports scooter in the Philippines, prized for its aggressive styling and punchy 155cc Blue Core engine. While its front wheel relies on a hydraulic disc brake, the rear braking power of this scooter is handled by a traditional drum system. Choosing the right brake shoe for Aerox V2 is a critical decision that directly affects your safety, stopping distance, and overall riding confidence, especially when navigating dense urban traffic or steep, winding mountain passes under heavy monsoon rains.
Quick Guide: Which Brake Shoe Category Fits Your Riding Style?
To find the right rear brake shoes for your Yamaha Aerox V2, you must first evaluate how and where you ride. The ideal option depends on whether you value original factory specifications, enhanced stopping power for heavy loads, or maximum cost savings.
- Choose Genuine OEM Brake Shoes if you prioritize predictable, factory-spec performance, guaranteed fitment, and the peace of mind that comes with zero compatibility guesswork. This is ideal for daily commuters who want a reliable setup without modifying their scooter's original dynamics.
- Choose Premium Aftermarket Brake Shoes if you frequently carry heavy loads, ride with a pillion passenger, or regularly tackle steep descents like those in Tagaytay or Antipolo. These options often feature advanced friction materials designed to resist heat fade under severe, prolonged stress.
- Choose Budget Aftermarket Brake Shoes if you primarily use your scooter for light, low-speed city commuting and are looking for a highly cost-effective replacement. However, you must accept potential trade-offs in wear rate and wet-weather performance.
Because there is no standardized independent laboratory testing data comparing every brand side by side in tropical environments, the best choice relies on matching the specific material composition of the brake shoe to your typical daily riding conditions and demands in the Philippines.
Products mentioned in this guide
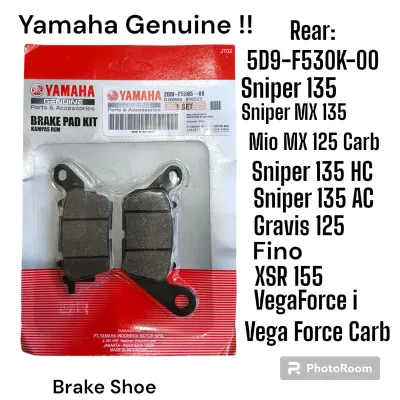
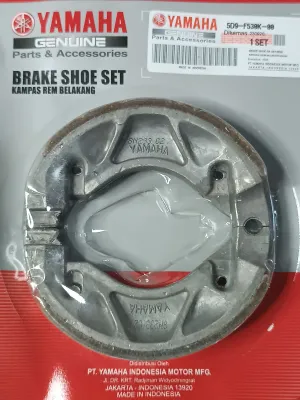
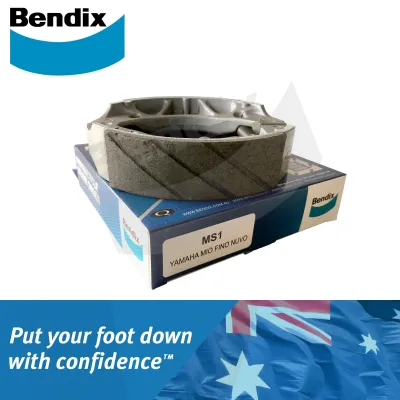
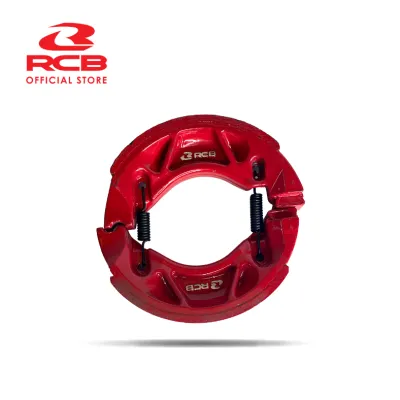
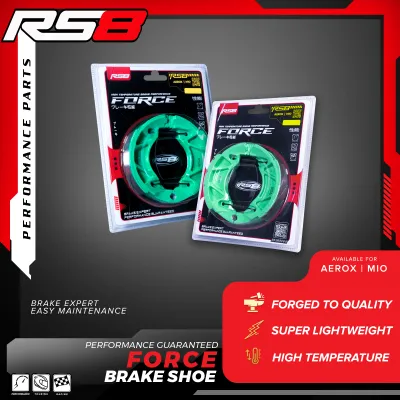
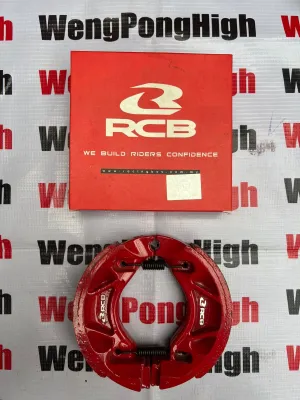
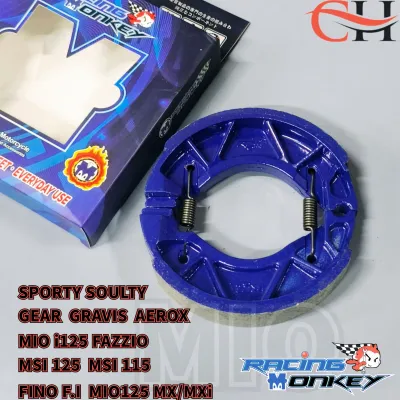
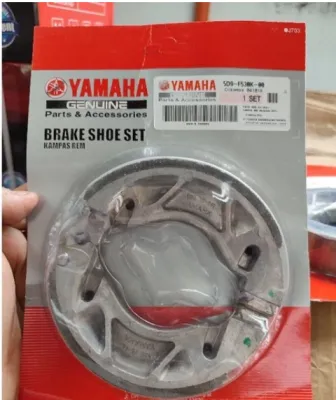
Prices are valid at publication and may change. Please refer to the product page for the latest price.
Key Dimensions for Evaluating Aerox V2 Brake Shoes
When comparing different brake shoe options for your Aerox V2, look beyond marketing claims. You must evaluate several critical performance dimensions that dictate how a brake shoe behaves under real-world conditions.

Stopping Power and Friction Coefficient The primary job of a brake shoe is to generate friction against the spinning inner wall of the wheel hub. The friction coefficient measures this stopping capability; a higher coefficient means more immediate bite and shorter stopping distances. Many reputable manufacturers print friction ratings on their packaging using a two-letter code (such as FF or GG). The first letter represents the cold friction coefficient, while the second represents the hot friction coefficient. For general scooter riding, an FG or GG rating indicates excellent, stable stopping power across a wide temperature range.
Heat Dissipation and Fade Resistance Unlike front disc brakes, which are open to the air, rear drum brakes are completely enclosed within the wheel hub. This enclosed design traps heat generated during braking. Under prolonged use, this heat buildup can lead to “brake fade,” a dangerous condition where the friction material loses its grip, causing the brake lever to feel soft and stopping distances to increase dramatically. High-quality brake shoes use specialized binders and thermal-resistant materials to maintain consistent friction even as temperatures rise inside the drum.
Wear Rate and Drum Longevity A critical trade-off exists between the durability of the brake shoe and the wear on your wheel hub. While harder semi-metallic compounds last longer and resist heat better, they can be highly abrasive to the softer aluminum drum of your Aerox V2. Over time, an overly aggressive brake shoe can wear down the inner wall of the drum, requiring an expensive replacement of the entire rear wheel hub. Conversely, softer organic shoes wear out faster but are much gentler on the drum.
Material Composition The performance traits of any brake shoe are ultimately dictated by its chemical compound:
- Organic Compounds: Composed of rubber, glass, and durable resins. They offer a smooth, quiet bite from the moment you start riding and are very gentle on the brake drum. However, they wear down relatively quickly and are prone to fading under heavy heat.
- Semi-Metallic Compounds: Infused with copper, steel, or brass fibers. These provide outstanding heat dissipation and a firm, aggressive bite, making them excellent for heavy-duty riding. The trade-offs include slightly higher noise levels and faster wear on the drum surface.
OEM vs. Aftermarket Brands: Performance and Value Compared
Understanding the broad categories of brake shoes available in the market helps narrow down your choices based on performance expectations and budget.
Genuine Yamaha (OEM) Parts
The original equipment manufacturer (OEM) brake shoe for the Aerox V2 represents the baseline standard of safety and consistency. These parts are engineered specifically to match the metal alloy of the Aerox’s rear wheel hub, ensuring that both the shoe and the drum wear down at a balanced, predictable rate.
With genuine parts, you get a highly consistent lever feel, excellent cold-bite performance, and virtually silent operation under normal conditions. They are highly resilient against the humid, dusty, and wet conditions common in local climates. However, they generally carry a price premium compared to budget aftermarket alternatives, and riders who push their scooters to the limit under heavy loads might find that the organic OEM lining fades during prolonged, aggressive braking.
Premium Aftermarket Brands
Premium aftermarket options are designed for riders seeking enhanced performance or specific characteristics not fully emphasized by OEM parts. Brands in this category often utilize advanced semi-metallic or specialized ceramic-infused friction linings that offer a higher coefficient of friction and superior thermal stability.
These materials are particularly beneficial when riding through stop-and-go traffic in hot tropical weather, where brake temperatures can spike rapidly. By keeping the friction coefficient stable at higher temperatures, premium aftermarket shoes minimize the risk of brake fade. When purchasing premium aftermarket brands, it is vital to verify the exact dimensions and look for reputable manufacturing certifications (such as ISO or ECE R90 compliance) on the packaging to ensure the product meets strict safety standards.
Budget and Local Market Options
For riders on a tight budget or those using their scooter for light, short-distance trips, economy aftermarket brake shoes are widely available in local motorcycle shops and online marketplaces. These options are highly cost-effective, often priced at a fraction of the cost of OEM parts, making them attractive for budget-conscious owners.
However, these savings come with notable trade-offs. Budget brake shoes frequently use lower-grade organic compounds or inconsistent bonding agents, which can lead to rapid wear, excessive brake dust, and a higher tendency to squeak. Under heavy stress—such as carrying a heavy payload or riding down steep hills—these budget shoes are much more susceptible to severe brake fade. If you choose this route, it is crucial to physically inspect the build quality before installation, checking for any loose friction material, uneven lining thickness, or poor bonding along the metal backing plate.
How to Verify Fitment and Avoid Compatibility Risks
The Yamaha Aerox V2 (often designated as the Aerox 155 Connected) shares many design elements with its predecessor, the V1, but assuming that all rear brake components are universally interchangeable can lead to serious safety risks. To protect yourself and ensure your rear brake functions correctly, you must perform a series of verification checks before purchasing any replacement brake shoe.
First, confirm your scooter’s exact model year, variant, and chassis number. Manufacturers sometimes update internal drum specifications or brake cam tolerances between production runs.
Second, understand the physical dimensions of the rear brake drum. The standard inner diameter of the rear brake drum on the Aerox V2 must be measured and compared against the specifications of the replacement shoe.
The arc of the brake shoe must perfectly match the curvature of the drum’s inner wall. If you install a “universal” or poorly manufactured shoe with an incorrect arc, only a small portion of the friction material will make contact with the drum surface. This drastically reduces the contact area, leading to an extremely spongy lever feel, poor stopping power, rapid localized wear, and excessive heat buildup that can warp the drum.
Always avoid sellers who list brake shoes as “universal fits-all-scooters” without specifying the exact compatible models and dimensions. Prioritize products that explicitly state compatibility with the Aerox V2 and list the precise diameter (typically 130mm for this class of scooter, but always verify your specific model’s manual).
Installation Safety and Proper Bedding-In Procedures
Replacing brake shoes involves disassembling the rear wheel and exposing the drum assembly, which is a critical safety component of your motorcycle. If you do not have the proper tools, torque wrench, or mechanical experience, it is highly recommended to have the installation performed by a qualified professional mechanic.
For those who choose to perform the replacement themselves, always consult your original vehicle owner’s manual or workshop manual for the correct torque specifications for the rear axle nut and brake linkage.
Begin by thoroughly cleaning the interior of the brake drum hub. Over time, worn friction material and road grime accumulate inside the drum, forming a fine, dark dust that can severely reduce the efficiency of your new brake shoes. Use a dedicated, non-residue brake cleaner spray to wash away this debris. Avoid using compressed air to blow out the dust, as inhaling brake dust particles can pose health risks.
Inspect the inner surface of the drum for any deep scoring, ridges, or uneven wear. If the drum surface is heavily damaged, installing new brake shoes will not restore full braking performance, and the wheel hub may need to be machined or replaced.
Apply a very light coat of high-temperature brake grease to the brake cam and pivot pins where the metal backing of the shoes makes contact. Be extremely careful not to get any grease or oil on the friction lining of the brake shoes or the inner surface of the drum, as this will ruin the braking capability and create an immediate safety hazard.
Once the new shoes are installed and the wheel is reassembled, adjust the rear brake lever free play according to the manufacturer’s specification (typically 10 to 20 mm of movement at the lever tip before the brake begins to engage).
After installation, you must perform a proper bedding-in (or burnishing) procedure to ensure optimal performance and longevity. New brake shoes do not perfectly match the micro-contours of a used brake drum immediately. To bed them in, ride your scooter at a moderate speed (around 30 to 40 km/h) in a safe, traffic-free area, and gently apply the rear brake to slow down to a walking pace. Repeat this process 10 to 15 times, allowing the brakes to cool slightly between applications. This gradual process transfers a thin, even layer of friction material from the shoe onto the drum wall, maximizing the contact area, preventing early brake fade, and eliminating annoying squeaks.
Frequently Asked Questions (FAQ)
How often should I replace the brake shoes on my Aerox V2?
The lifespan of your rear brake shoes depends heavily on your individual riding style, payload, and daily environment. Instead of relying solely on a fixed mileage interval, you should regularly inspect the wear indicator pointer located on the rear brake panel. When the brake lever is fully applied, if the pointer aligns with the wear limit mark on the hub, the shoes have reached the end of their service life. Alternatively, when the wheel is removed, you can measure the thickness of the friction lining; most manufacturers specify a minimum service limit of 2.0 mm. If the lining is worn past this point, or if you notice a sudden drop in braking efficiency, replace the shoes immediately.
Can I use Aerox 155 (V1) brake shoes on the Aerox V2?
While many aftermarket brands list their brake shoes as compatible with both the Aerox V1 and V2, you must always double-check the exact part numbers and dimensions before installation. Minor changes in the brake cam design, return spring tension, or shoe width can occur between different model generations. Even if a V1 shoe physically fits inside the V2 drum, slight variations in the contact arc or mounting points can lead to uneven wear, reduced braking force, or abnormal noise. Always verify the manufacturer’s compatibility list or consult an authorized dealer to ensure the part is fully approved for the Aerox V2.
Why do my new brake shoes squeak after installation?
Minor squeaking or squealing is relatively common during the initial bedding-in phase as the new friction material conforms to the drum’s inner surface. However, if the noise persists after several days of riding, it usually points to an underlying installation or material issue. Common culprits include accumulated brake dust or road grime inside the drum, lack of lubrication on the brake cam pivot points, or glazed friction linings caused by overheating before the shoes were properly bedded in. To resolve this, disassemble the drum, clean the components thoroughly with a non-residue brake cleaner, lightly sand the glaze off the shoe lining with fine-grit sandpaper, and ensure correct adjustment.
Community discussion
Share your experience or ask a question. Comments are reviewed before publication.