
To find the best cabin air filter for a Mitsubishi Xpander in the Philippines, you must balance filtration efficiency against the highly humid, dust-heavy tropical climate of local roads. While genuine Mitsubishi OEM filters offer guaranteed compatibility and standard performance, premium aftermarket options like activated carbon or PM2.5 multi-layer filters from reputable brands provide superior protection against urban smog and musty odors. The ideal choice depends on your daily driving routes, whether navigating the congested streets of Metro Manila or the dusty provincial roads of Luzon, Visayas, and Mindanao.
Selecting the right filter involves verifying the physical dimensions and interface of your specific Xpander model year, as well as understanding how different filter media affect airflow and your vehicle’s air conditioning system. Investing in a high-quality filter ensures clean cabin air and protects your vehicle’s HVAC components from premature wear.
Why a Clean Cabin Air Filter Matters for Your Xpander
The cabin air filter in your vehicle plays a critical role in maintaining a healthy interior environment. It acts as a barrier that traps road dust, pollen, soot, and exhaust fumes before they can enter the cabin through the ventilation system. In a tropical climate like the Philippines, where high humidity and heavy traffic are daily realities, this component works under demanding conditions to keep the air inside your vehicle breathable.
Products mentioned in this guide
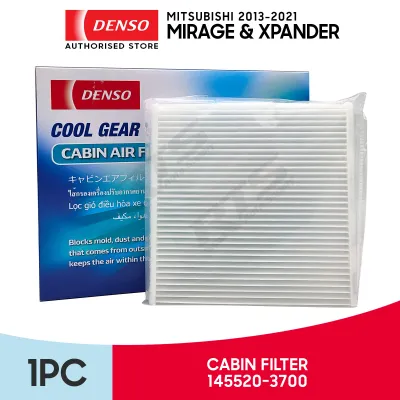
Prices are valid at publication and may change. Please refer to the product page for the latest price.
When a cabin filter becomes clogged with debris, the performance of your air conditioning system drops noticeably. The restricted airflow forces the blower motor to work harder, which can lead to increased wear on the electrical components and a slight drop in fuel efficiency. Furthermore, during heavy downpours, a clogged filter can prevent proper moisture clearance, causing your windshield and side windows to fog up and compromise your visibility on the road.
Recognizing the warning signs of a failing filter can save you from costly AC repairs. Common indicators that your filter needs immediate replacement include:
- Musty Odors: A damp, stale smell (often referred to locally as amoy kulob) coming from the vents when you first turn on the air conditioning.
- Reduced Airflow: Vents that blow weakly even when the fan speed is set to high.
- Whistling Noises: Subtle whistling or rushing air sounds originating from behind the glove compartment.
- Slower Cooling: The cabin taking significantly longer to reach a comfortable temperature on hot days.
How to Verify Compatibility and Choose the Right Filter
Before purchasing a replacement filter, you must verify that the product is fully compatible with your specific Mitsubishi Xpander model year and variant. The vehicle has undergone minor updates since its local introduction, and while many cabin filters fit across multiple model years, minor variations in housing dimensions can occur. Never assume compatibility based solely on a generic product label.

To ensure an exact fit, locate the original equipment manufacturer (OEM) part number. You can find this number printed on the side of your existing factory filter or listed in your vehicle owner’s manual. Common OEM part numbers associated with the Xpander include MZ600193 and 7803A112, but you should always cross-reference these codes with the manufacturer’s documentation before finalizing a purchase.
When choosing between OEM and aftermarket filters, consider your budget and performance needs. Genuine Mitsubishi parts offer guaranteed fitment and reliable performance, but they generally carry a higher price tag, often ranging from ₱800 to ₱1,500 at authorized dealerships. Reputable aftermarket brands—such as Bosch, Denso, or Sakura—provide high-quality alternatives that cost between ₱300 and ₱800, making them highly cost-effective options for regular maintenance.
Evaluating the filter media is the final step in the selection process. Standard particulate filters are excellent for basic dust protection, while activated carbon filters offer chemical filtration to neutralize odors. When evaluating these options, ensure the thickness and density of the media do not exceed the specifications of your Xpander’s HVAC system, as excessively dense filters can restrict airflow and strain the blower motor.
Which Filter Type Best Fits Your Driving Environment?
Your daily commute and geographic location should dictate the type of cabin air filter you install. Matching the filter media to your typical driving conditions ensures optimal air quality without putting unnecessary stress on your vehicle’s ventilation system.
Standard Particulate Filters
Standard particulate filters rely on mechanical or electrostatic fibers to capture airborne contaminants. These filters are highly effective at trapping larger particles such as road dust, pollen, and coarse debris. Because they have a relatively open fiber structure, they offer excellent airflow, allowing your air conditioning system to cool the cabin rapidly with minimal resistance.
These filters are highly cost-effective and serve as an excellent baseline option for drivers who primarily travel through rural areas or provinces with light traffic. However, standard particulate filters cannot block microscopic soot, fine exhaust gases, or strong chemical odors. If your daily drive involves bumper-to-bumper city traffic, a standard filter may not provide sufficient protection against urban air pollution.
Activated Carbon Filters
Activated carbon filters feature an additional layer of charcoal-infused media designed to absorb gases and odors. Through a process called adsorption, the porous carbon surface traps harmful gases, including nitrogen oxides, sulfur dioxide, and volatile organic compounds. This layer is highly effective at neutralizing the smell of diesel exhaust, asphalt, and environmental pollutants.
For drivers who frequently navigate congested urban highways such as EDSA or C5, an activated carbon filter is highly recommended. While these filters cost slightly more than standard particulate options, they significantly improve cabin comfort by keeping exhaust odors out. Keep in mind that the carbon layer eventually becomes saturated over time, meaning these filters must be replaced on schedule to maintain their odor-absorbing capabilities.
Premium or Multi-Layer Filters
Premium multi-layer filters combine mechanical filtration, activated carbon, and specialized electrostatic or antimicrobial barriers. Many of these products are designed to target PM2.5 particles, which are microscopic air pollutants capable of penetrating deep into the respiratory system. Some premium options also feature zinc-pyrithione or silver-ion coatings to inhibit the growth of mold and bacteria on the filter surface.
These high-performance filters are ideal for families with young children, elderly passengers, or individuals suffering from allergies and respiratory sensitivities. Before purchasing a premium multi-layer filter, verify that the product is specifically engineered for the Xpander’s blower capacity. Some unbranded or poorly designed multi-layer filters are excessively thick, which can restrict airflow, reduce cooling efficiency, and potentially cause the AC evaporator coils to freeze up.
Where to Source Authentic Replacement Filters
The local automotive market contains a wide variety of replacement parts, making it essential to source your cabin air filter from reliable channels to avoid counterfeit products. Poorly manufactured counterfeit filters often use low-grade paper that tears easily, fails to trap fine dust, or restricts airflow to dangerous levels.
To guarantee authenticity, purchase your filter directly from authorized Mitsubishi dealerships, established physical auto parts stores, or official brand flagship stores on reputable online marketplaces. When shopping online, prioritize sellers with high ratings, positive customer feedback, and clear product return policies. Avoid purchasing from unverified third-party vendors offering prices that seem too good to be true.
When inspecting a physical filter, use this checklist to spot potential counterfeits:
- Packaging Quality: Authentic filters come in sturdy, high-quality packaging with clear, sharp printing. Flimsy cardboard or blurry text is a common sign of a fake.
- Part Numbers and Branding: Genuine products feature clearly printed part numbers, brand logos, and airflow direction indicators on the filter frame.
- Build Integrity: Inspect the edges of the filter. Authentic filters have clean, secure edge sealing and evenly spaced pleats, whereas counterfeits often exhibit messy glue lines and uneven pleating.
- Weight and Feel: High-quality filters feel solid and do not bend easily. If the filter frame feels exceptionally flimsy or lightweight, it may lack the necessary structural support.
DIY Replacement: How to Change the Xpander Cabin Air Filter
Replacing the cabin air filter in a Mitsubishi Xpander is a straightforward, reversible maintenance task that you can easily perform at home. Doing this yourself saves time and service fees. Before starting, park your vehicle on a flat surface, turn off the engine, remove the ignition key, and engage the handbrake.
Required Tools and Materials:
- A compatible replacement cabin air filter
- A flashlight or headlamp
- A clean, damp microfiber cloth
- Your vehicle owner's manual
Step-by-Step Instructions:
- Empty and Open the Glove Box: Open the passenger-side glove compartment and remove all contents to prevent them from spilling during the process.
- Release the Damper Arm: Locate the plastic damper arm attached to the outer right side of the glove box. Gently slide the arm off its mounting pin. Do not pull forcefully, as the plastic pin can snap under excessive pressure.
- Disengage the Stop Tabs: Squeeze the left and right sides of the glove box inward to release the rubber stop tabs from the dashboard frame. Once cleared, lower the glove box downward to expose the cabin filter housing cover located behind it.
- Remove the Housing Cover: Locate the rectangular plastic cover of the filter housing. Press the locking tabs on the sides of the cover inward and pull the cover straight off. Set it aside in a secure place.
- Extract the Old Filter: Slide the old cabin air filter out of the slot. Take note of the physical orientation of the filter, specifically the direction of the "Air Flow" arrow printed on its side. On most Xpander models, the airflow arrow points downward.
- Clean the Housing: Use a damp microfiber cloth to wipe away any dust, leaves, or debris inside the empty filter housing. Ensure the area is completely dry before proceeding.
- Install the New Filter: Slide the new cabin air filter into the housing slot. Make sure the "Air Flow" arrow on the new filter points in the correct downward direction to match the system's airflow design.
- Reassemble the Components: Snap the housing cover back into place until you hear the tabs click securely. Lift the glove box back up, squeeze the sides to re-engage the stop tabs, and slide the damper arm back onto its mounting pin. Confirm that the glove box opens and closes smoothly.
Safety Boundary: If you encounter resistance when releasing the plastic clips, removing the housing cover, or sliding the glove box out of its tracks, stop immediately. Applying excessive force can crack the delicate plastic dashboard components. If the parts do not separate easily, consult a professional mechanic or your local dealership for assistance.
Frequently Asked Questions (FAQ)
How often should I replace the cabin air filter in my Xpander?
Under normal driving conditions, you should replace your cabin air filter every 10,000 to 15,000 kilometers, or at least once a year during your routine preventive maintenance service. However, if your daily commute involves heavily congested city traffic, construction zones, or dusty provincial roads, you should inspect the filter every 5,000 kilometers. Replacing the filter early in highly polluted or humid environments prevents mold growth and ensures your air conditioning system continues to perform efficiently.
Can I wash and reuse my Xpander's cabin air filter?
Standard particulate and activated carbon cabin air filters are strictly disposable and should never be washed or reused. Attempting to wash these filters with water will destroy the structural integrity of the paper media, strip away any electrostatic charges, and ruin the odor-absorbing properties of the activated carbon layer. Additionally, reinstalling a damp filter back into your vehicle’s dark HVAC housing creates an ideal breeding ground for mold, mildew, and bacteria, which can compromise your health and cause severe odors.
Will using an aftermarket filter void my Mitsubishi warranty?
Using a compatible, high-quality aftermarket cabin air filter does not automatically void your overall vehicle warranty. Consumable parts like air filters, wiper blades, and light bulbs are designed for regular replacement, and you are generally free to choose reputable aftermarket brands. However, to protect your warranty coverage, ensure the aftermarket filter fits perfectly and does not restrict airflow. Keep your purchase receipts as proof of regular maintenance, and consult your specific dealer’s warranty terms if you have any concerns regarding aftermarket parts.
Community discussion
Share your experience or ask a question. Comments are reviewed before publication.