
Customizing a motorcycle in the Philippines is a deeply personal way to express your style, and a well-chosen circle emblem serves as the perfect focal point for this transformation. The best circle emblems for motorcycle customization are those that balance visual appeal with the physical durability required to survive the country’s harsh tropical climate. Whether you are restoring a vintage Vespa in Manila, building a classic cafe racer in Cebu, or giving a modern underbone scooter a sporty edge, selecting the right badge involves understanding how materials, adhesives, and designs interact with your specific machine.
A high-quality circle emblem does more than just decorate your bike; it defines its character. From premium die-cast metal badges that evoke retro heritage to flexible 3D resin domes and highly versatile vinyl decals, the Philippine market offers a diverse range of options. To ensure your custom badge looks excellent and stays securely attached through intense heat waves and heavy monsoon downpours, you must evaluate several critical factors before making a purchase.
How to Choose the Right Circle Emblem for Your Motorcycle
Selecting an emblem is not merely a matter of finding an appealing design online or at a local shop. You must consider how the accessory will interact with your motorcycle’s surfaces and the demanding environment of Philippine roads.
Products mentioned in this guide
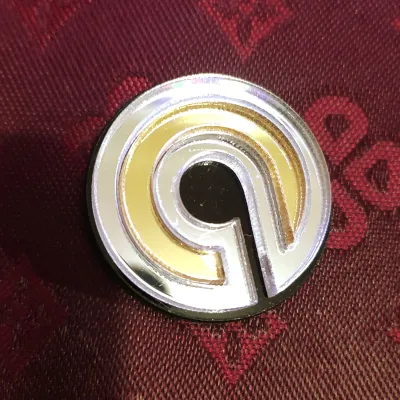
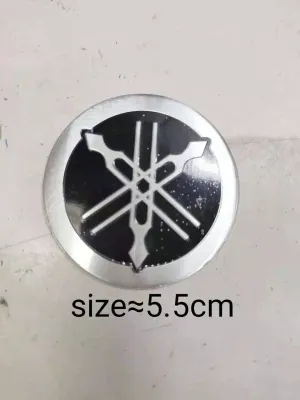
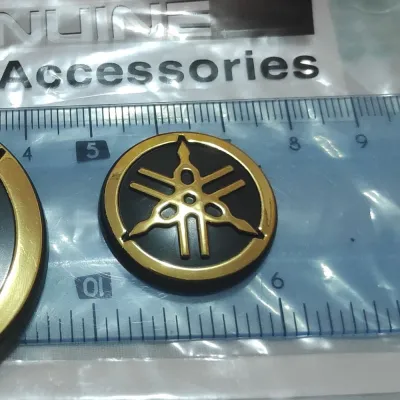
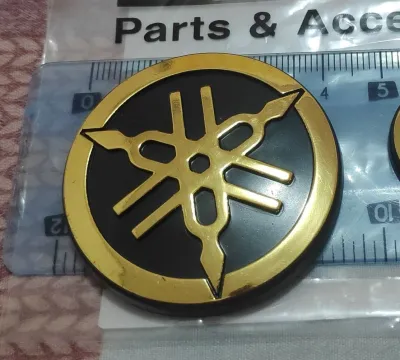

Prices are valid at publication and may change. Please refer to the product page for the latest price.
Material Durability in Tropical Climates The Philippine climate presents unique challenges for any exterior motorcycle accessory. The combination of intense ultraviolet (UV) radiation from the tropical sun, high relative humidity, and sudden, torrential rains can quickly degrade low-quality materials. Metal emblems, particularly those made of zinc alloy or aluminum with high-quality plating, offer the highest resistance to structural degradation, though they require proper coatings to prevent oxidation in coastal areas. Polyurethane resin emblems provide excellent flexibility and a modern look, but lower-grade resins will yellow and become brittle under prolonged sun exposure. Vinyl decals are highly practical and cost-effective, but they must be made from high-grade cast vinyl rather than cheap monomeric films, which tend to shrink, crack, and peel at the edges within a few months of outdoor parking.
Size and Proportion Before purchasing any circle emblem, you must measure the physical dimensions of your intended mounting surface. A badge that is too large can overhang the edges of a fuel tank or side panel, creating unsightly gaps where dirt and water can accumulate, eventually compromising the adhesive. Conversely, an emblem that is too small may look lost or disproportionate on a large cruiser tank. Use a flexible measuring tape to determine the diameter of the flat or gently curved area where you plan to place the badge. Keep in mind that a circle emblem requires a consistent radius; if your fuel tank has sharp body lines, creases, or deep recesses, you will need to find a placement zone that allows the entire backing of the emblem to make full contact with the surface.
Mounting Method and Paint Safety Emblems are typically secured using adhesive backing, mechanical screws, or magnetic mounts. For most customization projects, automotive-grade double-sided adhesive tape is the safest and most reliable option, as it does not require modifying the motorcycle’s bodywork. Magnetic emblems are generally unsuitable for motorcycles, as most modern body panels are made of plastic or fiberglass, and even on steel tanks, engine vibrations and wind resistance can cause a magnet to slide, scratching the clear coat. Screw-on emblems offer a highly secure, mechanical connection but are typically limited to factory-drilled mounting points or aftermarket brackets. Never drill new holes into your fuel tank or structural body panels to mount an emblem, as this introduces severe rust risks, fuel leaks, and structural hazards.
Design and Style Alignment A successful customization project relies on visual harmony, meaning your circle emblem should complement the existing design language of your motorcycle. For instance, a vintage-style cafe racer, scrambler, or classic scooter benefits immensely from a heavy metal emblem with deep enamel fills, which reinforces the retro, mechanical aesthetic. On the other hand, a modern sportbike, naked streetfighter, or high-performance underbone scooter is better suited to a sleek, low-profile 3D resin emblem or a minimalist vinyl decal with carbon fiber or metallic textures. Matching the emblem’s color palette, typography, and graphic style to your bike’s paint job and overall theme prevents the accessory from looking like an afterthought.
Top Circle Emblem Styles for Motorcycle Personalization
To help you narrow down your choices, let us explore the three primary categories of circle emblems available for motorcycle customization in the Philippines, examining their unique characteristics, benefits, and practical limitations.

Classic Metal and Enamel Badges
Best For: Vintage motorcycle restorations, custom cafe racers, scramblers, retro cruisers, and classic European-style scooters.
Classic metal and enamel badges represent the pinnacle of traditional motorcycle customization. These emblems are typically manufactured from zinc alloy, brass, or aluminum, featuring recessed areas filled with colored enamel that is baked at high temperatures to create a smooth, glassy, and incredibly durable finish.
The primary advantage of metal emblems is their premium, tactile feel and authentic weight. Unlike plastic alternatives, a real metal badge ages gracefully, developing a subtle patina over time that many classic bike enthusiasts highly desire. The cloisoné or soft enamel colors are highly resistant to fading, ensuring that the intricate graphics remain vibrant even after years of exposure to the intense Philippine sun.
However, metal badges have distinct physical limitations. Because they are rigid and heavy, they cannot conform to curved surfaces. If you attempt to apply a flat metal emblem to a highly contoured fuel tank, only a small portion of the adhesive will make contact, leading to the badge falling off during a ride. Additionally, the hard edges of a metal emblem can easily scratch your motorcycle’s paint if the badge shifts or if it is not backed with a protective layer of foam adhesive.
Pre-purchase Check: Always verify the curvature of your mounting surface before buying a metal emblem. If the emblem is completely flat, ensure you have a flat section on your side covers, battery box, or triple clamps. If you plan to mount it on a curved fuel tank, look for emblems specifically cast with a pre-curved back, or verify that the metal is thin enough to be carefully pre-bent by hand using a soft mandrel before application.
3D Resin and Polyurethane Emblems
Best For: Modern sportbikes, adventure motorcycles, modern automatic scooters, and any build requiring detailed, multi-colored graphics with a raised, glossy profile.
3D resin emblems, often referred to as domed stickers or polyurethane badges, are created by printing a high-resolution design onto a vinyl substrate and then pouring a clear, liquid polyurethane resin over the top. As the resin cures, it forms a perfectly smooth, clear dome that acts like a magnifying glass, enhancing the colors and details of the underlying graphic while providing a premium 3D depth.
These emblems offer an exceptional balance of flexibility, lightweight design, and visual impact. Unlike metal badges, polyurethane emblems possess a degree of flexibility, allowing them to conform easily to the gentle curves of modern motorcycle bodywork, such as the rounded fairings of a scooter or the contoured tank of a sportbike. They are also highly resistant to impact from small road debris, as the rubbery texture of the cured polyurethane naturally absorbs shocks and resists scratching.
The chief limitation of resin emblems lies in the quality of the chemical compound used. Lower-grade epoxy resins, which are commonly used in cheap, non-automotive badges, will rapidly turn yellow, cloudy, and brittle when exposed to the strong UV rays of the Philippines. Furthermore, if these emblems are placed too close to high-heat zones, such as near the engine cylinder head or the exhaust shield, the adhesive backing can soften, causing the emblem to slide or peel off.
Pre-purchase Check: Read the product specifications carefully to ensure the manufacturer uses automotive-grade polyurethane rather than standard epoxy resin. Look for explicit mentions of UV resistance, weatherproofing, and non-yellowing guarantees to ensure the emblem retains its crystal-clear appearance over years of outdoor parking.
Custom Vinyl Decals and Stickers
Best For: Daily commuters, budget-conscious customization projects, complex multi-colored graphics, and applications on highly complex, curved body panels.
Custom vinyl decals represent the most versatile and accessible form of circle emblem customization. These are produced by cutting or printing designs onto thin, adhesive-backed vinyl sheets. They can range from simple single-color die-cut designs to highly complex, digitally printed graphics featuring metallic, matte, gloss, or reflective finishes.
The primary benefit of vinyl decals is their extreme conformability. High-quality cast vinyl can be stretched and molded using a heat gun to fit almost any complex curve, recess, or body line on a motorcycle, making them ideal for areas where rigid metal or semi-flexible resin badges simply cannot go. They add virtually zero weight to the vehicle, do not alter the aerodynamics, and can be easily peeled off and replaced whenever you decide to update your motorcycle’s look. Reflective vinyl options also provide an added safety benefit by increasing your motorcycle’s visibility during nighttime riding along unlit provincial roads.
The main drawback of vinyl is its lack of physical depth; it is a flat sticker and does not offer the premium, tactile feel of a metal or 3D resin badge. Additionally, because vinyl is very thin, its longevity is highly dependent on the quality of the installation and the material itself. Cheap promotional vinyl will quickly fade, and the edges will begin to lift and collect dirt, especially if you frequently wash your motorcycle with high-pressure water sprays.
Pre-purchase Check: Always opt for premium, automotive-grade or marine-grade cast vinyl (such as those from reputable brands like 3M, Avery Dennison, or Oracal) with a built-in UV-protective laminate layer. Avoid cheap monomeric vinyls, which are designed for short-term indoor use and will degrade rapidly under Philippine weather conditions.
Installation and Placement Guide for Circle Emblems
Proper installation is just as important as choosing the right emblem. Even the highest-quality badge will fall off or look crooked if the surface is not prepared correctly or if the application technique is rushed.
Surface Preparation The secret to a permanent adhesive bond is a surgically clean surface. Before applying your circle emblem, wash the target area thoroughly with mild soap and water to remove loose dirt and grime. Once dry, wipe the exact mounting spot with a clean microfiber cloth saturated with a 70% isopropyl alcohol solution. This step is critical because it strips away any wax, grease, polish, or ceramic coatings that would otherwise prevent the adhesive from bonding directly to the paint’s clear coat. Never use household glass cleaners, mineral spirits, or kerosene, as these can leave behind a thin chemical residue or potentially damage your motorcycle’s finish. Allow the alcohol to evaporate completely before proceeding.
Placement Strategy Carefully plan where your emblem will sit before removing the adhesive liner. Avoid placing emblems near high-heat areas, such as directly on the engine casing, near the exhaust system, or on fairings that sit immediately adjacent to the radiator. Excessive heat will break down the adhesive polymers, leading to premature failure. Additionally, ensure the emblem is not positioned where your knees, riding pants, or luggage will constantly rub against it, as this mechanical friction will eventually lift the edges. Finally, double-check that the emblem does not obstruct any moving parts, such as the steering triple clamps, fork legs, or the fuel cap mechanism.
Application Technique To achieve perfect alignment, use the “hinge method.” Position the emblem (with its protective backing still on) exactly where you want it on the motorcycle. Place a strip of masking tape across the top or side of the emblem, securing it to the bodywork to act as a hinge. Flip the emblem up, peel away the protective backing liner, and slowly swing the emblem back down onto the surface. Press down firmly starting from the center of the circle and working your way outward to the edges. This outward motion forces out any trapped air bubbles, ensuring 100% adhesive contact. For resin and metal emblems, maintain firm pressure for at least 60 seconds to activate the pressure-sensitive adhesive.
Safety Boundary Under no circumstances should you drill holes into your motorcycle’s fuel tank to mount a screw-on emblem. Doing so poses a severe fire hazard, introduces immediate fuel leaks, and permanently ruins the structural integrity of the tank. If you have a screw-on style emblem but your motorcycle does not have pre-existing factory mounting holes, the safest solution is to remove the screws or studs from the back of the emblem (using a rotary tool or file if necessary) and mount it using a high-quality, heavy-duty automotive double-sided acrylic foam tape, such as 3M VHB. This tape provides a bond strong enough to withstand high-speed winds and vibrations without damaging your bike’s metalwork.
Maintenance and Care for Motorcycle Badges
Once your custom circle emblem is installed, taking proper care of it during your regular cleaning routine will ensure it remains vibrant and securely attached for years to come.
Routine Cleaning When washing your motorcycle, treat your emblems with care. Use a clean, soft microfiber wash mitt and a dedicated, pH-neutral motorcycle shampoo. Avoid using stiff-bristled brushes, abrasive scouring pads, or harsh chemical degreasers near the emblem, as these can scratch the soft surface of polyurethane resin, strip the paint or enamel from metal badges, and tear the edges of vinyl decals. When using a high-pressure washer, never point the spray nozzle directly at the edges of your emblems from a close distance; the intense water pressure can easily get underneath the adhesive layer and lift the badge clean off.
Waxing and Protection To protect your emblems from the harsh Philippine sun and environmental road grime, apply a protective layer during your regular detailing sessions. For both metal and resin emblems, you can apply a non-abrasive liquid spray wax, polymer sealant, or ceramic detailer. This creates a hydrophobic barrier that helps shed water, prevents mineral water spots from baking onto the emblem, and provides crucial UV blockers to slow down color fading. However, avoid applying traditional paste waxes over vinyl decals or emblems with deep, intricate recesses, as the wax will dry into an unsightly white residue that is extremely difficult to clean out of the tight crevices.
Adhesion Inspection Make it a habit to inspect your custom emblems periodically, especially after riding through heavy monsoon rains, traversing rough provincial roads, or completing a thorough wash. Gently press on the edges of the badge to check for any lifting, play, or soft spots in the adhesive. If you notice an edge starting to lift, do not attempt to fix it by squeezing superglue under the badge, as cyanoacrylate adhesives will permanently damage your motorcycle’s paint and melt plastic fairings. Instead, carefully remove the emblem, clean off the old adhesive residue, and reapply it using fresh, automotive-grade double-sided tape.
Frequently Asked Questions (FAQ)
Can I put a circle emblem on my motorcycle helmet?
Applying adhesive circle emblems, badges, or thick stickers to a motorcycle helmet requires extreme caution and is generally not recommended. The strong solvents found in many aftermarket adhesives can chemically react with the polycarbonate, ABS, or fiberglass shell of your helmet, micro-fracturing the material and severely compromising its structural integrity and impact-absorption capabilities. Additionally, adding a rigid metal or thick resin badge to the exterior of a helmet can create a snag hazard during a slide, transferring rotational forces directly to your neck. If you wish to customize your helmet, stick strictly to thin, manufacturer-approved vinyl decals, and ensure they are placed well away from the visor mechanism, ventilation ports, and safety certification stickers (such as the ICC or BPS stickers required in the Philippines).
How do I remove old adhesive from a circle emblem without damaging the paint?
To safely remove an old circle emblem and its leftover adhesive without ruining your motorcycle’s clear coat, you should avoid all sharp metal tools and harsh household solvents. Start by using a household hairdryer on a low or medium heat setting to gently warm the emblem and soften the underlying adhesive; never use an industrial heat gun on high heat, as this can easily bubble your paint or warp plastic fairings. Once the adhesive is warm, use a piece of high-strength dental floss or nylon fishing line in a sawing motion behind the emblem to slice through the softened foam tape. To clean up the remaining sticky residue, apply a dedicated, paint-safe automotive adhesive remover or a few drops of eucalyptus oil to a microfiber cloth, let it sit on the residue for a minute, and then gently rub it away with your thumb or a soft plastic trim removal tool. Never use acetone, lacquer thinner, or razor blades, as these will permanently strip away your motorcycle’s paint and clear coat.
Community discussion
Share your experience or ask a question. Comments are reviewed before publication.