
Finding the right cvt set for aerox v2 is one of the most impactful upgrades you can make for your scooter. The ideal transmission setup depends entirely on your daily riding conditions, weight load, and performance goals. Whether you want to restore the smooth, quiet feel of a brand-new factory machine, eliminate the annoying low-speed shudder during your daily Manila commute, or maximize acceleration for weekend touring, selecting the correct components requires understanding how each part interacts with your scooter’s engine.
In the Philippine market, motorcycle enthusiasts face unique challenges, including extreme tropical heat, high humidity, and prolonged stop-and-go traffic. These environmental factors place immense stress on the Continuously Variable Transmission (CVT) system. By choosing a well-matched CVT set, you can optimize power delivery, improve fuel efficiency, and ensure your scooter operates reliably under demanding local road conditions.
Why Upgrade the Aerox V2 CVT System?
The CVT system serves as the mechanical link between your scooter’s 155cc Blue Core engine and the rear wheel. Unlike a manual motorcycle with fixed gear ratios, the CVT constantly adjusts the effective gear ratio using centrifugal force and spring tension. This system directly dictates how your engine’s power is delivered, determining how quickly the scooter responds when you twist the throttle.
Products mentioned in this guide
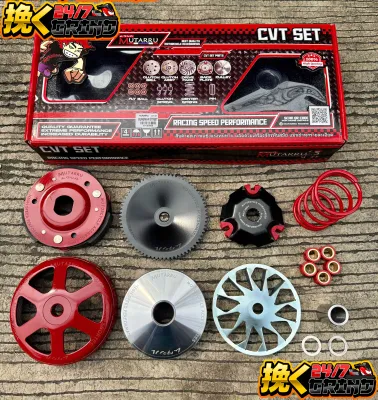
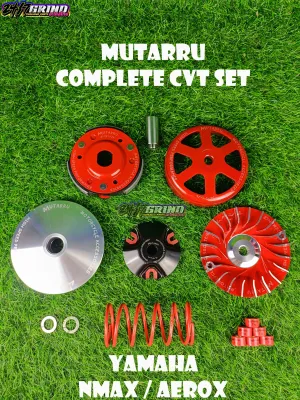
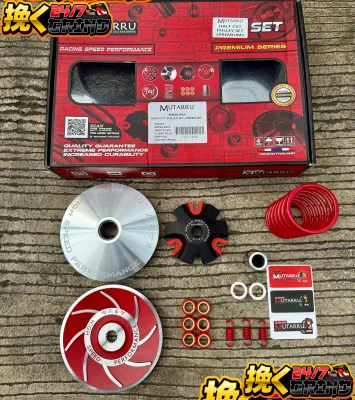
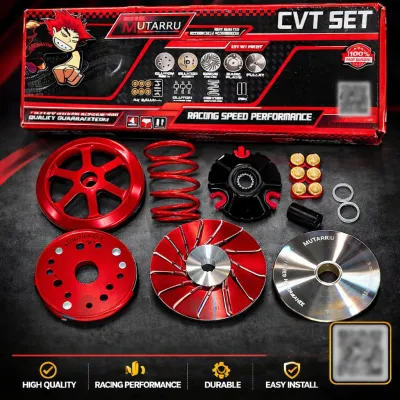
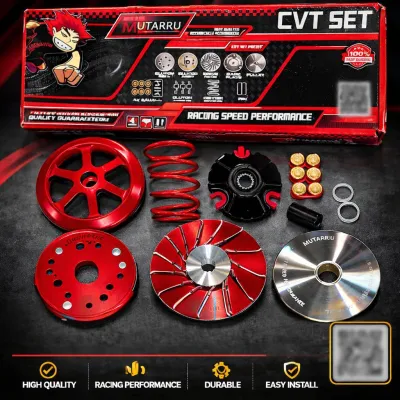
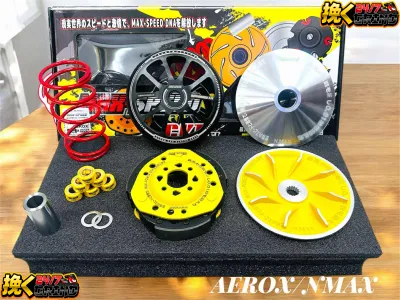
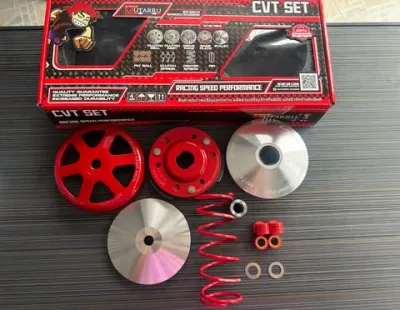
Prices are valid at publication and may change. Please refer to the product page for the latest price.
Yamaha tunes the stock Aerox V2 CVT system to meet a broad range of global standards, prioritizing fuel economy, low mechanical noise, and gradual, predictable acceleration. While this factory configuration is highly durable and excellent for relaxed riding, it often leaves performance-minded riders wanting more. The stock setup is designed to keep engine RPMs relatively low, which can sometimes result in a sluggish feel when you need immediate power to overtake vehicles or climb steep inclines.
Upgrading your CVT components allows you to customize the scooter’s power delivery to match your specific needs. Many riders seek upgrades to achieve crisper throttle response, eliminate low-speed belt slippage, or improve climbing power when traveling with a backrider. By changing specific components, you can shift the engine’s operating RPM into its peak power band more quickly, unlocking the full potential of the Variable Valve Actuation (VVA) system.
It is important to remember that there is no single “best” CVT set for every rider. A setup optimized for high-speed highway touring will behave very differently from one designed for navigating tight, congested city streets. Defining your primary riding style and identifying the specific limitations of your current setup are the crucial first steps before purchasing any aftermarket parts.
Key Selection Criteria for Aerox V2 CVT Sets
To make an informed purchase, you must understand the individual roles of the primary CVT components and how altering them affects your scooter’s behavior. Balancing these parts is essential; changing one component without considering the others can result in poor performance, excessive fuel consumption, or accelerated wear.

Roller Weights and Sliders
Roller weights sit inside the variator pulley and move outward via centrifugal force as engine speed increases, pushing the pulley faces closer together to force the belt into a higher gear ratio. Lighter roller weights require higher engine RPMs to slide outward, which keeps the scooter in a lower gear ratio longer, resulting in faster initial acceleration and improved throttle response. Conversely, heavier roller weights slide outward at lower RPMs, which lowers cruising engine speeds, improves fuel economy, and helps achieve a higher top speed if the engine has enough power to pull the gear.
Many riders opt for shaped sliders instead of traditional round rollers. Sliders feature a unique geometry that allows the variator to open wider and close more completely, often providing a wider gear ratio range. When selecting weights for your Aerox V2, you must find a balance that keeps the engine operating within its ideal power band without causing the engine to over-rev or bog down.
Contra Spring Stiffness
The contra spring, or main spring, is located in the rear pulley assembly and exerts pressure to keep the rear pulley faces pushed together, holding the drive belt tight. This spring plays a critical role in preventing belt slippage under heavy loads, such as when accelerating hard, carrying a passenger, or climbing steep hills. A stiffer contra spring resists the outward movement of the front variator, keeping the scooter in a lower gear ratio for better back-shifting and immediate throttle response when you slow down and speed up again.
However, installing an excessively stiff contra spring can cause issues. It forces the engine to run at unnecessarily high RPMs, increases operating temperatures inside the CVT case, and accelerates wear on both the drive belt and the roller weights. For most daily riders, a moderate increase in stiffness is sufficient to improve performance without sacrificing component longevity.
Clutch Springs and Shoes
Small clutch springs, also known as tension springs, control the RPM at which the clutch shoes expand outward to grab the clutch bell and transfer power to the rear wheel. Stiffer clutch springs delay this engagement, allowing the engine to build more RPMs and power before the scooter starts moving, which results in a punchier launch from a complete stop. Softer springs allow the clutch to engage at lower RPMs, providing smoother, quieter low-speed crawling in heavy traffic.
Upgraded clutch shoes often feature larger friction pads made from high-grip compounds that resist heat glazing. When paired with a matching clutch bell, these components ensure a solid, slip-free connection. This is particularly beneficial for eliminating the common low-speed shuddering sensation that many scooter riders experience during stop-and-go riding.
Material and Heat Dissipation
The tropical climate of the Philippines, combined with congested urban traffic, creates a harsh environment for any CVT system. Extreme heat inside the CVT casing can cause the drive belt to soften and slip, reduce the tension of the springs, and cause the clutch shoes to lose grip. Therefore, looking for aftermarket components engineered with superior heat dissipation features is highly recommended.
High-quality variator faces often feature optimized fan blade designs to draw more cooling air into the casing. Additionally, performance clutch bells may include cooling fins, outer grooves, or specialized vents designed to expel clutch dust and dissipate heat rapidly. Investing in parts made from durable, heat-treated alloys ensures consistent performance even during long rides on hot afternoons.
Compatibility Verification
Before purchasing any CVT component, you must strictly verify its compatibility with the Yamaha Aerox V2. Although the Aerox V2 shares many engine characteristics with the Aerox V1 and the NVX 155 platform, there are subtle dimensional differences in the crankcase, CVT cover clearance, and pulley face angles. Relying on generic category terms can lead to purchasing parts that do not fit correctly, which can cause severe engine damage or immediate transmission failure.
Always consult the manufacturer’s official compatibility charts or product documentation to confirm that the specific part number is rated for the Aerox V2. If you are unsure, consult a professional mechanic or contact the parts manufacturer directly. Verifying these specifications beforehand saves time and prevents costly installation errors.
Best CVT Set Categories Based on Riding Style
Because every rider has unique expectations, aftermarket manufacturers offer various CVT configurations. Understanding these categories helps you select a setup that aligns with your daily riding habits and budget.
OEM and Direct Replacement Sets
If you are completely satisfied with how your scooter performed when it first rolled off the showroom floor, an OEM or direct-replacement CVT set is your best option. Over thousands of kilometers, components like the drive belt, roller weights, and slide pieces naturally wear down, leading to a gradual loss of acceleration and increased vibration. Replacing these worn parts with genuine Yamaha parts or high-quality OEM-equivalent components restores the scooter’s original performance.
Choosing OEM parts guarantees perfect fitment, excellent durability, and maximum fuel economy. Because these parts are designed specifically for your vehicle, they maintain factory safety margins and ensure your manufacturer’s warranty remains intact. For riders who prioritize daily reliability, low maintenance, and quiet operation above all else, keeping the CVT system stock is a highly practical and cost-effective decision.
Daily Commute and Touring Upgrades
For riders who spend hours navigating heavy urban traffic or frequently take weekend road trips, a mild upgrade or “half-set” CVT modification offers an excellent balance. This approach typically involves keeping the stock rear clutch assembly while replacing the front variator, ramp plate, and roller weights, often paired with a slightly stiffer contra spring. This setup aims to improve low-to-mid-range acceleration without making the scooter uncomfortable or noisy for daily use.
By installing slightly lighter roller weights (often dropping 1 to 2 grams from the stock weight) and a 1000 RPM or 1200 RPM contra spring, you can achieve much cleaner throttle response. This modification helps the scooter accelerate smoothly past the initial lag, making it easier to filter through traffic or maintain speed when climbing elevated flyovers. This setup maintains a comfortable cruising RPM at highway speeds, preserving your fuel economy while providing a noticeable boost in daily usability.
Full Performance and Track-Oriented Sets
If your goal is maximum acceleration, aggressive throttle response, and the highest possible top speed, a full performance CVT kit is the path to take. These comprehensive packages replace almost every moving part inside the CVT casing, including the variator pulley, face plate, roller weights, slide keys, torque driver, clutch assembly, clutch bell, and a high-tensile drive belt. These components feature aggressive ramp profiles and lightweight materials designed to keep the engine screaming in its peak power band.
To get the most out of a full performance set, you must carefully tune the roller weights and spring rates to match the specific RPM where your engine’s VVA system engages. While these setups deliver exhilarating performance, they come with significant trade-offs. You will experience increased mechanical noise, higher fuel consumption, and faster wear on the drive belt and rollers, requiring more frequent maintenance and inspections.
Installation, Tuning, and Safety Guidelines
Modifying your scooter’s transmission carries inherent risks if not done correctly. Following proper procedures and safety guidelines is essential to protect your investment and ensure your safety on the road.
Professional Installation vs. DIY
While replacing CVT parts might seem like a straightforward task, it requires specialized tools and precise technical knowledge. Removing and tightening the variator and clutch nuts requires a proper holding tool (such as a universal holder or flyman wrench) and a calibrated torque wrench. Using improper tools, like an impact wrench without a torque limit or attempting to jam the pulleys with a screwdriver, can easily bend the crankshaft, strip the threads, or crack the aluminum pulley faces.
Unless you have extensive mechanical experience and access to the correct tools, having your new CVT set installed by a qualified professional mechanic is highly recommended. A professional can ensure that all fasteners are torqued to Yamaha’s exact factory specifications, preventing the catastrophic failure of components loosening while you are riding.
Break-in Period
Whenever you install new CVT components, especially a new drive belt or clutch shoes, you must observe a proper break-in period. New drive belts have a manufacturing glaze and must seat perfectly into the pulley angles, while new clutch shoes need time to wear down slightly and mate evenly with the inner surface of the clutch bell. Failing to break in these parts can lead to premature slipping, glazing, or even snapping the belt.
To break in your new setup, ride moderately for the first 100 to 200 kilometers. Avoid sudden full-throttle launches, carrying extremely heavy loads, or attempting high-speed runs during this period. Allowing the components to wear in gradually ensures maximum grip, smoother operation, and a much longer service life for your new parts.
Maintenance Intervals
Upgraded CVT systems operate under higher spring tensions and engine RPMs, which naturally increases the operating temperature and mechanical stress inside the transmission case. Consequently, you must shorten your maintenance and inspection intervals compared to a completely stock scooter. Regularly checking the condition of your components prevents unexpected breakdowns.
It is advisable to open and clean the CVT casing every 5,000 kilometers. During this inspection, check the drive belt for any signs of cracking, fraying, or narrowing. Inspect the roller weights for flat spots, replace worn slide pieces, and clean out accumulated clutch dust using a dry brush or compressed air. Additionally, ensure that high-temperature CVT grease is applied sparingly to the torque driver pins according to the manufacturer’s instructions, taking care not to get any grease on the belt or pulley faces.
Safety and Legal Boundaries
Modifying your transmission to achieve higher speeds or faster acceleration means your scooter will be operating closer to its mechanical limits. Before increasing your vehicle’s performance, you must ensure that your braking system and suspension are in excellent working condition. Increased speed demands greater stopping power; ensure your brake pads, discs, and brake fluid are inspected and upgraded if necessary to handle the extra performance safely.
Furthermore, you must remain aware of local road regulations in the Philippines. The Land Transportation Office (LTO) and local government units enforce specific guidelines regarding motorcycle modifications and noise levels. Ensure that any aftermarket CVT cover or components you install do not violate local laws or compromise the road legality of your scooter, allowing you to enjoy your upgraded ride with complete peace of mind.
Frequently Asked Questions (FAQ)
Can I use Aerox V1 CVT parts on the Aerox V2?
While the Aerox V1 and Aerox V2 share a similar 155cc engine platform, they are not completely identical. There are subtle differences in the crankcase design, CVT cover clearance, and specific part numbers for components like the variator face, belt length, and clutch assembly. Attempting to force V1 parts into a V2 crankcase can lead to improper alignment, excessive vibration, and premature wear of the drive belt. To ensure safety and optimal performance, you should always purchase parts that are explicitly labeled and verified by the manufacturer for the Aerox V2.
Will upgrading the CVT void my Yamaha warranty?
Yes, installing aftermarket performance CVT parts will generally void the manufacturer’s warranty on the transmission system and any related engine components. If a mechanical issue arises and the dealer finds aftermarket parts inside the CVT casing, they may deny your warranty claim. If you wish to preserve your warranty, it is best to stick to genuine Yamaha parts installed by an authorized service center. If you do choose to upgrade, it is a good practice to keep all of your original stock components safely stored so they can be reinstalled if you need to return the scooter to its factory configuration.
How often should I replace the drive belt after a CVT upgrade?
An upgraded CVT setup, particularly one utilizing a stiffer contra spring and lighter roller weights, places significantly more physical stress and heat on the drive belt. While a stock drive belt on a standard scooter can easily last up to 20,000 kilometers, an upgraded system requires more frequent replacement. You should inspect your drive belt every 5,000 kilometers for any signs of cracking, fraying, or side wear. For modified setups, plan to replace the drive belt every 10,000 to 15,000 kilometers, depending on how aggressively you ride, to prevent the belt from snapping unexpectedly while on the road.
Community discussion
Share your experience or ask a question. Comments are reviewed before publication.