
Spending hours scrubbing your car’s cabin only to find dust settling back onto freshly wiped surfaces or glass cleaner streaking your clean dashboard is a frustratingly common experience for car owners. The proper order for detailing a car interior from start to finish is to work systematically from top to bottom and dry to wet, beginning with complete decluttering and dry vacuuming, followed by cleaning hard surfaces, treating upholstery, and finishing with glass and odor management. This logical sequence ensures that gravity works with you rather than against you, preventing dirt from re-contaminating areas you have already cleaned. In the tropical climate of the Philippines, high humidity and intense heat can accelerate the drying of cleaning products and trap moisture inside the cabin, making a structured approach even more critical to avoid mold, sticky residues, and chemical stains. By following a methodical checklist, you protect your vehicle’s delicate interior materials while achieving a professional-grade finish with minimal wasted effort.
What Must You Remove and Prepare Before Cleaning Any Surfaces?
Before applying any cleaners or agitating dust, you must completely clear the cabin of all loose items, trash, and floor mats to expose every hidden corner of the interior. This initial preparation phase ensures unobstructed access to the entire carpet area and prevents accidental chemical damage to personal belongings. Begin by clearing out the glove box, center console, door pockets, and trunk. Place personal items in a designated box outside the vehicle so they do not get misplaced or accidentally sprayed with cleaning agents. Remove any aftermarket accessories, child safety seats, and all floor mats to reveal the bare carpet underneath.
Once the cabin is empty, check the vehicle’s owner’s manual and the manufacturer labels on seats, mats, and trim pieces for specific cleaning codes, material restrictions, or warranty conditions. Different materials—such as aniline leather, synthetic leather, Alcantara, or specialized carpet fibers—require highly specific care, and using an incompatible chemical can cause permanent discoloration or cracking.
Products mentioned in this guide
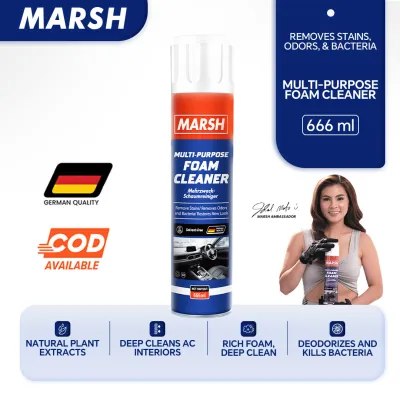
88 Lazada user ratings
Fast cleaning solution, No rinsing needed, No rinsing needed, Safe for hands and surfaces, Safe for hands and surfaces, Powerful foaming act…Read full reviewShow less
Fast cleaning solution, No rinsing needed, No rinsing needed, Safe for hands and surfaces, Safe for hands and surfaces, Powerful foaming action, Powerful foaming action, Non-greasy finish, Non-greasy finish, Easy to use, Protects against fading,
Maganda mabilis makapag linis tapos ang bango pa.. make sure na lang na nalinis na muna talaga yung surface ng basahan bago gamitan nito par…Read full reviewShow less
Maganda mabilis makapag linis tapos ang bango pa.. make sure na lang na nalinis na muna talaga yung surface ng basahan bago gamitan nito para hindi siya malabo ang surface.. mas malinis siya kapag isang pasada ng punas ng malinis na basahan..
Safe for hands and surfaces, easy to use. spray is working well and it cleans dirt. thank you seller and thank you rider.
Powerful foaming action, Great for car interiors, Protects against fading, No rinsing needed,
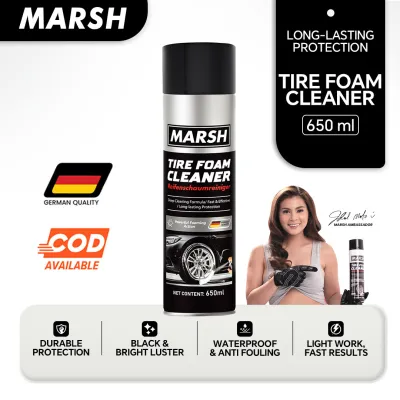
52 Lazada user ratings
Deep black shine, Good seller service, UV and acid rain resistant,
👌Ease of Use:basic ✅Effectiveness:very good
already repeat order good product
Prices are valid at publication and may change. Please refer to the product page for the latest price.
Before beginning the physical work, gather all your tools and products to maintain a continuous, efficient workflow. You will need a variety of soft detailing brushes, a vacuum cleaner with specialized attachments, multiple clean microfiber towels, and material-specific cleaners. In tropical climates, working in direct sunlight can cause cleaning solutions to dry instantly on hot surfaces, leaving stubborn chemical spots. Always position the vehicle in a shaded, well-ventilated area, and ensure all surfaces are cool to the touch before applying any liquids.
Why Should You Dust and Vacuum from Top to Bottom First?
You must dust and vacuum from top to bottom first because gravity naturally pulls loose dirt, dust, and debris downward onto lower surfaces as you agitate them. Cleaning the upper sections of the cabin before vacuuming ensures you do not have to vacuum the carpets and seats a second time. If you vacuum the floor first and then brush dust out of the air vents or headliner, those fine particles will settle directly back onto your clean carpet, forcing you to repeat your work.

Start the dry cleaning phase by using soft detailing brushes to gently agitate dust from the highest points of the cabin, including the headliner, sun visors, air vents, and tight crevices around the dashboard. As you brush the dust loose, immediately wipe the area with a dry, clean microfiber towel to capture the airborne particles before they settle on lower surfaces. This dry dusting step is crucial because applying liquid cleaners directly to a dusty surface creates a muddy slurry that is much harder to clean and can easily stain porous materials.
Once the loose dust has been brushed downward, begin the vacuuming sequence starting from the seats and moving down to the carpets and trunk. Use a soft brush attachment on leather or delicate plastic surfaces to prevent scratching, and switch to a narrow crevice tool to reach deep between the seats, seat rails, and console gaps. For fabric seats and carpets, a stiff-bristled upholstery brush can help loosen embedded dirt and pet hair from the fibers before vacuuming.
Safety is paramount when detailing around sensitive vehicle systems. Stop and consult a qualified professional if electrical components, parking sensors, or airbag seams are exposed or require deep crevice cleaning. Never insert metal vacuum nozzles, stiff wire brushes, or excessive moisture into airbag deployment seams, steering column electronics, or exposed wiring harnesses under the seats. Accidental damage to these components can compromise your vehicle’s safety systems or trigger expensive diagnostic trouble codes.
In What Order Should You Clean the Dashboard, Console, and Door Panels?
When cleaning the hard surfaces of your cabin, you should work from the highest points of the dashboard down to the center console, and finally to the lower door panels. This top-down sequence ensures that any accidental drips, overspray, or runoff from cleaning solutions land on untreated lower surfaces that will be cleaned next. By the time you reach the bottom of the door panels, you will have wiped away all stray drips, leaving a uniform, clean finish across all hard plastics and vinyl.
Begin by applying a mild, material-safe interior cleaner to a microfiber towel rather than spraying it directly onto the dashboard. Wipe the upper dashboard, steering column, and instrument cluster hood carefully. For sensitive areas like infotainment screens, digital instrument clusters, and climate control displays, avoid using standard interior cleaners or harsh chemicals that can strip delicate anti-glare coatings. Instead, use screen-safe microfiber cloths or manufacturer-approved wipes, applying minimal pressure to prevent scratching the soft plastic screens.
Next, move down to the center console, gear selector, and cup holders. These areas frequently accumulate sticky spills, dust, and oils from your hands. Use a soft-bristled detailing brush damp with a mild cleaner to agitate dirt in cup holders and tight seams, then immediately dry the area with a clean microfiber towel. Be extremely cautious around electronic buttons, USB ports, and accessory outlets; never allow liquid cleaners to pool in these areas, as moisture can easily penetrate the switches and cause electrical shorts.
Finish this phase by cleaning the door panels, armrests, and lower map pockets. These lower sections often bear the brunt of scuffs from shoes and road grime. When treating these areas, always verify product labels for material compatibility and dilution ratios. Avoid using harsh solvents or high-gloss silicone dressings on soft-touch plastics or leather-wrapped door trims. In hot, humid environments, inappropriate chemical dressings can degrade the plastic’s protective top coat over time, leading to a sticky, degraded surface that is difficult to restore.
How Do You Properly Treat Fabric or Leather Seats Without Cross-Contamination?
To properly treat fabric or leather seats without cross-contamination, you must identify the exact upholstery material and use dedicated, separate tools and products tailored specifically to that surface. Working in small, controlled sections prevents cleaning agents from drying prematurely and ensures that dirt from other parts of the car is not transferred to the seats. Because seats occupy a large portion of the interior and experience direct physical contact, using the wrong cleaning method can ruin the material or leave a sticky residue that attracts more dirt.
Before applying any product, verify the manufacturer’s care instructions in your owner’s manual to confirm whether your seats are upholstered in genuine leather, synthetic leather, or fabric. For genuine leather seats, apply a dedicated, pH-neutral leather cleaner to a soft microfiber towel or a soft-bristled horsehair brush. Work the cleaner gently into the leather pores in small, manageable sections, then immediately wipe away the lifted grime with a clean, dry microfiber towel. Once clean, apply a high-quality leather conditioner to replenish natural oils and protect the material from drying out and cracking under intense tropical heat and UV exposure.
For fabric seats, apply a specialized upholstery cleaner or foam cleaner sparingly to the surface. Agitate the cleaner with a medium-stiff upholstery brush to lift embedded dirt from the fabric fibers, then use a clean, damp microfiber towel or a wet-dry vacuum extractor to draw out the moisture and suspended soil. Be extremely careful not to over-wet the fabric or saturate the foam cushioning underneath. In highly humid climates, excess water trapped deep within seat foam can take days to dry, creating an ideal environment for mold, mildew, and persistent musty odors to develop.
To prevent cross-contamination, always use separate, color-coded microfiber towels for your seats. Do not use the same towel that you used to wipe down greasy dashboard dressings, door panel scuffs, or dirty door jambs. Transferring silicone-based dressings or harsh plastic cleaners onto leather or fabric seats can cause permanent staining, alter the texture of the upholstery, or leave a slippery residue that compromises passenger safety.
When Should You Clean the Interior Glass and Apply Air Fresheners?
You should clean the interior glass and apply air fresheners as the absolute final steps of the detailing process, after all other surfaces are completely clean and dry. This timing prevents dust, overspray, or chemical vapors from other cleaning steps from settling on and ruining your freshly cleaned windows. If you clean the glass early in the process, subsequent vacuuming, dashboard wiping, and leather conditioning will inevitably release airborne particles and chemical overspray that will leave a cloudy film on your windows.
To clean the interior glass, use a dedicated automotive glass cleaner and a clean, dry waffle-weave microfiber towel. Avoid household glass cleaners containing ammonia, as ammonia can damage aftermarket window tints, dry out rubber seals, and release harmful fumes inside a closed cabin. Spray the glass cleaner directly onto the microfiber towel rather than the glass to prevent overspray from landing on your freshly detailed dashboard or leather seats. Wipe the glass using a cross-hatch pattern—wiping horizontally on the inside and vertically on the outside if you are cleaning both sides—which allows you to instantly identify and eliminate any remaining streaks.
Before reinstalling your clean floor mats, ensure that the underlying carpets are completely dry to the touch. Reinstalling mats over damp carpets traps moisture against the floorboards, which can lead to rust on metal seat brackets, electrical corrosion in floor-routed wiring harnesses, and severe mildew odors. If necessary, leave the car doors open in a secure, shaded area with a fan running to thoroughly dry the carpets.
Finally, apply your chosen air freshener or odor eliminator to complete the detailing process. Never spray liquid air fresheners directly onto cleaned plastics, leather seats, or glass surfaces, as the concentrated oils and alcohol in these products can cause permanent staining, cloudiness, or chemical etching. Instead, place hanging air fresheners or spray odor eliminators in footwells or near cabin air intake vents according to the product instructions. This ensures a clean, fresh scent throughout the cabin without compromising any of your hard work.

Community discussion
Share your experience or ask a question. Comments are reviewed before publication.