
Upgrading the front brake rotor of your Yamaha Aerox V2 is a popular modification for riders looking to enhance both stopping performance and visual appeal. However, finding the correct big disc size is not as simple as picking the largest rotor available on an online marketplace. The maximum compatible disc diameter for your Aerox V2 is strictly determined by the caliper bracket (or adapter) you install alongside it. Without the correct bracket, even a slightly larger disc will not align with your brake caliper, rendering your braking system useless or highly dangerous.
To achieve a successful upgrade, you must treat the disc, the caliper bracket, and the caliper itself as a single, unified system. In this guide, we will break down how to determine the correct big disc size for your Aerox V2, the critical measurements you must verify before spending your hard-earned ₱, and the essential safety steps required for a secure installation.
Quick Answer: Determining Your Aerox V2 Brake Disc Compatibility
When planning a big disc upgrade for your Yamaha Aerox V2, the absolute limit of compatibility is not the physical space inside your 14-inch front wheel. Instead, the maximum compatible disc diameter is strictly dictated by the specific aftermarket caliper bracket designed for the Aerox V2 front fork and axle. The bracket acts as the bridge that relocates your brake caliper outward to accommodate the larger circumference of the new rotor.
Products mentioned in this guide
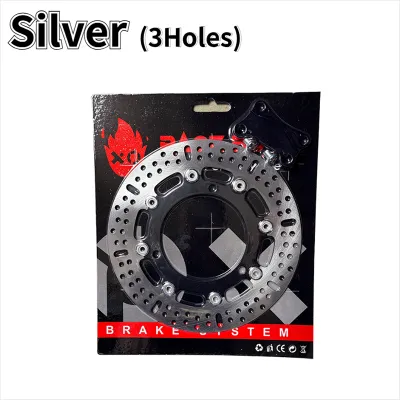
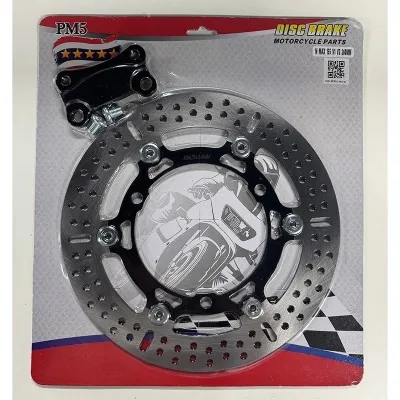
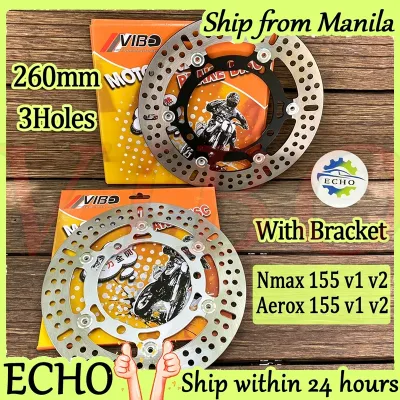
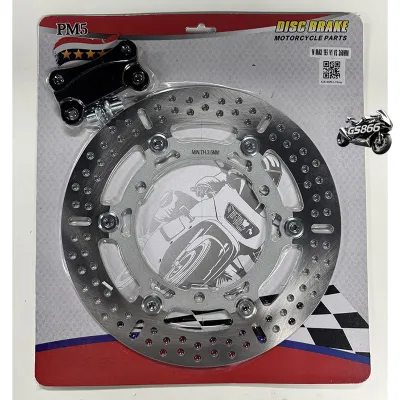
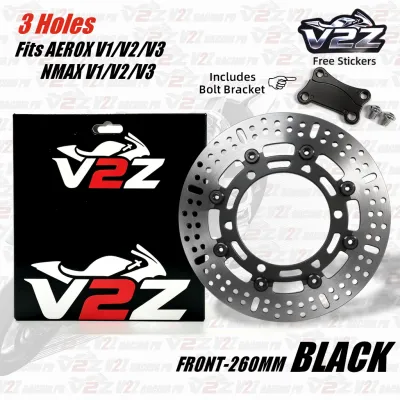
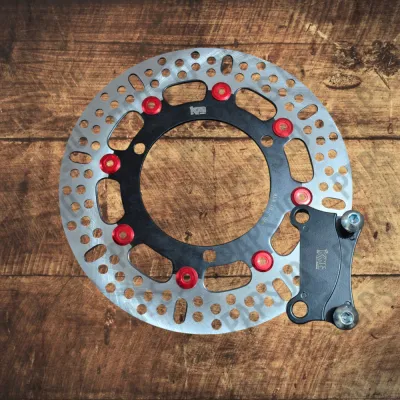
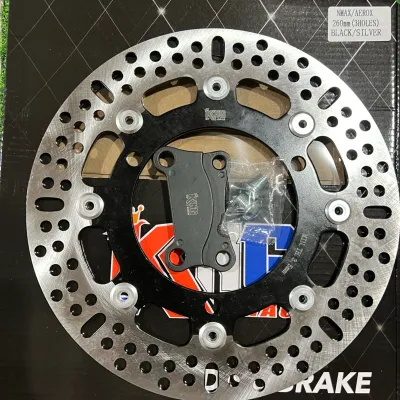
Prices are valid at publication and may change. Please refer to the product page for the latest price.
Because of this mechanical dependency, you must match the disc diameter to the bracket’s engineered offset. If you purchase a 260mm or 270mm big disc, you must pair it with a bracket explicitly designed to position the caliper for a 260mm or 270mm rotor on the Aerox V2 fork legs. Attempting to mix and match mismatched sizes will cause the brake pads to partially hang off the edge of the rotor or rub against the inner carrier, leading to rapid pad wear and catastrophic brake failure.
Before purchasing any big disc, your first step should always be to obtain and review the specification sheet from your chosen bracket manufacturer. Verify that the bracket is designed specifically for the Aerox V2 and note the exact rotor diameter it requires.
Key Disc Specifications to Verify Before Purchasing
To ensure a seamless fit and avoid costly return shipping fees, you must verify several critical physical dimensions of the aftermarket rotor. Do not rely solely on product titles on ecommerce platforms; instead, cross-reference these key specifications with your scooter’s stock setup and your aftermarket bracket.

Diameter and Offset The outer diameter of the disc must match your caliper bracket exactly. Additionally, you must verify the mounting surface offset. The offset refers to how far the braking surface sits inward or outward relative to the mounting hub. If the offset is incorrect, the disc will rub against the front fork leg or prevent the wheel axle from spinning freely. Ensure the rotor’s offset aligns the braking track perfectly within the center of your caliper.
Mounting Hole Pattern The Yamaha Aerox V2 front wheel hub has a specific bolt pattern that you must match. You must check the exact number of bolt holes, the bolt circle diameter (PCD), and the individual hole sizes. The Aerox V2 typically utilizes a specific multi-bolt mounting pattern on its stock wheel hub. Count the bolts on your current front wheel and measure the distance between opposite holes (PCD) to guarantee the new big disc will bolt securely to your hub without modification.
Disc Thickness A thicker rotor can handle more heat, but it must fit within the physical limits of your caliper. Ensure the new rotor’s thickness matches your caliper’s piston clearance and the width of your brake pads. If the disc is too thick, the brake pads will bind against the rotor even when the brake lever is fully released, causing excessive drag, extreme heat buildup, and premature wear. While minor weight differences between rotor brands exist, they rarely affect everyday handling on public roads.
Fixed vs. Floating Rotors When browsing big discs, you will encounter both fixed and floating designs:
- Fixed Rotors: Made from a single piece of steel, these are highly durable and cost-effective for daily commuting in tropical conditions.
- Floating Rotors: Feature a separate inner carrier and an outer steel braking ring connected by metal buttons. This design allows the outer ring to expand and contract independently under high heat, reducing the risk of warping during heavy braking down steep mountain passes. However, floating rotors require specific hub carrier clearances and precise alignment to prevent the floating buttons from striking the caliper body or fork leg.
Essential Supporting Components for the Upgrade
Upgrading to a big disc is never a standalone project. To ensure the system functions safely and effectively, you must budget for and install several supporting components.
Caliper Bracket (Adapter) As the mandatory anchor component of your brake upgrade, the caliper bracket dictates the maximum disc size you can run. It must be machined from high-grade billet aluminum or steel to withstand the immense torsional forces generated during hard braking. Always choose a bracket designed specifically for the Aerox V2 front fork mount.
Brake Caliper and Pads While some brackets allow you to retain the stock single-piston Aerox V2 caliper, many riders choose to upgrade to a dual-piston or four-piston aftermarket caliper. If you keep the stock caliper, ensure it has enough clearance to slide over the larger rotor without binding. Regardless of the caliper you use, pair the new disc with fresh brake pads. Never reuse old, unevenly worn brake pads on a brand-new rotor, as this will ruin the disc’s surface and severely compromise your stopping power.
Brake Hose and Fluid Relocating your caliper outward to accommodate a larger disc changes the path and tension of your front brake hose. Inspect the stock brake hose to ensure it reaches the new caliper position safely without stretching, pinching, or binding when the handlebars are turned fully from lock to lock. If the hose is under tension, you must install a longer, braided steel brake line. Additionally, always use fresh, high-quality brake fluid from a sealed container, matching the DOT rating (such as DOT 3 or DOT 4) specified on your master cylinder reservoir cap.
Safety Boundaries and Installation Requirements
Modifying your motorcycle’s braking system is a high-responsibility task. Because brakes are your primary safety device, any error during installation can lead to severe injury or accidents on busy roads in the Philippines.
First and foremost, ensure all aftermarket components comply with local road safety regulations and Land Transportation Office (LTO) inspection standards. Avoid using unbranded, ultra-cheap brake components of questionable material quality, as structural failure under load can be catastrophic.
During installation, pay close attention to how the parts fit together. If the caliper bracket, disc, or caliper instructions conflict, or if any component requires excessive force to align or bolt down, stop the installation immediately. Do not attempt to grind down components or force bolts into place. Consult a qualified motorcycle mechanic to diagnose the compatibility issue.
Once the physical installation is complete, perform these mandatory post-installation checks before riding:
- Bleed the Brake Lines: Ensure there are absolutely no air bubbles trapped in the brake system, which would cause a spongy lever feel and poor braking response.
- Bed in the New Pads: Follow the manufacturer's specific bedding-in instructions to transfer a thin layer of pad material onto the new rotor, ensuring optimal friction.
- Low-Speed Testing: Test the brakes at very low speeds in a controlled, traffic-free area to verify that the caliper grips firmly, releases completely, and does not rub or make unusual noises.
Frequently Asked Questions (FAQ)
Can I install a big disc on the rear wheel of the Aerox V2?
While it is technically possible with extensive modifications, rear big disc kits are far less common for the Aerox V2. The rear wheel setup has tight physical limitations, and installing a larger rotor requires a highly specific rear axle bracket. Additionally, a larger rear disc can easily interfere with the rear shock absorber, the exhaust system mounting brackets, or the crankcase. If you want to upgrade your rear braking, look for dedicated, rear-specific kits rather than attempting to adapt front wheel components.
Will upgrading to a big disc improve my braking distance?
Upgrading to a larger disc provides better heat dissipation and greater mechanical leverage, which significantly reduces brake fade during prolonged braking down steep hills or in heavy stop-and-go traffic. However, a big disc alone does not automatically guarantee a shorter stopping distance. Your actual stopping distance is heavily dependent on tire grip, road conditions, brake pad compound, suspension setup, and your own braking technique. To maximize the benefits of a big disc, ensure your tires are in good condition and have adequate tread depth.
Community discussion
Share your experience or ask a question. Comments are reviewed before publication.