
Upgrading the headlights of a Toyota Innova to LED bulbs is a practical modification for vehicle owners in the Philippines. The standard halogen bulbs equipped on many model years often struggle to provide sufficient illumination during heavy monsoon downpours, dark provincial highways, or poorly lit urban streets. By transitioning to high-quality LED technology, drivers can achieve a brighter, crisper light output that significantly enhances nighttime visibility and overall road safety. However, finding the ideal LED headlight bulb is not a one-size-fits-all process, as it requires a clear understanding of your vehicle’s specific model year, housing design, and electrical requirements.
To make a successful transition, you must first identify whether your Innova uses a traditional reflector housing or a modern projector setup, as this dictates the bulb size and the required beam pattern. Matching the exact original equipment manufacturer (OEM) bulb specification—such as H4 for older dual-beam systems, or H11 and 9005 for newer split-beam configurations—is essential to prevent physical fitment issues and electrical malfunctions. Furthermore, because the local climate presents unique challenges like extreme engine bay heat and high humidity, selecting a bulb with robust thermal management and weatherproofing is critical for long-term durability. This comprehensive guide outlines the essential steps, technical specifications, and safety considerations necessary to select and install the right LED headlight bulbs for your Toyota Innova.
Identifying Your Toyota Innova's Headlight Setup
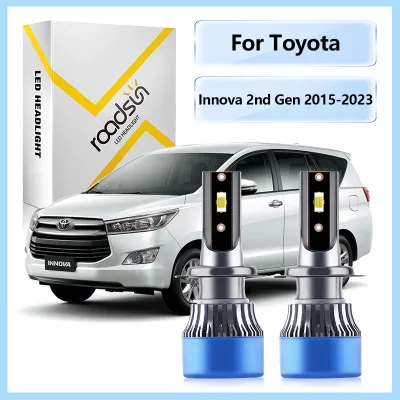
Before purchasing any aftermarket LED bulbs, you must accurately identify the generation and trim level of your Toyota Innova, as the headlight assembly designs have evolved significantly since the vehicle’s introduction. First-generation models, which spanned from 2005 to early 2016, utilize a classic multi-reflector headlight housing. These assemblies rely on a single, dual-filament H4 bulb per side to handle both low-beam and high-beam functions. The internal reflective facets of the housing are specifically engineered to shape the light emitted by this single bulb, meaning any LED replacement must precisely mimic the physical dimensions of a standard H4 halogen bulb to avoid scattering light uncontrollably.
Products mentioned in this guide
![[Toyota] Innova 2005-2016 Car LED Headlight Bulb Hi/Lo Beam Headlamp 6000K White 12000LM Super Bright Lampu Depan Kereta](https://img.lazcdn.com/g/p/870b84694dc60f478c2bfb8e2e98a5c7.jpg_400x400q80.jpg_.webp)
10 Lazada user ratings
great quality and nice looking bulbs, going to install and see if it works
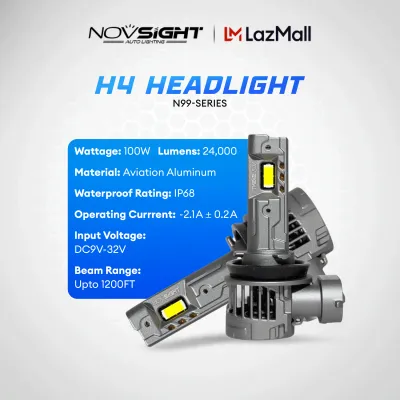
IP68 waterproof rating, Long lasting over 50,000 hours,
Compatibility:High lumen output 12000LM,
6000K white color temperature,
mganda, mliwanag,
Prices are valid at publication and may change. Please refer to the product page for the latest price.
In contrast, second-generation models—often referred to locally as the “Innova Reborn” (introduced in late 2016) and subsequent facelifts—feature more complex headlight configurations depending on the specific trim level. Lower and mid-tier trims, such as the E and G variants, typically continue to use halogen reflector systems but split the high and low beams into separate bulbs, commonly utilizing H11 bulbs for the low beams and 9005 (HB3) bulbs for the high beams. Premium trims, such as the V variant, come equipped from the factory with LED projector assemblies for the low beams while retaining halogen bulbs for the high beams. Upgrading a projector-equipped housing requires a different approach than upgrading a reflector housing, as projectors use a lens to focus the light beam rather than relying solely on open reflective surfaces.
To confirm your vehicle’s exact bulb requirements, always consult the lighting specifications section in your Toyota Innova owner’s manual or physically inspect the base of the existing bulbs. Halogen bulbs almost always have their fitment type, wattage, and voltage stamped directly onto the metal or plastic collar of the bulb base. Removing a bulb to check this stamp is the most reliable way to verify compatibility before ordering replacements. Additionally, take this opportunity to inspect the overall condition of your headlight housings; if the outer polycarbonate lenses are yellowed, hazy, or heavily oxidized by prolonged exposure to the tropical sun, the effectiveness of any new LED bulb will be severely compromised. Upgrading the bulbs without first restoring or replacing damaged, cloudy lenses will result in a dim, scattered beam that fails to illuminate the road safely.
Critical Specifications for a Compatible Innova LED Headlight
Physical compatibility goes beyond matching the bulb socket type; you must also ensure that the physical dimensions of the LED bulb are compatible with the rear clearance of the Innova’s headlight assembly. Unlike standard halogen bulbs, which are relatively compact, LED headlight bulbs require integrated cooling mechanisms at the rear of the bulb base. These cooling elements, which consist of either active fans or passive aluminum heat sinks, add significant depth and width to the bulb’s profile. You must measure or verify the clearance behind the headlight housing to ensure that the LED bulb’s rear structure does not interfere with structural components of the engine bay, the battery, or the air filter box.

Another critical physical factor is the factory dust cover, which is typically a flexible rubber boot or a hard plastic cap designed to seal the rear of the headlight housing against moisture, dust, and engine grime. If the cooling fan or heat sink of the aftermarket LED bulb protrudes too far outward, the dust cover may not fit back onto the housing properly. Operating a vehicle without a fully sealed dust cover allows humidity and road debris to enter the headlight assembly, leading to condensation on the inside of the lens and potential damage to the reflective coatings. Look for LED bulbs designed with compact, low-profile cooling systems, or consider purchasing specialized aftermarket dust covers with extended clearance if the factory covers cannot be reinstalled securely.
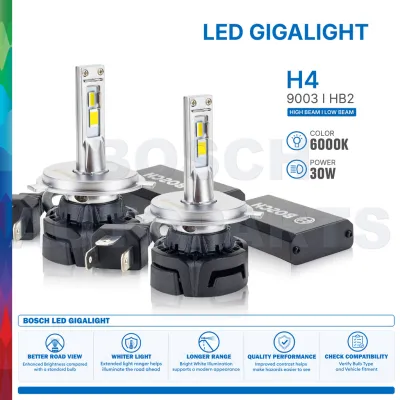
From an electrical standpoint, you must evaluate whether your Toyota Innova requires a CANbus-compatible LED bulb or an external decoder. While older generations of the Innova feature straightforward electrical systems that do not monitor bulb wattage, some newer model years or specific trim levels may utilize electronic control units that detect changes in electrical resistance. Because LED bulbs draw significantly less power than original halogen bulbs (often 15 to 25 watts compared to the standard 55 watts), the vehicle’s computer may interpret this low power draw as a burnt-out bulb. This can trigger dashboard warning lights, rapid flashing (hyper-flashing), or cause the headlights to flicker and shut off. Choosing an LED kit with built-in CANbus decoders or installing inline load resistors can resolve these electrical discrepancies by simulating the power draw of a standard halogen bulb.
When comparing the performance of different LED bulbs, it is vital to distinguish between raw lumen ratings and effective lux. Many aftermarket manufacturers advertise extremely high raw lumen figures—sometimes exceeding 10,000 or 20,000 lumens per pair—which simply represent the theoretical maximum output of the LED chips under ideal laboratory conditions. In reality, much of this light can be wasted if the bulb’s design does not align with the vehicle’s optics. Effective lux, which measures the actual intensity of light projected onto a specific area of the road, is a much more accurate indicator of real-world performance. A well-engineered LED bulb with a lower raw lumen rating but superior optical alignment will provide better visibility and a safer driving experience than an poorly designed, ultra-bright bulb that scatters light uselessly into the sky.
Beam Pattern, Safety, and Road Legality in the Philippines
The most critical safety aspect of upgrading to LED headlights is maintaining a correct and precise beam pattern. Halogen headlight housings are designed around a tiny, highly concentrated filament that emits light in a full 360-degree arc. LED chips, however, are flat surfaces that emit light directionally, usually in a 180-degree arc on either side of a central circuit board. If the LED chips are not positioned in the exact physical location as the original halogen filament, the headlight’s reflectors or projector lenses will not focus the light correctly. This misalignment results in a distorted beam pattern, dark spots on the road, and excessive glare that can temporarily blind oncoming drivers, creating a severe road safety hazard.
To ensure a safe beam pattern, look for LED bulbs that feature an adjustable mounting collar. This design allows you to rotate the bulb body within the headlight housing after it has been locked into the socket. For most reflector housings, the LED chips should face horizontally (at the 3 o’clock and 9 o’clock positions) to utilize the side reflectors properly and create a sharp, horizontal cutoff line. This cutoff line is essential because it keeps the brightest portion of the light beam focused downward onto the pavement and away from the windshields of oncoming vehicles. If your upgraded headlights do not produce a distinct, clean cutoff line, they are improperly aligned or incompatible with your housing.
After installing new LED bulbs, you must check and adjust the physical aiming of your headlights. Even if the bulb is perfectly aligned within the housing, the slight change in light source geometry can shift the overall angle of the beam. To adjust the aim, park your Innova on a level surface exactly 25 feet (approximately 7.6 meters) away from a flat wall, ensuring your tires are properly inflated and the vehicle has a normal load. Locate the vertical and horizontal adjustment screws on the back of each headlight assembly, and use a screwdriver to align the beam cutoff so that it sits slightly below the height of the headlight lenses on the wall. This simple adjustment ensures maximum road illumination while preventing glare from reaching other motorists.
In the Philippines, aftermarket lighting modifications are subject to strict regulations enforced by the Land Transportation Office (LTO) and local traffic law enforcement. According to LTO guidelines, headlights must emit either white or selective yellow light, and any modification must not pose a hazard to other road users. LED bulbs with extremely high color temperatures—such as 8000K or higher, which produce a distinct blue or purple tint—are generally prohibited and can result in fines or registration failure during vehicle inspections. Furthermore, blue-tinted light performs poorly in heavy rain and fog, as the shorter wavelengths scatter off water droplets, reducing your visibility. Opting for a clean white light in the 5000K to 6000K range provides the best balance of modern aesthetics, high visibility, and compliance with local road safety laws.
Evaluating Build Quality and Heat Dissipation
The longevity of an LED headlight bulb is directly tied to how effectively it manages heat. While LEDs are highly efficient, they still generate a substantial amount of heat at the junction point of the diode. If this heat is not dissipated quickly, the LED chips will rapidly degrade, leading to a loss of brightness, color shifting, and eventual premature failure. When evaluating build quality, pay close attention to the thermal management system employed by the manufacturer. High-quality bulbs are typically constructed from aviation-grade aluminum or copper, which offer excellent thermal conductivity to draw heat away from the delicate electronic components.
You will need to choose between active and passive cooling systems based on your driving conditions and installation space. Active cooling systems utilize a miniature, high-speed fan built into the rear of the bulb base to force air across a series of cooling fins. This design is highly effective at keeping high-output LEDs cool, but it introduces a mechanical moving part that can eventually fail due to dust, water, or bearing wear. Passive cooling systems, on the other hand, rely on solid aluminum heat sinks or flexible copper mesh belts to dissipate heat without moving parts. While passive systems are inherently more reliable and silent, they often require more physical space behind the headlight housing and may not support the highest wattage outputs.
Given the tropical climate of the Philippines, which is characterized by intense summer heat, high humidity, and severe monsoon seasons, weatherproofing is a non-negotiable specification. Always check the Ingress Protection (IP) rating of the LED bulbs and their external drivers. An IP65 rating indicates that the bulb is dust-tight and protected against water jets, while an IP67 or IP68 rating offers even greater protection against dust ingress and temporary immersion in water. A high IP rating ensures that the delicate internal circuitry and cooling fan can withstand heavy downpours, flooded streets, and the high-humidity environment of the engine bay without short-circuiting or corroding.
Finally, look for indicators of manufacturing standards and reliable warranty terms. Reputable manufacturers will clearly display safety and quality certifications, such as CE, RoHS, or FCC markings, on their packaging, indicating that the product has undergone standardized testing for electromagnetic interference and environmental safety. Additionally, a solid manufacturer’s warranty—ideally spanning one to two years—is a strong indicator of the brand’s confidence in their product’s durability. Avoid generic, unbranded bulbs that offer no warranty or clear specifications, as these products often use low-grade components that fail within a few months of use, ultimately costing more in replacements than a single set of high-quality bulbs.
Installation Boundaries and Professional Assistance
Installing LED headlight bulbs in a Toyota Innova is a task that many vehicle owners can complete at home with basic tools, provided they follow proper safety protocols. Before beginning any work on your vehicle’s electrical system, ensure the ignition is turned off, the keys are removed, and the negative terminal of the battery is disconnected. This simple step eliminates the risk of accidental short circuits or electrical shocks during the installation process. If you have recently operated the vehicle, allow the engine bay and the existing halogen bulbs to cool down completely; halogen bulbs operate at extremely high temperatures and can cause severe skin burns if handled immediately after use.
One of the primary challenges when installing LED bulbs in an Innova is navigating the tight clearances within the engine bay. On the driver’s side, the vehicle’s battery often sits directly behind the headlight assembly, leaving very little room for your hands to access the dust cover and bulb locking mechanism. On the passenger side, the air intake duct or air filter box can similarly restrict access. To make the installation safer and more comfortable, it is often highly beneficial to temporarily remove the battery or loosen the mounting bolts of the air intake components. This extra space allows you to align the new LED bulb correctly, secure the retaining spring clip, and route the wiring harness without bending or damaging the components.
While plug-and-play LED upgrades are straightforward, there are specific scenarios where you should stop and seek professional assistance from a qualified automotive electrician. If your upgrade requires splicing or cutting into the factory wiring harness to install external decoders, load resistors, or custom relay harnesses, professional installation is highly recommended to prevent damage to the vehicle’s electrical system. Furthermore, if you plan to perform a complete projector retrofit—which involves opening the sealed headlight housing to install a dedicated projector lens—this task requires specialized tools, sealing ovens, and precise alignment techniques that are best left to experienced professionals.
Improperly installed aftermarket lighting can lead to serious consequences, including blown fuses, melted wiring harnesses, or even vehicle fires. If you notice any unusual symptoms after installing your new LED bulbs—such as a burning smell, flickering lights, dashboard warning indicators, or a sudden loss of other electrical functions—immediately turn off the headlights and disconnect the battery. A professional auto electrician can diagnose the issue, verify that the current draw is within safe limits, and ensure that all connections are properly insulated and secured against vibration and moisture.
Frequently Asked Questions (FAQ)
Will installing aftermarket LED bulbs void my vehicle warranty?
Installing plug-and-play LED headlight bulbs that do not require modifications to the factory wiring harness generally does not void your entire vehicle warranty. Under standard automotive warranty terms, only issues directly caused by the aftermarket component itself will be excluded from coverage. However, if you cut, splice, or otherwise modify the original wiring loom to install the bulbs, any subsequent electrical failures may void the warranty for that specific system. To ensure complete peace of mind, it is always highly recommended to consult your local Toyota dealership regarding their specific policies on aftermarket lighting upgrades before proceeding.
Do I need a relay harness for my Innova's LED upgrade?
For the vast majority of Toyota Innova models, a dedicated relay harness is not necessary when upgrading to LED headlight bulbs. Because LED bulbs draw significantly less electrical current than original halogen bulbs, they place a lower load on the factory wiring and headlight switch. However, if you are installing exceptionally high-power LED upgrades, experiencing severe voltage drops, or retrofitting older models with degraded factory wiring, a relay harness can be beneficial. The harness draws power directly from the battery to ensure stable voltage, preventing flickering and protecting your factory switches from potential heat damage.
Can I use the same LED bulbs for my Innova's fog lights?
No, you cannot use the same LED bulbs for both your headlights and your fog lights, as they typically require different bulb sizes and serve entirely different optical purposes. While your headlights may use H4, H11, or 9005 bulbs depending on the model year, the fog lights on a Toyota Innova often utilize different sizes, such as H16 or HB4. Furthermore, fog lights require a highly specialized beam pattern that projects a wide, low-lying light to cut through rain and mist without reflecting glare back into your eyes. Always verify the specific bulb size for your fog lights separately before purchasing upgrades.

Community discussion
Share your experience or ask a question. Comments are reviewed before publication.