
Upgrading the front braking system of your Yamaha Mio i 125 to a larger 260mm disc brake is a highly effective way to improve stopping power, especially when navigating congested city streets and unpredictable tropical weather. However, because the stock Mio i 125 comes equipped with a smaller rotor, moving up to a 260mm diameter requires careful planning and a clear understanding of what makes a disc brake reliable. A reliable disc brake is not defined by brand hype, but by its material composition, precise machining tolerances, and how well it integrates with your scooter’s existing hydraulic system.
In the Philippine motorcycle market, riders are presented with a vast array of aftermarket options ranging from budget-friendly imports to premium performance brands. To identify the most reliable option for your daily commute, you must evaluate how these discs handle the extreme heat of stop-and-go traffic, resist warping under sudden downpours, and maintain structural integrity over thousands of kilometers. This guide establishes a practical, step-by-step framework to help you compare available 260mm discs, ensuring your upgrade delivers consistent safety, durability, and genuine value.
Safety First: Compatibility and Installation Requirements for Yamaha Mio i 125
Before purchasing any 260mm disc brake, you must verify the physical compatibility of the rotor with your specific Yamaha Mio i 125 wheel hub. The Mio i 125 stock wheel hub utilizes a specific three-hole mounting pattern, meaning any aftermarket disc must match this exact bolt circle diameter and offset. Attempting to force a disc with a different bolt pattern or an incorrect offset will lead to severe misalignment, causing the rotor to rub against the fork leg or the caliper body, which can lock up the front wheel during operation.
Products mentioned in this guide
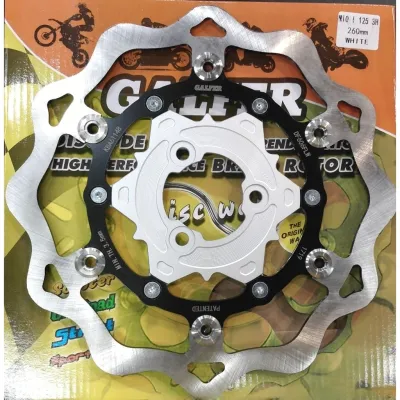
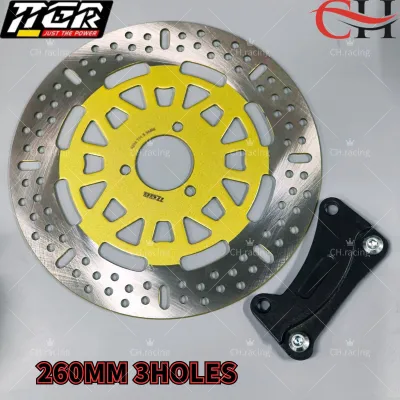
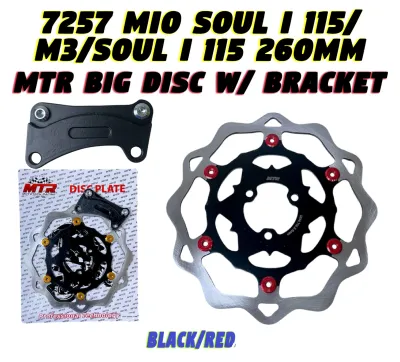
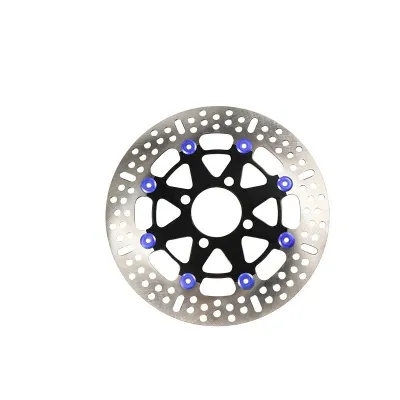
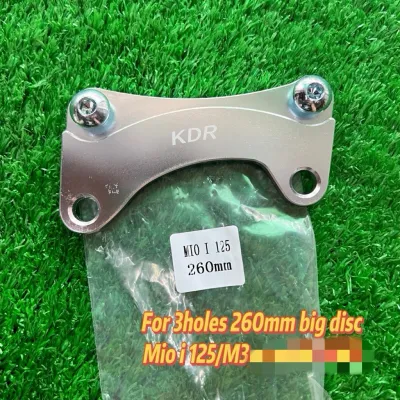
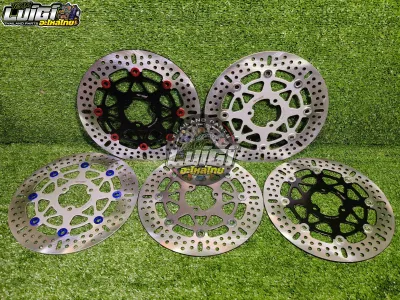
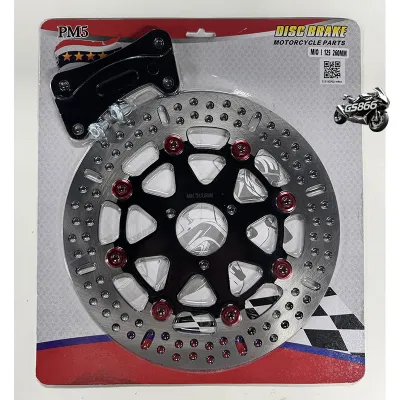
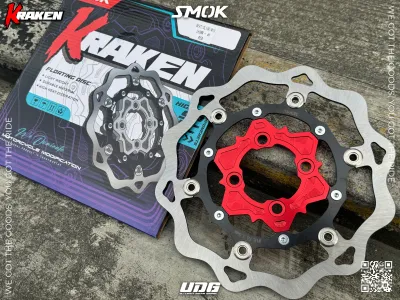
Prices are valid at publication and may change. Please refer to the product page for the latest price.
Modifying your motorcycle’s braking system also carries legal and regulatory considerations in the Philippines. Under Land Transportation Office guidelines, any modification that alters the safety parameters of a vehicle must not compromise roadworthiness. While upgrading to a larger disc is generally accepted as a safety enhancement, using unbranded or poorly manufactured components can lead to inspection failures during registration renewal. Furthermore, some comprehensive insurance policies may void coverage if an accident is traced back to an uncertified, improperly installed aftermarket braking component.
Because the front brake provides up to seventy percent of your scooter’s stopping power, DIY installation is highly discouraged unless you possess professional-grade tools and mechanical training. A proper installation requires mounting a specialized caliper relocation bracket to accommodate the larger 260mm radius. A qualified motorcycle mechanic should perform the installation to ensure that all mounting bolts are tightened to the manufacturer’s exact torque specifications using a torque wrench, thread-locking fluid is applied correctly, and the hydraulic system is thoroughly bled to eliminate air bubbles that cause a spongy lever feel.
OEM vs. Aftermarket 260mm Discs: Material and Design Differences
When comparing disc options, it is important to understand that Yamaha does not manufacture an official 260mm OEM disc specifically for the Mio i 125. Therefore, “OEM” options in this size category usually refer to genuine Yamaha rotors designed for larger scooter models that happen to share the same mounting pattern, or high-quality OEM-equivalent replacement brands that adhere strictly to factory material standards. These components offer predictable consistency, utilizing standard stainless steel alloys designed for balanced wear, quiet operation, and long-term reliability under normal riding conditions.

In contrast, aftermarket brands offer a wider variety of material claims, often boasting the use of high-carbon steel, specialized stainless steel alloys, or dual-material floating designs. High-carbon steel rotors generally provide a stronger initial bite and better thermal stability, making them highly resistant to warping under heavy braking loads. However, the aftermarket landscape is also flooded with counterfeit products that mimic the appearance of premium brands. To protect yourself, always inspect the packaging for holographic security stickers, verify the presence of cleanly stamped part numbers on the inner ring of the disc, and purchase only from authorized physical shops or official online flagship stores.
The manufacturing quality of a disc directly influences how it behaves during heavy stop-and-go traffic in hot tropical climates. Premium aftermarket discs undergo precise metallurgical treatments, such as heat tempering, to relieve internal stresses within the metal. This process, combined with tight machining tolerances, minimizes lateral runout—the tiny side-to-side wobble of the disc as it rotates. Cheap, poorly machined discs often suffer from high runout, which leads to uneven pad wear, annoying brake pulsations, and localized hot spots that can permanently warp the rotor.
Critical Specifications to Check Before Buying
When browsing 260mm disc options in-store or on local online marketplaces, you should pay close attention to the physical dimensions and structural design of the rotor. First, check the thickness of the disc; most reliable 260mm rotors have a starting thickness of 3.5mm to 4.0mm. A thicker disc provides greater structural rigidity and a larger thermal mass to absorb heat, but it also adds unsprung weight to your front wheel. Excessively heavy rotors can slightly slow down your scooter’s steering response and affect how the front suspension reacts to road bumps, so finding a balance between thickness and weight is key.
The surface pattern of the rotor is another critical factor for daily commuting in the Philippines, where sudden afternoon downpours and dusty roads are common. Drilled holes and slotted grooves are not just for aesthetics; they serve the vital function of clearing water, mud, and brake dust away from the contact patch between the pad and the rotor. In wet conditions, a well-designed drilled pattern prevents a film of water from forming on the disc, ensuring immediate braking response when you pull the lever. However, excessive drilling can reduce the overall surface area of the disc, slightly lowering its maximum heat capacity, so look for patterns that maintain a solid outer edge.
Additionally, check for protective surface treatments or anti-corrosion coatings on the non-swept areas of the rotor, such as the inner mounting bell and the edges of the cooling slots. Because of the high humidity and frequent rain in tropical regions, untreated steel will quickly develop unsightly surface rust. High-quality aftermarket discs often feature an electroplated or painted protective layer that keeps these non-contact areas clean and rust-free, preserving both the structural integrity of the mounting points and the overall appearance of your Mio i 125.
Balancing Stopping Power, Durability, and Budget
Achieving the perfect braking setup requires balancing immediate stopping power with long-term durability and your personal budget. Stopping power is characterized by two distinct phases: the initial bite, which is the immediate friction felt when you first apply the brakes, and progressive modulation, which allows you to control the braking force smoothly as you pull the lever harder. To achieve a predictable, progressive feel, you must match the rotor’s surface profile with an appropriate brake pad compound. For instance, pairing a hard, high-carbon steel rotor with soft organic pads can lead to rapid pad wear, while pairing a soft stainless steel rotor with aggressive sintered pads can quickly score and ruin the disc.
To ensure long-term safety, you must regularly monitor the wear indicators and minimum thickness markings stamped directly onto the face of the rotor. As brake pads press against the spinning disc, both components wear down over time. Once a disc wears below its specified minimum thickness—typically indicated by a stamp such as “Min. Th. 3.0mm”—it loses its structural strength and heat dissipation capabilities. Continuing to ride on an excessively thin rotor increases the risk of catastrophic failure, where the disc can crack or shatter under emergency braking conditions.
When calculating your budget, look beyond the initial purchase price of the disc itself. A complete 260mm upgrade requires factoring in the cost of a high-quality caliper relocation bracket, a fresh set of compatible brake pads, and the labor fee for professional installation. While a budget-friendly aftermarket disc might cost around ₱800 to ₱1,500, it may wear out quickly or warp within a few months of heavy commuting. Investing in a mid-range or premium disc priced between ₱2,000 and ₱4,500 often yields a lower total cost of ownership, as these components are built to withstand daily commuting loads for years without needing premature replacement.
Decision Framework: Choosing the Right 260mm Disc for Your Commute
To simplify your decision, you can map your riding habits, maintenance commitment, and budget to a specific category of 260mm disc brakes. If your primary goal is hassle-free daily commuting with minimal maintenance, look for OEM-equivalent or certified standard aftermarket brands. These discs prioritize guaranteed fitment, standard warranty coverage, and predictable performance under normal city speeds. They are designed to work seamlessly with standard organic or semi-metallic brake pads, offering a quiet and smooth ride without requiring constant adjustments.
If you are a spirited rider who frequently travels on steep mountain roads, carries heavy cargo, or rides in highly congested stop-and-go traffic, premium aftermarket brands are the logical choice. These discs feature advanced heat-management designs, such as floating rotors that allow the outer braking ring to expand and contract independently of the inner mounting bell. This floating design virtually eliminates thermal warping under extreme heat. To maximize this investment, you should pair these premium rotors with high-performance semi-metallic or sintered brake pads and commit to regular cleaning to keep the floating pins free of road grime.
Budget aftermarket options should generally be reserved for short-term or temporary solutions. If you choose a budget-friendly disc, you must commit to a strict maintenance routine, performing frequent visual inspections for signs of warping, hairline cracks around the drilled holes, or uneven wear patterns. Regardless of which category you choose, always perform a final physical clearance check before riding. Verify that your front wheel spins freely, the caliper bracket aligns the pads perfectly with the swept area of the disc, and there is adequate clearance between the larger 260mm rotor and your front fender or speedometer cable.
Frequently Asked Questions (FAQ)
Will a 260mm disc fit the stock caliper bracket of the Mio i 125?
No, a 260mm disc will not fit the stock caliper bracket of the Yamaha Mio i 125. Because the stock rotor is significantly smaller, the stock caliper is positioned closer to the wheel axle. Installing a larger 260mm rotor requires a caliper relocation bracket to push the caliper outward, aligning the brake pads perfectly with the new, larger outer diameter of the disc. Always verify whether the 260mm disc you are purchasing is sold as a kit that includes the correct bracket for your specific Mio i 125 model year, or if you need to purchase a compatible bracket separately.
Do I need to change my brake pads when installing a new 260mm disc?
Yes, it is highly recommended to install a fresh set of brake pads whenever you replace or upgrade your disc rotor. Old brake pads develop wear patterns, grooves, and uneven surfaces that match your old rotor. If you install these used pads onto a brand-new, flat 260mm disc, they will not make full contact with the surface, severely reducing your initial stopping power. Furthermore, the uneven contact can cause localized hot spots, leading to premature warping or deep scoring on your new rotor.
How can I tell if my aftermarket disc brake is warped or needs replacement?
The most common sign of a warped disc brake is a distinct pulsating or vibrating sensation felt through the front brake lever when you apply pressure at moderate to high speeds. You may also notice an uneven braking feel, where the scooter seems to grab and release repeatedly as you slow down. Visually, you can inspect the disc for deep circular grooves, a bluish discoloration indicating extreme overheating, or hairline cracks radiating from the drilled holes. For a precise check, a mechanic can use a dial indicator to measure the lateral runout; any measurement exceeding the manufacturer’s limit (typically 0.10mm to 0.15mm) indicates the disc must be replaced.
Community discussion
Share your experience or ask a question. Comments are reviewed before publication.