
Selecting a compatible top box bracket for the Yamaha Aerox V2 requires finding an accessory engineered specifically for the second-generation model’s unique rear subframe and bodywork. Because the Aerox V2 features a redesigned rear section compared to its predecessor, universal brackets or older V1 models will not fit without risky modifications. A properly matched bracket ensures that your top box remains secure during daily commutes, protects your scooter’s plastic cowls from cracking under stress, and maintains the vehicle’s structural integrity. This guide outlines the precise physical requirements, available bracket designs, and verification steps needed to choose a reliable, no-modification top box bracket for your Aerox V2.
Understanding the Yamaha Aerox V2 Mounting Points
The rear structure of the Yamaha Aerox V2 dictates exactly how and where an aftermarket top box bracket must attach. Unlike standard underbone motorcycles that feature exposed metal frames, the Aerox V2 utilizes a sporty, fully faired rear cowl that conceals the underlying steel subframe. To mount a bracket securely, you must access the factory-designated anchor points located beneath the passenger grab rail area.
The stock grab rails on the Aerox V2 are integrated into the rear bodywork, securing directly to the subframe via heavy-duty bolts. These mounting points are engineered by the manufacturer to handle specific vertical and lateral forces. When installing a top box bracket, the bracket’s mounting plates must align precisely with these factory bolt holes to transfer the weight of the cargo directly to the steel subframe rather than the plastic body panels.
Products mentioned in this guide
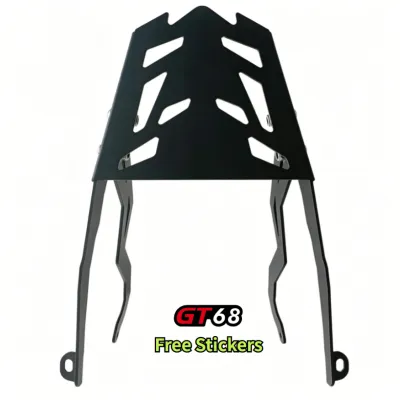
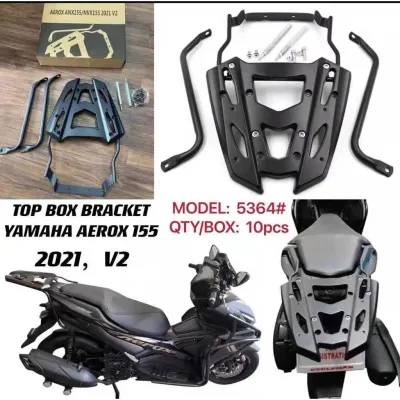
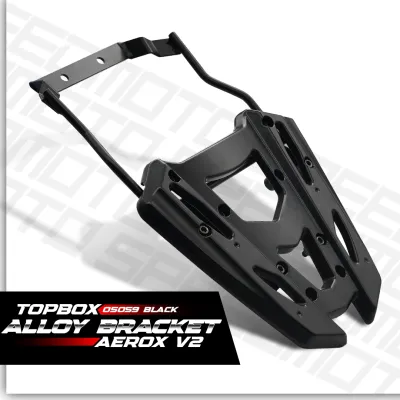
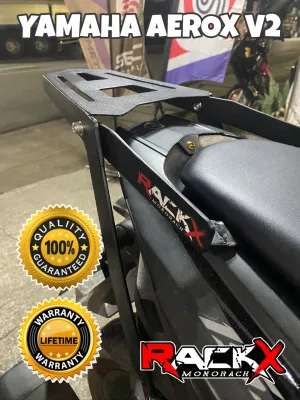
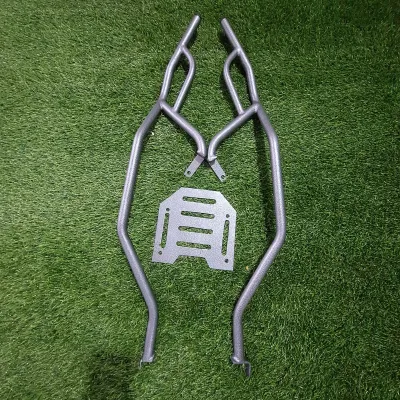
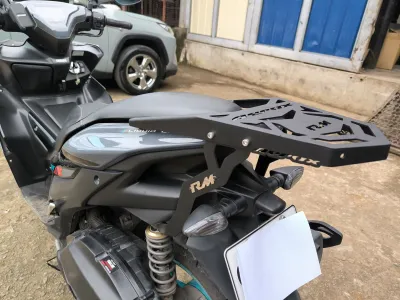
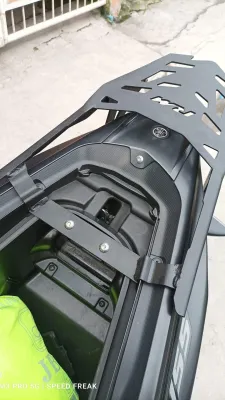
Prices are valid at publication and may change. Please refer to the product page for the latest price.
While the subframe structure remains consistent across the standard Aerox V2, Connected, and ABS variants, minor differences in the routing of the rear wiring harness or the placement of the rear fender assembly can affect access. The factory mounting points typically utilize M8 bolts with standard metric coarse threads. It is crucial to identify these thread types and sizes before attempting installation, as using incorrect bolts can strip the subframe threads, compromising the security of the entire assembly.
Accessing these mounting points requires removing the stock grab handles or the plastic covers that shield the subframe. During this process, riders must take care not to lose the factory spacers or collars, which help maintain the correct distance between the subframe and the plastic cowls. A compatible bracket must accommodate these factory dimensions precisely to prevent the metal arms of the bracket from rubbing against or pinching the painted plastic bodywork.
Key Criteria for Choosing a No-Modification Bracket
A true “no-modification” or “plug-and-play” bracket must install seamlessly using only basic hand tools, requiring no drilling into the plastic cowls, cutting of the frame, or custom welding. Achieving this level of compatibility requires evaluating several critical design and manufacturing standards before making a purchase.

Hole Alignment and Precision Engineering The primary indicator of a high-quality bracket is the precision of its mounting plate hole alignment. The bracket’s bolt holes must match the center-to-center distance of the Aerox V2’s subframe mounting points precisely. Even a minor deviation of one or two millimeters can force the mounting bolts in at an angle, leading to cross-threading, stripped subframe threads, or uneven stress distribution that can cause the bolts to shear under load.
Material Durability and Weather Resistance Given the tropical climate of the Philippines, where motorcycles are regularly exposed to intense heat, heavy monsoon rains, and high humidity, material selection is paramount. Brackets constructed from high-tensile carbon steel must feature a thick, professionally applied electrostatic powder-coated finish. This coating acts as a durable barrier against moisture, road salt, and UV rays, preventing rust from weakening the metal structure over time. Alternatively, marine-grade aluminum alloy brackets offer excellent corrosion resistance and a lighter weight, though they must be sufficiently thick to withstand constant vibration.
Vibration Resistance and Weld Quality The single-cylinder engine of the Aerox V2, combined with uneven road surfaces, potholes, and speed bumps, subjects the rear rack to continuous high-frequency vibrations. To prevent metal fatigue and eventual cracking, the bracket must feature robust, clean welds—preferably TIG (Tungsten Inert Gas) or MIG (Metal Inert Gas) welds—with visible penetration and no signs of porosity. Look for designs that incorporate gussets or reinforcing plates at critical bend points where stress is most concentrated.
Clearance and Safety Compliance A compatible bracket must maintain a safe clearance distance from all surrounding bodywork. There should be a visible gap between the bracket arms and the plastic cowls to ensure that engine vibrations do not cause the metal to rub against and damage the painted surfaces. Furthermore, the bracket and the mounted top box must not obstruct the visibility of the rear taillight, integrated turn signals, license plate, or rear reflectors. Ensuring these safety elements remain fully visible is essential for maintaining road safety and complying with local traffic regulations.
Types of Top Box Brackets Available for the Aerox V2
Motorcyclists can choose from several distinct bracket designs, each offering unique advantages depending on storage requirements, passenger comfort, and aesthetic preferences. Understanding these types helps you select the design that best fits your riding lifestyle.
Grab Rail Replacement Brackets This is the most common and robust design available for the Aerox V2. Installation requires the complete removal of the stock passenger grab handles, with the bracket’s mounting arms bolting directly into the vacated subframe points. Because these brackets connect directly to the primary subframe anchors, they typically offer high weight capacity and structural stability. The integrated rear rack plate sits slightly behind the passenger seat, providing a solid foundation for medium to large top boxes while keeping the pillion area clear.
Over-the-Rail Clamp-on Brackets For riders who wish to retain the stock passenger grab handles and original rear aesthetics, over-the-rail clamp-on brackets are an alternative. These designs utilize clamping plates and long bolts to sandwich or secure around the existing grab rails without removing them. While this preserves the original pillion handholds, these brackets often have lower weight limits due to the indirect mounting method. They also require careful installation with protective rubber spacers to prevent the metal clamps from scratching or denting the stock grab rails.
Pillion Seat Integration Plates Pillion seat integration plates, or low-profile solo racks, are designed for riders who primarily travel alone and prioritize aerodynamics and a sporty appearance. These plates mount flush with the rear cowl, often replacing the passenger seat cushion or sitting directly over it when the top box is attached. While they offer excellent weight distribution by keeping the cargo closer to the motorcycle’s center of gravity, they eliminate passenger carrying capability and are less practical for those who frequently ride with a pillion.
How to Verify Compatibility Before Purchasing
With numerous aftermarket accessories available on online marketplaces and in local physical shops, verifying compatibility before finalizing your purchase is essential to avoid the hassle of returning mismatched parts. Follow this systematic verification process to ensure a secure fit.
Analyze Product Descriptions and Labels When browsing online marketplaces, look for explicit product titles and descriptions that specify “Aerox V2” or “Aerox 155 V2” compatibility. Avoid listings that use generic terms like “Aerox Bracket” or “Aerox V1/V2 Universal” without providing detailed fitment notes. Because the mounting points and rear bodywork of the V1 and V2 generations are physically different, a bracket designed for one will not fit the other without modification.
Verify Technical Dimension Diagrams Request or locate technical drawings from the seller that display the exact measurements of the bracket, particularly the center-to-center distance between the mounting holes. Use a vernier caliper or a precise tape measure to check these dimensions against your Aerox V2’s actual rear mounting points. Comparing these physical measurements helps ensure that the bracket will align precisely with your scooter’s subframe before you attempt installation.
Evaluate Verified Buyer Feedback and Photos Customer reviews on ecommerce platforms are a valuable source of real-world compatibility information. Scroll through the feedback section and look specifically for reviews written by verified Aerox V2 owners. Pay close attention to uploaded photos showing the bracket installed on the scooter. Look for comments regarding the ease of installation, whether the holes aligned without forcing, and if the package included all necessary hardware, such as spacers and longer bolts.
Direct Seller Inquiry and Return Policy Check Before clicking the purchase button, send a direct message to the seller to confirm compatibility with your specific Aerox V2 model year and variant (such as the Connected or ABS version). Ask if they offer a clear return or exchange policy in case of fitment issues. Ensure that the seller accepts returns for compatibility mismatches, provided the bracket is returned in its original packaging without scratches or signs of installation damage.
Installation Safety and Weight Distribution Limits
Proper installation and adherence to weight limits are critical to ensuring road safety, maintaining stable vehicle handling, and preventing structural damage to your Aerox V2.
Adhering to Weight Capacity and Subframe Limits Every top box bracket and top box has a manufacturer-specified maximum load capacity. However, the ultimate limiting factor is the structural capacity of the Aerox V2’s rear subframe. Overloading the rear rack can place excessive stress on the subframe welds, potentially leading to hairline cracks or structural failure over time. As a general safety guideline, keep the combined weight of the bracket, top box, and cargo within the limits recommended by the vehicle manufacturer, which is typically between 5 kg and 10 kg for rear luggage carriers.
Proper Torque and Thread-Locking Compounds During installation, use a torque wrench to tighten all mounting bolts to the torque specifications recommended in the bracket’s manual or the vehicle’s service manual. Applying too much torque can strip the threads in the subframe, while too little torque can allow the bolts to back out under vibration. To prevent bolts from loosening over time due to engine vibrations and rough road conditions, apply a medium-strength thread-locking compound (such as blue threadlocker) to the bolt threads before securing them.
Weight Distribution and Handling Impacts Carrying a heavy load high and far back on a scooter significantly alters its center of gravity, which can negatively impact steering response, braking distance, and high-speed stability. To maintain balanced handling, place heavier items in the under-seat compartment or near the bottom of the top box, keeping lighter items near the top. Avoid carrying excessively heavy cargo in the top box, as this can cause the front wheel to lose traction, especially when accelerating or riding uphill.
When to Seek Professional Assistance If you encounter stripped threads in the subframe, severely misaligned bracket holes, or if the bracket requires excessive force to align during installation, stop immediately. Forcing a misaligned bracket can damage the subframe or crack the scooter’s plastic mounting tabs. Consult a qualified motorcycle mechanic or professional installer to inspect the subframe threads, chase the threads with a tap if necessary, or verify if the aftermarket bracket is defective.
Frequently Asked Questions (FAQ)
Can I use a top box bracket designed for the Aerox V1 on the V2?
No, you cannot use a top box bracket designed for the Aerox V1 on the V2 without risky modifications. The Aerox V1 and V2 generations feature different rear bodywork shapes, grab rail configurations, and mounting hole distances on the subframe. Attempting to force a V1 bracket onto a V2 will place severe stress on the plastic cowls, likely causing them to crack, and can strip the subframe threads due to misalignment. Always purchase a bracket specifically labeled for the Aerox V2.
Will installing a top box bracket void my Yamaha warranty?
Installing a bolt-on top box bracket that utilizes existing factory mounting holes and requires no modifications—such as drilling into the plastic panels or cutting the frame—generally does not void the overall vehicle warranty. However, any damage directly caused by the aftermarket bracket or its installation, such as cracked plastics from rubbing, stripped subframe threads, or electrical issues from pinched wires, will not be covered under the manufacturer’s warranty. For specific warranty terms, consult your local authorized Yamaha dealer in the Philippines.
Do I need to reinforce the rear subframe for heavy top boxes?
For standard daily commuting with moderate loads, such as carrying a helmet, rain gear, and small personal items, reinforcing the rear subframe is not necessary, provided you stay within the recommended weight limits. However, if you plan to carry exceptionally heavy cargo or travel long distances over rough roads, you should consult a professional fabricator or mechanic. To maintain safe handling, always keep heavy items low and centered in the under-seat compartment rather than high and far back in the top box.
Community discussion
Share your experience or ask a question. Comments are reviewed before publication.