
Selecting the right disc brake for your Honda Click V2 is a decision that directly impacts your safety, riding comfort, and overall maintenance costs. Whether you are navigating the daily stop-and-go traffic of busy metropolitan streets or cruising along provincial highways in the Philippines, your scooter’s braking system must perform reliably under diverse weather conditions, including intense tropical heat and sudden monsoon downpours. The choice between an Original Equipment Manufacturer (OEM) disc brake and an aftermarket alternative is not about finding a single “best” brand, but rather about identifying which option aligns with your specific riding habits, budget, and technical verification capabilities. By understanding the physical specifications of your Honda Click V2 and evaluating the structural differences between factory parts and aftermarket upgrades, you can make a well-informed decision that ensures optimal stopping power and long-term durability.
Understanding Your Brake Rotor Options
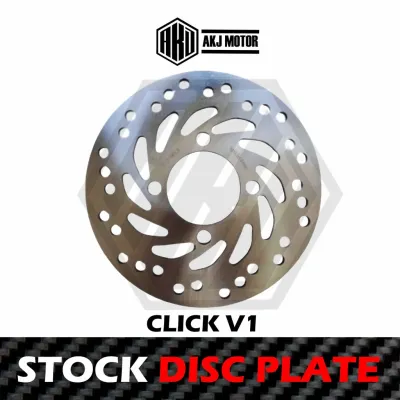
Original Equipment Manufacturer (OEM) parts are produced either directly by Honda or by their authorized component manufacturers to match the exact engineering standards of the Honda Click V2. These parts preserve the scooter’s original handling dynamics, brake lever feel, and factory warranty conditions. When you purchase an OEM rotor, you get a component that has undergone rigorous factory testing specifically for your vehicle model, ensuring a seamless fit without any modifications.
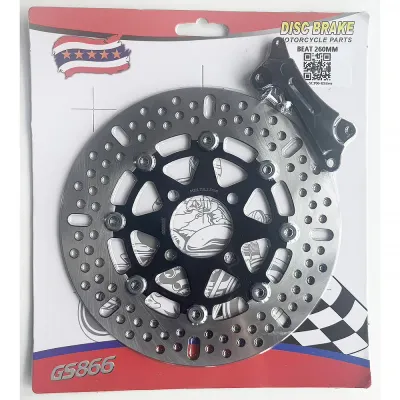
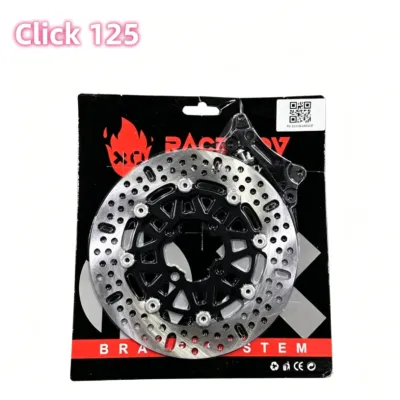
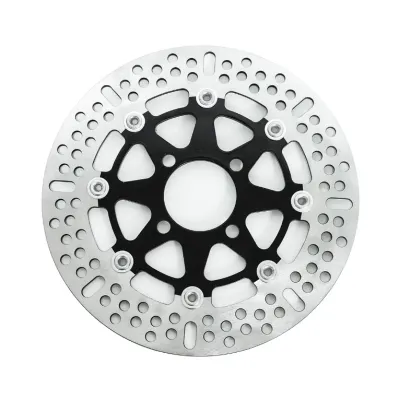
Aftermarket brands operate independently of the vehicle manufacturer. They produce rotors that fit the Honda Click V2 but may use different materials, ventilation patterns, or thicknesses. The aftermarket segment is broad, encompassing reputable performance brands that offer specialized designs (such as slotted or wave-patterned rotors) as well as budget-friendly manufacturers aiming to provide cost-effective direct replacements.
Products mentioned in this guide
Prices are valid at publication and may change. Please refer to the product page for the latest price.
However, the popularity of the Honda Click V2 has also led to an influx of unbranded, unlabeled, or counterfeit replica rotors in online marketplaces. These cheap replicas often lack verifiable material grades, precise manufacturing tolerances, or quality control certifications. Installing an unbranded rotor poses severe safety risks, as substandard metals can warp under the high temperatures generated during braking, potentially leading to sudden brake failure or caliper lockup. Always prioritize brands that provide transparent technical specifications and clear manufacturing origins.
Key Specifications to Verify Before Buying
To ensure a safe and successful replacement, you must verify several critical physical dimensions of your Honda Click V2’s braking system before making a purchase.

First, check the mounting hole pattern and hole spacing. The rotor is secured to the front wheel hub by a specific number of bolts (typically 4 bolts for the Click V2, but this must be verified based on your specific model year and wheel type). The bolt circle diameter (BCD) and the distance between adjacent mounting holes must match perfectly. Even a millimeter of deviation will prevent the bolts from aligning, rendering the rotor unusable.
Second, verify the outer and inner diameter. The standard front disc for a stock Honda Click V2 is typically 190mm. If you purchase a rotor with a larger outer diameter without installing a corresponding caliper relocation bracket, the caliper will not fit over the disc. Conversely, a smaller diameter will result in incomplete pad contact. The inner diameter (the center bore) must also fit snugly over the wheel hub’s center pilot to ensure the rotor remains perfectly centered.
Third, confirm the rotor thickness and offset. New rotors have a specified thickness (often around 3.0mm to 3.5mm for light scooters). You must verify both the initial thickness and the minimum service limit stamped on the rotor. Additionally, check the offset—the lateral distance between the mounting surface and the friction surface. An incorrect offset pushes the rotor too far inward or outward, causing it to rub against the caliper body or fork leg, which leads to rapid wear, drag, and dangerous heat buildup.
Establish a strict verification rule: if the product listing, packaging, or manufacturer documentation does not explicitly state the exact mounting hole count, bolt circle diameter, outer diameter, inner diameter, thickness, and offset, do not purchase the item. Relying on generic titles like “suitable for Click V2” without dimensional proof is a major safety hazard.
Comparing OEM and Aftermarket Disc Brakes
The theoretical stopping power of a disc brake is influenced by its material composition and surface design. OEM rotors generally use a solid or lightly drilled stainless steel design optimized for consistent, predictable braking in everyday commuting scenarios. Aftermarket rotors often feature aggressive drilled, slotted, or wave patterns. Theoretically, these designs improve heat dissipation and help shed water and road grit more quickly during heavy downpours. However, visual aesthetics do not guarantee superior performance. A highly drilled rotor has less surface area for the brake pads to grip, which can actually reduce stopping power unless paired with high-friction pad compounds. Always rely on the manufacturer’s technical specifications regarding friction coefficients rather than the visual appeal of the rotor’s shape.
The longevity of a brake rotor depends heavily on the grade of steel or alloy used in its construction. Reputable manufacturers often use high-carbon stainless steel (such as SUS420 or equivalent grades) which offers an optimal balance of hardness and thermal stability. This prevents the rotor from warping under the intense heat cycles of stop-and-go city riding. OEM rotors are engineered to wear predictably alongside OEM organic or semi-metallic brake pads. When evaluating aftermarket options, check the product labels for material specifications. Lower-grade steel alloys used in cheap aftermarket rotors wear down rapidly, develop deep grooves, or warp when subjected to sudden temperature changes, such as splashing through a puddle after prolonged braking.
When comparing value, look beyond the initial purchase price in Philippine Pesos (₱). While a budget aftermarket rotor might cost less upfront than an OEM replacement, its shorter lifespan and potential to accelerate brake pad wear can result in higher long-term costs. Conversely, premium aftermarket rotors may carry a higher price tag but offer specialized features like floating designs that reduce thermal stress. To calculate the true value, factor in the cost of professional installation, the price of a new set of compatible brake pads, and the expected replacement interval based on your riding conditions.
| Feature / Dimension | OEM Disc Brakes | Reputable Aftermarket Disc Brakes |
|---|---|---|
| Specification Verification | Guaranteed compatibility with factory Honda Click V2 dimensions; no manual measurements required. | Requires independent verification of mounting holes, outer/inner diameter, and offset before purchase. |
| Performance Claims | Optimized for predictable, linear braking and consistent lever feel in standard commuting conditions. | May offer specialized designs (slotted/wave) for enhanced heat dissipation or wet-weather clearing. |
| Material & Durability | Standardized factory-grade stainless steel; highly resistant to premature wear when paired with OEM pads. | Varies by brand; premium options use high-carbon steel, while budget options may wear faster. |
| Price Positioning (₱) | Mid-to-high price point reflecting factory quality control and guaranteed fitment. | Broad range from budget-friendly entry-level options to high-end premium performance upgrades. |
| Installation Complexity | Direct bolt-on replacement; requires no modifications or additional brackets. | Direct bolt-on for standard sizes; oversized options require custom caliper relocation brackets. |
Safety Boundaries and Installation Requirements
Brake rotors are critical safety components. Any failure in the braking system can lead to severe accidents, loss of vehicle control, and physical injury. Because of this high safety impact, we strongly recommend that all brake rotor replacements and modifications be performed by a qualified motorcycle technician at a reputable service center. Attempting a DIY installation without the proper tools, torque specifications, or mechanical experience can compromise your safety on the road.
Installing a new rotor is not a simple “install and ride at full speed” procedure. Both new rotors and new brake pads require a mandatory bedding-in (or burnishing) process. This process involves performing a series of gentle, controlled stops from moderate speeds (e.g., slowing down from 40 km/h to 10 km/h without coming to a complete stop) to gradually heat the components. This allows a thin, uniform layer of brake pad material to transfer onto the rotor’s friction surface. Proper bedding-in ensures optimal contact, prevents brake squeal, and guards against localized hot spots that cause premature warping. Avoid sudden, hard braking for the first 100 to 200 kilometers of riding after installation.
Establish a clear safety protocol during your first test ride. If you notice any caliper rubbing, unusual squealing or grinding noises, abnormal vibrations through the handlebars, or a spongy feel in the brake lever, cease riding the scooter immediately. Park the vehicle in a safe location and conduct a thorough inspection. Do not attempt to “ride through” these symptoms, as they indicate a misalignment, loose mounting bolts, or an incompatible component that could lead to sudden brake failure.
Never mix incompatible brake pads with your new rotor. Always follow the rotor manufacturer’s explicit recommendations regarding pad compound pairing (such as organic, semi-metallic, or sintered copper pads). Using sintered pads on a rotor designed only for organic pads will cause rapid, destructive wear to the disc, while using organic pads on a hard, race-oriented rotor will result in extremely poor stopping power.
How to Make Your Final Decision
To finalize your choice, evaluate your riding profile against these conditional frameworks:
Choose OEM if you use your Honda Click V2 primarily for daily commuting, value hassle-free maintenance, and want to maintain your scooter’s factory warranty conditions. OEM rotors eliminate the guesswork of specification verification and deliver the exact braking performance and lever feel that the vehicle engineers intended.
Choose aftermarket if you are looking for a cost-effective replacement that matches OEM dimensions, or if you have specific performance preferences (such as improved wet-weather braking) and are willing to spend the time independently verifying every physical dimension. Ensure you only buy from reputable aftermarket brands that publish complete technical specifications.
Verify first if you are considering specialized aftermarket designs, such as floating rotors or oversized discs. These modifications often require aftermarket caliper brackets, can alter the unsprung weight of your front wheel, and must comply with local Land Transportation Office (LTO) regulations and traffic laws in the Philippines regarding vehicle modifications. Always consult a professional mechanic to verify that any non-standard brake modification is structurally sound and road-legal before making a purchase.
Frequently Asked Questions (FAQ)
Can I use a larger disc brake on my Honda Click V2 for better stopping?
Yes, you can physically install a larger disc brake, but it is not a simple direct replacement. An oversized rotor increases the leverage of the braking force, which theoretically improves stopping power. However, because the caliper is positioned for a standard 190mm disc, you must install a custom caliper relocation bracket to push the caliper outward to match the larger diameter. This modification alters the forces acting on your front forks and suspension geometry. Additionally, a larger, heavier disc increases unsprung weight, which can slightly affect steering responsiveness. If your scooter uses a front-wheel-mounted speed sensor, ensure the modification does not interfere with sensor alignment or speedometer accuracy. Always consult a professional mechanic to ensure the bracket is made of high-strength material (such as CNC-machined aluminum) and is safely installed.
Do I need to change my brake pads when installing a new disc brake?
Yes, it is highly recommended to install a new set of brake pads whenever you replace your disc brake rotor. Over time, your old brake pads develop microscopic wear patterns, grooves, and ridges that match the unique surface imperfections of your old rotor. If you pair these uneven pads with a perfectly flat, new rotor, the contact patch will be extremely limited. This mismatch leads to poor initial braking efficiency, excessive heat concentration on the contact points, and rapid, uneven wear on your new rotor. Replacing both components simultaneously ensures a clean slate for the bedding-in process, allowing the pads and rotor to wear together evenly. If your existing pads are almost brand new, they must be thoroughly inspected for glaze or contamination and lightly sanded flat by a professional, though installing new pads remains the safest and most reliable standard.
Community discussion
Share your experience or ask a question. Comments are reviewed before publication.