
Maintaining a vehicle often requires looking beneath the surface, whether you are upgrading an audio system, routing a dashcam wire, replacing a damaged fender liner, or accessing a blown fuse behind the dashboard. Almost every modern vehicle relies on specialized plastic fasteners, push-pins, and trim clips to hold interior panels, bumper covers, and engine bay shields securely in place. While these fasteners are highly efficient for automotive manufacturing, removing them without the proper equipment can quickly turn a simple DIY task into a frustrating and expensive ordeal.
To build a practical and damage-free DIY car toolbox, every car owner should have three essential types of clip remover tools: pliers-style fastener removers, nylon-reinforced pry tools, and dedicated push-pin pliers. Having these specialized hand tools on hand ensures that you can extract stubborn clips cleanly without scratching delicate paintwork, cracking expensive plastic trim, or destroying the fasteners themselves. Investing in a modest set of these tools saves significant time and prevents the inevitable rattles that occur when panels are reinstalled with broken or missing clips.
Why Improvised Tools Damage Car Clips and Panels
When attempting to remove interior door panels or engine bay shrouds, many car owners instinctively reach for a standard flathead screwdriver or a pair of household pliers. While these tools are incredibly versatile for general household tasks, their mechanical design is fundamentally unsuited for automotive fasteners. A standard flathead screwdriver features a narrow, flat tip that concentrates all the prying force onto a single, tiny point on the edge of the clip. This point-loading easily exceeds the shear strength of aged plastic, causing the screwdriver to slip, gouge the surrounding panel, or instantly snap the fragile head off the push-pin.
Products mentioned in this guide
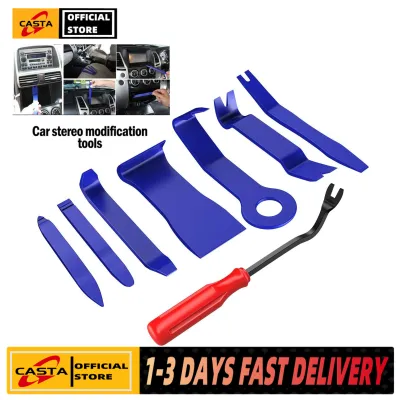
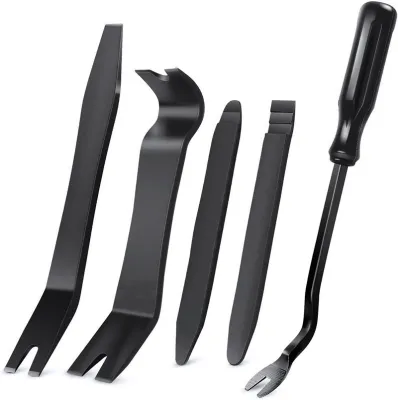
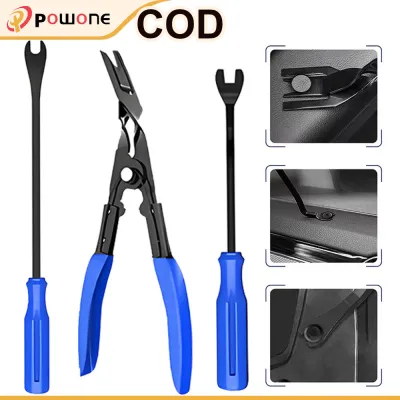
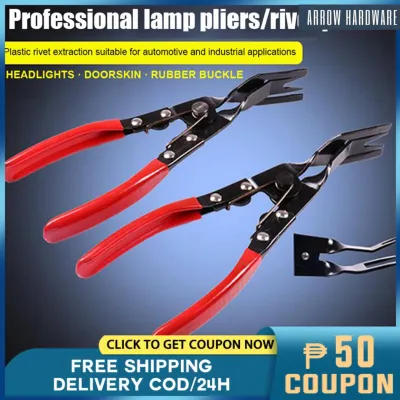
Prices are valid at publication and may change. Please refer to the product page for the latest price.
Using household pliers to pull clips presents a similar mechanical mismatch. Pliers apply lateral crushing force to grip the fastener, which frequently crushes the hollow stem of plastic rivets or shears off the retaining flanges. Once the head of a clip is damaged or broken, extracting the remaining stem from its mounting hole becomes significantly more difficult, often requiring drilling or destructive prying that risks permanent damage to the vehicle’s body panels.
Beyond the immediate frustration of a broken clip, using improvised tools introduces substantial hidden costs to DIY repairs. Cracked dashboard bezels, scratched interior door cards, and gouged paintwork are highly visible blemishes that degrade a vehicle’s aesthetic and resale value. In humid, tropical climates, even a minor scratch through the clear coat and primer down to the bare metal can quickly become a hotbed for corrosion and rust. Furthermore, sourcing replacement original equipment manufacturer (OEM) clips is not always straightforward; many dealerships charge premium prices for individual fasteners, and finding exact matches for older or less common vehicle models can involve lengthy shipping delays.
An authentic clip remover tool solves these mechanical challenges by distributing leverage evenly. Instead of applying force to a single point, a dedicated clip remover features a wide, flat, and cradled fork design that slides completely beneath the fastener’s head. This allows the tool to apply uniform upward pressure across the entire underside of the clip, lifting it straight out of its mounting hole. By transferring the prying stress away from the delicate surrounding panel and onto a wide, engineered fulcrum, these tools allow you to extract even the tightest fasteners cleanly and safely.
Core Clip Remover Tool Types for Your DIY Toolbox
To handle the wide variety of fasteners used throughout a vehicle, a well-rounded toolbox requires a few distinct variations of clip removal tools. Each type is engineered to leverage different mechanical advantages depending on the space available, the material of the panel, and the design of the fastener itself.

Pliers-Style Fastener Removers
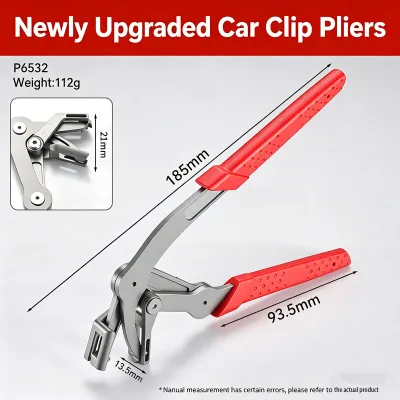
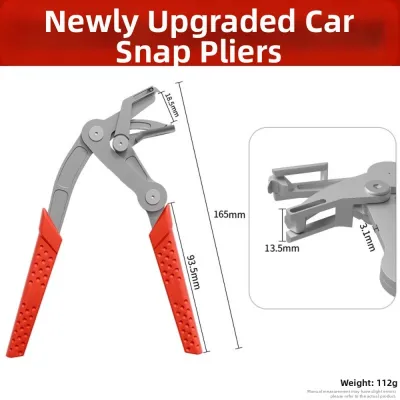
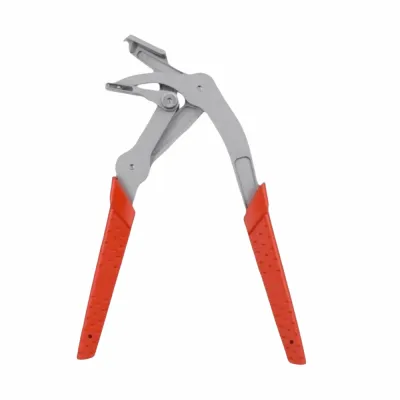
Pliers-style fastener removers utilize a scissor-action mechanism designed to slide flat under a clip head and pull it straight out of its housing. Unlike manual pry bars that require a solid surface to lever against, these pliers use their own internal pivot point as a built-in fulcrum. When you squeeze the handles, the specialized wedge-shaped jaws close together and lift the fastener vertically in a single, controlled motion. This vertical extraction is highly beneficial because pulling a plastic clip at an angle is the primary cause of stem breakage.
These pliers are exceptionally well-suited for tight engine bay compartments, stiff exterior bumper clips, and heavy-duty metal retainers. For example, when removing the radiator cover or front grille to access headlight assemblies, space is often too restricted to swing a manual pry bar. Pliers-style removers can slip into these narrow gaps and pop the clips loose with minimal physical effort. They are also invaluable for extracting stubborn, rusted metal trim clips that require more pulling force than plastic tools can safely provide.
When shopping for pliers-style removers, look for tools featuring a 30-degree or 80-degree angled head. This offset design provides excellent visibility of the fastener and allows your hands to clear surrounding components easily. Opt for models with spring-loaded handles and comfortable, non-slip padded grips to reduce hand fatigue during repetitive tasks. Additionally, ensure the jaws are slim, highly polished, and tapered to slide effortlessly under flush-mounted clips without marring the underlying surface.
While highly effective, pliers-style removers do have limitations. Because they rely on mechanical clamping force, squeezing the handles too aggressively on brittle, sun-damaged plastic clips can crush the fastener head before it has a chance to lift. It is essential to apply smooth, progressive pressure, allowing the wedge-shaped jaws to lift the clip naturally rather than trying to yank it out by force.
Pry-Style and Forked Trim Tools
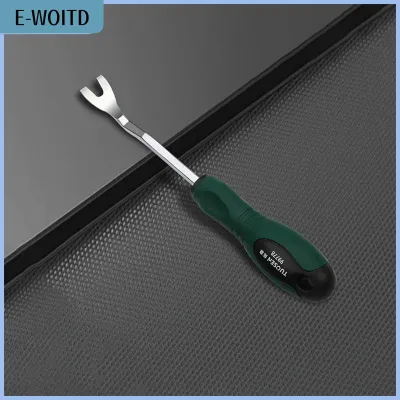
Pry-style and forked trim tools are manual levers designed to slide under a clip and pop it out of its mounting seat. These tools generally feature a V-notch or U-shaped fork at the working end, connected to a curved shaft that provides a natural pivot point. By resting the curved heel of the shaft against a solid surface and pressing down on the handle, you generate substantial upward leverage to back the clip out of its hole. They are highly effective for large interior panels, door cards, pillar trims, and trunk linings where fasteners are spaced far apart.
These tools are typically available in two primary material options: nylon-reinforced plastic and heavy-duty steel. Nylon-reinforced plastic variants are absolutely essential for any interior cabin work. High-quality nylon tools possess a degree of structural flexibility; if you apply excessive force, the tool will bend or flex slightly rather than gouging a soft leather dashboard, scratching a painted plastic bezel, or tearing delicate vinyl upholstery. They are non-marring by design, making them the safest choice for sensitive cosmetic areas.
For heavy-duty applications where plastic tools would simply bend or snap, rolled-edge steel pry tools are required. These are ideal for tough exterior panels, undercarriage splash shields, and mudguards that are secured with stiff, thick-gauge plastic rivets or metal spring clips. When using steel pry tools, it is vital to select models with smooth, highly polished, and rounded edges. Sharp or rough edges on a steel tool can easily cut through paint, slice rubber weatherstripping, or shave off slivers of plastic from the panels you are trying to save.
Push-Pin Pliers and Specialty Extractors
Many modern vehicles make extensive use of two-stage push-rivets, particularly on bumper covers, fender liners, and engine beauty covers. These fasteners consist of an outer expanding sleeve and a central locking pin. To remove them safely, you must first pull the center pin upward to collapse the expanding legs of the sleeve before attempting to extract the entire rivet. Attempting to pry the entire assembly out at once almost always shears the head off or stretches the mounting hole. Push-pin pliers are engineered specifically to solve this problem.
The tips of push-pin pliers feature a unique, stepped jaw design with small, sharp recesses that grip the thin flange of the center locking pin. When you squeeze the handles, the jaws close securely around the pin and lift it upward, cleanly unlocking the rivet assembly. This allows you to remove the entire push-pin in one reusable piece, saving you from having to purchase costly replacement fasteners every time you perform basic maintenance.
In addition to push-pin pliers, a complete toolbox benefits from a set of long-reach shaft extractors. These tools resemble long screwdrivers but terminate in a forked, angled tip. They are indispensable for reaching recessed fasteners located deep within fender wells, behind headlight assemblies, or underneath the dashboard where standard-length tools cannot reach. Many multi-functional fastener pliers also feature integrated cutters and gripping surfaces, allowing them to double as light-duty tools for cutting zip ties, releasing spring-type hose clamps, or extracting small cotter pins.
How to Match the Remover to Specific Car Parts
Using the wrong tool for a specific area of your vehicle can quickly result in cosmetic damage or broken components. Matching the physical characteristics of the tool to the specific material and location of the fastener is key to a successful repair.
Interior Trim and Dashboards
Vehicle interiors are packed with delicate materials, including soft-touch vinyl, leather, thin plastics, and painted electronic bezels. When working on dashboards, radio surrounds, or A-pillars, metal tools should generally be avoided. Instead, rely on a comprehensive set of nylon-reinforced plastic pry tools. These tools can slide into the tight seams between panels to release the hidden snap-fit clips without leaving unsightly pry marks or scratches. If a clip is exceptionally tight, a highly polished, thin-profile steel fork tool can be used, but only with extreme caution and proper surface protection.
Safety Warning: Before removing any interior trim panels near the steering wheel, A-pillars, or side roof rails, always disconnect the vehicle’s battery and consult the manufacturer’s service manual. These areas often house airbag modules and sensitive electrical wiring harnesses. Accidental deployment or damaged wiring can pose severe safety risks and require expensive professional repairs.
Bumpers and Fender Liners
Exterior components like bumpers, grille covers, and fender liners are exposed to harsh road environments. The clips in these areas are typically caked with road grime, mud, and sand, making them incredibly stiff and difficult to remove. For these fasteners, nylon tools are often too flexible to be effective. Instead, use heavy-duty steel pliers-style removers or robust steel fork tools. These tools provide the necessary rigidity and mechanical leverage to overcome the friction caused by packed dirt and weathered plastic.
Engine Bay and Undercarriage
Under-hood and under-car areas present unique challenges, including tight clearances, heat-hardened plastics, and corrosion. Fasteners in these regions, such as splash shield rivets and heat-shield retainers, are often deeply recessed. Long-reach, angled push-pin pliers and specialized metal fork tools are essential here. They allow you to reach past hot engine components or deep into wheel arches to extract fasteners cleanly without having to disassemble adjacent parts.
To help you quickly choose the right tool for your next project, refer to this quick-reference guide mapping common vehicle areas to their ideal clip removal tools:
| Car Component | Common Fastener Type | Recommended Tool | Primary Benefit |
|---|---|---|---|
| Dashboard & Radio Bezel | Small plastic push-pins, snap-fit tabs | Nylon-reinforced plastic pry tools | Prevents scratching delicate finishes and soft-touch plastics |
| Door Panels & Interior Trim | Hidden ribbed pine-tree clips, metal spring clips | Wide-forked steel pry tool or wide nylon wedge | Distributes leverage over a wider area to prevent tearing the door card |
| Bumper Covers & Grilles | Large two-stage plastic push-rivets | 30-degree or 80-degree push-pin pliers | Pulls the center locking pin straight up without snapping the head |
| Fender Liners & Splash Guards | Dirt-caked plastic clips, metal retaining screws | Pliers-style fastener remover, long-reach fork | Provides maximum mechanical advantage against grime-packed fasteners |
| Engine Bay Covers | Heat-exposed, brittle plastic push-pins | Angled pliers-style remover or push-pin pliers | Reaches into tight clearances and extracts fragile clips with minimal stress |
Safe Removal Techniques to Protect Paint and Brittle Plastics
Even with the correct tools, successful clip removal requires proper technique and an understanding of how environmental factors affect automotive materials. Adopting a methodical approach will protect your vehicle’s finish and keep your repair costs to a minimum.
Climate and Material Degradation
In tropical and highly humid climates, such as in the Philippines, vehicles are subjected to intense solar heat and high UV radiation. This constant thermal cycling and UV exposure accelerate the degradation of automotive plastics. Over time, the plasticizers within the clips and trim panels leach out, leaving them dry, brittle, and highly prone to shattering under tension. Before applying any force, always visually inspect the clips. If they appear faded, chalky, or show signs of micro-cracking, assume they will break and handle them with extreme care.
Paint Protection
Never place a metal tool directly against a painted body panel to leverage a clip out. The hard steel will easily crush the clear coat and dig into the paint, exposing the raw metal to moisture and rust. To prevent this, always place a physical barrier under the tool’s fulcrum point. A thick microfiber cloth folded several times, a clean shop towel, or a few layers of blue painter’s masking tape applied directly to the panel will distribute the load and protect the paint from marring.
Lubrication and Prep
For stubborn, grime-caked exterior clips, do not attempt to force them dry. Instead, spray a small amount of a plastic-safe penetrating oil or a simple solution of warm, soapy water around the base of the clip. Let it sit for a minute or two to penetrate the shaft. The liquid acts as a lubricant, softening dried mud and reducing the friction between the expanding legs of the clip and the metal mounting hole, allowing for a much smoother extraction.
The "Stop and Reassess" Rule
One of the most important rules of DIY automotive work is knowing when to stop. If you are applying moderate pressure and the clip refuses to budge, the panel begins to bow excessively, or your tool starts to slip, stop immediately. Forcing the tool will likely result in snapping the molded-in plastic retaining tab on the back of the trim panel. Unlike a broken clip, which is cheap and easy to replace, a broken panel tab is often irreparable and will cause the panel to sag or rattle permanently.
When a fastener is stuck, take a moment to shine a flashlight behind the panel. Check if there is a hidden screw, a secondary locking tab, or a bolt that you missed. Always consult the vehicle’s official workshop manual or a professional repair guide to verify the exact locations of all fasteners before applying heavy leverage.
Frequently Asked Questions (FAQ)
Can I use a flathead screwdriver to remove car clips in an emergency?
While you can use a flathead screwdriver in an absolute emergency, it is highly discouraged. The narrow tip of a screwdriver concentrates force on a single point, which almost always cracks brittle plastic clips and scratches the surrounding paint or trim. If you have no other choice, wrap the tip of the screwdriver in several layers of electrical tape or a thick cloth to cushion the contact point. Alternatively, a dull plastic putty knife or a wooden craft stick can serve as a safer, non-marring temporary tool to pry the panel loose gently.
How do I know if a plastic clip is reusable after removal?
Before reinstalling any plastic clip, perform a quick visual and tactile inspection. Check the stem for stretching, stress whitening (which indicates the plastic is near its breaking point), or cracks. Ensure the locking tabs or expanding legs still have their spring tension and have not been flattened or sheared off. If a clip feels loose or fails to click securely back into place, replace it. Keeping an assortment box of common OEM-style replacement clips in your garage—which typically cost between ₱300 and ₱800 for a multi-piece kit—is highly recommended to avoid reinstalling worn-out fasteners that cause wind noise and panel rattles.
What should I do if a clip breaks off inside the panel hole?
If a plastic clip snaps and leaves its stem lodged inside the mounting hole, do not try to push it further inside. Pushing the broken piece into a hollow door cavity or dashboard structure will often cause permanent, annoying rattles whenever you drive over rough roads. Instead, use a pair of needle-nose pliers, fine tweezers, or a specialized thin-profile metal extractor to grip the remaining portion of the stem and pull it straight out. If the stem is completely flush and cannot be gripped, you can carefully thread a small wood screw into the center of the broken plastic stem to give yourself a handle, then pull the screw and the broken clip out together.
Community discussion
Share your experience or ask a question. Comments are reviewed before publication.