
Selecting the right tools for oil filter remover is a critical decision for any car owner building a basic home maintenance toolkit. While an oil change is one of the most straightforward DIY tasks, attempting it without the proper equipment often leads to stripped threads, crushed filter canisters, or damaged engine components. In the tropical climate of the Philippines, where high humidity and intense engine heat cycles can cause rubber gaskets to bake onto the metal engine block, having a dedicated, reliable removal tool is even more essential. By understanding the mechanical designs of different wrenches and matching them to your vehicle’s specific layout, you can ensure a safe, efficient, and leak-free maintenance process.
For most home mechanics, a combination of a versatile oil filter wrench (such as an adjustable strap or pliers-style wrench) and a vehicle-specific cap socket provides the most reliable setup. Having the right tool prevents costly damage to the engine block, filter housing, and surrounding components during routine oil changes.
Why Your Toolkit Needs Dedicated Oil Filter Wrenches
Using improvised tools to remove a stubborn oil filter is a common mistake that frequently results in costly garage repairs. Many novice mechanics attempt to use standard pipe wrenches, channel locks, or even drive a screwdriver straight through the filter canister to gain leverage. This screwdriver method is highly dangerous; the thin metal of a spin-on filter canister can easily tear like paper, leaving you with a shredded, sharp metal sleeve still firmly seized to the engine block and no remaining surface to grip. Furthermore, slippage from improper tools can scar the engine block’s mounting surface or damage nearby components, such as plastic sensors, wiring harnesses, or radiator hoses.
Products mentioned in this guide
Prices are valid at publication and may change. Please refer to the product page for the latest price.
Dedicated oil filter wrenches are engineered specifically to distribute pressure evenly around the circumference of the filter or to lock securely onto the flutes of a cartridge housing cap. Factory-installed filters and those tightened by high-torque professional tools often develop high breakaway torque over months of operation. Thermal expansion from daily driving, combined with the gradual degradation of the rubber gasket, creates a strong seal that requires a specialized grip to break. Using the correct tool preserves the structural integrity of the filter housing, prevents oil spills from punctured canisters, and ensures that the mounting threads on the engine block remain undamaged.
Essential Oil Filter Wrench Types for Basic Maintenance
When building a basic automotive toolkit, it is important to recognize that no single oil filter wrench fits every vehicle. Modern cars generally use one of two filter styles: a traditional metal spin-on canister or a cartridge-style filter housed inside a permanent plastic or metal assembly. Consequently, tool manufacturers have developed several distinct mechanical designs to transfer torque effectively to these different housings.

For a home garage, the primary goal is to select a tool that offers maximum grip with minimal risk of slipping or damaging the vehicle. When choosing tools, consider their material durability and storage requirements. In humid environments, steel tools without protective coatings can rust quickly, which degrades their grip and moving parts. Opting for tools made from chrome-plated steel, anodized aluminum, or those with a black-oxide finish will ensure long-term reliability in your home toolkit.
Strap and Band Wrenches
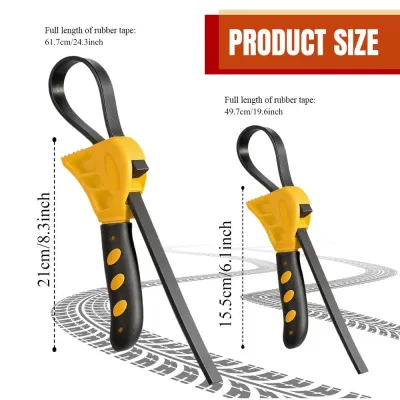
Strap and band wrenches are classic, friction-based tools that are highly effective for vehicles with accessible, standard-sized spin-on filters. A band wrench features a loop of spring steel attached to a handle; as you pull the handle, the band constricts tightly around the filter canister, utilizing friction to break the seal. Nylon strap wrenches operate on a similar principle but use a heavy-duty woven strap that can be adjusted to fit a wider range of diameters, making them highly versatile.
These tools are ideal for older vehicle models or larger engine bays where there is ample clearance around the filter. Because the grip relies entirely on surface friction, it is crucial to wipe any spilled oil off the filter canister before attempting removal, as a greasy surface will cause the strap or band to slip. Additionally, strap and band wrenches require a relatively wide rotational arc to operate, meaning they are often unsuitable for modern, tightly packed engine bays where clearance is measured in centimeters.
Claw, Cap, and Socket Wrenches
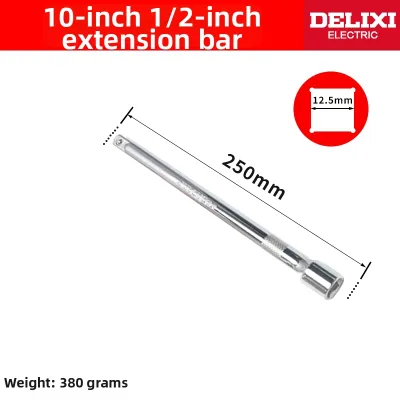
For tight spaces, recessed filters, and modern cartridge-style housings, positive-grip tools like claw, cap, and socket wrenches are the preferred choice. A claw wrench typically features two or three spring-loaded metal jaws with serrated teeth. When attached to a standard 3/8-inch or 1/2-inch drive ratchet or breaker bar, the jaws automatically tighten and bite into the metal filter canister as you apply counterclockwise torque, providing a slip-free grip even on greasy surfaces.
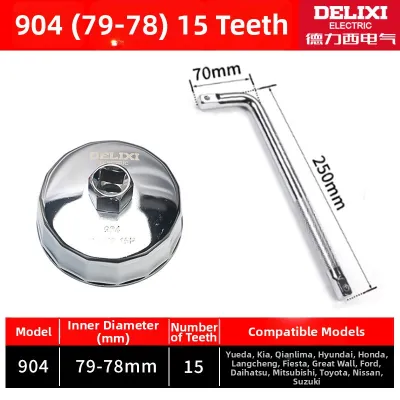
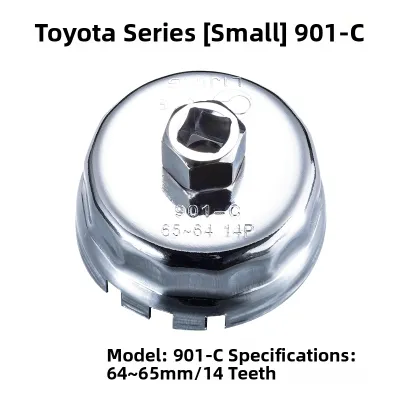
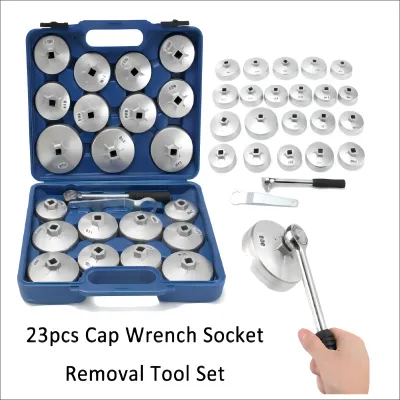
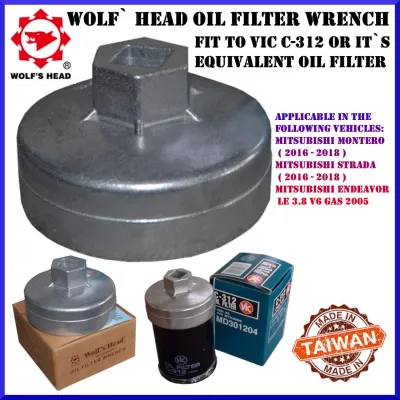
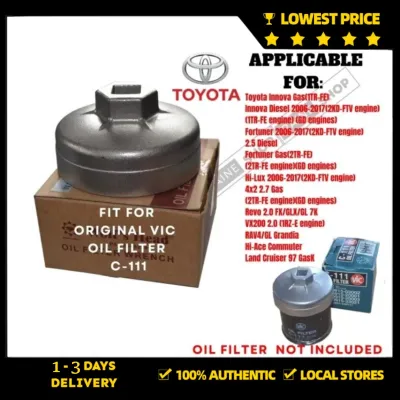
Cap and socket wrenches, on the other hand, are designed to fit like a glove over the fluted end of a specific filter or cartridge housing cap. These tools distribute the rotational force evenly across all the flutes, virtually eliminating the risk of rounding off or cracking the housing. Because they are driven from the end of the filter rather than the sides, they require very little lateral clearance, making them perfect for deeply recessed filters. However, because they must match the exact diameter and flute count of your filter, they are less versatile and may require purchasing a new socket if you change vehicles.
Pliers-Style and Adjustable Wrenches
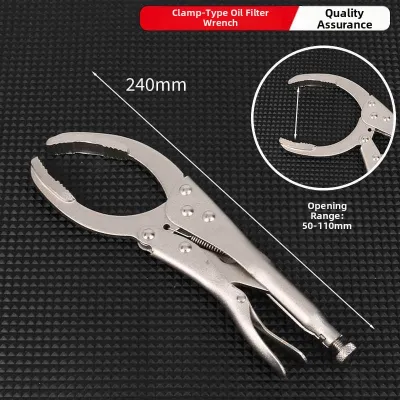
Pliers-style oil filter wrenches offer excellent versatility and are a favorite for multi-car households. Featuring long handles and curved, adjustable jaws lined with sharp teeth, these tools operate like heavy-duty slip-joint pliers. They allow the user to manually squeeze the handles to clamp the jaws onto the filter canister while simultaneously applying turning force.
The primary advantage of pliers-style wrenches is their adaptability; a single pair of pliers can often adjust to fit filters ranging from small motorcycles to large utility vehicles. This makes them a highly cost-effective addition to a basic toolkit. The trade-off, however, is their physical bulk. The long handles and wide jaw profile require significant physical clearance around the filter. If your vehicle’s oil filter is positioned close to a hot exhaust manifold, tucked behind a frame rail, or recessed inside an engine cavity, you may not have enough room to position or squeeze the pliers effectively.
How to Match the Tool to Your Vehicle and Filter
Before purchasing any tools for oil filter remover, you must verify the physical and mechanical specifications of your vehicle’s oiling system. Never assume compatibility based solely on a tool’s generic category or a broad vehicle type. The first step is to consult your vehicle owner’s manual or official factory service documentation to identify whether your engine uses a spin-on metal canister or a cartridge-style filter element.
If your vehicle uses a cartridge-style filter, you will need to measure the physical diameter of the plastic or metal housing cap and count the number of flutes (the flat ridges along the edge). For example, many common Asian and European passenger cars use a 64 mm cap with 14 flutes. Purchasing a matching precision-cast aluminum cap socket is the safest way to service these housings without cracking the expensive plastic assembly. For spin-on filters, measure the outer diameter of the canister to ensure any band or strap wrench you buy can constrict tightly enough to grip it.
Next, perform a visual inspection of the filter’s location under the hood or beneath the vehicle. Note whether you must access the filter from the top of the engine bay or from underneath, and check for nearby obstructions such as exhaust pipes, suspension members, or plastic splash shields. If space is extremely tight, a low-profile cap socket paired with a short ratchet is often the only viable option. If the filter is easily accessible from underneath, a versatile pair of oil filter pliers or a strap wrench may serve you well across multiple vehicles.
Safe Removal Practices and Operational Boundaries
Working on your vehicle’s lubrication system requires strict adherence to safety protocols to prevent personal injury and mechanical damage. Before beginning any work, perform a thorough pre-removal check. Ensure that the engine has cooled sufficiently; engine oil and exhaust components can reach temperatures well over 100°C, posing a severe burn hazard. Always wear appropriate personal protective equipment, including safety glasses to shield your eyes from dripping oil and heavy-duty nitrile gloves to protect your skin.
When positioning your chosen removal tool, ensure perfect alignment. If using a cap socket, seat it fully onto the flutes of the housing before applying torque. Applying force to an angled or partially seated tool can easily round off the plastic corners or crack the housing. For spin-on filters, place the wrench near the stronger, reinforced base of the canister rather than the weak middle section to avoid crushing the metal tube and causing a massive oil spill.
It is vital to recognize your operational limits and establish clear stopping conditions. If you apply reasonable force and the filter does not budge, or if you hear plastic cracking or see the metal canister beginning to tear, stop immediately. Severely seized, cross-threaded, or damaged filters require professional intervention. Forcing a stuck filter can strip the threads on the engine block’s oil filter adapter, leading to catastrophic engine failure or an incredibly expensive repair bill. In such cases, consult a qualified professional mechanic to safely extract the damaged component.
Frequently Asked Questions (FAQ)
What should I do if the oil filter is completely stuck and the tool is slipping?
If your oil filter is completely stuck and your removal tool is slipping, first verify that you are using the correct tool size and that it is perfectly aligned. Clean any oil, grease, or road grime off the filter surface to maximize grip. If the tool continues to slip, apply a high-quality penetrating oil directly to the seam where the filter gasket meets the engine block, and allow it to soak for at least 15 to 30 minutes. For metal spin-on filters, switching to a claw-style wrench or a pair of oil filter pliers can provide the aggressive, biting grip needed to break the stubborn seal. If these steps fail and the filter canister begins to deform or tear, stop immediately and seek professional mechanical assistance to avoid damaging the engine block threads.
Do I need a torque wrench when installing the new oil filter or housing cap?
Yes, using a torque wrench is highly recommended, especially for modern vehicles equipped with plastic cartridge-style filter housings. These plastic caps are fragile and can easily warp or crack if over-tightened, leading to sudden oil pressure loss while driving. Always refer to the torque specification stamped on the cap or listed in your vehicle’s service manual, and use a calibrated torque wrench to tighten it precisely. For traditional metal spin-on filters, a torque wrench is generally not required; instead, follow the standard hand-tightening rule. First, lubricate the new rubber O-ring or gasket with a thin film of clean engine oil. Spin the filter on by hand until the gasket makes firm contact with the mounting surface, then tighten it an additional three-quarters to one full turn by hand. Never use a removal tool to tighten a new oil filter, as this will make future removal extremely difficult and can damage the gasket.
Community discussion
Share your experience or ask a question. Comments are reviewed before publication.