
To build a practical and versatile automotive toolbox, a car owner needs two distinct categories of pry tools: non-marring nylon or plastic trim removal tools for delicate cabin work, and heavy-duty forged steel pry bars for mechanical and under-hood tasks. Having both types on hand ensures you can tackle everything from upgrading an infotainment screen to checking suspension play without causing costly collateral damage to your vehicle.
In the tropical climate of the Philippines, high cabin temperatures and humidity can accelerate the degradation of plastic interior clips and adhesive seals, making them exceptionally brittle. Attempting maintenance or upgrades on these components without the correct tools often results in broken parts, scratched paint, and frustration. Equipping yourself with the right set of tools is the first step toward successful DIY vehicle maintenance.
Why Improvised Tools Risk Damaging Your Vehicle
Using makeshift tools like flathead screwdrivers or butter knives to pry open vehicle panels is a recipe for expensive cosmetic and structural damage. The primary issue lies in the physics of force distribution. A standard flathead screwdriver concentrates all applied leverage onto a tiny, sharp point, creating an intense localized load that easily punctures soft dashboard vinyl, gouges plastic trim, or chips protective paint down to the bare metal.
Products mentioned in this guide
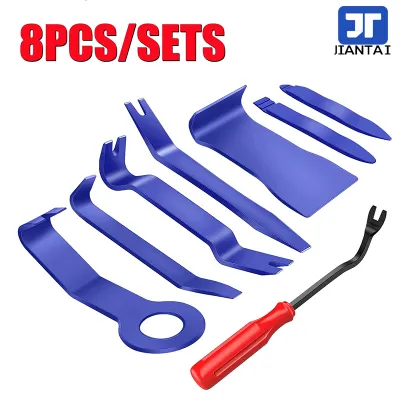
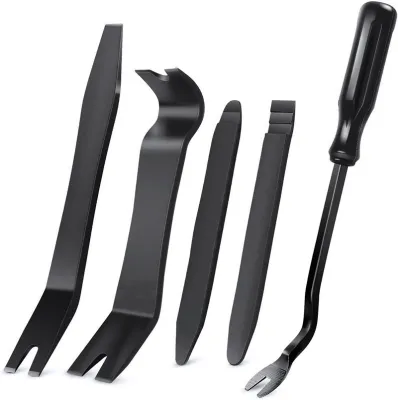
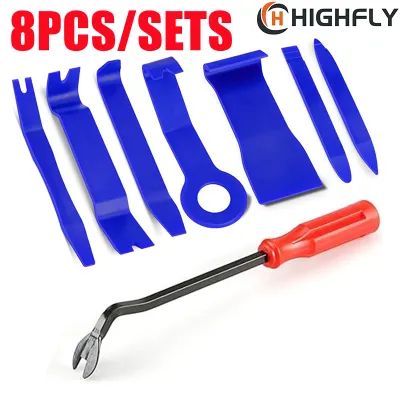
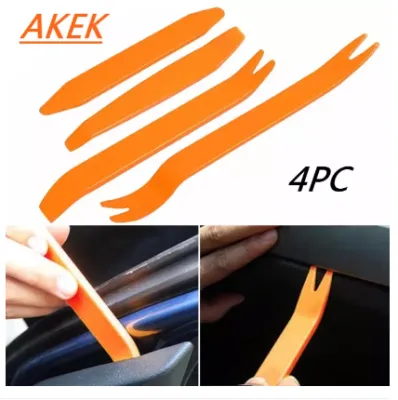
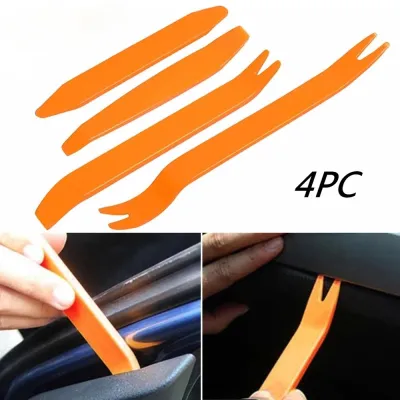
Prices are valid at publication and may change. Please refer to the product page for the latest price.
In contrast, a purpose-built trim removal or pry tool features a wide, flat, and often contoured tip designed to distribute the prying force across a much larger surface area. This significantly reduces the risk of crushing the underlying material. Furthermore, improvised metal tools lack the flexibility needed to pop stubborn plastic clips safely, often shearing the clip mounts directly off the back of the door panel rather than releasing them from the metal frame.
From a financial perspective, investing in a dedicated set of pry tools is a highly cost-effective decision. Replacing a single cracked dashboard bezel, a torn leather door card, or repairing a deeply scratched paint finish can cost thousands of pesos at a professional detailing or body shop. A comprehensive set of specialized pry tools costs a fraction of that amount and can save you from self-inflicted repair bills on your very first project.
Best Pry Tools for Delicate Interior and Trim Removal
Working inside the cabin requires a gentle touch and specialized materials. Modern car interiors are packed with fragile plastics, leather-wrapped surfaces, and sensitive electronics that demand tools designed specifically for surface preservation.

Plastic and Nylon Trim Removal Tools
Nylon-reinforced plastic wedges, wide-edge panel pullers, and specialized clip removers are the gold standard for interior cabin work. Because these tools are made of durable yet slightly yielding plastics, they are designed to flex or wear down before they can scratch or crack your vehicle’s interior panels.
These non-conductive materials are mandatory when working around sensitive electronic components, such as infotainment touchscreens, digital instrument clusters, and steering column shrouds. Using non-conductive tools minimizes the risk of short-circuiting hidden wiring harnesses or accidentally triggering sensitive Supplemental Restraint System (SRS) airbag sensors. Always refer to your vehicle’s factory service manual and disconnect the negative battery terminal before performing any work near airbag modules or electrical systems.
While plastic tools are designed to protect your vehicle, they do have physical limits. If you notice a nylon tool flexing excessively or turning white at the stress point, stop immediately. This level of flex indicates that the panel is held by a hidden screw, a heavy-duty metal clip, or is bound by dirt and adhesive, requiring you to pause and inspect the assembly rather than forcing it.
Metal Pry Tools with Protective Coatings
There are scenarios where plastic tools simply lack the structural strength to release stubborn components, such as heavy door cards, seat track covers, or thick weatherstripping. For these demanding interior tasks, slim metal pry tools with protective vinyl, rubber, or powder-coated finishes provide the necessary rigidity without exposing bare steel to your car’s interior.
Before using any coated metal tool, thoroughly inspect the tip and shaft to ensure the protective layer has not worn away, torn, or exposed sharp metal edges. A damaged coating can easily scrape paint or tear soft vinyl surfaces during use.
Even when using a fully coated metal tool, you should always place a secondary buffer—such as a folded microfiber cloth or a strip of heavy-duty masking tape—between the tool’s pivot point and the vehicle’s surface. This extra layer of protection absorbs the crushing force and prevents localized scuffing on delicate painted or plastic surfaces.
Heavy-Duty Pry Bars for Under-Hood and Mechanical Tasks
Moving from the cabin to the engine bay or undercarriage requires tools built for raw structural force rather than surface preservation. In these environments, heavy-duty steel tools are required to overcome seized components and high-torque assemblies.
Standard Pry Bars and Crowbars
Forged steel pry bars are essential for heavy-duty garage tasks, such as adjusting alternator tension on older engine layouts, separating stubborn exhaust hangers from their rubber mounts, or checking suspension bushings for excessive play. These tools are built to withstand massive bending forces without deforming.
When selecting a heavy-duty bar, look for hexagonal or I-beam shaft profiles. These geometries resist bending and twisting under extreme loads far better than cheap, round-shaft alternatives. Additionally, choose models with comfortable, impact-resistant handles that provide a secure grip, especially when working in greasy or humid conditions.
Keep in mind that longer bars provide greater leverage, but they also increase the risk of applying too much torque. This excessive force can easily snap brittle, road-grimed, or corroded fasteners. In coastal regions where salt air accelerates underbody rust, always spray stubborn bolts with a penetrating fluid and let it soak before attempting to pry or loosen them.
Ball-End and Angled Pry Bars
Engine bays and wheel wells are notoriously cramped, making straight pry bars difficult to position effectively. Ball-end pry bars, also known as rolling head or ladyfoot bars, feature a curved, rounded head that acts as its own built-in fulcrum. This unique shape allows you to apply high leverage in tight, vertical spaces where a straight tool cannot find purchase.
Angled or offset pry bars are similarly useful for navigating around steering linkages, drive shafts, and subframe components during suspension repairs. The angled tip allows you to slide the tool under a component and pry upward or outward from a more comfortable and safer body position.
Before applying force with any heavy-duty metal bar in the engine compartment, thoroughly verify the clearance around nearby components. A slipping pry bar can easily puncture a radiator core, crush a plastic coolant hose connector, or pinch and sever a vital electrical wiring harness. Always ensure your tool is seated securely on a solid, load-bearing metal surface before applying pressure.
How to Choose the Right Pry Tool for the Job
Selecting the correct pry tool requires matching the tool’s specifications to the physical demands of your current task. Using the wrong tool can lead to broken parts or tool failure.
- Material Selection: Match the tool's material to the fragility of the component you are targeting. Use flexible nylon or soft plastic for painted panels, leather-wrapped trim, and electronic bezels. Switch to fiberglass-reinforced composites for stiffer exterior trim pieces like grille inserts or fender flares. Reserve forged alloy steel exclusively for mechanical underbody components, engine brackets, and heavy suspension assemblies.
- Length and Leverage: Select a tool length that balances control and force. A compact 6-inch trim tool provides the precise hand control needed to pop delicate dashboard clips without snapping the plastic panel. Conversely, a 12- to 24-inch steel pry bar is necessary to generate the mechanical advantage required to move heavy engine components or test suspension joints. Never use cheater pipes or sleeve extensions to artificially lengthen a pry bar, as this can overload the tool and cause it to shatter.
- Tip Geometry: The shape of the tool's tip determines how safely it interacts with fasteners. Flat, ultra-thin tips are ideal for slipping into tight gaps to initiate a separation. Forked or V-notched tips are designed to slide directly around the shaft of plastic push-pins and trim clips, allowing you to apply equal upward pressure on both sides of the fastener to prevent it from shearing off. Tapered, wedge-shaped tips are best for lifting larger flat panels or separating split mechanical joints.
Safe Leverage Techniques to Protect Your Car's Surfaces
Applying force to your vehicle requires proper technique to ensure safety and prevent damage. Even the best tool can cause harm if used incorrectly.
When prying against a painted body panel, glass, or soft dashboard vinyl, never use the vehicle’s surface directly as a pivot point. Always place a solid fulcrum block—such as a small block of softwood, a thick piece of hard plastic, or a dedicated rubber prying pad—underneath the neck of the tool. This block absorbs and distributes the crushing force across a wider surface area, preventing dents and paint chips.
Before inserting any pry tool into a gap, take a moment to inspect what lies directly behind the panel. Use a flashlight to peer into the seam, checking for hidden wiring harnesses, window regulator cables, airbag inflators, or fluid lines. Piercing a wire harness can cause complex electrical faults, while nicking a brake or fuel line poses severe safety hazards.
Establish a strict “stop and reassess” boundary during your DIY projects. If a plastic trim panel or mechanical component does not budge under moderate, controlled pressure, do not apply brute force. Excessive resistance usually means there is a hidden screw, a forgotten bolt, or severe corrosion holding the part in place. Stop immediately, consult your vehicle’s factory service manual, or seek assistance from a professional mechanic to avoid costly structural damage.
Frequently Asked Questions (FAQ)
Can I use a flathead screwdriver instead of a dedicated pry tool in an emergency?
Using a flathead screwdriver for interior trim or painted surfaces is highly discouraged, as the narrow metal tip easily gouges plastic, chips paint, and slips off fasteners. If you face an absolute emergency on a non-visible mechanical component and have no other option, wrap the screwdriver’s tip tightly in several layers of electrical tape. Additionally, place a wooden block or a thick piece of cardboard under the shaft to act as a protective fulcrum, minimizing direct metal-to-metal contact.
How do I remove broken plastic clips left inside the panel holes after prying?
When plastic clips inevitably break and leave their stems stuck inside the sheet metal mounting holes, do not attempt to pry them out with a large pry bar or screwdriver, which can warp the metal or scratch the anti-corrosion coating. Instead, use a pair of specialized clip removal pliers or a small, angled metal pick tool to grab the underside of the broken stem. Apply gentle, straight-outward pressure to extract the remaining plastic piece without enlarging or deforming the mounting hole.
Community discussion
Share your experience or ask a question. Comments are reviewed before publication.