
Applying a high-quality vinyl skin to your Cardo Packtalk Edge is an excellent way to protect your device’s premium finish from scratches, road debris, and UV exposure while adding a personalized touch to your riding gear. However, because this motorcycle communicator relies on precise physical buttons, a tactile jog dial, sensitive microphone connections, and an air-vented acoustic design, a misaligned skin can easily compromise its performance. Blocking a microphone port or restricting a button’s travel can lead to failed voice commands, muffled audio, or difficulty operating the unit while wearing heavy riding gloves.
This guide walks you through the exact preparation, application, alignment, and verification steps needed to install a protective skin flawlessly. By following these steps, you can ensure your Cardo Packtalk Edge remains fully functional, weatherproof, and ready for the road.
Essential Tools and Preparation for a Dust-Free Application
Achieving a seamless, bubble-free finish requires careful preparation and a controlled environment. Before you begin peeling any adhesive backing, gather the necessary tools to ensure a precise installation:
Products mentioned in this guide
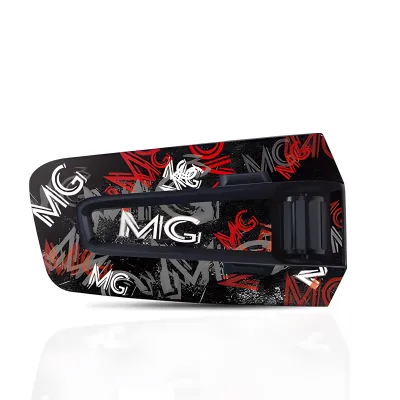
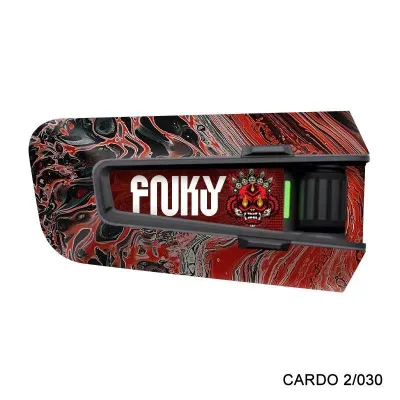
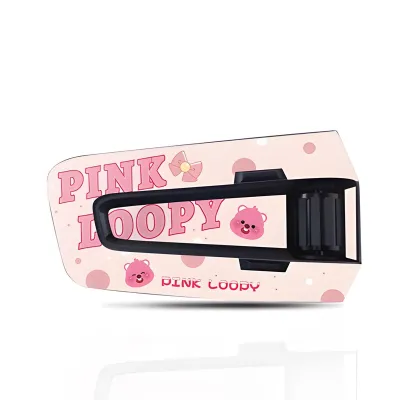
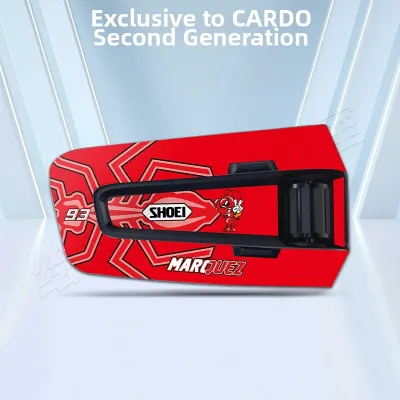
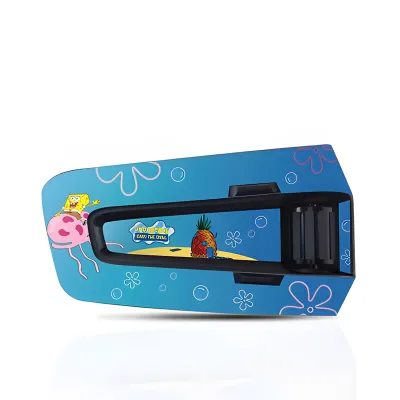
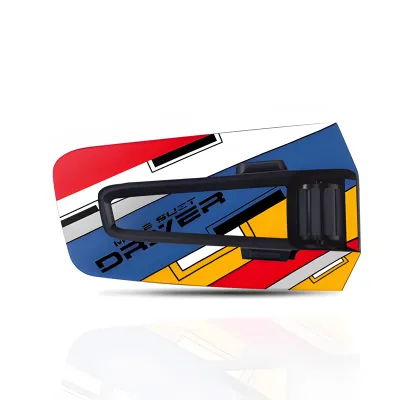
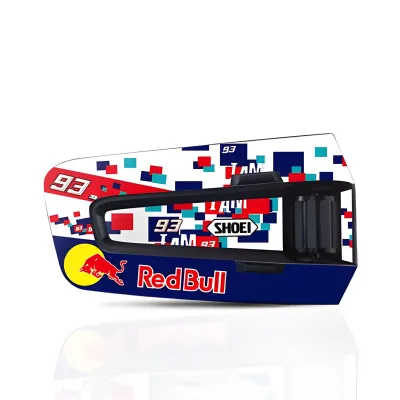
Prices are valid at publication and may change. Please refer to the product page for the latest price.
- 70% Isopropyl Alcohol: This is essential for stripping away finger oils, road grime, and wax without damaging the plastic housing of the Cardo unit.
- Microfiber Cloth: A clean, lint-free cloth ensures no tiny fibers are left behind on the surface to cause unsightly bumps under the vinyl.
- Plastic Squeegee or Soft Card: A plastic squeegee, or even an old credit card wrapped in a thin microfiber cloth, helps smooth out the vinyl and push out trapped air.
- Precision Tweezers: These are highly useful for handling small, intricate pieces of the skin, such as those designed for the buttons or around the jog dial, preventing your fingers from transferring oils to the adhesive backing.
- Hairdryer: A standard hairdryer set to its lowest heat setting will help soften the vinyl, making it pliable enough to conform to the curved contours of the Packtalk Edge.
The environment in which you apply the skin plays a massive role in the final result. Always work indoors in a well-lit, low-dust, and low-wind area; applying a skin outdoors or near an open window invites airborne dust and pollen to settle on the adhesive, ruining the bond. In tropical, high-humidity environments like the Philippines, temperature control is particularly important. Ensure both the Packtalk Edge and the vinyl skin are at room temperature before starting. If the device has just been brought in from a cold, air-conditioned room into a humid garage, micro-condensation can form on the surface, which traps moisture beneath the skin and prevents the adhesive from bonding securely.
To prepare the device, first detach the Packtalk Edge from its Air Mount cradle. Thoroughly wipe down the entire plastic housing with the 70% isopropyl alcohol and your microfiber cloth, paying special attention to the recessed areas around the buttons, the edges of the jog dial, and the charging port. Do not spray alcohol directly onto the device; instead, dampen the cloth slightly to prevent liquid from entering any openings. Allow the unit to air-dry completely for at least five minutes before proceeding, ensuring all moisture has evaporated.
Step-by-Step Guide to Applying the Cardo Packtalk Edge Skin
Applying a pre-cut vinyl skin is a test of patience and precision. Following a structured, step-by-step approach prevents common alignment errors and ensures the adhesive adheres smoothly to the complex curves of the communicator.

- Step 1: The Dry Fit: Before removing any part of the adhesive backing, perform a dry run. Place the entire skin sheet over the Packtalk Edge to visualize how the cutouts line up with the physical features of the device. Identify the key anchor points, such as the circular opening for the jog dial, the LED indicator light, and the physical buttons. Understanding how these reference points align beforehand will save you from misplacing the skin once the adhesive is exposed.
- Step 2: Peeling and Initial Placement: Do not peel the entire skin off its backing paper at once, as this makes the vinyl highly susceptible to stretching, picking up dust, or sticking to itself. Instead, peel back only a small portion—about 15 to 20 percent—of the backing paper from one of the straight edges, preferably near the USB-C port or the base of the unit. Align this small exposed section perfectly with the corresponding edge of the Packtalk Edge, using the port cutout as your primary guide. Gently press it down to anchor the skin in place.
- Step 3: Squeegee Technique: With the anchor point secured, slowly peel away the remaining backing paper with one hand while using your plastic squeegee or cloth-wrapped card with the other. Work in slow, deliberate strokes from the center of the device outward toward the edges. This technique pushes any air out from under the vinyl before it can get trapped. Maintain light, even pressure to avoid scratching the vinyl surface.
- Step 4: Managing Curves and Edges: The Cardo Packtalk Edge features aerodynamic, sweeping curves that can cause flat vinyl to crease or bunch up at the corners. When you reach these curved areas, use a hairdryer on its lowest heat setting to apply gentle heat for two to three seconds from a distance of at least 15 centimeters. This warms the vinyl, making it temporarily soft and pliable. Gently stretch and wrap the warmed vinyl over the curves, smoothing it down with your thumb. Avoid overheating the device, as excessive heat can damage the internal lithium-ion battery or warp the plastic housing.
- Step 5: Bubble Removal: If you notice a small air bubble trapped under the skin, do not panic. If the adhesive is still fresh, you can carefully lift the skin up to the point of the bubble, release the air, and squeegee it back down. For tiny bubbles near the edges, use your thumb to push them outward toward the nearest open border. Avoid stretching the vinyl during this process; pulling too hard on the material will deform the cutouts and lead to lifting or peeling along the edges over time.
Protecting Functionality: Aligning the Microphone, Buttons, and Ports
The primary challenge of skinning any communication device is maintaining its core functionality. The Cardo Packtalk Edge is engineered with precise physical interfaces and acoustic paths that must remain completely unobstructed to operate safely and effectively on the road.
Microphone and Speaker Cutouts
Clear communication is the primary purpose of your Cardo system, making the alignment of acoustic areas critical. The Packtalk Edge features specific contact points and vent areas that connect to your helmet’s microphone and speakers. When applying the skin, pay close attention to the bottom and back areas where the unit docks with the Air Mount. If your skin kit includes coverage for the mounting plate, verify that the acoustic vents and the gold-plated connector pins remain completely exposed. Applying a skin that covers these connection points or muffles the internal microphone ports will degrade voice command recognition, cause your riding companions to hear muffled audio, or prevent the unit from communicating with the helmet harness entirely. If you notice the skin lacks a pre-cut hole for a critical port, do not attempt to force it; instead, trim the skin before application or contact the skin manufacturer.
Button Tactility and Controls
Operating a communicator while riding requires distinct tactile feedback, especially when wearing thick leather gloves. The Packtalk Edge relies on three main tactile buttons and a textured jog dial to control volume, media, and intercom functions. A properly designed skin should feature generous cutouts that surround these buttons without overlapping them. During application, align the skin so that it sits perfectly centered around the button housings. If the vinyl overlaps the edge of a button, it can restrict its physical travel, making it difficult to press or causing it to stick in the “active” position. Ensure the skin does not interfere with the smooth rotation of the jog dial; there should be a clear, uniform gap around the dial’s base to prevent friction from wearing down the vinyl or binding the control.
Charging and Audio Ports
The USB-C charging port on the Cardo Packtalk Edge is recessed to maintain its IP67 weatherproof rating when sealed. When applying the skin around this port, ensure the material does not overhang the opening. Even a fraction of a millimeter of overhanging vinyl can prevent your USB-C charging cable from seating fully into the port, leading to interrupted charging or connection failures. Furthermore, if the skin is forced into the port opening by a cable plug, it can bunch up, peel, and leave sticky adhesive residue inside the port, which is difficult to clean and can attract dust. Always double-check that the port cutout is perfectly centered and that the weatherproofing rubber flap can open and close securely without catching on the skin’s edges.
Post-Application Verification: Testing Device Operations
Once the skin is fully applied and the adhesive has had a few minutes to set, you must perform a comprehensive verification check before hitting the road. This step ensures that the cosmetic upgrade has not compromised the safety or functionality of your communicator.
Begin with a physical inspection. Run your fingers firmly over all the edges, seams, and cutouts of the applied skin to ensure they are completely flat and adhered to the plastic. Check that there are no lifting corners that could catch the wind at high speeds, which would cause the skin to peel off rapidly during a ride. Press each physical button multiple times to confirm that you still feel a distinct, clicky tactile feedback and that the buttons return to their original position instantly. Rotate the jog dial completely in both directions to verify there is no rubbing or resistance.
Next, conduct connection and mounting tests. Insert your USB-C charging cable into the port to ensure it clicks securely into place without pushing against the edge of the vinyl. Then, mount the Packtalk Edge onto your helmet’s Air Mount. The magnetic connection should snap together effortlessly, and the physical locking mechanism must engage fully. If you feel any resistance or if the unit does not lock securely, the skin may be too thick or misaligned near the mounting interface. Never ride with a poorly secured unit, as wind resistance can dislodge it. Finally, power on the device, pair it with your smartphone, and perform a quick audio test. Make a test call or use voice commands to ensure the microphone picks up your voice clearly and the speakers deliver crisp sound without any muffled interference.
Safe Removal and Long-Term Maintenance
To keep your Cardo Packtalk Edge looking pristine, proper long-term maintenance of the vinyl skin is essential. Clean the skinned surface regularly using only a damp microfiber cloth. Avoid using harsh chemical solvents, degreasers, or abrasive cleaners, as these can dissolve the printed design on the vinyl, degrade the adhesive, or damage the underlying plastic of the Cardo unit. If you ride in muddy or dusty conditions, gently wipe away debris immediately after your ride to prevent dirt from embedding along the edges of the skin.
If you decide to change the look of your device or return it to its original state, removing the skin safely is straightforward. Never use sharp metal tools or craft knives to pry up the vinyl, as this will permanently scratch the plastic housing. Instead, apply gentle heat to the skin using a hairdryer on low heat for a few seconds to soften the adhesive. Once the vinyl is warm and pliable, use your fingernail or a plastic tool to lift a corner, then peel the skin off slowly at a low, 45-degree angle. Peeling slowly prevents the vinyl from tearing and minimizes the amount of adhesive residue left behind. If any sticky residue remains on the plastic shell, dampen a microfiber cloth with a small amount of 70% isopropyl alcohol and gently rub the area until the surface is completely clean and smooth.
Frequently Asked Questions (FAQ)
Can I cut a generic skin to fit the Packtalk Edge?
It is highly discouraged to manually cut a generic sheet of vinyl to fit your Cardo Packtalk Edge. The device features intricate curves, recessed ports, and precise button layouts that are incredibly difficult to replicate by hand. Attempting to trim vinyl directly on the device with a craft knife or razor blade carries a high risk of permanently scratching the plastic housing, cutting into the rubberized buttons, or puncturing the weatherproof seals. Furthermore, hand-cut edges are rarely perfectly smooth, making them far more likely to peel or lift when exposed to wind and rain. For the best fit, protection, and ease of installation, always purchase high-quality skins that are digitally pre-cut specifically for the Packtalk Edge model.
Will applying a skin void the Cardo warranty?
Applying a standard, non-liquid adhesive vinyl skin to your Cardo Packtalk Edge generally does not void the manufacturer’s warranty, as it is considered a non-permanent cosmetic modification. However, this is conditional on the application and removal process not causing physical damage to the device. For example, if you use excessive heat from a heat gun that warps the plastic housing or damages the internal battery, or if you use a sharp blade to cut the skin and damage the seals, those actions would void your warranty. Always ensure the skin you choose uses a high-quality, residue-free adhesive that can be removed cleanly without damaging the original finish or leaving permanent residue that could clog the ports or acoustic vents.
Community discussion
Share your experience or ask a question. Comments are reviewed before publication.