
Applying an engine oil treatment to your motorcycle is a practical way to enhance lubrication, reduce friction, and protect internal components from premature wear. This is especially true in tropical regions like the Philippines, where daily commutes often involve navigating dense stop-and-go traffic under intense heat, putting immense thermal stress on both air-cooled and liquid-cooled engines. However, adding any aftermarket additive to a motorcycle engine requires a different approach than doing so for a passenger car. Because most motorcycles utilize a wet clutch system where the engine oil also lubricates the transmission and clutch plates, choosing and applying the wrong product can lead to severe mechanical issues.
To apply F2R engine oil treatment safely and effectively, you must understand your motorcycle’s specific mechanical requirements, calculate the exact mixing ratios, and follow a precise application process. This guide details the essential pre-application checks, provides a step-by-step walkthrough of the oil change and treatment process, and outlines the critical post-application verifications needed to keep your machine running smoothly. By taking a methodical approach, you can maximize the benefits of the treatment while safeguarding your engine and transmission from accidental damage.
Pre-Application Checks: Ensuring Engine and Clutch Compatibility
Before you open any bottle of aftermarket additive, you must establish whether the product is fully compatible with your motorcycle’s internal design. The most critical factor to consider is the fundamental difference between motorcycle and automotive engine layouts. While passenger cars isolate their engine oil from the transmission and clutch, the vast majority of motorcycles use a unit construction design. In this setup, a single oil reservoir lubricates the engine crankcase, the gearbox, and the wet clutch assembly. This means the fluid you put into your engine is the exact same fluid that bathes your clutch plates.
Products mentioned in this guide
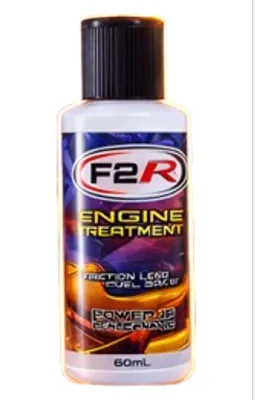

Prices are valid at publication and may change. Please refer to the product page for the latest price.
Because of this shared lubrication system, you must verify that the F2R engine oil treatment you intend to use is explicitly rated as “Wet Clutch Safe” or carries a JASO MA or JASO MA2 compatibility certification. The Japanese Automotive Standards Organization (JASO) classifies oils based on their friction characteristics; JASO MA and MA2 oils are specifically formulated to deliver high friction performance, ensuring that wet clutches do not slip under load. If you introduce an additive that contains automotive friction modifiers—such as molybdenum or other slip agents designed solely for dry-clutch car engines—you will compromise the grip of your motorcycle’s clutch plates. This results in immediate clutch slippage, power loss, and rapid wear of the clutch friction material.
Your next step is to consult your motorcycle’s owner’s manual to verify its exact engine oil capacity and review the manufacturer’s stance on aftermarket additives. Note the specific capacity requirements: the volume required for a standard oil change is often different from the volume needed when you also replace the oil filter, or when the engine is completely disassembled for a rebuild. Additionally, check for any warnings regarding the use of oil additives, as some manufacturers explicitly state that unauthorized oil treatments can void your factory warranty. If you find any conflicting instructions between the F2R product label and your motorcycle’s owner’s manual, always defer to the vehicle manufacturer’s guidelines or consult a qualified professional mechanic before proceeding.
Once you have confirmed compatibility, gather all the necessary tools and materials to ensure a clean, uninterrupted workflow. You will need:
- The correct grade and viscosity of fresh motorcycle oil (such as 10W-40 or 20W-50, as recommended by your manual).
- The F2R engine oil treatment bottle.
- A clean oil drain pan capable of holding the total volume of your engine's oil.
- A socket wrench or spanner that fits your engine's drain plug perfectly to prevent rounding the bolt head.
- A brand-new crush washer for the drain plug to guarantee a leak-free seal.
- A clean, dry funnel to prevent spills on hot engine parts.
- Clean shop rags or microfiber towels for quick cleanup.
- Personal protective equipment, including safety glasses and nitrile gloves, to protect your skin and eyes from hot, degraded oil.
Step-by-Step Application: Mixing and Adding the Treatment
Step 1: Warm Up and Drain the Old Oil
To begin the process, start your motorcycle and let it idle for 3 to 5 minutes. This brief warm-up period raises the temperature of the existing engine oil, lowering its viscosity so that it flows quickly and carries out suspended contaminants, soot, and metallic wear particles more thoroughly. Avoid letting the engine run too long or taking it for a hard ride immediately before draining, as scorching hot oil can cause severe burns if it contacts your skin during the draining process.

Park the motorcycle on a flat, level surface. If your bike is equipped with a center stand, use it to keep the motorcycle perfectly upright and stable. If you only have a side kickstand, use a rear paddock stand or secure the front wheel to ensure the bike remains vertical, which is essential for draining the oil completely and taking accurate level readings later.
Position your drain pan directly beneath the engine’s drain plug. Using your socket wrench, carefully loosen the drain plug, turning it counterclockwise. As you remove the plug, keep a slight inward pressure on it to prevent oil from gushing out prematurely over your fingers, then pull it away quickly. If your motorcycle utilizes a spin-on or cartridge-style oil filter, remove it at this stage according to your manual’s instructions, allowing any trapped oil in the filter housing or cooler lines to drain into the pan.
While the old oil is draining, inspect the drain plug itself. Clean any metallic sludge or debris from its magnetic tip, if equipped, as this is a normal byproduct of gearbox wear but should be cleared regularly. Always discard the old drain plug crush washer; these washers are designed to deform under torque to create a perfect seal, and reusing a flattened washer often leads to slow, persistent oil leaks. Once the oil slow-drips to a stop, thread the drain plug back in by hand to prevent cross-threading, then use a torque wrench to tighten it to the manufacturer’s specified torque. Install your new oil filter, lubricating its rubber gasket with a drop of fresh oil before tightening it to the recommended specification.
Step 2: Calculate the Correct Mixing Ratio and Total Volume
One of the most critical phases of this application is determining the exact volume of F2R treatment to add. You must never pour the entire bottle of treatment into your engine without performing basic calculations first. Read the F2R product label carefully to locate the manufacturer’s recommended mixing ratio, which is typically expressed as a specific volume of treatment per liter of engine oil (for example, 50 ml of treatment per 1,000 ml of engine oil).
To prevent damaging your engine, you must adhere to the following formula: Total Fluid Volume = Volume of New Oil + Volume of F2R Treatment
The total fluid volume of your mixture must match, but never exceed, the maximum oil capacity specified in your motorcycle’s owner’s manual. Overfilling the crankcase is a critical error that can damage your engine.
To calculate the exact amount of fresh oil you need to pour, subtract the volume of the F2R treatment from your total oil capacity. For instance, if your motorcycle’s manual states that an oil and filter change requires exactly 1.0 liter (1,000 ml) of oil, and your calculated F2R treatment dosage is 100 ml, you must measure out exactly 900 ml of fresh motorcycle oil. Adding a full liter of oil plus the 100 ml of treatment would result in 1,100 ml of total fluid, overfilling your crankcase by 10% and risking severe engine damage. Use a clean, graduated measuring cup to measure both fluids precisely.
Step 3: Add the Treatment and New Oil
Before pouring, check the F2R instructions to see if the product should be pre-mixed with your fresh oil or added directly to the crankcase. If pre-mixing is recommended, pour your measured fresh oil and the calculated F2R treatment into a clean, dry container and stir them gently with a clean tool until the mixture is uniform. If the manufacturer directs you to add them separately, you can pour the oil treatment directly into the oil filler port first, followed by the fresh oil.
Place your clean funnel securely into the engine’s oil filler port. Pouring oil or treatments without a funnel is highly discouraged, as any spills onto the hot exhaust pipes or cylinder head will burn, producing heavy smoke, unpleasant odors, and a potential fire hazard once the engine is started.
Slowly pour the pre-mixed fluid or the calculated volume of fresh motorcycle oil into the funnel. If you are adding them separately, pour the treatment first, then slowly add the fresh oil to help wash the thick treatment down into the crankcase. Stop pouring occasionally to allow the oil to flow down into the oil pan, and monitor the oil level through the engine’s sight glass or by inserting the dipstick. The level should gradually rise toward the upper fill line but must remain below it.
Once you have added the calculated volumes and verified that the level is correct, remove the funnel and wipe the filler port area clean with a shop rag. Reinstall the oil filler cap, making sure the rubber O-ring is in good condition and seated correctly in its groove to prevent oil mist from escaping when the crankcase becomes pressurized during operation.
Post-Application Verification: Checking Levels and Clutch Performance
With the fresh oil and F2R treatment successfully added, you must verify the fluid levels and check for proper mechanical operation before taking the motorcycle out for a normal ride. Begin by ensuring the motorcycle is perfectly upright on level ground. If you use a side stand, the tilted angle of the engine will cause the oil to pool on one side, giving you a false low reading on your sight glass or dipstick and tempting you to overfill the engine. Let the bike sit undisturbed for 2 to 3 minutes to allow all the newly poured oil to settle completely into the bottom of the oil pan. Check that the oil level rests comfortably between the lower and upper indicator lines.
Next, start the engine and let it idle smoothly for 3 to 5 minutes. Do not rev the engine or twist the throttle immediately after starting; the oil pump needs a few moments to circulate the new oil and treatment mixture to the cylinder head, camshafts, and transmission gears. Watch your instrument cluster closely to ensure that the oil pressure warning light (if your motorcycle is equipped with one) turns off within a few seconds of startup. While the engine is idling, use a flashlight to inspect the drain plug, the oil filter cover, and the oil filler cap for any signs of weeping, dripping, or active oil leaks.
Once you have confirmed there are no leaks and the engine is idling smoothly, perform a brief, low-speed test ride in a safe, controlled environment, such as a quiet side street or an open parking lot. Pay close attention to the feel of your clutch lever and the responsiveness of the transmission. As you accelerate gently through the first few gears, listen for any unusual friction noises, clicking, or knocking from the engine block. Most importantly, monitor the engine RPMs relative to your road speed; if you notice the engine revs climbing rapidly while your speed remains constant, your clutch is slipping. If this occurs, park the motorcycle immediately, as continued riding will destroy your clutch plates.
Critical Mistakes to Avoid to Prevent Engine or Clutch Damage
- Overfilling the Crankcase: This is one of the most common and damaging mistakes riders make when using oil additives. Failing to subtract the volume of the F2R treatment from the total oil capacity leads to an overfilled crankcase. When the oil level is too high, the rapidly spinning crankshaft strikes the surface of the oil, whipping it into a frothy foam. This aerated oil cannot be pumped effectively, reducing oil pressure and preventing a consistent lubricating film from protecting your bearings and cylinder walls. Additionally, the excess volume increases internal crankcase pressure, which can blow out delicate rubber engine seals, force oil into your airbox through the breather tube, and contaminate your spark plugs.
- Ignoring Wet Clutch Compatibility: Assuming that any high-performance engine treatment is safe for your motorcycle is a recipe for transmission failure. Many automotive engine treatments contain friction-reducing compounds like polytetrafluoroethylene (PTFE) or soluble molybdenum, which are designed to minimize drag in dry-clutch car engines. If these compounds are introduced into a motorcycle's wet clutch, they coat the clutch friction plates and eliminate the grip required to transfer power to the rear wheel. This leads to severe clutch slippage, excessive heat buildup, and eventually requires a complete and costly replacement of your clutch pack, which can cost several thousand Philippine Pesos (₱2,000 to ₱5,000 or more depending on your motorcycle model) in parts and professional labor.
- Using Additives as a Substitute for Maintenance: It is vital to remember that engine treatments are supplementary products designed to enhance the performance of healthy oil; they are not a cure-all for mechanical neglect. An additive cannot repair physically worn piston rings, scored cylinder walls, or damaged bearings, nor can it restore the viscosity of severely degraded, old oil. Never use an additive as an excuse to delay your regularly scheduled oil and filter changes. Neglecting your manufacturer's recommended maintenance intervals will result in the accumulation of acidic sludge and abrasive particulate matter that no treatment can neutralize.
- Mixing Incompatible Chemistries: Avoid mixing F2R engine oil treatment with other aftermarket additives, such as zinc boosters, ceramic friction reducers, or engine flush residues left behind in the crankcase. Different additive brands utilize highly specific, proprietary chemical packages that are carefully balanced. When you mix multiple different chemistries together, they can react unpredictably, causing key ingredients to fall out of suspension or form a thick, jelly-like sludge. This sludge can easily clog your engine's oil pickup screen and narrow oil galleries, starving critical overhead components of lubrication and leading to catastrophic engine failure.
Frequently Asked Questions (FAQ)
Can I use F2R engine oil treatment with synthetic or semi-synthetic oil?
Yes, F2R engine oil treatment is generally formulated to be fully compatible with mineral, semi-synthetic, and fully synthetic motorcycle oils. However, because chemical formulations can vary, you must always read the product label on your specific bottle of F2R to confirm compatibility before mixing. High-quality engine treatments are designed to blend seamlessly with standard base oils without breaking down their existing additive packages, provided you adhere to the manufacturer’s recommended mixing ratios.
How often should I reapply the treatment?
To maintain the protective benefits of the additive, you should typically reapply the F2R engine oil treatment during every scheduled oil change. Because the treatment remains suspended within your engine oil, it is completely drained out of the crankcase along with the old, dirty oil during routine maintenance. Always refer to the specific reapplication guidelines printed on the F2R packaging, as some specialized formulations may recommend different intervals depending on your riding habits, mileage, and environmental conditions.
Community discussion
Share your experience or ask a question. Comments are reviewed before publication.