
Applying F2R oil treatment to a diesel engine is a straightforward maintenance task that involves verifying your current oil level, calculating the correct dosage, pouring the additive into a warm engine, and checking the dipstick to ensure the crankcase is not overfilled. Diesel engines operate under high compression and generate significant soot, which can degrade motor oil over time. In tropical climates like the Philippines, where high ambient temperatures and heavy traffic put extra stress on engines, using a high-quality oil treatment can help maintain lubrication efficiency and protect internal components from premature wear. However, the treatment must be applied systematically to ensure proper mixing and to avoid mechanical issues associated with overfilling.
Preparation and Safety Checks Before Application
Before adding any treatment to your diesel engine, you must perform several essential preparation and safety checks. First, locate your vehicle’s dipstick, pull it out, wipe it clean with a lint-free cloth, reinsert it fully, and pull it out again to check the current oil level and condition. If the oil appears excessively dark, thick, gritty, or has a strong burnt odor, it is highly degraded. Adding an additive to worn-out oil will not restore its protective properties; in this scenario, you must perform a complete oil and filter change before introducing the treatment.
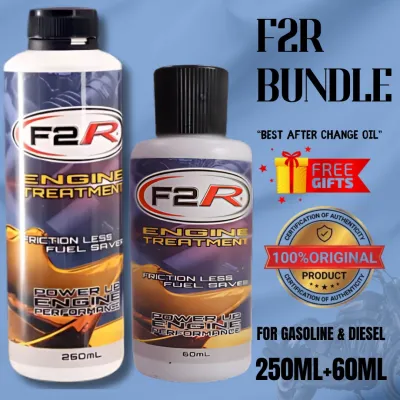
Next, read the product label on your F2R oil treatment bottle carefully. The label contains critical instructions regarding the correct dosage and mixing ratios for different engine capacities. Diesel engines in pickup trucks, SUVs, and utility vehicles have varying oil capacities, typically ranging from five to eight liters or more. You must determine your engine’s exact oil capacity by consulting your vehicle’s owner’s manual so you can calculate the precise amount of treatment required.
Products mentioned in this guide


Prices are valid at publication and may change. Please refer to the product page for the latest price.
Finally, verify that the engine is at a safe operating temperature before application. The engine should be warm to the touch, which helps the treatment mix quickly and evenly with the existing motor oil. However, the engine must be turned off during the entire application process. Working on a boiling hot engine poses severe burn risks from hot metal surfaces, boiling coolant, or spraying oil. Always allow a hot engine to cool down to a warm, manageable temperature, and wear protective gloves and safety glasses to safeguard yourself against accidental splashes.
Step-by-Step Application Process
To begin the physical application, locate the oil filler cap on top of the engine’s valve cover. Before removing the cap, take a clean rag and thoroughly wipe away any road dust, grime, or dried oil from the surrounding area. Diesel engines often accumulate significant dirt under the hood, and allowing even a tiny grain of sand or debris to fall into the open filler neck can cause abrasive wear on your camshafts, lifters, and bearings. Once the area is clean, carefully unscrew the oil filler cap and place it in a secure, clean spot.

Next, calculate the exact volume of treatment you need to add. Refer to the dosage instructions on the F2R bottle and compare them to your engine’s total oil capacity. If your engine oil level is already at the maximum fill line on the dipstick, adding the treatment directly will result in overfilling. In such cases, you may need to drain a small, equivalent amount of oil from the oil pan first, or plan the application to coincide with a fresh oil change where you can underfill the base oil slightly to accommodate the volume of the treatment.
Place a clean, dry funnel securely into the oil filler neck. Using a funnel is highly recommended because spilling oil treatment onto hot engine components, such as the exhaust manifold, can create heavy smoke, unpleasant odors, or even pose a fire hazard. Slowly and steadily pour the calculated amount of F2R oil treatment into the funnel. Allow the bottle to sit upside down in the funnel for a few moments to ensure all the viscous fluid drains into the engine.
After pouring the treatment, remove the funnel and immediately recheck the dipstick. Insert the dipstick fully, wait a few seconds for the fluid level to settle, and pull it out to read the level. The combined volume of your base engine oil and the newly added treatment must not exceed the maximum fill line on the dipstick. If the level is safe, securely reinstall the oil filler cap, turning it until it is fully tightened or clicks into place, ensuring a proper seal that prevents oil leaks and maintains crankcase vacuum.
Post-Application Verification and Engine Monitoring
Once the treatment is safely inside the engine and the filler cap is secured, start the engine and let it idle in a well-ventilated area for several minutes. Idling allows the oil pump to draw the newly added treatment from the oil pan and distribute it evenly through the oil galleries, lubricating the cylinder walls, crankshaft bearings, and valve train under low-load conditions. Avoid revving the engine immediately after application, as the additive needs a few minutes of gentle circulation to mix thoroughly with the base oil.
While the engine is idling, perform a careful visual inspection of the engine bay. Look closely around the oil filler cap and the dipstick tube to ensure there is no oil seeping or spraying out. If you recently performed an oil change or loosened the drain plug, inspect under the vehicle to confirm that the drain plug and oil filter are completely dry and free of leaks.
Next, monitor your vehicle’s dashboard instrument cluster. Ensure that the oil pressure warning light turns off promptly after starting the engine and does not flicker or illuminate while idling. If your vehicle is equipped with an oil pressure gauge, verify that the reading remains within the manufacturer’s specified normal operating range. Finally, take the vehicle for a short, gentle drive and listen closely to the engine’s sound profile to establish a baseline, noting any changes in the characteristic diesel clatter over the next few days.
Common Mistakes to Avoid When Using Oil Treatments
One of the most critical mistakes to avoid when using any oil treatment is overfilling the crankcase. If the oil level rises above the maximum line on the dipstick, the spinning crankshaft can physically contact the oil pool in the pan, whipping it into a froth. This aerated oil contains tiny air bubbles, which cannot be pressurized effectively by the oil pump. As a result, critical engine components may suffer from localized oil starvation, leading to rapid wear, increased operating temperatures, and potential seal damage due to elevated crankcase pressure.
Another common error is mixing multiple aftermarket additives in the same oil cycle. Additives are complex chemical formulations designed to work within specific parameters. Pouring different brands or types of treatments into your engine simultaneously can cause chemical conflicts, neutralizing the beneficial properties of both products or, worse, causing the additives to fall out of suspension and form harmful sludge that can clog oil passages.
Lastly, do not expect oil treatments to perform mechanical miracles. While high-quality additives can enhance lubrication, reduce friction, and help quiet minor valve train noise, they cannot repair physical mechanical damage. If your diesel engine has worn-out piston rings, a blown head gasket, severely damaged bearings, or deep cylinder scoring, no liquid additive can restore these components. Physical wear and structural damage require professional mechanical diagnosis, disassembly, and repair.
Frequently Asked Questions (FAQ)
Can I add F2R oil treatment right before an oil change?
It is not advisable to add F2R oil treatment right before a scheduled oil change. Doing so means the active ingredients will only circulate in your engine for a very short period before being drained out and discarded with the old oil, resulting in a waste of the product. To maximize the effectiveness and lifespan of the treatment, it should be added to fresh, clean oil during an oil change or shortly after, allowing the additive to protect your engine throughout the entire service interval.
Will adding this treatment void my vehicle's warranty?
To determine if an aftermarket additive will affect your vehicle’s warranty, you must consult your owner’s manual and review the manufacturer’s specific warranty terms. Some vehicle manufacturers discourage the use of third-party oil additives and state that any engine damage directly caused by unapproved chemicals will not be covered under warranty. If you choose to use an additive, ensure it is compatible with your engine’s oil specifications and does not violate any explicit guidelines set by your vehicle’s manufacturer.
How often should I reapply the treatment?
You should rely on the instructions provided on the F2R product label to determine the correct reapplication intervals. Generally, oil treatments are formulated to be added during every scheduled oil change to maintain consistent lubrication and wear protection. Do not guess the reapplication interval or assume the treatment remains effective indefinitely, as the active ingredients gradually deplete over time and mileage along with your engine’s base oil.

Community discussion
Share your experience or ask a question. Comments are reviewed before publication.