
Applying F2R oil treatment to a gasoline motorcycle engine requires a systematic approach to ensure the additive blends correctly with your engine oil without exceeding the crankcase capacity. In the tropical climate of the Philippines, where motorcycles frequently endure high ambient temperatures, stop-and-go traffic, and intense humidity, maintaining proper engine lubrication is vital for long-term reliability. Using an oil treatment is a common practice among riders looking to support their engine’s internal components, but improper application can lead to mechanical issues.
To achieve the best results, you must verify engine compatibility, calculate the precise dosage based on your motorcycle’s specific crankcase capacity, prepare the engine under stable thermal conditions, and follow a careful pouring and circulation process. This guide outlines the exact steps, safety precautions, and monitoring practices required to apply the treatment safely and keep your motorcycle running smoothly.
Preparation and Compatibility Checks
Before introducing any chemical treatment to your motorcycle’s engine, you must ensure that both the machine and your working environment are properly prepared. Start by parking your motorcycle on a flat, level surface. Utilizing the center stand, rather than the side stand, is essential because a tilted motorcycle will give inaccurate oil level readings on both the dipstick and the sight glass, which can lead to accidental overfilling.
Products mentioned in this guide
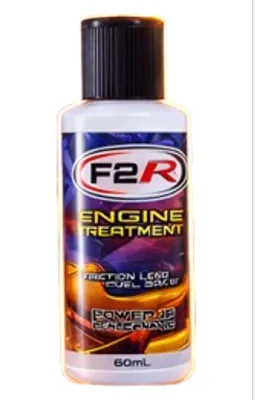


Prices are valid at publication and may change. Please refer to the product page for the latest price.
Allow the engine to reach a warm, safe operating temperature before beginning. If the engine is completely cold, the existing oil will be highly viscous and will not mix readily with the treatment. Conversely, if the engine is boiling hot after a long ride, you risk severe thermal burns from hot metal parts or splashing oil. Let the motorcycle idle for a few minutes, or let a hot engine cool down for fifteen minutes, until the crankcase is warm to the touch.
Inspect the current state of your engine oil before adding any treatment. Locate the oil dipstick or sight glass on the side of the crankcase. If the oil appears pitch black, gritty, thick, or smells strongly of gasoline, do not add the treatment. These symptoms indicate that the oil has degraded and is due for a complete change. Adding an additive to worn-out, contaminated oil is ineffective because the base oil can no longer support the additive package.
Gather all necessary tools and safety gear before opening the oil filler cap. You will need a clean, dry funnel specifically designated for engine fluids, several lint-free microfiber rags to wipe up any drips, safety glasses to protect your eyes from accidental splashes, and chemical-resistant gloves. Cleanliness is paramount during this stage; even a tiny amount of road dust, sand, or water entering the filler neck can cause abrasive wear inside the engine.
Thoroughly clean the area surrounding the oil filler cap before unscrewing it. Road grime, mud, and debris tend to accumulate around the engine casings. Use a clean rag or a soft brush to clear away any loose dirt from the base of the cap. This simple preventive step ensures that no foreign contaminants fall directly into the crankcase when the port is opened.
How to Determine the Correct Dosage
Determining the exact volume of oil treatment to add is a critical step that requires careful calculation rather than guesswork. Start by locating the manufacturer’s dosage instructions directly on the F2R product label. Because chemical formulations and concentrations vary, you must follow the specific mixing ratios provided on the packaging rather than relying on generic online forums or advice meant for passenger cars.

Cross-reference the product label instructions with your motorcycle’s owner’s manual to confirm the total engine oil capacity. Most standard underbone motorcycles, scooters, and backbones in the market have an oil capacity ranging from 0.8 liters to 1.2 liters, though larger displacement engines will hold significantly more. Note whether your manual specifies a different oil volume for a standard oil change versus an oil change that includes a oil filter replacement, as the filter holds a small amount of residual oil.
Calculate the required volume of treatment using the recommended mixing ratio. If the product label specifies a percentage-based ratio, apply that percentage directly to your engine’s total oil capacity. For example, if the instructions recommend a 10% ratio and your engine holds exactly 1,000 milliliters of oil, you will need to add 100 milliliters of the treatment. Use a clean, graduated measuring cup to measure the fluid precisely if the bottle does not feature clear volume markings.
Understand the mechanical risks associated with over-treating your engine oil. Adding too much treatment increases the total volume of fluid in the crankcase, which can lead to oil aeration. When the oil level is too high, the spinning crankshaft whips air into the oil, creating a frothy foam. This foamy mixture cannot be pumped effectively, leading to a sudden drop in oil pressure, localized overheating, and accelerated wear on critical components like the camshaft and piston rings. Furthermore, excessive additives can alter the oil’s engineered viscosity, preventing it from flowing quickly during cold starts.
Under-treating the engine oil also carries downsides, primarily rendering the application ineffective. If you add too little of the treatment, the active ingredients will be too diluted within the base oil to provide any noticeable protective benefits or chemical stability. Always aim for the precise ratio recommended by the manufacturer to ensure the additive functions as intended without disrupting the base oil’s performance.
Step-by-Step Application Process
Deciding when to apply the oil treatment is the first step in the physical application process. The most effective time to add an oil treatment is during a fresh oil change. Introducing the additive alongside clean, unused engine oil ensures that the treatment can disperse evenly throughout a clean system, working in harmony with the fresh detergent and anti-wear packages already present in the new base oil.
If you choose to add the treatment as a top-up between scheduled oil changes, you must first verify that there is sufficient physical space in the crankcase. Check the dipstick or sight glass to ensure the current oil level is low enough to accommodate the volume of the treatment without exceeding the maximum fill line. If the oil level is already at the “Full” or “Max” mark, do not add the treatment unless you drain an equivalent volume of oil first.
Ensure the motorcycle is stable, the ignition is turned off, and the keys are removed from the switch to prevent any accidental starting during the procedure. Slowly unscrew the oil filler cap counterclockwise. Place the cap on a clean, lint-free rag on your workbench; never place it directly on the ground where it can pick up dirt, sand, or moisture.
Insert your clean, dry funnel into the oil filler neck. If you are performing a complete oil change, pour in the fresh engine oil first, leaving out a volume equal to the amount of oil treatment you calculated in the previous section. For instance, if your engine requires 1,000 milliliters of total fluid and you are adding 100 milliliters of treatment, pour in exactly 900 milliliters of fresh engine oil first.
Before opening the F2R oil treatment bottle, shake it vigorously for at least thirty seconds. Chemical additives, viscosity modifiers, and solid lubricants can settle at the bottom of the container during storage and transport. Shaking the bottle thoroughly ensures that all active ingredients are suspended evenly in the carrier oil before you pour them into the engine.
Slowly pour the measured amount of oil treatment through the funnel into the filler neck. Because many oil treatments have a thicker consistency than standard engine oil, pour slowly to prevent the fluid from backing up in the funnel and spilling over the engine casing. If any spills occur, wipe them up immediately with a clean microfiber rag to prevent the oil from burning and smoking when the engine heats up.
Remove the funnel and inspect the oil filler cap’s O-ring or gasket for any signs of cracking, flattening, or degradation. If the seal is in good condition, screw the cap back onto the filler neck clockwise. Hand-tighten the cap securely to avoid stripping the plastic threads; do not use pliers or adjustable wrenches unless the manufacturer specifies a particular torque value for a metal cap.
Start the engine immediately after securing the filler cap and let it idle on the center stand for 10 to 15 minutes. Do not rev the engine aggressively or take the motorcycle for a high-speed ride immediately. Allowing the engine to idle at a stable speed gives the oil pump sufficient time to draw the treatment from the oil pan, mix it thoroughly with the base oil, and distribute the blended lubricant to all critical moving parts, including the valve train, cylinder walls, and transmission gears.
Post-Application Verification and Monitoring
Once the engine has idled for the recommended duration, turn off the ignition and let the motorcycle sit undisturbed on its center stand for 5 to 10 minutes. This waiting period is crucial because it allows the warm oil to drain back down from the cylinder head and upper engine components into the oil pan, ensuring you get an accurate measurement of the total oil volume.
Check the oil level again using the dipstick or the sight glass while keeping the motorcycle perfectly upright. The oil level should sit comfortably between the minimum and maximum indicators, ideally just below the upper limit. If the level is above the maximum mark, you must address the overfill before riding. If the level is correct, wipe the dipstick clean, reinsert it, and tighten the cap.
Conduct a brief, cautious test ride in a controlled environment, such as a quiet residential street or an empty parking lot. Keep your speed moderate and pay close attention to the overall feel of the motorcycle. This initial ride helps verify that the engine is operating normally under light load conditions.
Monitor the motorcycle closely for any unusual symptoms during and immediately after the test ride. Watch for excessive blue or white smoke emitting from the exhaust pipe, which can indicate that oil is bypassing the piston rings or valve seals due to overfilling or viscosity issues. Keep an eye on the dashboard for any warning lights, particularly the oil pressure warning indicator, which must remain off during operation.
Listen carefully to the sound of the engine. Any new or unusual mechanical noises, such as ticking, metallic knocking, or a high-pitched whine, can indicate that the oil is foaming or that the oil pump is struggling to circulate the thicker fluid mixture. If you notice any of these sounds, park the motorcycle safely and shut down the engine immediately.
Continue to follow your motorcycle manufacturer’s recommended oil change intervals. Adding an oil treatment does not extend the life of your base oil indefinitely. Over time, engine oil still accumulates combustion byproducts, soot, moisture, and fuel dilution, while its shear stability naturally degrades. Regular oil changes remain the foundation of proper motorcycle maintenance.
Troubleshooting Common Application Issues
If you discover that you have accidentally overfilled the crankcase during the application process, do not operate the motorcycle. Riding with an overfilled engine can cause permanent damage to internal seals and gaskets. To correct this, place a clean drain pan beneath the engine and carefully loosen the oil drain plug to let a small, controlled amount of oil escape, then retighten the plug to the specified torque. Alternatively, you can use a clean fluid extraction syringe with a flexible hose inserted through the oil filler neck to draw out the excess fluid without messing with the drain plug.
Be aware of potential wet clutch compatibility issues after adding any oil treatment. Most gasoline motorcycles utilize a wet clutch system, where the engine oil also lubricates the clutch plates. If an additive contains friction modifiers that are incompatible with wet clutches, you may experience clutch slippage. This symptom manifests as the engine speed (RPM) rising rapidly when you twist the throttle, but the motorcycle failing to accelerate proportionally.
If you experience persistent clutch slippage, abnormal engine noises, or if the oil pressure warning light remains illuminated, stop riding immediately. Continuing to run the engine under these conditions can glaze or burn the clutch plates, or cause severe internal engine damage. The safest course of action is to drain the treated oil completely, replace the oil filter, refill the crankcase with fresh, manufacturer-approved motorcycle oil that meets JASO MA or MA2 standards, and consult a qualified mechanic to inspect the system.
Frequently Asked Questions (FAQ)
Can I mix F2R oil treatment with synthetic and semi-synthetic oils?
Always check the specific F2R product label for base oil compatibility before mixing. While many modern oil treatments are formulated to blend with mineral, semi-synthetic, and fully synthetic oils, some additives are designed only for specific oil types. If the product label does not explicitly state compatibility with your chosen oil type, avoid mixing them to prevent chemical incompatibility or additive dropout.
Will adding oil treatment void my motorcycle's warranty?
Using third-party chemical additives can potentially affect your motorcycle’s factory warranty. Many manufacturers state in their warranty terms that damage caused by non-approved aftermarket fluids or additives is not covered. Before applying any treatment to a new or warrantied motorcycle, review your owner’s manual warranty section and consult an authorized dealership to ensure you do not compromise your coverage.
Community discussion
Share your experience or ask a question. Comments are reviewed before publication.