
Achieving maximum water repellency on your car windshield during the heavy monsoon season in the Philippines requires the right tools and a meticulous application process. Utilizing a professional compression sprayer like the ik multi pro 2 allows you to mist glass cleaners, prep agents, or sprayable silica-based sealants with unmatched precision and uniformity. When water repellent coatings are applied correctly, rain droplets bead up and slide off the glass effortlessly, significantly improving visibility and driving safety during sudden downpours.
The tropical climate in the Philippines presents unique challenges for automotive glass care. High humidity levels and intense heat can cause detailing chemicals to dry or flash prematurely, leading to uneven coverage and stubborn streaks. By understanding how to prepare your glass and utilize the consistent, pressurized output of a professional sprayer, you can achieve a durable hydrophobic barrier that stands up to harsh tropical weather.
Preparation: Tools and Conditions for a Successful Application
To ensure the hydrophobic coating bonds chemically to the glass, you must prepare your workspace and gather your detailing arsenal.
Products mentioned in this guide
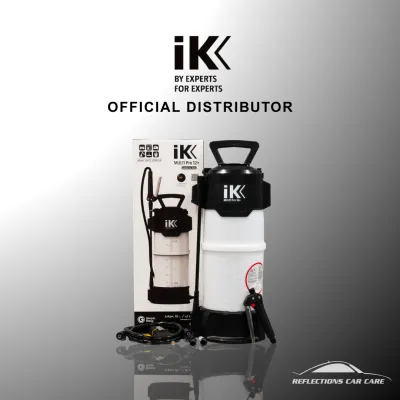
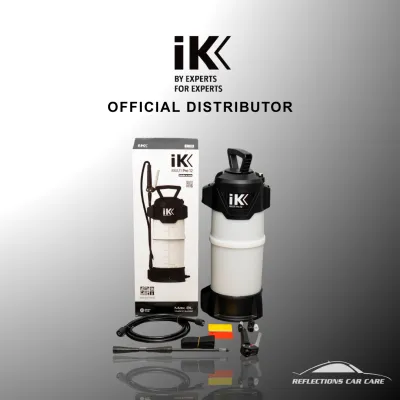
Prices are valid at publication and may change. Please refer to the product page for the latest price.
Essential Tools:
- IK Multi Pro 2 Sprayer: This professional-grade compression sprayer is equipped with highly resistant Viton seals, making it ideal for spraying isopropyl alcohol (IPA) prep solutions, specialized glass cleaners, or sprayable water repellents.
- Dedicated Glass Cleaner: A residue-free, ammonia-free formula designed to lift initial road grime, grease, and dust without leaving films behind.
- Decontamination Clay or Glass Polish: A glass clay bar or specialized cerium oxide polish to strip stubborn water spots, mineral deposits, and bonded contaminants.
- Microfiber Towels: Several clean, high-density, lint-free microfiber towels. Use waffle-weave towels for cleaning and short-pile towels for buffing.
- Applicator Pad: A high-quality microfiber or foam applicator pad to level the sealant evenly across the glass surface.
Ideal Environmental Conditions: In the Philippines, high ambient temperatures and humidity can cause liquid sealants to flash too quickly. This rapid evaporation prevents the active ingredients from leveling properly, leading to severe streaking and a weak chemical bond.
Always perform this application in a shaded, well-ventilated garage or workshop. Ensure the glass surface is completely cool to the touch before applying any chemicals. Never attempt this process under direct sunlight, as hot glass will instantly bake the product onto the surface.
Safety and Surface Check: Before starting, inspect your vehicle’s wiper blades. Worn, cracked, or hardened rubber blades will drag unevenly across a newly coated windshield, causing immediate smearing and premature degradation of the hydrophobic layer. Replace damaged blades beforehand to protect your investment.
Always consult the user manual of your specific vehicle and the safety data sheet of the chemical product you load into your sprayer. Ensure the chemicals you use are fully compatible with automotive glass, surrounding plastic trims, and rubber seals.
Step-by-Step Application Process for IK Multi Pro 2
Achieving a flawless, high-performance hydrophobic barrier requires a systematic approach to cleaning, spraying, and curing.

Step 1: Deep Clean and Decontaminate the Windshield
Begin by washing the entire vehicle, or at least the windshield area, with a standard pH-neutral car shampoo to remove loose dust, grit, and road grime. Rinse the glass thoroughly with clean water to prevent scratching during the subsequent decontamination steps.
Next, spray a dedicated automotive glass cleaner across the surface. Wipe it down using a clean microfiber towel to strip away surface oils, road film, and residual waxes from previous car washes.
Inspect the glass for stubborn water spots, tree sap, or industrial fallout, which are common in urban areas like Metro Manila. If the glass feels rough to the touch, use a glass clay bar lubricated with glass cleaner, or apply a mild glass polish to restore a perfectly smooth surface.
Perform a final wipe-down with an isopropyl alcohol (IPA) solution—which can be conveniently misted using your ik multi pro 2—to ensure no polishing oils or residues remain. The glass must be completely dry and chemically bare before the coating is applied.
Step 2: Apply the Coating Evenly
Depressurize your sprayer, fill it with your sprayable glass sealant or water repellent solution according to the manufacturer’s dilution and safety instructions, and pump it to build consistent operating pressure.
Mist a moderate, controlled amount of the product onto your microfiber applicator pad, or lightly spray a fine mist directly onto a section of the windshield.
Spread the product across the glass using a cross-hatch pattern—overlapping horizontal strokes followed immediately by vertical strokes. This technique guarantees full, uniform coverage without leaving any microscopic gaps.
Avoid applying too thick of a layer. A heavy application does not increase the durability of the hydrophobic barrier; instead, it creates a gummy residue that is exceptionally difficult to buff off and will result in distracting night-time glare and wiper chatter.
Step 3: Buffing and Curing
Always consult the specific chemical product’s label for exact flashing (drying) and curing times, as these parameters vary widely depending on whether you are using a polymer sealant, a silica-based (SiO2) spray, or a ceramic coating.
Once the applied product begins to haze or flash—typically indicated by a slight rainbow effect or a cloudy appearance—it is time to buff.
Take a clean, dry, high-gsm microfiber towel and gently buff the surface using moderate, circular pressure. Flip the towel to a fresh, dry side frequently to prevent redistributing the removed residue back onto the clean glass.
After buffing, keep the vehicle in a dry, sheltered environment for the entire curing duration specified by the chemical manufacturer. Prevent any rain, morning dew, or windshield washer fluid from contacting the glass during this critical bonding phase to ensure maximum longevity.
Verifying the Results and Maintaining the Coating
Once the curing process is complete, you can verify the performance of your hydrophobic barrier and take steps to prolong its lifespan.
The Water Bead Test: To test the hydrophobic effect, gently spray or pour clean water onto the windshield. A successful application will cause the water to immediately bead up into tight, high-contact-angle droplets. When driving at speeds above 50 to 60 km/h, these beads should effortlessly slide up and off the windshield without the aid of your wipers.
Maintenance in the Philippines’ Rainy Season: The tropical climate of the Philippines presents unique challenges, including heavy monsoon downpours and highly acidic road spray. To preserve the hydrophobic layer, wash your vehicle regularly using only pH-neutral car wash shampoos.
Avoid using harsh household dishwashing liquids, laundry detergents, or abrasive sponges, as these aggressive chemicals and materials will rapidly strip the protective coating from the glass. When visiting commercial car washes, request that they avoid using stiff-bristled brushes or highly alkaline pre-soaks on your windshield.
Wiper Care: Never operate your windshield wipers on dry glass. The friction between dry rubber and the glass surface can scratch the windshield and quickly abrade the protective coating.
If dust or light dirt accumulates on the glass, always activate your windshield washer fluid first to lubricate the surface before running the wipers. Ensure your washer reservoir is filled with a compatible, non-aggressive glass washer concentrate.
Common Application Mistakes to Avoid
Avoiding common pitfalls during the preparation and application stages will save you time and ensure a long-lasting hydrophobic effect.
- Working in Direct Sunlight: Applying glass sealants on hot glass causes the solvents to evaporate instantly. This prevents the product from leveling properly, leaving behind stubborn, cloudy streaks that are incredibly difficult to remove.
- Skipping Decontamination: Attempting to apply a water repellent over road film, water spots, or old wax prevents the sealant from bonding directly to the silica pores of the glass. The coating will fail prematurely, often washing away after the first heavy rain.
- Using Substandard Towels: Dirty, damp, or cheap microfiber towels will shed lint and spread oily residues across the glass, ruining the optical clarity of your windshield.
- Coating the Wiper Blades: Avoid spraying or wiping the water repellent directly onto the rubber wiper elements. This can cause the rubber to degrade, harden, or produce severe squeaking and smearing during operation.
Frequently Asked Questions (FAQ)
Can I apply IK Multi Pro 2 on side windows and mirrors?
Yes, you can use the exact same preparation, spraying, and buffing process to treat your side windows, rear windshield, and exterior side mirrors. Applying a hydrophobic barrier to these surfaces significantly improves lateral visibility and prevents water pooling, which is highly beneficial when checking your mirrors during heavy downpours.
What should I do if the windshield looks streaky or hazy after application?
Streaking or hazing typically indicates that the product was applied too thickly or was not fully buffed off during the flashing window. To resolve this, spray a very small amount of glass cleaner or isopropyl alcohol onto a clean microfiber towel and firmly buff the affected area. Alternatively, you can apply a very thin, fresh layer of the sealant over the streaks to reactivate the active ingredients, then immediately buff it clean with a fresh, dry microfiber towel.
Community discussion
Share your experience or ask a question. Comments are reviewed before publication.