
Changing motorcycle engine oil is one of the most frequent maintenance tasks you must perform, particularly when navigating the hot, humid, and congested roads of the Philippines. For many riders, the traditional method of crawling under the machine, struggling with a stubborn drain plug, and cleaning up messy spills can turn a quick chore into an exhausting ordeal. Using a fluid extractor pump offers a modern, clean, and highly efficient alternative that draws the old oil directly out of the crankcase through the dipstick or filler hole.
This approach is especially popular among scooter owners who want to avoid the hassle of removing plastic body panels or belly pans. By utilizing vacuum pressure, a fluid extractor pump pulls the spent lubricant into a sealed container in a matter of minutes, keeping your hands and your garage floor completely clean.
Benefits and Limitations of Using a Fluid Extractor Pump
One of the primary advantages of utilizing a fluid extractor pump is the elimination of the risk of stripping the oil pan threads. Motorcycle and scooter crankcases are typically made of soft aluminum, and over-tightening the steel drain plug can easily strip the threads, leading to an expensive and complex repair. Additionally, on many modern scooters, accessing the drain plug requires removing delicate plastic under-cowls or belly pans. An extractor pump bypasses these steps entirely, allowing you to complete the job from the top side of the engine. It also prevents hot oil from spilling onto the exhaust pipes, which can create unpleasant smoke and odors when you next ride.
Products mentioned in this guide

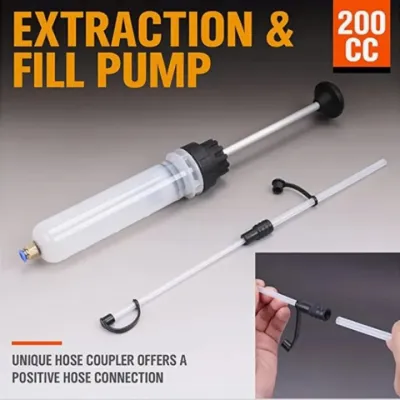
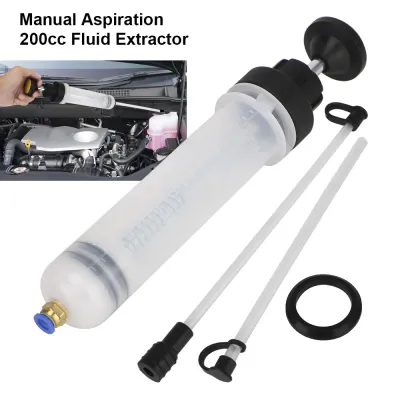
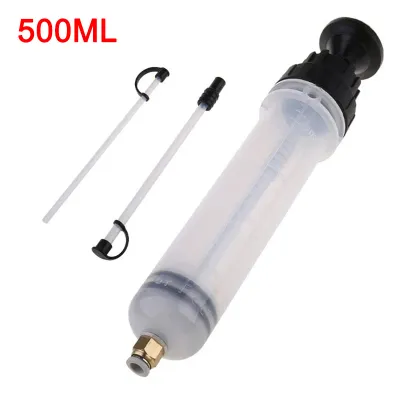
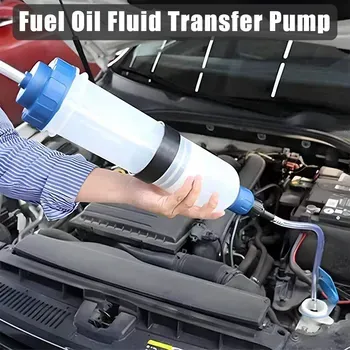
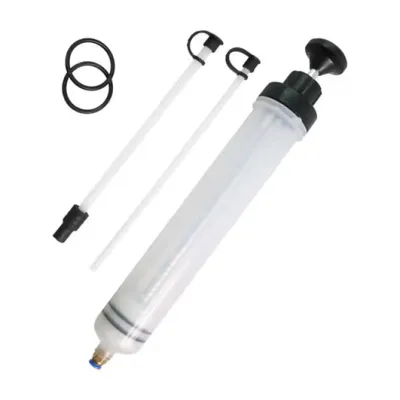
Prices are valid at publication and may change. Please refer to the product page for the latest price.
However, it is important to recognize the limitations of this method. Because the extraction tube relies on suction from above, it may not fully capture heavy metallic wear particles or thick sludge that naturally settles at the absolute bottom of the oil pan. Traditional gravity draining allows these heavier contaminants to wash out with the force of the exiting oil stream. For this reason, many motorcycle manufacturers and experienced mechanics recommend a hybrid maintenance schedule: use the extractor pump for your frequent, routine oil changes, but perform a traditional gravity drain at least once a year or every third oil change to ensure any settled debris is thoroughly flushed out.
Essential Tools and Materials for the Oil Change
Before starting, gather all necessary equipment to ensure a smooth workflow. You will need a reliable fluid extractor pump, which can be either a manual hand-pump model or a pneumatic version that connects to an air compressor. Manual pumps are highly portable and cost-effective, typically ranging from ₱800 to ₱2,500 in local automotive supply shops. Ensure your pump kit includes a selection of thin, flexible, and heat-resistant extraction tubes.

You also need the correct grade and volume of fresh motorcycle engine oil. Always consult your owner’s manual to verify the exact viscosity (such as 10W-40 or 10W-30) and performance specifications (like JASO MA2 for wet-clutch motorcycles or JASO MB for automatic scooters). Never substitute passenger car oil, as it lacks the specific additives required for motorcycle transmissions and clutches.
Additionally, prepare a replacement oil filter cartridge or clean the built-in metal strainer screen, along with any necessary replacement O-rings. Keep a clean funnel, several high-quality shop rags, and nitrile gloves nearby to protect your skin from used oil, which contains harmful combustion byproducts. Lastly, have a sealable, heavy-duty plastic container ready to temporarily store the waste oil if your pump’s reservoir is not large enough.
Before performing any maintenance, always check the applied product’s label and the treated item’s manufacturer instructions. If instructions conflict, the item is unidentified, or the use is not covered, stop and consult the manufacturer or a qualified professional.
Step-by-Step Guide to Extracting the Old Engine Oil
Executing a clean and thorough oil extraction requires methodical preparation and careful handling of the equipment. Following these steps will help you maximize the amount of old oil removed while protecting your engine’s internal components.
Preparing the Motorcycle
To ensure the oil flows smoothly through the narrow extraction tube, start by warming up the engine. Let the motorcycle idle on its stand for 3 to 5 minutes. This warms the oil, reducing its viscosity so that it flows quickly under vacuum pressure.
However, you must exercise caution: do not attempt to extract the oil immediately after a long, hard ride. If the engine is excessively hot, the oil can melt or deform the plastic extraction tubes, and contact with the hot engine casing or oil can cause severe skin burns. Always verify that the engine is warm to the touch, not scalding.
Park the motorcycle on a level surface, ideally using the center stand. This ensures the oil pools evenly at the bottom of the crankcase and keeps the dipstick or filler tube as vertical as possible. Finally, remove the oil filler cap or dipstick to break the internal vacuum, allowing air to flow freely into the crankcase as the oil is drawn out.
Inserting the Extractor Tube
Select the extraction tube from your pump kit that has the largest diameter that can still fit comfortably inside your motorcycle’s dipstick or filler opening. A wider tube allows the oil to flow faster, but it must not be forced down, as it could get wedged or damaged.
Gently feed the flexible tube down through the opening. Push it slowly until you feel it meet physical resistance, which indicates it has reached the bottom of the oil pan.
Once the tube touches the bottom, pull it back up by approximately 1 centimeter. This small adjustment is critical: if the tube is pressed flat against the bottom of the pan, the suction will seal the opening shut, stopping the flow. Raising it slightly also prevents the tube from directly sucking up concentrated pockets of thick sludge that could clog the narrow line. Secure the tube at the top using the pump’s built-in clip or a piece of tape to prevent it from sliding deeper or slipping out during the extraction.
Pumping and Extracting the Oil
Connect the extraction tube to the main inlet of the fluid extractor pump. If you are using a manual pump, vigorously stroke the handle 10 to 15 times to build up a strong vacuum inside the reservoir. For pneumatic models, connect your air line and engage the vacuum switch.
You will quickly see the warm, dark oil rise through the clear extraction tube and drain into the pump’s reservoir. Monitor the flow rate closely; if the oil flows very slowly, the oil may have cooled too much, or the tube might be slightly misaligned. If the flow stops prematurely, gently adjust the depth of the tube by sliding it up or down a few millimeters.
Continue the process until you hear a distinct gurgling or sucking air sound from the tube, which signals that the liquid oil level has dropped below the tube’s intake.
To maximize the extraction, gently and carefully tilt the motorcycle slightly to the side (only if it is safely supported on a stable center stand) to encourage any pooled oil in the corners of the crankcase to migrate toward the extraction tube. Perform one final pumping pass to draw out these remaining drops.
Replacing the Filter and Refilling with Fresh Oil
With the old oil successfully extracted, you must now address the oil filter. Depending on your motorcycle model, this may involve removing a spin-on canister filter or opening a small side cover to replace an internal paper filter cartridge. Some smaller underbone motorcycles and scooters use a washable metal mesh strainer instead of a paper filter. Refer to your manufacturer’s instructions to locate and service this component.
When replacing a paper filter or cleaning a strainer, always inspect the rubber O-rings and gaskets. Remove the old O-ring carefully, ensuring no debris is left in the sealing groove. Lightly coat the new O-ring with a smear of fresh engine oil before installing it; this prevents the rubber from pinching, tearing, or binding when you tighten the cover.
Next, place a clean funnel into the oil filler hole. Carefully pour in the exact volume of fresh motorcycle oil specified in your owner’s manual. Be precise, as both under-filling and over-filling can cause serious engine performance issues or seal damage. Once completed, reinstall the oil filler cap or dipstick securely to prevent leaks.
Verify the initial oil level. Depending on your motorcycle, this is done either by looking at the sight glass on the side of the crankcase or by inserting the dipstick. If using a dipstick, remember that most manufacturers specify checking the level with the dipstick resting on the threads, not screwed in.
Post-Change Verification and Safe Waste Disposal
Before taking your motorcycle out on the road, perform a quick safety check. Start the engine and let it idle in place for about one minute. Do not rev the engine; allow the oil pressure to build up naturally.
While the engine is idling, inspect the area around the oil filter housing, the filler cap, and the untouched drain plug for any signs of weeping or active oil leaks. Since you did not remove the drain plug, it should remain dry, but it is always wise to verify.
Turn off the engine and let the motorcycle sit for 3 to 5 minutes to allow the fresh oil to drain back down into the oil pan. Recheck the oil level using the dipstick or sight glass, ensuring it sits comfortably between the minimum and maximum marks. Add a small amount of oil if the level has dropped slightly after filling the new filter.
Finally, handle the waste oil responsibly. Pour the extracted oil from the pump’s reservoir into a clean, sealable plastic container. In the Philippines, pouring used motor oil down household drains, into storm sewers, or directly onto the soil is illegal and causes severe environmental damage to local waterways. Take the sealed container to an authorized recycling center, a local auto repair shop, or a designated hazardous waste disposal facility where it can be processed safely.
Frequently Asked Questions (FAQ)
Is a fluid extractor pump as effective as gravity draining for motorcycles?
Fluid extractor pumps are highly effective for routine maintenance, removing up to 90% to 95% of the liquid oil quickly and cleanly. They are an excellent choice for riders who perform frequent oil changes due to high-mileage commuting in tropical traffic. However, gravity draining remains slightly superior for flushing out heavy metallic wear particles and dense sludge that settle at the absolute lowest point of the oil pan. For the best long-term engine health, consider using the extractor pump for your regular oil changes, but perform a traditional gravity drain once a year or every third oil change to ensure a complete flush of the crankcase.
Community discussion
Share your experience or ask a question. Comments are reviewed before publication.