
Checking and adjusting your vehicle’s wheel alignment at home is a practical way to maintain handling performance and prevent premature tire wear. By using basic wheel alignment tools, you can measure and adjust camber and toe angles in your own garage. However, achieving a precise alignment requires patience, a perfectly level workspace, and a clear understanding of your vehicle’s suspension limits. Taking the time to perform these checks can save you pesos (₱) on professional shop fees while keeping your vehicle running smoothly.
Understanding Camber, Toe, and DIY Alignment Limits
Camber is the inward or outward tilt of the tire when viewed from the front of the vehicle. Negative camber means the top of the tire tilts inward toward the engine, while positive camber means it tilts outward. Proper camber ensures the tire tread maintains optimal contact with the road surface during cornering, preventing uneven shoulder wear.
Toe refers to the direction the tires point relative to the vehicle’s centerline when viewed from directly above. Toe-in means the front edges of the tires point toward each other, while toe-out means they point away. Incorrect toe is the primary cause of rapid, scrub-like tire wear and can make the steering feel either overly darting or sluggish.
Products mentioned in this guide
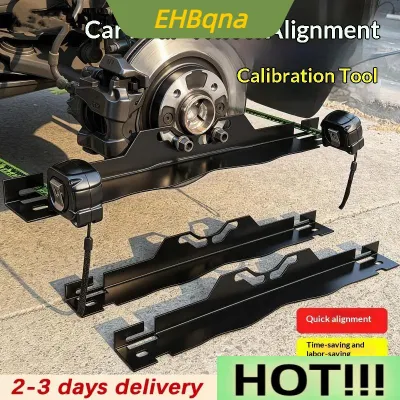
1 Lazada user ratings
he gave me 1pcs! i dont like this seller. check the other store i post
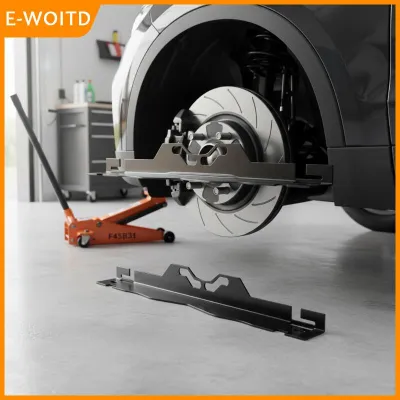
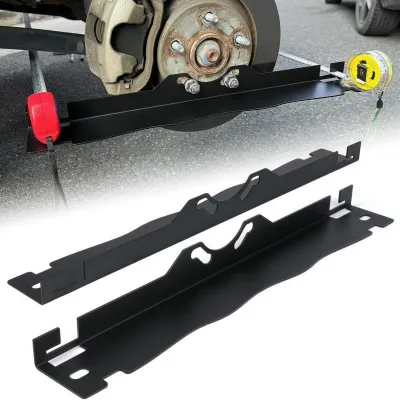
30 Lazada user ratings
good, Improves driving stability, Easy to install and use, Compact and portable design, tapos na gamitin, tago mina, private use only
👌Ease of Use:10 🔨Durability:10 thick enough 🔄Versatility:10
goods kung ano ung nakita ko sya den ung dumating
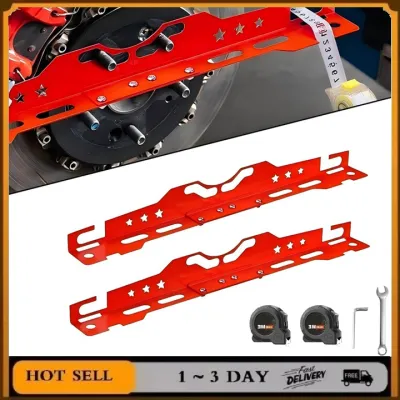
11 Lazada user ratings
Thank you, the material is very good, and I like the appearance very much.
Not aluminum and not the same as per photo
Received in good packaging
51 Lazada user ratings
Suitable for DIY car maintenance, Clear step-by-step instructions,
Ok yong appearance.... Magagamit ko to soon.
Helps adjust tire angles,
🔄Versatility:good 👍 👌
very good quality
5 Lazada user ratings
Orange color design, Accurate measurement,
51 Lazada user ratings
dapat kasi nasa good condition ang items bago nyo ideliver sa buyer at gumagana ng maayos ... nag grinder pa ako at nagwelding,naputol kasi …Read full reviewShow less
dapat kasi nasa good condition ang items bago nyo ideliver sa buyer at gumagana ng maayos ... nag grinder pa ako at nagwelding,naputol kasi pundido ang bakal konting pukpok lang naputol na sya para lang maalign ang items na binili ko ..WALA SA ALIGNMENT..
🔨Durability:legit talaga c seller, ang bilis damating High-quality materials for long-lasting use, Perfect alignment every time, magagamit t…Read full reviewShow less
🔨Durability:legit talaga c seller, ang bilis damating High-quality materials for long-lasting use, Perfect alignment every time, magagamit talaga ng anak ko sa business niya
dumating na Thanks seller maganda di pa nagamit hehe. thanks din sa Nag deliver medyo kinabahan kala nya di kukunin. hehe
Thank you IFMoto nice item not yet try but look durable.thank you sa Lazada at Kay Boss Rider
Oky nmn yng items
Prices are valid at publication and may change. Please refer to the product page for the latest price.
While DIY methods using physical tools can yield highly functional results, they lack the sub-millimeter precision of professional computerized laser alignment machines. A professional alignment rack measures all four wheels simultaneously relative to the vehicle’s thrust line. DIY measurements are highly dependent on your setup’s physical accuracy and the flatness of your floor.
Before attempting any adjustments, inspect the vehicle for underlying mechanical issues. If you suspect bent control arms, damaged steering racks, or worn wheel bearings, stop immediately. Attempting to align a vehicle with damaged suspension components is unsafe and ineffective. Additionally, vehicles equipped with advanced driver assistance systems (ADAS)—such as lane-keep assist—often require professional sensor recalibration after any steering or suspension geometry changes.
Essential Tools and Safe Vehicle Preparation
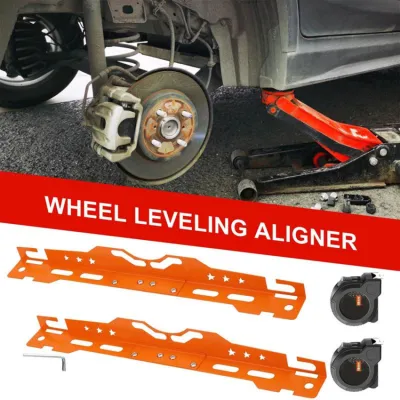
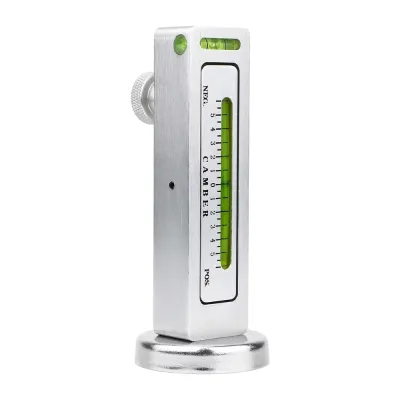
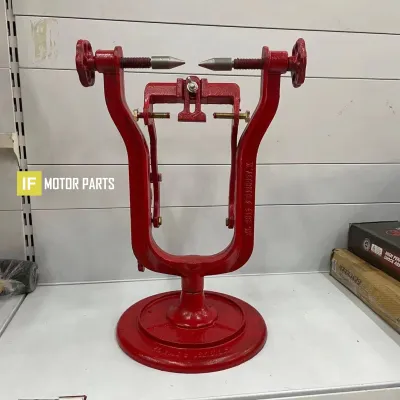
To perform a successful home alignment, you will need a reliable set of wheel alignment tools. A digital inclinometer or a dedicated camber gauge is necessary for measuring vertical angles. For toe measurements, you can use specialized toe plates with dual tape measures, or set up a traditional string box using high-tensile string, jack stands, and rulers. You will also need a reliable floor jack, heavy-duty jack stands, wheel chocks, and basic hand tools like wrenches and penetrating fluid.

Safety is paramount when working underneath a vehicle. Park on a completely flat, level concrete surface, such as a garage floor. In tropical climates like the Philippines, outdoor driveways often feature steep slopes for monsoon rainwater runoff, which will distort your measurements. Use a long carpenter’s level to verify the workspace is flat. Securely support the vehicle on jack stands and place wheel chocks behind the tires remaining on the ground.
Before taking any measurements, verify that your tires are inflated to the manufacturer’s recommended cold pressure. Unequal tire pressure directly alters the ride height and skews your alignment readings. Inspect the suspension bushings, ball joints, and tie rod ends for excessive play by raising the wheel and shaking it firmly at the 12-and-6 o’clock positions, then the 9-and-3 o’clock positions. If you detect any clicking, knocking, or loose movement, replace the worn parts before proceeding.
Step-by-Step Guide to Measuring Camber and Toe
To measure camber, ensure the vehicle is resting fully on its suspension on a level surface. Place your digital inclinometer against a flat, vertical portion of the wheel rim or use a camber gauge adapter that securely grips the outer lip of the wheel. Ensure the tool is perfectly vertical. Read the angle displayed on the digital screen; a negative sign typically indicates negative camber, while a positive reading indicates positive camber. Record this baseline value for both sides.
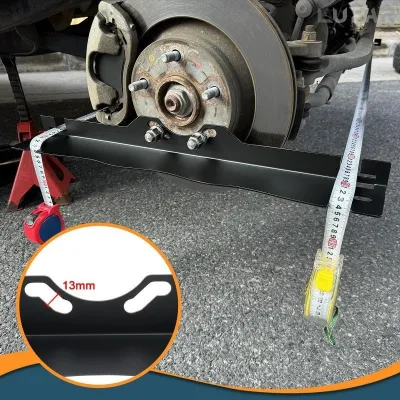
To measure toe using toe plates, press one plate flat against the outer sidewall of each front tire, ensuring they are parallel to the ground. Run two tape measures through the slots at the front and rear edges of the plates. The difference between the front measurement and the rear measurement determines your toe. If the front measurement is smaller than the rear, you have toe-in; if it is larger, you have toe-out. Alternatively, a string box setup involves running parallel strings along both sides of the vehicle at hub height, measuring the distance from the string to the front and rear edges of each wheel rim to calculate individual wheel toe.
Every time you lift the vehicle or make an adjustment, the suspension geometry binds slightly due to lateral tire friction against the ground. To get accurate readings, you must settle the suspension. Roll the vehicle backward and forward several times, or bounce the front and rear bumpers vigorously. Professional shops use slip plates under the tires to prevent this binding, but at home, rolling the vehicle is a reliable way to relieve tension before taking final measurements.
Adjusting Tie Rods and Camber Bolts Safely
Consult your vehicle’s specific service manual to locate the correct adjustment points. For toe adjustments, you will turn the threaded inner tie rod shafts, which are secured by lock nuts against the outer tie rod ends. For camber, many modern vehicles do not have factory-adjustable camber. You may need to install aftermarket eccentric camber bolts in the lower strut mounts, or adjust the upper control arms or camber plates if your vehicle is equipped with them.
Spray all adjustment threads with penetrating oil to break loose any rust or road grime. Loosen the tie rod lock nut while holding the outer tie rod end steady with a wrench to prevent damage to the ball joint boot. Make very small, incremental turns—such as a quarter-turn at a time—on the inner tie rod. Turning the rods in equal but opposite directions on both sides helps keep the steering wheel centered. Always re-measure your angles after making an adjustment and settling the suspension.
Once you achieve the desired alignment specifications, tighten all lock nuts and fasteners to the manufacturer’s specified torque values. Loose steering or suspension components can fail catastrophically while driving. Turn the steering wheel fully from lock to lock to ensure there is no binding, rubbing, or interference with brake lines and ABS sensor wires. Because steering and suspension adjustments directly impact vehicle control, always refer to your original vehicle documentation and seek qualified professional assistance if you are unsure of any step.
Verifying the Alignment and Knowing When to Stop
After completing your adjustments and securing all fasteners, conduct a safe, low-speed test drive. Choose a flat, straight, and quiet road with minimal traffic. Release the steering wheel briefly to see if the vehicle tracks straight or pulls to one side. Verify that the steering wheel is perfectly centered when driving straight. Pay attention to how the steering feels when turning and returning to the center position.
Over the next few weeks of normal driving, regularly inspect your tire tread. Run your hand across the tread surface from the inside edge to the outside edge. If you feel a sharp, feather-like edge on the tread blocks, it indicates excessive toe scrub. Uneven shoulder wear suggests that your camber adjustments may still need refinement.
If you experience steering wheel vibration, a wandering sensation at higher speeds, or if the vehicle pulls aggressively to one side, your DIY adjustment was unsuccessful. Do not attempt to drive long distances under these conditions. If you cannot bring the alignment within the manufacturer’s baseline specifications using basic tools, stop and schedule an appointment with a professional alignment shop immediately.
Frequently Asked Questions (FAQ)
Can I align my wheels without specialized alignment tools?
It is possible to estimate toe using basic household items like a string line and a standard tape measure, but the margin of error is significantly higher. Without dedicated wheel alignment tools like toe plates or a digital camber gauge, it is extremely difficult to detect subtle angle variations. Relying solely on improvised tools increases the risk of rapid tire wear and poor handling, making specialized DIY tools a highly recommended investment for accurate results.
Does adjusting camber and toe affect my vehicle's warranty?
Performing your own suspension adjustments or installing aftermarket camber bolts can impact your vehicle’s warranty coverage. Review your owner’s manual and warranty terms carefully before making modifications. If an improper DIY adjustment or a non-approved aftermarket component causes damage to related parts—such as wheel bearings, steering racks, or tires—the manufacturer may deny warranty claims for those specific repairs.
How often should I check my wheel alignment at home?
You should perform a basic alignment check whenever you experience a harsh impact, such as hitting a deep pothole or a curb. It is also highly recommended to check your alignment after installing new suspension components like struts, control arms, or tie rod ends. Regularly inspecting your tire tread for uneven wear patterns serves as an excellent ongoing indicator of your vehicle’s alignment health between professional service intervals.
Community discussion
Share your experience or ask a question. Comments are reviewed before publication.