
Upgrading your motorcycle’s stopping power is a practical modification, especially when navigating the wet, unpredictable roads and heavy stop-and-go traffic of the Philippines. One of the most common upgrades for underbones and scooters is switching to a larger brake rotor, with 220mm being a highly popular size. However, a 220mm caliper bracket is not a universal fit. To check if a 220mm caliper bracket is compatible with your motorcycle’s brake setup, you must verify the mounting points on your front fork or rear swingarm, match the bracket to your exact caliper model, and confirm the lateral clearance of your wheel hub and rotor.
Before purchasing any aftermarket brake components, always check your motorcycle manufacturer’s service manual and the installation instructions of the aftermarket parts. Because the braking system is your vehicle’s most critical safety feature, any incompatibility or improper installation can lead to catastrophic mechanical failure. If you encounter conflicting specifications or are unsure about the fitment, stop the installation and consult a qualified professional mechanic.
Understand What "220mm" Means for Your Brake Setup
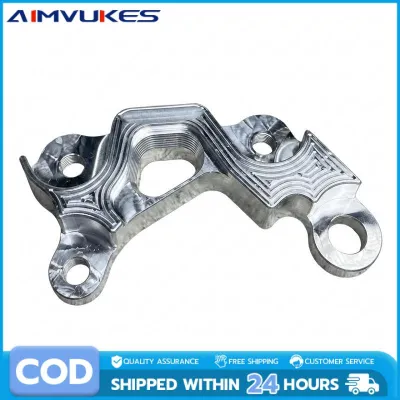
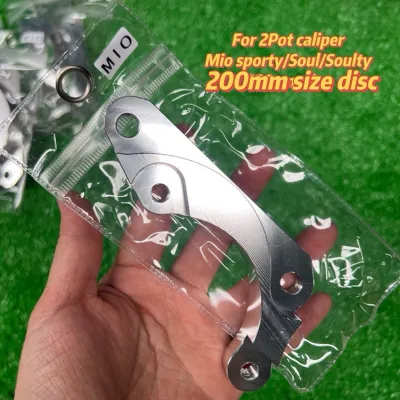
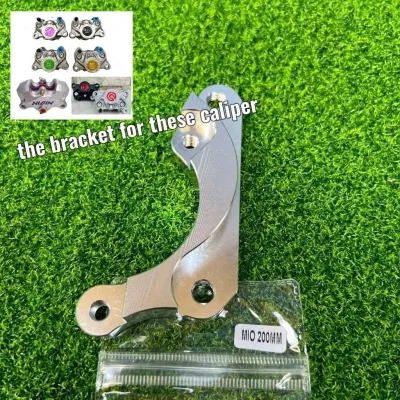
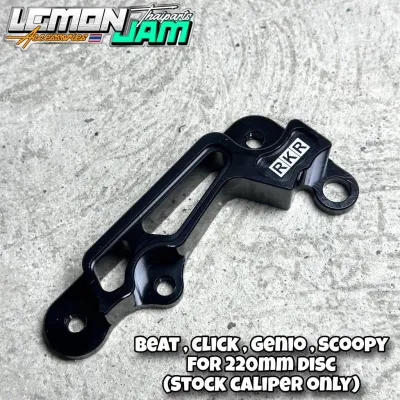
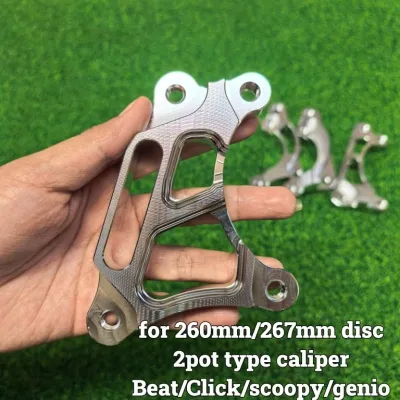
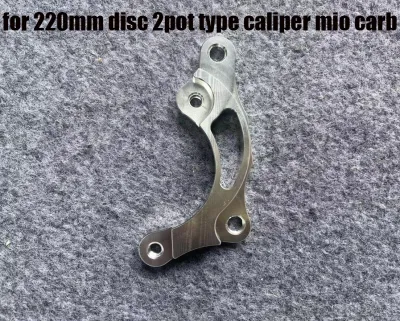
When shopping for a “220mm caliper bracket,” “220mm” refers specifically to the outer diameter of the brake rotor (disc) that the bracket is designed to accommodate. The bracket itself does not measure 220mm; rather, it is an engineered spacer designed to reposition your brake caliper further away from the wheel axle so that it can properly clamp onto a larger 220mm disc. In the local market, quality CNC-machined brackets typically range from ₱300 to ₱1,500 depending on the brand and material.
Products mentioned in this guide
![[Fast Delivery] For Caliper 2 Pot Type220mm 260mm Disc Bracket Mio Sporty Soul Soulty Click Beat Scoopy Genio 2Pot](https://img.lazcdn.com/g/p/676a402a9b6c9994915adabcbb96f4a0.jpg_400x400q80.jpg_.webp)
Prices are valid at publication and may change. Please refer to the product page for the latest price.
The core function of the caliper bracket is to bridge the physical gap between your motorcycle’s fork leg (for front brakes) or swingarm (for rear brakes) and the brake caliper. It must hold the caliper at the precise angle and distance required to ensure the brake pads make full, even contact with the rotor’s swept area. If the bracket is slightly off, the brake pads may only grip a portion of the rotor, leading to poor stopping power and rapid, uneven pad wear.
To achieve a successful installation, a 220mm caliper bracket must simultaneously satisfy three distinct fitment dimensions. First, it must bolt perfectly to the mounting lugs on your motorcycle’s fork or swingarm. Second, it must match the mounting pattern, bolt spacing, and offset of your specific brake caliper. Finally, it must align perfectly with the lateral position and thickness of the 220mm rotor. If any one of these three interfaces is mismatched, the system will not function safely.
Verify Fork and Shock Mounting Specifications
The first step in verifying compatibility is examining the mounting points on your motorcycle’s fork leg or swingarm. You must first identify whether your setup uses a radial or an axial mounting configuration. Axial mounts have bolts that run perpendicular to the brake rotor (entering from the side), which is common on standard underbones and older scooters. Radial mounts feature bolts that run parallel to the rotor (entering from the front or rear).

Once you have identified the mounting type, use a digital caliper to measure the center-to-center distance between the two mounting holes on the fork. Common spacing measurements for small-displacement motorcycles range from 43mm to 95mm. Additionally, measure the diameter of the mounting holes (usually 8mm or 10mm) and the thickness of the fork’s mounting lug to ensure the mounting bolts will have sufficient thread engagement.
After gathering these measurements, cross-reference them with your motorcycle’s service manual or the bracket manufacturer’s fitment chart. Never assume a bracket will fit based solely on a generic online listing. For instance, a bracket labeled for a specific scooter model might not fit if your vehicle has aftermarket forks or if the manufacturer altered the fork casting geometry for a different model year.
Match the Bracket to Your Specific Caliper Model
Even if a bracket bolts perfectly to your front forks, it must also match your brake caliper. Caliper brackets are machined to accommodate specific caliper mounting standards and hole spacings. For example, aftermarket calipers often use standard mounting patterns such as 84mm axial spacing (common for Brembo-style two-piston calipers) or 100mm and 108mm radial spacing for larger four-piston setups.
You must identify the exact brand, model, and piston configuration of the caliper you plan to run. A bracket designed for a stock Nissin two-piston caliper will not line up with an aftermarket Brembo, Adelin, or RCB caliper, even if they are all intended for a 220mm rotor. The physical body shape, offset, and bolt-hole positioning of each caliper brand vary significantly.
Additionally, verify the caliper’s mounting bolt diameter and thread pitch. Most caliper mounting bolts use an M10 size with a 1.25mm thread pitch, but some specialized setups may use an M10x1.5 or M8 thread. The bracket’s threaded holes or pass-through holes must match these specifications. Using a bracket designed for a different caliper model will result in severe misalignment, causing the brake pads to bind, the rotor to warp, or the caliper to lock up.
Check Rotor Thickness and Wheel Clearance
Beyond the mounting bolt patterns, you must account for the spatial alignment within your wheel assembly. Brake rotors of the 220mm variety come in several thicknesses, typically ranging from 3mm to 5mm. The caliper bracket’s lateral offset—the distance it pushes the caliper inward or outward relative to the fork leg—must match the exact lateral position of your rotor’s braking surface. If the offset is incorrect, the caliper will sit too close to one side of the rotor, causing constant friction and premature wear.
You must also check for adequate clearance between the caliper body and the surrounding wheel components. On compact wheel setups, such as 14-inch scooter wheels or narrow 17-inch spoke wheels, a larger caliper paired with a 220mm bracket can sit dangerously close to the wheel spokes, hub, or inner fork leg. Ensure there is a safety margin of at least 2mm of clearance around the entire caliper body to prevent contact during wheel flex.
Before finalizing your purchase, confirm that the 220mm rotor itself is compatible with your wheel hub’s mounting pattern. Once you have all the components, perform a dry fit by assembling the wheel, rotor, bracket, and caliper without adding brake fluid. Spin the wheel slowly by hand to visually verify that the brake pads sit squarely in the center of the rotor’s braking surface and that no metal-to-metal rubbing occurs.
Safety Boundaries and Installation Rules
Your motorcycle’s braking system is your primary safety defense; therefore, there is absolutely no room for compromise. Never use uncertified, homemade, or 3D-printed caliper brackets, as these materials cannot withstand the extreme shear stresses and high temperatures generated during emergency braking. Only purchase brackets CNC-machined from high-grade billet aluminum (such as 6061-T6 or 7075-T6) from reputable manufacturers.
Do not attempt to use random washers, unverified spacers, or longer non-graded bolts to force a mismatched bracket to fit your fork leg. Doing so alters the load distribution on the mounting bolts, introducing dangerous shear stresses that can cause the bolts to snap under heavy braking loads. If a bracket does not line up perfectly flush with your mounting points without forcing it, it is the wrong part for your vehicle.
When performing the final assembly, always use a calibrated torque wrench to tighten all mounting bolts to the exact torque specifications specified by your motorcycle’s manufacturer and the caliper manufacturer. Apply a medium-strength thread-locking compound to the bolt threads to prevent them from backing out due to road vibrations. Finally, because routing brake lines and bleeding air require specialized tools, it is highly recommended to have a qualified professional mechanic perform or inspect the final installation.
Frequently Asked Questions (FAQ)
Can I use spacers to make an incompatible caliper bracket fit?
No, you should never use generic spacers, washers, or collar sleeves to correct lateral misalignment or mismatched bolt spacing on a caliper bracket. Adding unverified spacers creates a leverage effect that multiplies the shear stress on the mounting bolts, which can lead to structural failure under sudden braking. If a caliper bracket does not sit perfectly flush and aligned with your fork lugs and caliper mounts on its own, it is the incorrect part for your setup.
Do I need to change my brake line when installing a new caliper bracket?
In many cases, yes. Moving your caliper outward to accommodate a larger 220mm rotor changes the physical distance and routing angle between the master cylinder and the caliper. You must check if your original brake line has enough slack to accommodate this new position throughout the entire range of your front suspension’s travel. If the stock line is stretched tight or kinked, upgrade to a high-quality braided stainless steel brake line of the appropriate length to maintain consistent hydraulic pressure.
Community discussion
Share your experience or ask a question. Comments are reviewed before publication.