
Choosing the right coolant reservoir tank for your Honda Click or Yamaha Mio depends entirely on identifying your scooter’s exact model year, engine displacement, and chassis generation. Because these popular liquid-cooled and air-cooled scooters have undergone multiple design revisions over the years, a reservoir tank built for one generation will not align with the mounting brackets, frame clearance, or hose routes of another. To make the correct purchase, you must verify your vehicle’s specific model code, compare the structural integrity of OEM and aftermarket options, and perform precise physical measurements of the mounting points and hose inlets before installation.
In the tropical climate of the Philippines, where high ambient temperatures and heavy stop-and-go traffic put immense stress on motorcycle engines, a fully functional cooling system is vital. The coolant reservoir tank, also known as the expansion or overflow tank, plays a critical role in managing the thermal expansion of the engine coolant. As the engine heats up, excess coolant expands and flows into the reservoir; as the engine cools, the resulting vacuum draws the fluid back into the radiator. A cracked, leaking, or improperly fitted reservoir disrupts this pressure balance, leading to coolant loss, engine overheating, and potentially catastrophic cylinder head damage.
Identify Your Exact Honda Click or Yamaha Mio Variant
To avoid purchasing an incompatible part, you must first pinpoint the exact generation and engine displacement of your scooter. Manufacturers frequently update frame designs and internal component layouts during model refreshes, which directly alters the shape and mounting location of the coolant reservoir. For example, a reservoir tank designed for an older Honda Click 125i V1 will not fit the tighter, redesigned frame of a Honda Click 125i or 150i V2 Game Changer, nor will it match the completely overhauled chassis of the newer Honda Click 160.
Products mentioned in this guide
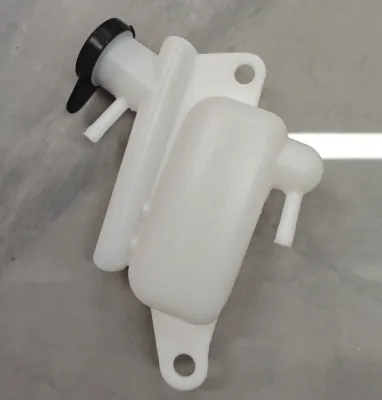
![[Fast Delivery] ORIGINAL HONDA - TANK RESERVE- CLICK 125 V2- 19111-K59-A10](https://img.lazcdn.com/g/p/46f316997bec5a1e98c3fd4af320b632.png_400x400q80.png_.webp)
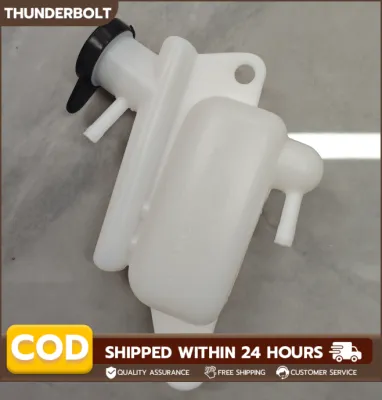
![[TOP SLAE] CLICK 150 & CLICK 125 V1 / V2 V3 COOLANT RESERVOIR / TANK RESERVE HONDA GENUINE](https://img.lazcdn.com/g/p/62acf61c242ca9ca7f286d5a00a65be0.jpg_400x400q80.jpg_.webp)
![CLICK 150 & CLICK 125 V1 / V2 V3 COOLANT RESERVOIR / TANK RESERVE HONDA GENUINE [Fast Delivery]](https://img.lazcdn.com/g/p/2e6fd0ab81b55eba2395fcad1be0c964.jpg_400x400q80.jpg_.webp)
Prices are valid at publication and may change. Please refer to the product page for the latest price.
To find your scooter’s precise specifications, locate the Vehicle Identification Number (VIN) or chassis number stamped directly onto the frame. On most Honda Click models, this identifier is located on the metal frame tube beneath the seat utility box, accessible by lifting the seat. For Yamaha Mio models, the location depends on the specific variant, but it is typically stamped on the frame under the seat or near the rear engine mount. Write this number down carefully, as it contains the exact model code and production year of your vehicle.
Once you have retrieved your chassis number, cross-reference it with the manufacturer’s official parts catalog or consult an authorized dealer. This step is especially critical for Yamaha Mio owners, as the “Mio” moniker covers a vast family of scooters with completely different engine types. While classic models like the Mio Sporty and Mio Amore are strictly air-cooled and do not use a coolant reservoir, liquid-cooled variants like the Mio Aerox 155 require highly specific reservoir shapes designed to tuck neatly behind their aggressive fairings. Matching your chassis number to the official parts microfiche ensures you obtain the correct baseline OEM part number for your search.
Weighing OEM vs. Aftermarket Reservoir Options
When sourcing a replacement coolant reservoir tank, you will generally choose between genuine Original Equipment Manufacturer (OEM) parts and third-party aftermarket alternatives. Genuine OEM tanks sourced from authorized Honda or Yamaha dealers offer guaranteed fitment and are manufactured from high-grade, heat-stabilized polypropylene. This material is specifically engineered to withstand constant thermal cycling and exposure to hot coolant without warping, cracking, or yellowing prematurely under the intense tropical sun.

Aftermarket options, widely available on online marketplaces and local motorcycle accessory shops, are often highly appealing due to their lower price points. While some reputable aftermarket brands produce high-quality replacement plastics, many unbranded or budget options suffer from inconsistent manufacturing standards. These lower-quality tanks may feature thinner walls, brittle plastic formulations, or poorly molded seams that are prone to splitting under pressure or engine vibration.
To evaluate aftermarket options safely, closely inspect the seller’s product listings, customer reviews, and return policies. Look for reviews from buyers who have installed the specific tank on the exact same scooter model and year as yours, paying close attention to comments regarding plastic thickness and mounting alignment. If you use your scooter for demanding daily tasks, such as delivery services or long-distance commuting, investing a few hundred ₱ more in a genuine OEM tank is highly recommended to ensure long-term reliability and peace of mind on the road.
Critical Fitment Checks Before You Buy
Before finalizing your purchase, perform a thorough physical inspection of the replacement tank’s specifications to ensure it matches your scooter’s existing cooling system. The first critical dimension to verify is the inner diameter of the overflow hose connection. The inlet and outlet nipples on the replacement reservoir tank must match your scooter’s original hose diameter exactly; a nipple that is too large can split the aged rubber hose during installation, while one that is too small will fail to create an airtight seal, leading to persistent coolant leaks.
Next, examine the mounting bracket alignment, tab thickness, and bolt hole spacing on the replacement tank. Because scooters pack their engine components and electrical wiring tightly beneath plastic body panels, there is virtually no room for error. Even a minor 2mm deviation in bolt hole spacing or an overly thick mounting tab can prevent the reservoir from seating properly against the frame. Attempting to force a poorly fitting tank into place can stress the plastic, leading to premature cracking at the mounting points due to engine vibration.
Finally, verify the visibility and accuracy of the “Upper” and “Lower” level markings molded into the side of the tank. These markings must align perfectly with your scooter’s designated inspection window or maintenance cover. If the markings are placed incorrectly or are difficult to read, you will struggle to perform essential daily pre-ride inspections, increasing the risk of operating your scooter with insufficient coolant or overfilling the system and causing an overflow when the engine reaches operating temperature.
Safe Installation and Post-Swap Verification
Working on a motorcycle cooling system carries inherent safety risks, making it essential to follow proper procedures to prevent severe burns and engine damage. Always wait for the engine and radiator to cool down completely—ideally for several hours—before attempting to remove the old reservoir tank or open any cooling system caps. A hot cooling system is highly pressurized, and opening it prematurely can cause boiling coolant to spray out violently.
As you remove the old reservoir tank, take the opportunity to inspect the entire length of the overflow hose for signs of wear. Look for cracks, dry rot, swelling, or brittleness caused by years of exposure to engine heat and tropical humidity. If the hose shows any signs of degradation, replace it immediately along with the tank, and always use new, high-quality stainless steel spring clamps or worm-gear clamps to secure the connections.
After mounting the new reservoir tank securely to the frame, fill it to the designated “Upper” or “Max” line with a high-quality, pre-mixed coolant recommended by your scooter’s manufacturer. To prevent airlocks—which are pockets of trapped air that block coolant flow and cause localized engine overheating—follow the official workshop manual instructions for bleeding air from the cooling system. This process typically involves running the engine at idle with the radiator cap removed for a few minutes until all visible air bubbles have escaped, then topping off the fluid levels.
Once the system is bled and the radiator cap is securely reinstalled, conduct a brief test run in a controlled area. Allow the engine to reach its normal operating temperature, then park the scooter on a level surface and inspect all hose connections, mounting bolts, and the tank body for any signs of weeping or leaking. If you notice persistent leaks, if the high-temperature warning light on your dashboard illuminates, or if the coolant level drops rapidly, immediately shut off the engine and consult a qualified professional mechanic to diagnose the issue.
Frequently Asked Questions (FAQ)
Can I use a universal coolant reservoir tank on my scooter?
Using a universal or generic coolant reservoir tank on a modern liquid-cooled scooter like a Honda Click or Yamaha Mio is highly discouraged due to severe fitment and safety challenges. Universal tanks lack the model-specific mounting brackets required to bolt securely to your scooter’s frame, forcing riders to rely on temporary fasteners like zip-ties or custom metal straps. Under the constant, high-frequency vibrations of daily riding on uneven roads, these temporary mounts can easily fail, causing the tank to shift, contact hot engine components, melt, or interfere with moving parts. Furthermore, universal tanks often feature incorrect hose nipple diameters and capacities, which can disrupt the pressure dynamics of your cooling system and lead to overheating.
Why is my new coolant reservoir tank overflowing when the engine is hot?
While a small rise in the coolant level is normal as the engine warms up and pushes expanding fluid into the reservoir, a continuous overflow usually points to an underlying pressure issue rather than a defect in the new tank. The most common culprit is a faulty radiator cap; if the cap’s internal spring or rubber seal degrades, it can no longer hold the rated system pressure, allowing coolant to escape prematurely into the reservoir and overflow. Another serious cause is a compromised cylinder head gasket, which allows high-pressure combustion gases to leak into the cooling passages, overpressurizing the system and violently forcing coolant out of the reservoir. Inspect your radiator cap for wear and consult a professional mechanic if you suspect a head gasket failure.
How do I clean a cloudy or stained coolant reservoir tank?
To clean a cloudy or stained plastic coolant reservoir tank safely, remove the tank from the scooter completely and flush out any remaining coolant. Fill the tank with a mixture of warm water and mild dish soap, or a solution of warm water and white vinegar to help dissolve stubborn mineral scale and old coolant residue. Use a soft-bristled bottle brush to gently scrub the interior walls, taking care not to scratch the plastic. Never use harsh chemical solvents like gasoline, acetone, or brake cleaner, and avoid using boiling water or abrasive wire brushes; these harsh methods will degrade the chemical structure of the polypropylene, causing micro-cracks, severe cloudiness, and structural weakness that can lead to catastrophic failure under heat and pressure.
Community discussion
Share your experience or ask a question. Comments are reviewed before publication.