
Navigating the dense, unpredictable traffic of Metro Manila requires constant focus and reliable navigation. Whether you are filtering through lanes along EDSA or navigating the tight streets of Manila, having your GPS clearly visible is essential for finding the most efficient routes. A motorcycle phone mount is a critical tool for daily commuters. However, the constant stop-and-go movement, sudden braking, and uneven road surfaces common in urban commuting place immense physical stress on both the mount and your smartphone. Selecting the right Motobubble phone holder involves matching the mount to your motorcycle’s handlebar configuration, verifying your smartphone’s physical dimensions, and ensuring the setup can withstand demanding local riding conditions.
Core Requirements for Stop-and-Go Commuting
Urban commuting in the Philippines presents unique challenges that standard phone mounts may not be fully equipped to handle. The frequent acceleration and hard braking required to navigate sudden lane changes and traffic build-ups generate significant forward and backward inertia. This constant shifting forces the phone holder to maintain a tight grip without slipping or shifting its angle. Additionally, road imperfections, potholes, and speed bumps introduce sudden vertical shocks that can dislodge poorly secured devices. A reliable mount must feature robust shock-absorbing properties to cushion your smartphone from these harsh impacts.
Another critical factor is operational convenience during brief stops. When pulling over to check a delivery address, pay a toll, or park, you often need to attach or detach your phone quickly. A mounting system that requires complex two-handed adjustments can be frustrating and potentially unsafe in active traffic lanes. Look for mechanisms that allow for swift, single-handed locking and release, enabling you to secure your phone in seconds. At the same time, the mount’s physical footprint must be carefully considered. It should position your smartphone within your natural line of sight without obstructing your view of the instrument cluster, turn signals, side mirrors, or essential handlebar controls.
Products mentioned in this guide
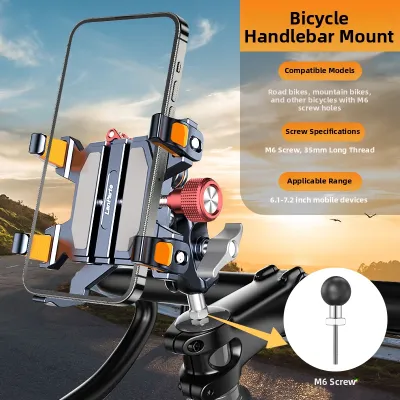
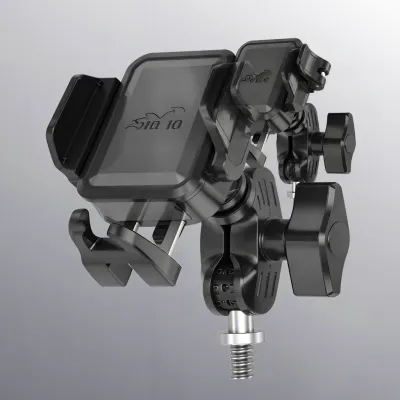
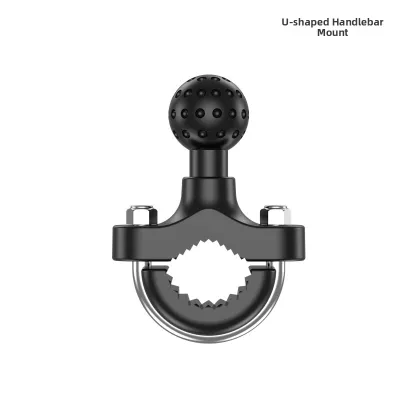
Prices are valid at publication and may change. Please refer to the product page for the latest price.
Evaluating Motobubble Mounting Mechanisms
Choosing the correct base mount is the first step in ensuring long-term stability and safety. Motobubble offers several mounting configurations designed to accommodate different motorcycle and scooter designs. The most common option is the handlebar tube mount, which clamps directly onto exposed metal handlebars. Before choosing this style, you must measure the diameter of your handlebar tube and verify that there is sufficient open clamping space. Ensure the clamp will not interfere with your brake master cylinder, throttle assembly, or control switches.

For riders of modern scooters or underbone motorcycles with fully enclosed plastic fairings, exposed handlebar space is often unavailable. In these scenarios, a mirror stem mount is the standard alternative. This mechanism attaches directly to the threaded post of your side mirror. When installing a mirror stem mount, it is crucial to verify the thread size and direction of your mirror post. The mount must be tightened securely so that it does not cause the mirror to vibrate excessively or rotate out of its legally required viewing position during your commute.
Some specialized setups may utilize mounts that attach to the brake fluid reservoir cover or feature model-specific brackets. Regardless of the style you choose, always consult the manufacturer’s compatibility guidelines for your specific motorcycle or scooter model. While some mounts offer quick installation, they may sacrifice long-term stability under heavy vibration. Conversely, more permanent, bolt-on mounting bases provide superior security but require more effort to install or transfer to another vehicle. Weigh these trade-offs based on your daily commuting route and how often you leave your motorcycle parked in public areas.
Checking Smartphone Compatibility and Security
A phone holder is only as reliable as its grip on your specific device. Before purchasing, you must measure the exact width, height, and thickness of your smartphone, taking into account the protective case you use daily. Many riders make the mistake of checking only the bare phone dimensions, only to find that their rugged, shockproof case makes the device too thick for the holder’s clamps. Compare these total measurements against the holder’s specified clamping range to ensure a secure fit.
The locking mechanism itself deserves close inspection. Mechanical clamps that use a screw-tightening or spring-loaded system must provide a positive lock that cannot be accidentally jarred open by road vibrations. Some designs incorporate secondary locking switches or silicone safety nets that wrap around the corners of the phone for added redundancy. If you prefer magnetic mounting systems, ensure the magnetic force is rated for motorcycle use and that the corresponding metal plate is securely adhered to your phone or case.
Additionally, check that the holder’s grip arms or silicone straps do not block access to your phone’s side buttons, charging port, or camera lenses. Blocking the power or volume buttons can cause the phone to restart or trigger emergency functions while riding. Access to the charging port is particularly important for long commutes where you may need to connect a power bank or USB charger. Before heading out into traffic, always perform a physical test by placing your phone in the holder and attempting to wiggle it free; if there is any play or slippage, adjust the clamps or consider a different holder model.
Weather Protection and Visibility Adjustments
Riding in Metro Manila means preparing for sudden weather shifts, from intense tropical sunlight to sudden torrential downpours. To maintain clear visibility of your GPS navigation, you must be able to adjust the angle of your phone quickly. Look for holders equipped with a high-quality ball joint or pivot arm that allows for multi-angle rotation. This flexibility enables you to tilt the screen slightly to eliminate glare from the sun without forcing you to look down and take your eyes off the road ahead.
During the rainy season, protecting your smartphone from water damage is a primary concern. While many modern smartphones feature water-resistant ratings, continuous exposure to high-speed rain can still force moisture into charging ports and speakers. If your phone is not fully waterproof, or if you want extra peace of mind, consider a Motobubble holder that includes a dedicated rain shield or a fully enclosed waterproof pouch. Keep in mind that enclosed pouches can trap heat in direct sunlight, so they are best reserved for active rainfall rather than hot, dry days. For sunny commutes, an integrated sun visor on the holder can significantly improve screen readability by shading the display.
Installation Boundaries and Pre-Ride Safety Checks
Proper installation is critical to preventing expensive device damage or dangerous distractions while riding. When mounting your phone holder, always follow the manufacturer’s torque specifications and tightening instructions. Over-tightening metal bolts onto plastic components can cause the plastic to crack over time under the stress of road vibrations, leading to sudden failure. Conversely, under-tightening will allow the mount to rotate or slide along the handlebar when you hit a bump.
Before finalizing the installation, sit on your motorcycle and turn the handlebars fully from lock to lock. The phone holder, mounting arm, and smartphone must not contact the fuel tank, fairings, windscreen, or any control cables at any point in the steering range. If you notice any interference with your steering, braking, or throttle operation, stop immediately and reposition the mount. If you are unsure about the safety of your setup, consult a qualified motorcycle mechanic to assist with the installation.
Make it a habit to perform a quick pre-ride safety check before every commute. Give the phone holder a firm shake to verify that the mounting base remains tight on the handlebar or mirror stem. Insert your phone and double-check that the locking mechanism is fully engaged and secure. If you use a charging cable, route it carefully along the handlebars, securing it with zip ties or cable wraps so that it cannot snag on your hands, the throttle, or the front brake lever during tight turns.
Frequently Asked Questions (FAQ)
Can I use a Motobubble holder with a thick rugged phone case?
Yes, but compatibility depends entirely on the specific holder’s maximum clamping width and depth specifications. Many rugged cases add significant thickness and width to a smartphone, which may exceed the limits of standard spring-loaded or automatic-clamping holders. Always measure your phone with the case installed and compare those dimensions against the manufacturer’s product specifications. If the fit is extremely tight, consider a holder with adjustable mechanical arms or a dedicated universal mount designed for larger devices to ensure a secure grip.
Will the vibration from my scooter damage my phone's camera?
High-frequency engine vibrations, particularly from single-cylinder scooter engines, can potentially damage the delicate optical image stabilization (OIS) systems found in modern smartphone cameras over time. This damage can result in a blurry camera focus or a vibrating image when trying to take photos. To protect your device, check if the specific Motobubble model you are considering features built-in vibration dampening materials, or look for an optional vibration dampener accessory that can be integrated into the mounting arm to absorb these harmful frequencies.

Community discussion
Share your experience or ask a question. Comments are reviewed before publication.