
Finding the correct oil filter for your motorcycle is the single most important step in protecting your engine from premature wear, especially when riding in demanding tropical climates. To choose the right one, you must match your motorcycle’s exact model, year, and engine specifications with a filter that meets or exceeds the original equipment manufacturer (OEM) standards for thread dimensions, gasket size, and bypass valve pressure. Installing an incorrect or low-quality filter can lead to catastrophic oil leaks, loss of oil pressure, and severe internal engine damage.
In environments characterized by high ambient temperatures, dusty roads, and dense stop-and-go traffic, your engine oil works under extreme thermal stress. The oil filter is your engine’s primary line of defense, capturing microscopic metal shavings, carbon deposits, and airborne dust before they can scour bearing surfaces. By understanding how to identify your vehicle’s precise requirements and verify technical specifications, you can confidently select a filter that ensures optimal lubrication and engine longevity.
Step 1: Identify Your Motorcycle's Exact Specifications
Before you begin browsing online marketplaces or visiting local auto parts shops, you must gather the precise technical identity of your motorcycle. Relying solely on a general model name is one of the most common mistakes riders make when purchasing oil filters. Popular model families often span decades and multiple engine redesigns, meaning a filter that fits an older generation may not seal correctly or handle the oil pressure of a newer version.
Products mentioned in this guide
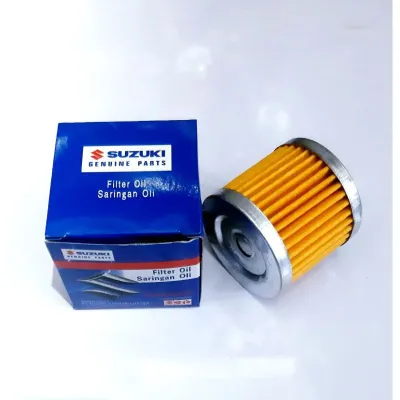
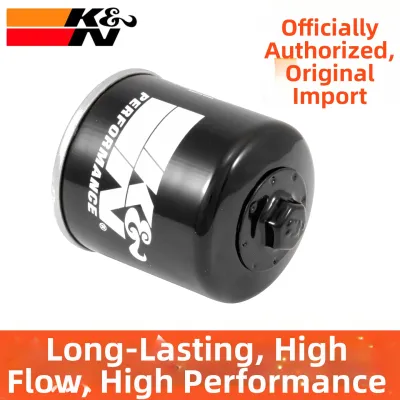
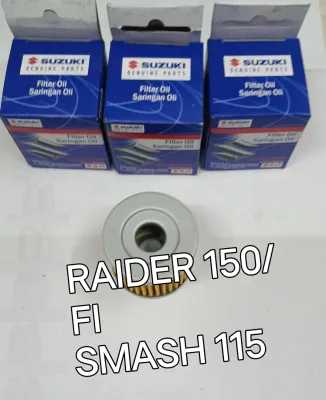
Prices are valid at publication and may change. Please refer to the product page for the latest price.
To find your motorcycle’s exact specifications, locate the Vehicle Identification Number (VIN) stamped on the steering head sleeve or printed on your official registration documents. This unique code allows you to look up the exact production year and engine variant. You should cross-reference this information with your owner’s manual or the manufacturer’s official parts catalog to find the original equipment part number.
Mid-year production changes, regional market variations, and displacement updates frequently alter filter requirements within the same model year. For example, a motorcycle manufactured for the European market might utilize a different filter housing or thread pitch than the exact same model sold in Southeast Asia. Always confirm the exact make, model, year, and specific engine code or displacement before attempting to match any aftermarket filter part numbers.
Using visual matching is highly unreliable and dangerous for your engine’s health. Two filters may look identical on the outside, sharing the same canister diameter and height, yet feature completely different internal thread pitches or bypass valve pressure ratings. Always rely on verified alphanumeric specifications rather than a visual comparison when identifying your replacement parts.
Step 2: Understand Motorcycle Oil Filter Types
Motorcycle engines utilize two primary designs of oil filters: spin-on canisters and internal cartridge elements. Knowing which system your engine uses determines not only the physical part you need to buy but also the specific tools and installation steps required for your maintenance routine.

Spin-On Filters
Spin-on filters consist of a self-contained metal canister that houses both the pleated filter media and the internal safety valves. This design is highly common on modern standard motorcycles, cruisers, and touring bikes because of its durability and ease of replacement.
The entire canister screws directly onto a threaded mounting boss located on the exterior of the engine block. A thick rubber gasket on the base of the canister seals against a machined flat surface on the engine casing to prevent oil from escaping under high pressure. When it is time for an oil change, you unscrew and dispose of the entire metal assembly, replacing it with a brand-new unit.
Cartridge or Element Filters
Cartridge or element filters consist of a bare, pleated paper or synthetic fiber filter media wrapped around a plastic or metal core. Unlike spin-on designs, cartridge filters do not have their own protective metal shell or built-in valves.
Instead, this replaceable element fits inside a permanent metal or plastic housing that is bolted directly to the motorcycle’s engine block. This design is highly prevalent on modern sportbikes, adventure motorcycles, and high-performance off-road engines because it reduces environmental waste and allows riders to easily inspect the used filter media for metal debris during maintenance. When servicing a cartridge system, you must thoroughly clean the permanent housing and replace the rubber sealing O-rings, which are usually included with the new filter element.
Step 3: Match Critical Filter Specifications
Once you know the style of filter your motorcycle requires, you must match several critical technical specifications. These dimensions and internal ratings ensure the filter can handle the physical flow of oil without leaking or restricting pressure.
Thread Size and Pitch (Spin-On)
For spin-on filters, the internal threads of the canister must match the engine’s mounting boss exactly. Common metric thread sizes, such as M20x1.5, are visually indistinguishable from slightly different imperial or metric pitches to the naked eye. Attempting to force an incorrect thread pitch onto the mounting boss will cross-thread the metal, stripping the threads on your engine casing and resulting in an expensive repair and catastrophic oil loss during operation.
Gasket and O-Ring Diameter
To prevent oil from spraying out under high pressure, the rubber gasket on a spin-on filter or the O-ring on a cartridge housing must seat perfectly against the engine casing. You must verify the inner and outer diameters of the seal. A gasket that is even a millimeter too narrow or too wide may fail to compress uniformly, leading to a slow weep or a sudden blow-out when the engine reaches operating temperature.
Bypass Valve Pressure
The bypass valve is a critical safety mechanism designed to protect your engine from oil starvation. If the filter media becomes completely clogged with debris, or if you start your motorcycle in cold weather when the oil is thick and highly viscous, the bypass valve opens. This allows oil to bypass the filtration media entirely and flow directly to the engine’s moving parts, as circulating dirty oil is far safer than running the engine dry.
You must ensure the aftermarket filter’s bypass valve pressure rating, measured in pounds per square inch (PSI) or bar, matches your motorcycle’s oil pump specifications. If the rating is too low, the valve will open under normal riding conditions, constantly circulating unfiltered oil through your engine. If the rating is too high, the valve may fail to open when needed, starving your engine of lubrication during cold starts or high-RPM operation.
Anti-Drain Back Valve
The anti-drain back valve is a flexible rubber or silicone membrane located just behind the inlet holes of a spin-on filter. Its primary function is to prevent oil from draining out of the filter and back into the oil pan when the engine is turned off. This ensures that the filter remains full of oil, providing immediate lubrication and oil pressure the moment you start the engine.
This valve is highly critical if your motorcycle’s filter is mounted horizontally or upside down. If your engine design positions the filter in a way that gravity naturally drains the oil out, a faulty or missing anti-drain back valve will cause a dry start every time you turn the key, leading to rapid wear on your piston rings and engine bearings.
Step 4: Evaluate OEM vs. Aftermarket Options
Choosing between an Original Equipment Manufacturer (OEM) filter and an aftermarket alternative requires balancing cost, availability, and engineering standards. Both paths can provide excellent engine protection, provided you follow strict quality guidelines.
OEM filters serve as the gold standard for guaranteed fitment and performance. Because they are designed by or directly for the motorcycle manufacturer, you can trust that the filter media porosity, bypass valve pressure, and gasket material are perfectly calibrated to your engine’s specific oil flow rates and operating temperatures. For riders who want to maintain their factory warranty or prefer a simple, risk-free purchase, OEM is the safest choice.
If you decide to purchase an aftermarket filter, look for reputable, established brands that explicitly state their products meet or exceed the specific OEM part number’s specifications. High-quality aftermarket manufacturers publish comprehensive cross-reference catalogs that map their filters to exact motorcycle makes, models, and years. These brands often use advanced synthetic blend media that offers higher filtration efficiency and better flow rates than basic paper filters.
Avoid unbranded, suspiciously cheap, or “universal” oil filters commonly found on unverified online marketplaces. These budget filters often utilize thin, low-grade paper media that can tear under pressure, allowing large particles of debris to enter the engine. Furthermore, their internal bypass valves and anti-drain back valves are frequently poorly calibrated or made from cheap plastics that degrade rapidly when exposed to hot engine oil.
To verify the quality of an aftermarket filter, look for recognized manufacturing standards and certifications on the packaging, such as ISO 9001 or TÜV certification. These markings indicate that the manufacturer adheres to strict quality control processes, ensuring that every filter off the assembly line meets consistent structural and functional tolerances.
Step 5: Final Verification and Pre-Installation Checks
Before you begin the installation process, you must perform several quick checks to ensure the new filter is safe to use. Working on your motorcycle’s lubrication system carries inherent safety risks; always ensure the engine is completely cool to prevent severe burns from hot engine oil, secure the motorcycle on a stable paddock stand, and consult your original-vehicle service manual for exact procedures.
First, perform a side-by-side physical comparison of the new filter and the old one you just removed. For spin-on filters, check that the overall height, outer diameter, and gasket placement match exactly. For cartridge filters, verify that the length, outer diameter, and inner core diameter of the new element are identical to the old unit.
Next, inspect the new filter thoroughly for any manufacturing or shipping damage. Check the metal threads of a spin-on filter to ensure they are clean, sharp, and free of metal burrs or debris. Inspect the rubber gasket or O-ring for any cuts, tears, or flat spots that could prevent a proper seal.
Before mounting the new filter, apply a thin film of clean engine oil to the rubber gasket or O-ring. This lubrication is a critical step; it prevents the rubber from binding, twisting, or tearing as you tighten the filter against the engine casing. A dry gasket can easily bunch up during installation, creating a gap that will spray oil under pressure.
Finally, install the filter according to your manufacturer’s specific torque settings. Over-tightening a spin-on filter can crush the rubber gasket, strip the mounting threads, or distort the metal canister, while under-tightening will cause the filter to back off due to engine vibration. If you do not have a torque wrench, follow the standard “hand-tight plus a quarter to a half turn” rule specified in your manual, and always perform a stationary test run to check for leaks before taking your motorcycle out on the road. If you are uncomfortable performing these mechanical steps, seek qualified professional installation at a registered motorcycle service center.
Frequently Asked Questions (FAQ)
Can I use a car oil filter on my motorcycle?
You should not use an automotive oil filter on your motorcycle unless the specific part number is officially cross-referenced and approved by a reputable filter manufacturer. Although some car and motorcycle filters share identical thread sizes and outer dimensions, they are engineered for very different operating environments. Motorcycle engines typically run at much higher RPMs, experience greater oil pressure fluctuations, and share their engine oil with the wet clutch and gearbox, requiring specific bypass valve pressures and flow rates that standard automotive filters cannot provide.
Does the brand of the oil filter matter?
Yes, the brand of the oil filter matters significantly. Reputable, established brands invest in high-quality synthetic or blend media, robust steel canisters, and reliable silicone valves that maintain their flexibility under extreme heat. In contrast, cheap, unbranded filters often use inferior paper media that can collapse under pressure, restricting oil flow and causing severe engine wear or oil starvation.
How often should I change my motorcycle oil filter?
You should always consult your motorcycle’s owner’s manual for the manufacturer’s recommended maintenance intervals. As a general industry best practice, it is highly recommended to change your oil filter every time you change your engine oil. Replacing the filter with every oil change ensures that the fresh, clean oil is not immediately contaminated by the trapped debris and dirty residual oil left inside the old filter.
Community discussion
Share your experience or ask a question. Comments are reviewed before publication.