
The Yamaha Sniper 150 is a staple on Philippine roads, celebrated for its sporty performance, fuel efficiency, and underbone agility. Whether you are navigating the congested streets of Metro Manila or cruising along provincial highways, the heart of this machine—its 150cc liquid-cooled engine—relies on precise mechanical timing. At the center of this timing system is the cam chain tensioner, a small but critical component designed to maintain the exact amount of tension on the engine’s timing chain (cam chain). Without proper tension, the cam chain can slip, fluctuate, or lose its alignment with the camshaft and crankshaft, disrupting the engine’s combustion cycle.
A failing or worn-out tensioner on your Sniper 150 typically presents clear warning signs that you should never ignore. The most common symptom is a distinct metallic rattling or “ticking” noise coming from the left side of the cylinder head, especially during cold starts or when idling. This sound, often referred to by local riders as a “taktak” or “tik-tik” noise, indicates that the tensioner is no longer keeping the cam chain taut, allowing it to slap against the engine casing or guide rails. Other symptoms include sluggish throttle response, minor power loss during acceleration, or occasional engine misfires as the valve timing fluctuates.
Neglecting these early warning signs or replacing a worn-out unit with an incompatible, low-quality part can have catastrophic consequences. If the cam chain becomes too loose, it can jump teeth on the timing gears, completely throwing off the engine’s timing. In a high-compression engine like the Sniper 150’s, this timing slip can cause the piston to strike the open valves, bending the valves, damaging the piston head, and leading to an expensive, full-engine rebuild. Ensuring you select a high-quality, compatible tensioner is a fundamental maintenance step to keep your motorcycle running safely and reliably.
Products mentioned in this guide
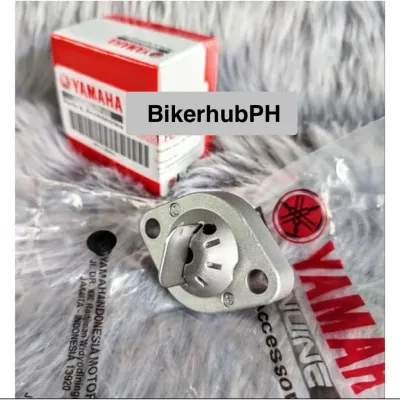
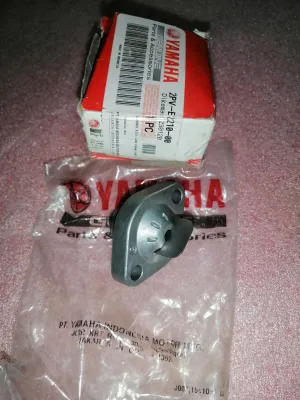
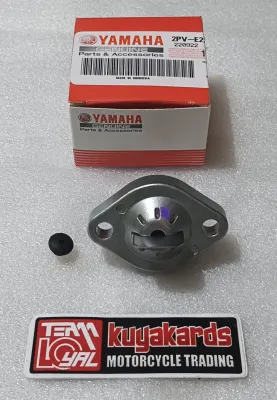
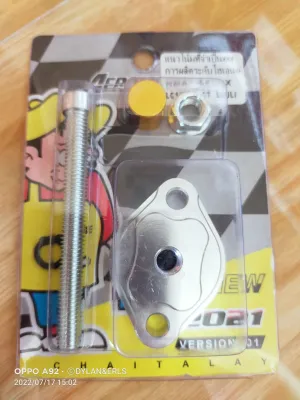
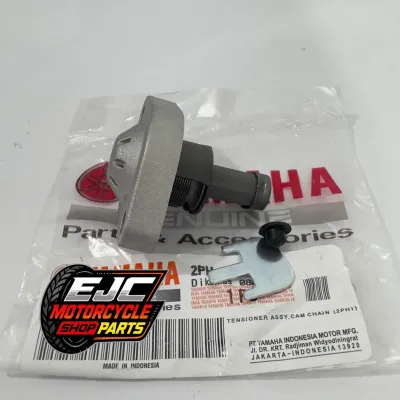
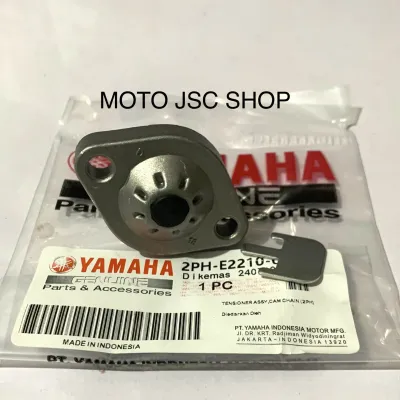
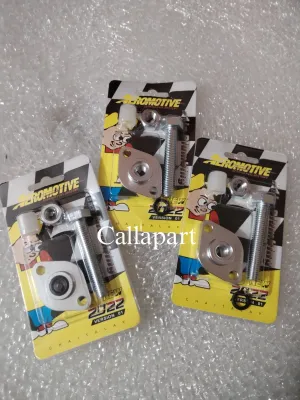
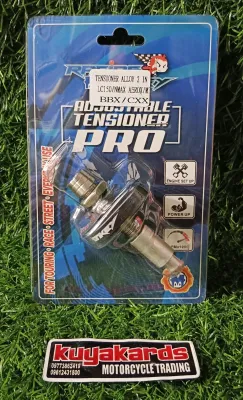
Prices are valid at publication and may change. Please refer to the product page for the latest price.
Verifying Compatibility and Model-Year Specifications
Choosing a replacement tensioner requires a clear understanding of your motorcycle’s specific model year and mechanical requirements. The Yamaha Sniper 150 has seen various minor updates and iterations since its introduction in the Philippine market. While many engine components remain identical across different production years, assuming absolute compatibility without verification can lead to installation issues or oil leaks.
OEM vs. Aftermarket Options
When shopping for a replacement tensioner, you will primarily choose between Original Equipment Manufacturer (OEM) parts and aftermarket alternatives. OEM parts, sourced directly from Yamaha’s authorized distribution network, offer guaranteed compatibility, factory-tested spring rates, and adherence to original engineering specifications. For riders who use their Sniper 150 for daily commuting and want a reliable, “install-and-forget” solution, an OEM tensioner is generally the safest and most reliable choice.
Aftermarket options are widely available in local motorcycle shops and online marketplaces, ranging from premium performance brands to unbranded components. High-quality aftermarket tensioners can offer enhanced durability, such as bodies machined from billet aluminum or heavy-duty internal springs designed to withstand higher engine RPMs. However, when evaluating aftermarket brands, you must cross-reference the manufacturer’s exact part numbers and compatibility lists rather than relying on generic product titles like “universal motorcycle tensioner” or “fits Sniper 150.” Minor design updates to the engine casing or oil gallery placements over different model years can alter the mounting interface, bolt spacing, or plunger depth, making an unverified aftermarket part highly risky.
Automatic vs. Manual Tensioner Designs
The mechanical design of the tensioner is another critical factor to consider, as it directly impacts your maintenance routine and riding experience. The stock Yamaha Sniper 150 comes equipped with an automatic cam chain tensioner. This design uses an internal spring and a one-way ratchet or screw mechanism to automatically extend the plunger as the cam chain naturally stretches over time. Automatic tensioners require zero manual adjustment, making them highly convenient for daily riders who prefer a low-maintenance setup that adapts dynamically to engine wear.
In contrast, manual cam chain tensioners replace the automatic spring mechanism with a threaded bolt and a locknut. To set the tension, the rider or a mechanic must physically screw the bolt inward until the correct chain play is achieved, then secure it with the locknut. While manual tensioners are favored by some racing enthusiasts and owners of heavily modified engines because they eliminate the risk of automatic spring failure under extreme RPMs, they require periodic inspection and manual adjustment. If a manual tensioner is adjusted too tightly, it will put excessive wear on the cam chain, guide rails, and camshaft bearings; if it is too loose, the timing chain will rattle and risk jumping. For standard daily commuting under typical Philippine road conditions, sticking to a high-quality automatic tensioner design is highly recommended.
Assessing Build Quality and Material Indicators
With many aftermarket parts flooding the local market, distinguishing a high-quality tensioner from a substandard one requires careful physical inspection and an understanding of material specifications. A tensioner operates under high temperatures and constant mechanical stress inside the engine block, meaning any material weakness can lead to rapid component failure.

First, look closely at the materials used in the tensioner’s construction. High-quality tensioners typically feature bodies made from CNC-machined billet aluminum or high-grade cast alloy, which offer excellent heat dissipation and dimensional stability. The internal plunger and ratchet teeth must be constructed from hardened steel to prevent the teeth from rounding off over time under the constant pressure of the cam chain guide. Avoid unbranded, suspiciously cheap tensioners that feel unusually light or exhibit rough, uneven machining marks, as these are often made from low-grade zinc alloys or soft metals that can warp under engine heat or strip their mounting threads during installation.
Second, pay close attention to the sealing components included with the tensioner. Because the tensioner mounts directly to the engine cylinder block, it is a common site for engine oil leaks if not sealed correctly. A reliable tensioner kit should include a high-quality rubber O-ring or a durable gasket designed to withstand high temperatures and oil exposure. Cheap, counterfeit, or low-grade kits often supply thin, poorly molded O-rings that degrade rapidly, leading to persistent oil weeping that can slowly drain your engine oil and cause overheating during long rides in the tropical Philippine climate.
Finally, leverage the collective experience of the local riding community. Before making a purchase, search through dedicated Yamaha Sniper 150 owner groups, local forums, and online product reviews. Look for feedback regarding how well a specific aftermarket brand holds up after several thousand kilometers of daily use. Genuine user reviews often highlight hidden issues, such as premature spring fatigue or oil leakage, helping you avoid problematic brands before spending your hard-earned money.
A Step-by-Step Purchasing and Inspection Checklist
To ensure you receive a genuine, high-quality tensioner that fits your motorcycle perfectly, follow this systematic purchasing and inspection checklist before and after your purchase.
- Pre-Purchase Verification: Before browsing shops, consult your motorcycle's official Yamaha service manual or visit an authorized Yamaha 3S shop to identify the exact OEM part number for your specific Sniper 150 model year. Having this part number handy allows you to verify compatibility with absolute certainty.
- Source Selection: Purchase your replacement part only from authorized Yamaha dealerships, established local motorcycle accessory shops, or highly rated official flagship stores on reputable online marketplaces. Be highly skeptical of listings offering "OEM parts" at a fraction of the standard retail price, as counterfeit motorcycle components are common and present severe safety hazards.
- Post-Delivery Physical Inspection: Once the part arrives, unbox it immediately and inspect it under good lighting. Check the threads on the mounting bolt holes and the plunger mechanism for any signs of cross-threading, metal burrs, or manufacturing defects. For automatic tensioners, gently test the plunger's movement to ensure it extends smoothly and locks firmly without slipping backward.
- Authenticity Verification: Genuine Yamaha parts feature distinct packaging indicators, including high-quality cardboard boxes, clear and aligned label printing, and specific holographic security stickers. Inspect the laser-etched part numbers on the tensioner body itself to ensure they match the packaging and official catalog listings.
- Return Policy Check: Confirm that the seller offers a clear return, exchange, or warranty policy. This provides a safety net if you discover a manufacturing defect or if the mounting flange dimensions do not match your engine block upon closer physical comparison.
Installation Safety and When to Seek Professional Help
Replacing a cam chain tensioner on a Yamaha Sniper 150 is a precise mechanical task that directly affects your engine’s internal timing. While some experienced DIY mechanics may feel comfortable performing the replacement at home, it is vital to understand the safety boundaries of this procedure to prevent catastrophic engine damage.
The primary risk during installation is the loss of timing chain tension while the engine is not at the correct position. If the tensioner is removed while the valve springs are under tension, the camshaft can rotate unexpectedly, causing the cam chain to jump teeth on the sprocket. To prevent this, the engine must be set to Top Dead Center (TDC) on the compression stroke before the old tensioner is removed. Doing so ensures that there is minimal tension on the camshaft, keeping the chain securely in place while you swap the parts.
If you do not own a calibrated torque wrench, a socket set, and a copy of the official Yamaha service manual, or if you are uncomfortable locating Top Dead Center, do not attempt this installation yourself. Instead, take your motorcycle and the new part to a qualified motorcycle technician or an authorized Yamaha service center. A professional mechanic has the specialized tools and experience to install the tensioner safely, replace the single-use gasket, and torque the mounting bolts to the exact factory specifications—typically around 10 to 12 Newton-meters (Nm) for the small mounting bolts, though you must always verify the exact value in your specific model’s service manual.
If you choose to attempt the installation and encounter any resistance when inserting the new tensioner, if the bolt holes do not align perfectly with the engine block, or if the plunger does not extend smoothly, stop immediately. Forcing a mismatched or improperly aligned tensioner into the engine block can strip the aluminum threads of the cylinder or damage the internal chain guides. Always prioritize safety and mechanical precision over a quick DIY fix to keep your Yamaha Sniper 150 running smoothly on the road.
Community discussion
Share your experience or ask a question. Comments are reviewed before publication.