
Daily commuting and long-distance touring in the Philippines demand robust cargo solutions. Whether you are navigating the congested streets of Metro Manila or embarking on a weekend ride through the scenic routes of Marilaque, securing your belongings is a top priority. A dedicated monorack serves as the structural backbone for your motorcycle’s top box, ensuring that your helmet, rain gear, and daily essentials remain stable throughout the journey. While universal brackets might seem like a convenient, one-size-fits-all solution, they often compromise on safety, structural integrity, and fitment. This guide is designed to help you evaluate fitment, load limits, and sourcing strategies to find the most suitable DC monorack option for your specific motorcycle model, rather than relying on generic universal brackets.
Verifying Motorcycle Compatibility and Mounting Points
Before purchasing any luggage accessory, you must verify that the monorack is engineered specifically for your motorcycle’s exact make, model, and production year. Motorcycle frames and subframes vary significantly between scooters, underbones, and backbone motorcycles. A bracket designed for a specific 150cc scooter will not safely align with the mounting points of another model, even within the same brand. Start by consulting your motorcycle’s owner’s manual and official chassis specifications. Locate the designated mounting points, which are typically positioned near the rear grab rail or integrated directly into the subframe. These points are structurally reinforced by the manufacturer to handle vertical and torsional loads. Attempting to force a monorack onto non-designated areas of the frame can lead to structural failure, cracked plastics, or compromised handling.
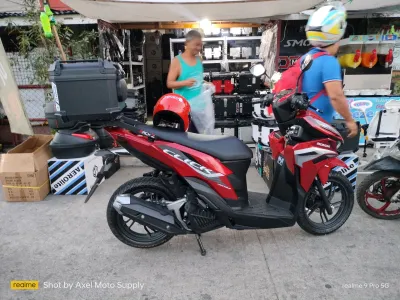
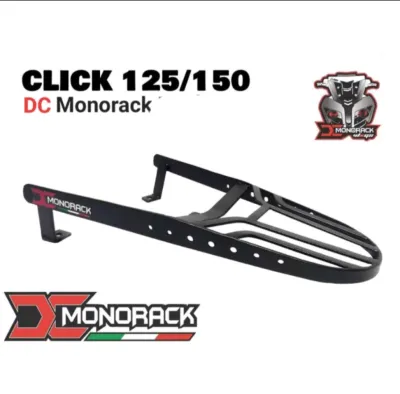
Understanding the distinction between universal brackets and model-specific monorack plates is crucial for road safety. Universal brackets often rely on adjustable sliders, clamps, or multiple joint points to fit various motorcycles. While adaptable, these joints introduce multiple potential failure points that can loosen under continuous vibration. In contrast, a model-specific DC monorack is welded and bent to match the precise geometry of your motorcycle’s rear section, distributing the weight evenly across the factory-designated mounting points. This tailored fit minimizes the risk of the rack shifting or bending under heavy loads, providing a much more stable foundation for your top box.
Products mentioned in this guide
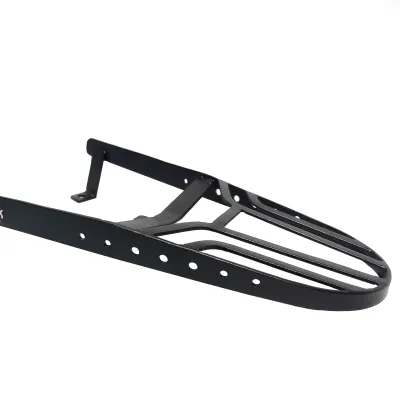
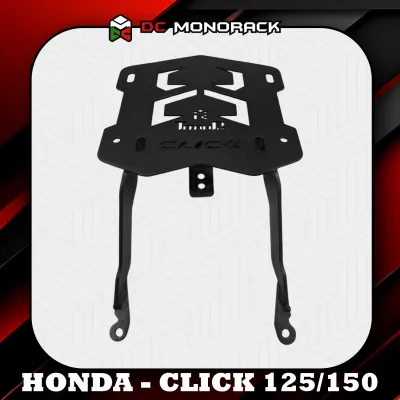
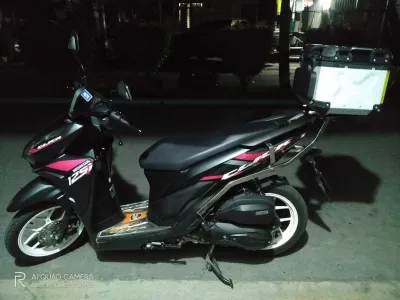
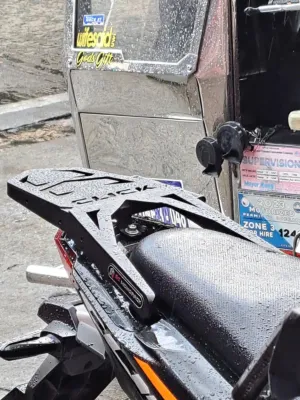
Prices are valid at publication and may change. Please refer to the product page for the latest price.
Modifications to your motorcycle can significantly complicate the installation process. If you have installed an aftermarket exhaust, a tail tidy, or a modified rear fender, the clearance around the mounting points may have changed. Aftermarket exhaust pipes often sit higher or wider than stock units, potentially coming into direct contact with the monorack’s support arms. Similarly, custom subframes or cosmetic modifications can block access to the factory bolt holes. If you observe any misalignment, clearance issues, or structural modifications on your motorcycle, it is highly recommended to seek a professional assessment. A qualified motorcycle mechanic can determine if the monorack can be safely installed without compromising the structural integrity of the frame or interfering with safety-critical components like the rear lighting and suspension travel.
Evaluating Load Capacity and Top Box Integration
Every monorack comes with a manufacturer-specified maximum load rating that must never be exceeded. This rating is determined through structural testing and is designed to keep the motorcycle stable under normal operating conditions. When evaluating these limits, you must distinguish between static weight—the weight of the cargo when the motorcycle is parked—and dynamic weight, which is the force exerted on the rack while riding over bumps, potholes, and uneven road surfaces. A heavy top box bouncing over a sudden pothole can exert forces several times its static weight on the monorack and subframe. Exceeding the recommended load limit can lead to metal fatigue, bent brackets, or sudden structural failure while in motion. Always calculate the combined weight of your top box, the mounting plate, and the items you plan to carry to ensure they remain well within the monorack’s specified limits.

Compatibility between the monorack and your chosen top box is another critical factor. The monorack serves as the base, but the top box requires a specific mounting plate and locking mechanism to stay secure. You must check the mounting interface and bolt patterns on both the monorack and the top box plate. Many high-quality monoracks feature pre-drilled holes designed to align with major top box brands, but you must verify this compatibility in the product documentation before making a purchase. Using incompatible plates or attempting to drill custom holes in the monorack can weaken its structural integrity and void any manufacturer warranties.
The physical placement of cargo significantly alters your motorcycle’s center of gravity. Mounting a heavy top box far behind the rear axle creates a leverage effect, transferring weight away from the front wheel. This shift can lighten the steering, reduce front-tire traction, and make the motorcycle highly sensitive to crosswinds and high-speed wobbles. To maintain safe handling and suspension performance, especially on wet or uneven roads, pack your heaviest items at the bottom of the top box and as close to the passenger seat as possible. Regularly inspect your rear suspension pre-load settings; carrying consistent cargo may require adjusting the suspension to prevent bottoming out and to maintain proper steering geometry.
Sourcing Reliable Options and Avoiding Counterfeits
Finding a genuine DC monorack in the local market requires a cautious and systematic approach. The popularity of motorcycle touring in the Philippines has led to an influx of counterfeit and substandard brackets that mimic the appearance of reputable brands but lack the necessary structural integrity. To ensure your safety, prioritize purchasing from authorized physical motorcycle accessory shops where you can physically inspect the product’s welds, material thickness, and finish. Legitimate physical retailers often have direct relationships with distributors, ensuring that the products they stock are authentic and designed for the local market.
If you prefer the convenience of online shopping, utilize reputable e-commerce platforms but exercise strict due diligence. Look for sellers with verified official store badges, high positive ratings, and active customer feedback sections. Legitimate sellers will readily provide detailed product specifications, clear photos of the mounting brackets, and confirmation of compatibility with specific motorcycle models and years. Avoid purchasing from unverified individual sellers or listings with vague descriptions that do not specify the exact motorcycle model the rack is designed for.
Authentic products typically come with official manufacturer warranties, structured packaging, and comprehensive installation manuals. When browsing online marketplaces, be wary of listings that offer unusually low prices in ₱ compared to the average market rate. Extremely cheap brackets often use lower-grade steel, thinner tubing, and substandard welding techniques that are prone to cracking under load. Other red flags include missing installation hardware, such as specialized spacers, high-tensile bolts, or washers required for a secure fit. A lack of model-specific fitment details or vague descriptions claiming the rack “fits all models” should be treated with high suspicion. Investing in a genuine, verified monorack prevents the costly and dangerous consequences of a bracket failure on the highway.
Installation Safety and Routine Maintenance
Installing a monorack is a critical modification that directly affects your motorcycle’s structural safety and roadworthiness. It is essential to use the correct torque settings specified in the product manual or your motorcycle’s service manual. Under-tightening bolts can cause them to back out due to engine and road vibrations, while over-tightening can strip the threads in your motorcycle’s subframe or snap the mounting bolts. During installation, always apply a medium-strength thread-locking compound to the bolt threads to prevent them from loosening over time. Use only the OEM-grade or high-tensile hardware supplied with the monorack; replacing these with standard hardware store bolts can introduce weak points that cannot handle the shear forces of a loaded rack.
While many riders attempt a DIY installation, you must recognize when to stop and consult a qualified motorcycle mechanic. If you encounter stripped threads in the subframe, misaligned brackets that require excessive force to line up, or missing structural bolts, do not attempt to force the installation or improvise with non-standard parts. A professional mechanic has the specialized tools, such as thread repair kits and calibrated torque wrenches, to resolve these issues safely. They can also ensure that the rack does not interfere with the rear suspension travel or the visibility of your tail lights and turn signals.
Once installed, the monorack requires ongoing maintenance to ensure long-term reliability, especially when subjected to the high humidity and heavy rainfall typical of the Philippine climate. Establish a routine inspection checklist to perform before long rides or after carrying heavy loads. Check the tightness of all mounting bolts using a torque wrench to ensure they have not vibrated loose. Inspect the entire bracket for any signs of weld integrity compromise, hairline cracks, or metal fatigue, paying close attention to the joint areas and bends. Wipe down the monorack regularly to remove road grime, salt, and moisture, and promptly touch up any chipped paint or exposed metal with a rust-inhibiting primer to prevent corrosion from weakening the structure.
Frequently Asked Questions (FAQ)
Can I install a DC monorack on a motorcycle with an aftermarket exhaust?
Installing a DC monorack alongside an aftermarket exhaust requires careful measurement of physical clearance. Modified exhaust systems often have different routing, larger canisters, or higher mounting brackets than the original factory setup. You must ensure there is sufficient space between the monorack’s support arms and the exhaust pipe to prevent heat damage to the rack’s finish or any attached plastic components. If the exhaust heat shield or canister interferes with the rack’s mounting path, you may need to consult a professional to determine if safe clearance can be maintained.
Does a monorack affect the motorcycle's warranty?
To determine how a monorack affects your motorcycle’s warranty, you must consult your specific dealership and review your warranty booklet. Generally, installing bolt-on accessories does not void the entire vehicle warranty, but any structural modifications, frame drilling, or damage directly caused by improper rack installation or overloading will typically not be covered. Always verify the dealership’s policies regarding aftermarket accessories before proceeding with the installation to protect your coverage.
What tools are required for a standard monorack installation?
A standard monorack installation typically requires basic hand tools, including a metric socket set, Allen keys, and a calibrated torque wrench. However, because mounting designs vary significantly between motorcycle models, you must refer to the monorack’s official instruction manual for the exact tool sizes and torque specifications. Using the correct, well-fitting tools prevents damage to the bolt heads and ensures that all fasteners are tightened to the precise safety standards required for road use.
Community discussion
Share your experience or ask a question. Comments are reviewed before publication.