
Choosing the right engine support for your Honda Click V2 is essential for maintaining the scooter’s structural integrity, ride comfort, and handling safety. The engine support system acts as the critical link between the engine assembly and the main frame, absorbing harsh road shocks and isolating high-frequency engine vibrations. In tropical environments like the Philippines, where daily commutes involve navigating flooded streets, heavy traffic, and uneven road surfaces, these components undergo significant stress. Selecting the correct replacement part requires verifying exact manufacturer specifications rather than relying on visual approximations or generic listings. This comprehensive guide will walk you through understanding the engine support components, verifying compatibility, diagnosing wear, and preparing for a safe replacement process.
Understanding Engine Support Components on the Honda Click V2
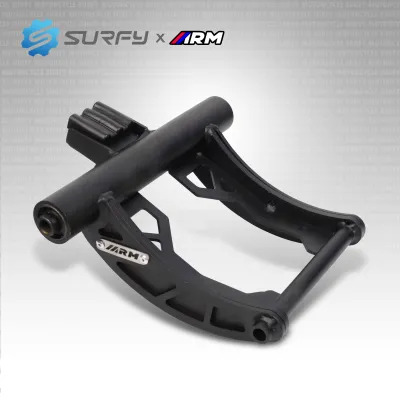
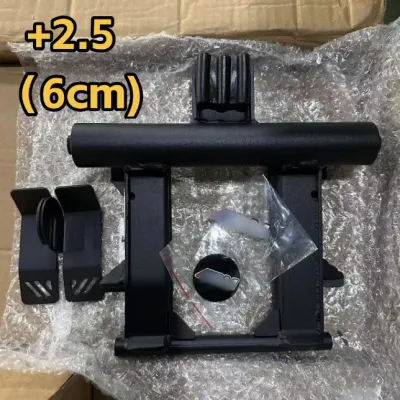
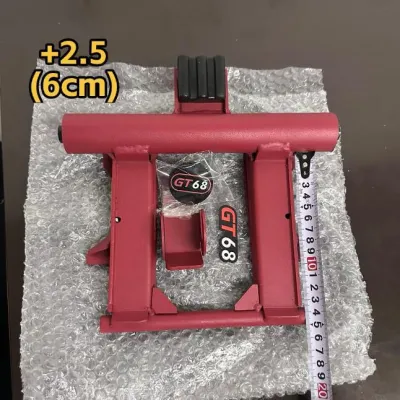
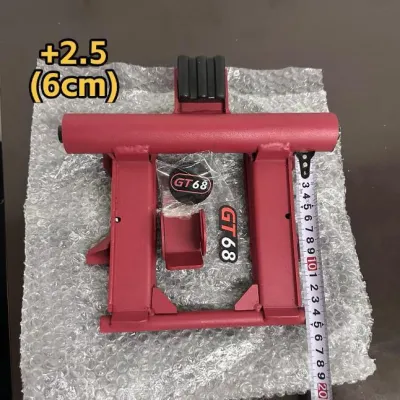
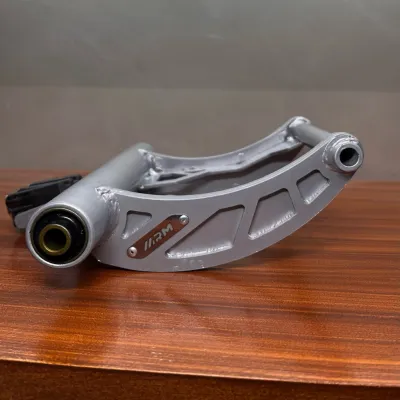
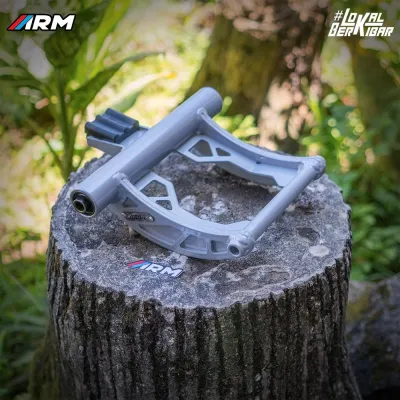
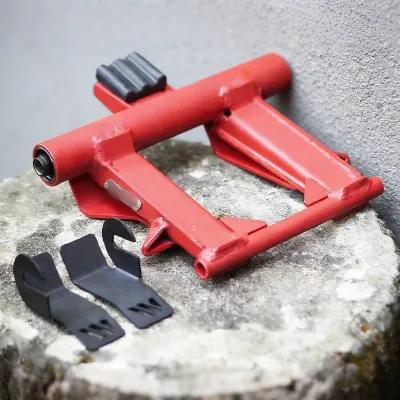
To make an informed purchase, you must first understand what constitutes the engine support system on a modern automatic scooter like the Honda Click V2. The system is not a single solid piece but an assembly of structural metal and flexible dampening components. The primary structural element is the engine hanger, often referred to as the engine bracket. This heavy-duty metal arm pivots to allow the engine—which also functions as the rear swingarm on this scooter design—to move vertically in response to suspension travel.
Equally critical are the engine mounting bushings, commonly called engine support rubbers. These cylindrical components consist of an outer metal sleeve, a high-density rubber core, and an inner metal sleeve through which the mounting bolts pass. The rubber core is specifically formulated with a precise durometer (hardness) to absorb the rotational torque of the engine during acceleration while dampening high-frequency vibrations before they reach the chassis.
Products mentioned in this guide
Prices are valid at publication and may change. Please refer to the product page for the latest price.
These components must work in perfect harmony to maintain the alignment of the rear wheel relative to the frame. If the bushings degrade or the hanger bends, the engine can shift laterally. This misalignment directly compromises handling stability, causes uneven tire wear, and places abnormal torsional stress on the frame welds. Using components that match the exact engineering specifications of your scooter is the only way to preserve its original ride quality and structural safety.
How to Verify Compatibility and OEM Specifications
Ensuring that you purchase the correct engine support components requires a systematic verification process. Because minor design updates can occur between model years or specific variants of the Honda Click 125i and 150i V2, relying on generic product titles on online marketplaces can lead to purchasing incompatible parts. The most reliable starting point is to locate your scooter’s Vehicle Identification Number (VIN), which is typically stamped on the frame under the seat utility box.

With the VIN or the exact model code from your owner’s manual, you can cross-reference the official Honda parts catalog. The engine hanger and the rubber bushings have distinct OEM (Original Equipment Manufacturer) part numbers. Finding these exact numbers stamped on your existing parts, or verifying them through an authorized dealer, eliminates any guesswork.
To obtain genuine components, visit an authorized Honda motorcycle dealer or an official spare parts distributor in the Philippines. This allows you to verify the exact fitment for your specific model year and check current pricing in ₱ directly from official price lists. Authorized dealers can access the official parts database to ensure you receive the latest updated part numbers, which may feature improved rubber compounds or reinforced bracket designs.
Avoid purchasing unverified “universal” or generic aftermarket engine supports. While these parts often claim broad compatibility across multiple scooter models, they frequently lack the precise mounting dimensions, metal thickness, and rubber load ratings required for the Click V2. A mismatch of even a millimeter in bushing diameter or a slight variance in rubber hardness can lead to severe vibration transfer, rapid wear, or mechanical failure under load.
Diagnosing Existing Engine Support Issues
Before purchasing replacement parts, a thorough diagnosis is necessary to confirm that the engine support system is indeed the source of your scooter’s symptoms. Begin with a detailed visual inspection of the engine hanger and bushings. You will need to clean the area around the lower frame and engine pivot points to remove road grime, mud, and oil residue. Inspect the rubber bushings for visible signs of dry rot, deep cracks, tearing, or separation between the rubber core and the metal sleeves. A collapsed bushing will often show the inner metal sleeve sitting off-center.
Physical symptoms during operation are also strong indicators of wear. If you experience excessive, unusual vibrations transmitted through the floorboard and handlebars, especially at idle or during specific RPM ranges, the dampening capability of the bushings has likely deteriorated. Another common sign is a distinct clunking or thumping noise coming from underneath the seat when you suddenly apply or release the throttle. This noise occurs when the worn bushings allow the engine assembly to shift excessively within the hanger.
You must also inspect the structural metal hanger itself for signs of physical damage. Look closely for hairline cracks near the weld joints, bent arms, or severe corrosion. In coastal regions or areas with high humidity, road salt and moisture can accelerate rust, weakening the structural integrity of the bracket. Any sign of metal fatigue or deformation requires an immediate replacement of the entire hanger assembly.
It is crucial to differentiate these symptoms from other mechanical issues to avoid replacing perfectly good parts. For instance, a worn rear shock absorber, loose engine hanger pivot bolts, or degraded rear wheel bearings can produce similar handling instability and unusual noises. To isolate the issue, place the scooter securely on its center stand, grasp the rear wheel firmly, and attempt to move the engine assembly laterally. If there is noticeable side-to-side play at the pivot points, the engine support bushings or hanger are the primary culprits.
Preparation and Safety Steps for Replacement
Replacing the engine support components on a scooter is a major mechanical task that affects the vehicle’s structural alignment. If you choose to perform this maintenance yourself, proper preparation and strict adherence to safety protocols are mandatory. Start by gathering the necessary tools, which include a high-quality socket set, combination wrenches, a torque wrench, a soft-faced mallet, and specialized bushing extraction tools if you plan to replace only the rubber inserts.
You must work on a flat, level, and stable concrete surface. Place the scooter securely on its center stand. Because removing the engine support requires disconnecting the main structural link between the frame and the engine, you must support the engine assembly independently. Use a dedicated motorcycle jack, an adjustable scissor jack, or solid wooden support blocks placed under the engine crankcase. Failure to secure the engine properly will cause it to drop, damaging the wiring harness, throttle cables, brake lines, and potentially causing severe personal injury.
Personal protective equipment is non-negotiable. Wear heavy-duty mechanics’ gloves to protect your hands from sharp metal edges and high-torque slips, and wear safety glasses to shield your eyes from falling road debris, rust particles, or cleaning solvents. Ensure the workspace is well-ventilated and free of flammable materials.
Establish a clear safety boundary before you begin unbolting any components. If you find that the mounting bolts are severely seized due to rust, or if you cannot stabilize the engine assembly securely with your available equipment, stop immediately. Attempting to force seized bolts without proper support can tip the scooter over or strip the frame threads. In such cases, reassemble any loosened parts and transport the scooter to a qualified professional mechanic.
Installation Guidelines and Torque Verification
The installation process must follow a logical and precise sequence to ensure the safety and longevity of the new components. Begin by carefully removing any obstructing body panels, the exhaust system, and any brackets that limit access to the engine hanger. Take care not to strain or pinch the surrounding electrical wiring, oxygen sensors, rear brake cables, or fuel lines. Label and organize all removed fasteners to ensure they return to their original positions.
If you are replacing the rubber bushings within the existing hanger, use a proper bushing press tool to extract the old ones. Avoid using a hammer and chisel to force the bushings out, as this can easily score, warp, or crack the aluminum or steel mounting bores of the hanger. Clean the bores thoroughly and apply a thin film of a manufacturer-approved lubricant if specified, then press the new bushings in evenly until they are fully seated.
When positioning the new engine support or hanger assembly back onto the scooter, align the mounting holes carefully. Always hand-thread all mounting bolts for several turns before using any wrenches. This simple step prevents cross-threading, which can ruin the threads on the engine case or the main frame. Once all bolts are hand-tightened and the engine alignment is verified, you can proceed to final tightening.
Using a calibrated torque wrench is absolutely critical during this stage. Do not rely on feel or guess the tightness of these structural fasteners. Tightening the bolts below the manufacturer’s specified torque can cause them to back out under road vibrations, leading to catastrophic failure while riding. Conversely, over-tightening can strip the threads, stretch the bolts beyond their yield strength, or crush the new rubber bushings, causing premature failure. Refer to the official service manual for the exact torque values, which are typically specified in Newton-meters (Nm).
Post-Installation Testing and Maintenance
Once the installation is complete and all fasteners are torqued to specification, you must perform a series of systematic checks before returning the scooter to regular service. Start by conducting an initial idle test. Place the scooter on its center stand, start the engine, and let it reach operating temperature. Observe the engine’s position to ensure it sits level and does not exhibit abnormal movement. Feel the handlebars and floorboard to verify that the harsh, excessive vibrations have been successfully resolved.
Next, perform a low-speed test ride in a controlled, traffic-free environment, such as a quiet residential street or an empty parking lot. Pay close attention to the scooter’s handling characteristics. The steering should feel stable, and the rear end should track straight without any pulling or swaying. Listen carefully for any unusual squeaks, clunks, or metallic noises during acceleration, braking, and gentle cornering.
After completing a short break-in period—typically after the first few kilometers of riding—return the scooter to your workspace. Once the engine has cooled, use your torque wrench to re-check the tightness of all the newly installed mounting bolts. It is common for components to settle slightly after experiencing initial road loads, and verifying the torque ensures long-term safety.
To maximize the lifespan of your new engine support components, practice preventative maintenance. Avoid chronic overloading of the scooter, as carrying loads beyond the manufacturer’s specified weight limit places extreme compression stress on the rubber bushings, causing them to deform permanently. Additionally, keep the engine support area clean and free of engine oil or fuel leaks, as petroleum products can rapidly degrade and soften the rubber compounds, leading to premature failure.
Frequently Asked Questions (FAQ)
Can I use aftermarket engine supports instead of genuine Honda parts?
While high-quality aftermarket options exist, you must exercise extreme caution when choosing them over genuine Honda parts. Genuine OEM parts are engineered specifically for the Click V2, ensuring the perfect balance of rubber hardness (durometer) and structural strength. Many cheap aftermarket alternatives use inferior rubber compounds that are either too soft, leading to rapid wear and engine misalignment, or too hard, which transmits harsh engine vibrations directly to the rider. If you decide to purchase an aftermarket support, ensure it comes from a reputable, established brand with verified user feedback, and verify that its physical dimensions and load ratings match the OEM specifications exactly.
How often should the engine mounting bushings be replaced?
There is no fixed mileage or time interval for replacing the engine mounting bushings on the Honda Click V2. The lifespan of these components depends heavily on riding conditions, road quality, carrying loads, and exposure to environmental factors like heat and moisture. In typical riding conditions, they can last for tens of thousands of kilometers, but they should be inspected visually during every routine maintenance service or oil change. You should replace them immediately if you observe deep cracking, rubber tearing, off-center sagging, or if you begin to experience excessive chassis vibrations and clunking noises during acceleration.
Community discussion
Share your experience or ask a question. Comments are reviewed before publication.