
Cleaning a motorcycle carburetor is one of the most effective ways to restore smooth engine performance, crisp throttle response, and reliable starting. Over time, fuel left sitting in the float bowl evaporates, leaving behind a sticky varnish that clogs the microscopic passages and precision-drilled jets inside the unit. This guide walks you through the complete process of safely removing, disassembling, cleaning, and reinstalling your motorcycle’s carburetor to bring your engine back to its optimal operating state.
Signs Your Motorcycle Carburetor Needs Cleaning
Before tearing down your fuel system, verify if the carburetor is the actual source of your engine trouble. A dirty carburetor typically causes a rough or erratic idle, where the engine struggles to maintain a steady RPM or stalls when you release the throttle. Hesitation or “flat spots” during acceleration, where the engine bogs down when you twist the grip, is another classic sign of restricted fuel flow.
Hard starting, especially when cold, often points to a clogged pilot jet or a malfunctioning choke circuit. Conversely, if the float needle is stuck open or the jets are partially obstructed, you might notice black exhaust smoke, indicating an overly rich fuel mixture.
Products mentioned in this guide
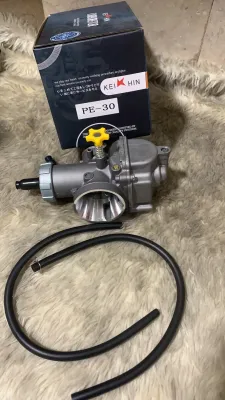
20 Lazada user ratings
After every transaction, buyers are encouraged to rate and describe their experience with their seller and vice versa. This feedback helps u…Read full reviewShow less
After every transaction, buyers are encouraged to rate and describe their experience with their seller and vice versa. This feedback helps users build trustworthy reputations so that other users can feel confident transacting with them.
Quality:Goods na good seller 100 persent Appearance:maganda pag kabalot ayos na ayos Performance:quality maganda siya at madaling itono sala…Read full reviewShow less
Quality:Goods na good seller 100 persent Appearance:maganda pag kabalot ayos na ayos Performance:quality maganda siya at madaling itono salamat seller at raider ingat palagi
Actually 2nd order kuna to or 3rd okay nman kasi angnproduct kaya natingin nlng ako sa recent order ko hahaha
akala ko katulad ng asa picture hindi pala katulad pero pwede na rin
iba dumating hndi tulad ng nasa picture
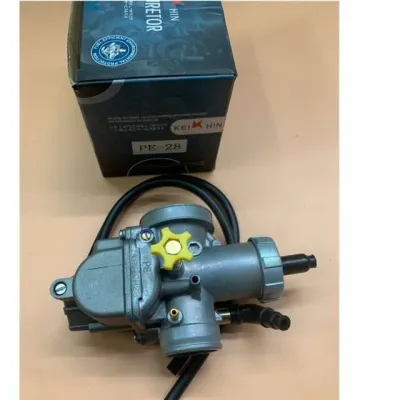
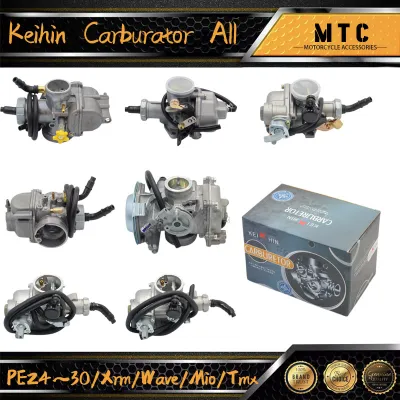
125 Lazada user ratings
Smooth throttle response and acceleration., Enhances engine power and performance., Excellent performance and fuel efficiency.,
ayos safe namn dumating napaka ganda kahit class A solid namn tumakbo 🔌Compatibility:10 🏅Performance:10 🔨Durability:10
🔨Durability:
legit goods
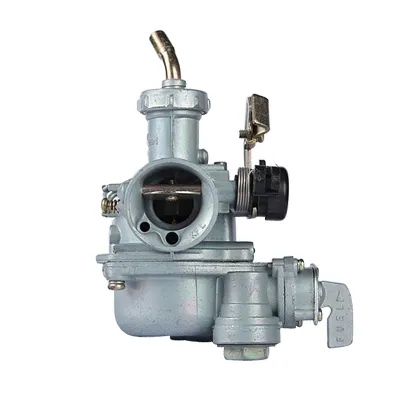
53 Lazada user ratings
salamat po seller sa magandang item na ipinadala nyo sakin. sakto sa honda wave 100 ko. salamat ulit seller sa uulitin po.
maganda sakto sa wave 110 ko fit sya gana ulit ang motor ko. mabilis din ang shipping ilang days lang dito na agad.
naka bubble wrap ang product secure. hindi ko pa nakakabit. sana tumipid pa sa gas motor ko
Maayus any packing salamat seller .Sana gumana ng maayus dko pa nkabit
ayos tamang tama sa motor ko.. salamat po sa seller at sa raider..
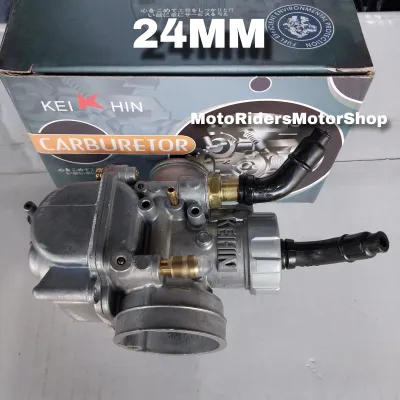
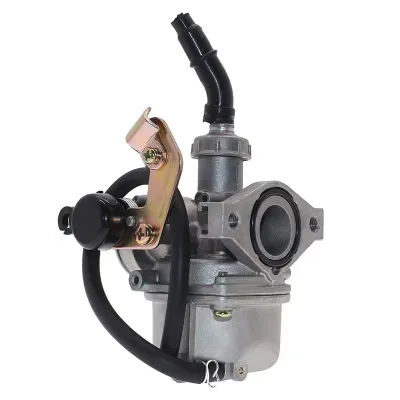
131 Lazada user ratings
Maayos naman dikopa na kakabit i hope na walang problema pag na salpak, mabilis din dumating after 2 days lng, thanks seller.
🔌Compatibility:10Excellent carburetor!, 🔨Durability:10 🏅Performance:10Good value for money., Works like a charm!,
nakabit ko na salamat at smooth na ang andar ng motor salamat seller at rider.
Good value for money., Highly recommended!,
Perfect fit for my motorcycle euro xrm 110
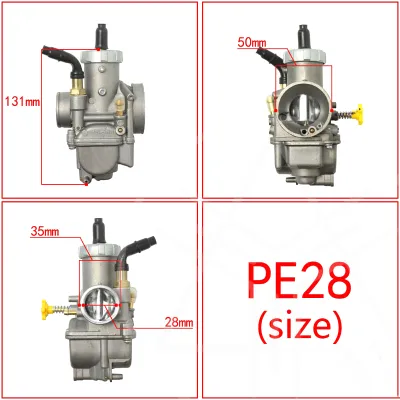
62 Lazada user ratings
Enhances engine power, Durable zinc alloy material, Durable zinc alloy material, Lightweight and portable design, Lightweight and portable d…Read full reviewShow less
Enhances engine power, Durable zinc alloy material, Durable zinc alloy material, Lightweight and portable design, Lightweight and portable design, Neat and compact packaging,
Sumigaw siya na malakas ang makina, hindi masama, hindi masama, hindi masama, hindi masama, maganda ang carburetor, salamat sa mabait na nag…Read full reviewShow less
Sumigaw siya na malakas ang makina, hindi masama, hindi masama, hindi masama, hindi masama, maganda ang carburetor, salamat sa mabait na nagbebenta.
Very good, well packaged, gagamitin ko at mag-uupdate soon about sa quality at kung tumagal, mura ang presyo...Check ko ang jetting.
Ok, maayos ang mga bagay at hindi nasira, sinusubukan ko. Sana tuloy tuloy na.
ok naman sya maganda kaso may hunting issue may basag ng kunti
Prices are valid at publication and may change. Please refer to the product page for the latest price.
Rule out other common maintenance culprits before proceeding. A fouled spark plug can cause similar misfires; inspect the plug tip for black carbon or fuel wetness. Similarly, a heavily clogged air filter restricts airflow, mimicking a rich carburetor mixture. Clean or replace the air filter first to see if performance improves.
Halt DIY troubleshooting and consult a qualified mechanic if you hear deep metallic knocking, observe heavy blue or white exhaust smoke, or suspect low cylinder compression. A simple carburetor cleaning will not resolve internal mechanical damage, and professional diagnostic tools are required to prevent further engine wear.
Tools and Materials Required for the Job
Gathering the correct tools and safety gear before you begin prevents delays and protects delicate engine components. You will need a set of high-quality hand tools, including screwdrivers that match your carburetor’s fasteners perfectly. Many Japanese motorcycles use Japanese Industrial Standard (JIS) screws rather than standard Phillips screws; using a standard Phillips screwdriver on these soft fasteners can easily strip the heads. You will also need metric wrenches or sockets, a set of hex keys, and a shallow drain pan to catch escaping fuel safely.

Select a dedicated aerosol carburetor cleaner spray, and read the product label carefully before use. Verify that the cleaner is explicitly formulated for automotive or motorcycle carburetors and check its compatibility with surrounding materials. Some aggressive solvents can quickly melt, swell, or degrade plastic parts, rubber seals, and delicate gaskets.
Additionally, secure a source of compressed air, which is indispensable for drying parts and blowing debris out of tiny internal passages. Clean, lint-free microfiber rags are necessary to wipe down surfaces without leaving fibers behind that could clog the jets. Set up a clean, well-lit, and highly organized workspace, and wear chemical-resistant gloves and safety glasses to protect your skin and eyes from pressurized solvent spray.
Safe Removal and Disassembly Procedures
Working with gasoline requires strict adherence to safety protocols. Always work in a well-ventilated area far away from open flames. Turn the fuel petcock to the “OFF” position and disconnect the motorcycle’s battery, starting with the negative terminal, to eliminate any risk of electrical sparks. Place a drain pan beneath the carburetor float bowl, loosen the drain screw, and drain all remaining fuel safely.
Once drained, take clear reference photos of the carburetor from multiple angles. Photograph the routing of the throttle cables, choke cables, fuel lines, and vacuum hoses to guide your reassembly. Carefully disconnect the fuel delivery line, choke cable, and throttle cables from their respective linkages on the carburetor body.
Loosen the mounting clamps securing the carburetor to the rubber intake manifold boot and the airbox boot. Gently wiggle the carburetor body to free it from the boots, taking care not to tear the rubber. Move the carburetor to your clean workbench. Remove the screws holding the float bowl to the bottom of the carburetor body, then lift the bowl off to expose the float assembly and brass jets.
Carefully slide out the float pin to release the float and the delicate float needle valve. Next, use a properly fitting flathead screwdriver to unscrew the main jet, pilot jet, and emulsion tube. Because these components are made of soft brass, they are highly susceptible to damage. If you encounter a screw or jet that is completely seized, stop immediately. Forcing a stuck brass jet will strip its threads or slot, ruining the carburetor body. In this situation, seek assistance from a professional mechanic who has specialized extraction tools.
Cleaning the Internal Components and Passages
With the carburetor fully disassembled, you can begin the deep cleaning process to remove varnish, gum, and dirt. Place the removable metal parts—including the brass jets, the emulsion tube, and the metal float bowl—into a small container. Spray them thoroughly with your approved carburetor cleaner, strictly adhering to the time limits specified on the product label. Over-soaking metal parts in harsh chemicals can strip protective coatings or cause surface corrosion.
After soaking, use compressed air to blow through each jet and internal passage in the carburetor body. This forces out dissolved varnish and loosened debris. Never use sewing needles, copper wire, or drill bits to clear clogged jets. Even soft wire can scratch or permanently enlarge the precision-machined orifices of brass jets, altering the fuel-air mixture and permanently ruining the carburetor’s calibration. If a jet remains clogged after spraying, soak it again or use a specialized, soft-filament carburetor cleaning brush designed specifically for this purpose.
Wipe down the inside of the float bowl with a lint-free rag to remove any remaining sediment. Inspect the tip of the float needle valve under a bright light; it should have a smooth, perfect rubber cone. If you see a visible groove, pitting, or wear on the rubber tip, the needle will fail to seal properly, leading to fuel overflowing from the bowl. If this wear is present, you must replace the needle and seat.
Keep all rubber O-rings, gaskets, and the vacuum diaphragm completely away from harsh chemical solvents. Carburetor cleaner causes rubber to swell, stretch, or tear, rendering these critical seals useless. If any rubber seals are cracked, flattened, or brittle, discard them and install new ones from a model-specific carburetor rebuild kit.
Reassembly and Reinstallation on the Motorcycle
Reassembling your carburetor requires patience and systematic attention to detail. Lay out all cleaned and inspected parts on your workbench, referring to your disassembly photos to confirm the correct placement of every component. Begin by carefully threading the pilot jet, main jet, and emulsion tube back into the carburetor body. Tighten them gently until they are snug; do not over-tighten, as the soft brass threads can easily strip.
Reinstall the float needle onto the float arm, lower the assembly into position, and slide the float pin back into place. Before closing the unit, ensure that the float bowl gasket is perfectly seated in its groove. A pinched or misaligned gasket will cause immediate fuel leaks once the fuel valve is opened. If your carburetor uses a top-mounted vacuum diaphragm, ensure the rubber membrane is seated flat in its channel without any wrinkles before securing the top cover.
When reinstalling the carburetor onto the motorcycle, verify your specific vehicle model, year, and mounting specifications in your owner’s manual. Push the carburetor firmly into the rubber intake manifold boot, ensuring it is fully seated and aligned straight. Tighten the mounting clamps evenly. Over-tightening can crack the plastic or rubber boots, while under-tightening will allow air to bypass the carburetor, creating a lean condition that can damage your engine.
Reconnect the fuel line, throttle cables, and choke cable according to your reference photos. Before starting the engine, perform a physical check of the throttle grip. Twist the throttle fully and release it; it must snap back to the closed position smoothly and instantly in all steering positions. Check that the cables have the manufacturer-specified amount of free-play to prevent the engine from revving unexpectedly when you turn the handlebars.
Post-Cleaning Tuning and Verification
With the carburetor securely mounted and all lines reconnected, verify your work. Turn the fuel petcock back to the “ON” position and wait a few minutes. Inspect the carburetor body, fuel lines, and the bottom drain screw for any signs of wetness or dripping fuel. If you detect a leak, turn the fuel valve off immediately and resolve the issue before proceeding.
If there are no leaks, start the motorcycle. You may need to crank the engine a few times to allow fuel to refill the empty float bowl. Once started, let the engine idle and warm up until it reaches its normal operating temperature. Observe the exhaust output and listen to the idle stability. The engine should settle into a smooth, consistent idle without hunting or sputtering.
To fine-tune the engine, locate the idle speed screw and the air-fuel mixture screw. Refer strictly to your motorcycle’s service manual for the baseline settings, which are typically specified as a set number of turns out from fully closed. Adjust the idle speed screw until the engine idles within the manufacturer’s recommended RPM range.
If the engine continues to run poorly—such as popping on deceleration, bogging down under load, or showing signs of running excessively lean or rich—stop tuning. These persistent issues may indicate an air leak around the intake boot, incorrect float height settings, or internal engine wear. At this point, consult a professional mechanic to perform a comprehensive diagnostic check and prevent potential engine damage.
Frequently Asked Questions (FAQ)
How often should you clean a motorcycle carburetor?
There is no single mileage or calendar interval that applies to every motorcycle, as carburetor fouling depends heavily on fuel quality and usage patterns. In tropical climates like the Philippines, high humidity and temperature can cause fuel left in the tank to degrade and varnish quickly, especially during periods of inactivity. If you leave your motorcycle parked for several weeks without draining the float bowl, you may need to clean the carburetor sooner.
Always refer to your motorcycle’s owner’s manual for the manufacturer’s recommended maintenance schedule. Rather than relying solely on a fixed calendar, watch for performance triggers such as hard starting, sluggish throttle response, or an unstable idle to determine when a cleaning is necessary.
Can you clean a carburetor without removing it from the bike?
While there are fuel system additives and aerosol sprays designed to be introduced directly into the air intake while the engine is running, these methods have significant limitations. In-place cleaning products are only effective for removing light varnish or carbon deposits from the throttle plate and the throat of the carburetor.
They cannot reach or clear deeply clogged internal passages, the pilot jet, or the emulsion tube, which are the primary causes of fuel-air mixture issues. To resolve persistent performance problems, a complete removal, disassembly, and manual cleaning of the internal components are strictly necessary.
Community discussion
Share your experience or ask a question. Comments are reviewed before publication.