
Finding the right engine air filter for a second-generation Mitsubishi Montero requires a clear understanding of your vehicle’s specific engine configuration and physical airbox dimensions. Because these rugged sport utility vehicles are frequently driven in tropical, high-humidity, and dusty environments across the Philippines, maintaining a clean and perfectly sealed air filter is vital to protect the engine from premature wear. Whether you choose a genuine original equipment manufacturer (OEM) part or a reputable aftermarket alternative, the key to a successful purchase is verifying compatibility before completing your order.
Operating a vehicle with an ill-fitting or clogged air filter can lead to restricted airflow, reduced fuel efficiency, and potential engine damage. In severe cases, a poorly sealed filter allows abrasive road dust and fine volcanic ash to bypass the filtration media entirely, scoring cylinder walls and damaging sensitive intake components. By taking a systematic approach to identifying your vehicle’s specifications and cross-referencing part numbers, you can ensure your engine receives clean, unrestricted air for optimal performance.
Identifying Your Exact Montero Gen 2 Specifications
To avoid purchasing an incompatible air filter, you must first locate the precise engine code and OEM part number designated for your specific vehicle variant. The term “Montero Gen 2” can sometimes cause confusion in online catalogs. In some contexts, it refers to the classic second-generation Montero SUV produced during the 1990s, while in local Philippine automotive circles, it is also frequently used to describe the second-generation Montero Sport mid-size SUV produced from the mid-2000s up to 2015. Because these two vehicle families utilize entirely different chassis layouts and engine families, relying solely on a generic online product label is highly risky.
Products mentioned in this guide
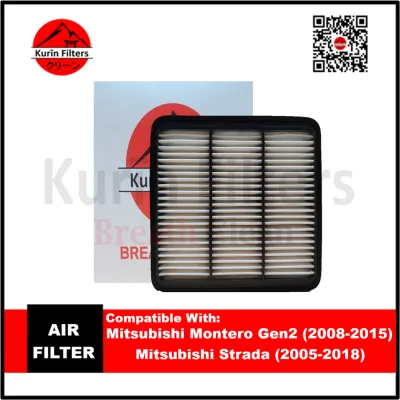
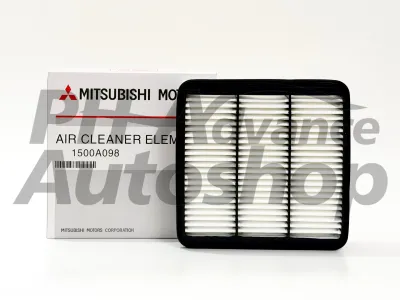
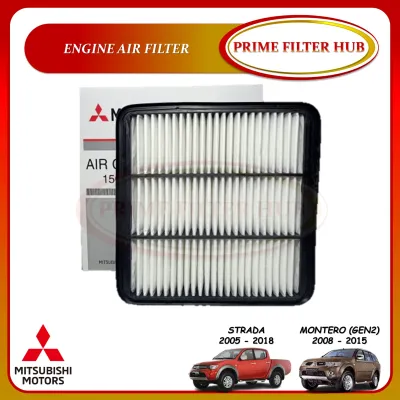
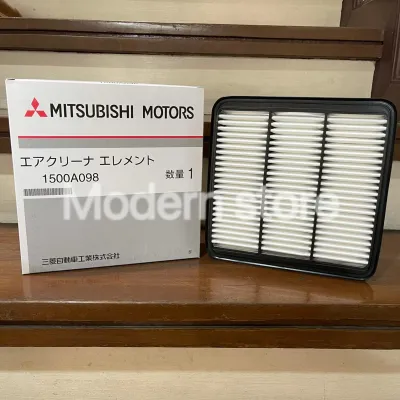
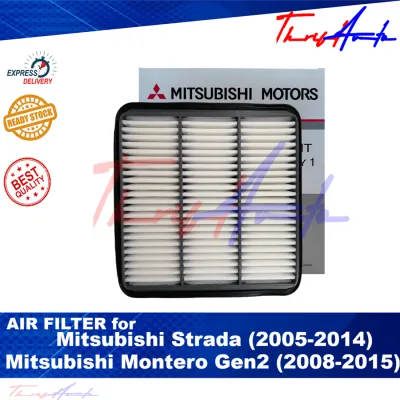
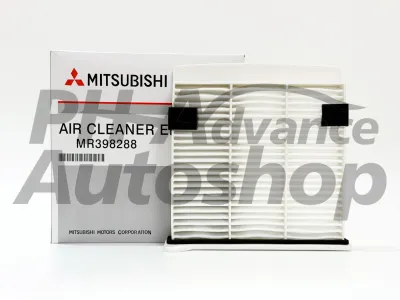
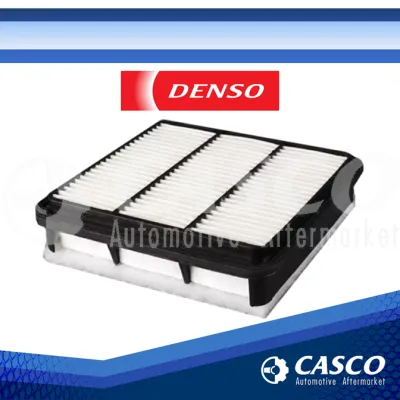
Prices are valid at publication and may change. Please refer to the product page for the latest price.
Your primary source of truth is the vehicle identification plate, which is typically riveted to the firewall inside the engine bay or located on the door jamb. This metal plate displays the exact engine model code. For instance, your vehicle might be equipped with a 2.5-liter 4D56 turbodiesel, a 3.2-liter 4M41 turbodiesel, or a V6 gasoline engine such as the 3.0-liter 6G72 or 3.5-liter 6G74. Each of these engines utilizes a distinct airbox design, meaning a filter designed for a diesel variant will not fit a gasoline model, and vice versa.
Once you have identified your engine code, consult your owner’s manual or previous maintenance records from an authorized service center to locate the original equipment manufacturer (OEM) part number. If the manual is unavailable, you can often find the part number stamped directly onto the plastic housing of the existing airbox or printed on the frame of the currently installed filter, provided it is an OEM unit. Having this part number on hand is the most reliable way to navigate online parts databases and retail catalogs.
Many e-commerce platforms and online automotive retailers group parts under broad, unverified compatibility tags. A listing might claim to fit “all Montero models,” but regional variations in emissions equipment, left-hand versus right-hand drive steering gear clearance, and model year transitions can alter the required filter shape. Knowing your exact engine code and OEM part number eliminates this guesswork and prevents the inconvenience of returning incorrect parts.
Comparing OEM and Aftermarket Air Filter Options
When shopping for a replacement air filter, you will generally choose between genuine OEM parts and aftermarket alternatives. Genuine Mitsubishi OEM filters are engineered to the exact tolerances and filtration specifications established by the factory. Sourcing an OEM filter from an authorized dealership or a certified parts distributor guarantees a perfect physical fit and ensures the filtration media provides the precise balance of airflow and particulate capture required by your engine.

For owners of turbocharged diesel models, maintaining this balance is especially critical. Turbochargers draw in vast volumes of air, and any restriction caused by an overly dense or poorly designed filter can lead to increased exhaust gas temperatures, sluggish throttle response, and reduced fuel economy. Genuine OEM filters utilize high-quality paper or synthetic media designed to withstand the high suction pressures generated by turbocharged engines without collapsing or tearing.
Aftermarket air filters present a wide range of options, from budget-friendly standard paper replacements to premium high-performance media. Reputable aftermarket brands design their products to match or exceed OEM specifications, often offering excellent filtration efficiency at a competitive price point. When evaluating aftermarket options, pay close attention to the type of filtration media used:
- Standard Paper Media: These filters closely mimic the factory design, utilizing pleated cellulose fibers to trap dust. They are highly effective for daily driving in normal urban conditions and are designed to be discarded and replaced once dirty.
- Synthetic Media: Often dry and non-oiled, synthetic filters use advanced polymer fibers that offer improved dust-holding capacity and resistance to moisture, making them well-suited for humid tropical climates.
- Oiled Cotton Media: These reusable filters allow for higher airflow and can be cleaned and re-oiled. However, they require meticulous maintenance; applying too much oil during the cleaning process can cause oil droplets to migrate down the intake tube, contaminating the mass airflow sensor and triggering engine warning lights.
Before purchasing any aftermarket filter, verify that the manufacturer explicitly lists your vehicle’s OEM part number as a direct cross-reference. Avoid products that rely on vague marketing claims of universal compatibility or superior performance without providing detailed physical specifications and compliance with international filtration standards.
Step-by-Step Fitment Verification Before Purchasing
To ensure the air filter you select will physically fit and seal correctly inside your vehicle’s airbox, follow this practical verification checklist before finalizing your order:
First, cross-reference your identified OEM part number with the filter manufacturer’s official online catalog. Do not rely solely on the search tools provided by retail websites or online marketplaces. Instead, visit the official website of the aftermarket brand you are considering and use their dedicated part-finder tool to confirm that their product is a certified match for your specific engine and model year.
Second, if the original part number is missing, faded, or has been replaced by an unbranded aftermarket unit, take physical measurements of your existing filter. Remove the filter from the airbox and use a tape measure or digital caliper to record its exact length, width, and height in millimeters. Measure the outer edges of the filter frame, including the rubber sealing gasket. Even a minor discrepancy of two or three millimeters can prevent the airbox cover from latching securely, leading to unfiltered air bypassing the filter.
Third, carefully inspect the product images and technical drawings provided by the seller. Compare the shape of the corners—some filters feature sharp 90-degree angles, while others have rounded corners or a single chamfered edge to ensure correct orientation. Count the number of pleats if visible, and check for the presence of any integrated mounting tabs, alignment notches, or metal reinforcement mesh that matches your original filter.
Finally, establish a strict safety boundary: if there is any conflict between your physical measurements, the OEM part number, or the retailer’s compatibility description, stop the purchase process immediately. Do not attempt to force an ill-fitting filter into your airbox or modify the filter frame to make it fit. Operating a vehicle with an improperly sealed airbox can lead to severe engine wear. Instead, consult a qualified mechanic or an authorized parts specialist to resolve the discrepancy and identify the correct part.
Installation Checks and Maintenance Boundaries
Replacing an engine air filter is a straightforward task, but performing a few critical checks during the installation process is essential to prevent engine contamination and ensure a proper seal. Before placing the new filter into the housing, use a clean, damp microfiber cloth to wipe down the interior of the airbox. Remove any accumulated road dust, dried mud, leaves, or insects that have settled in the bottom of the housing, taking care not to push any debris down the clean-air intake tube leading to the engine.
When inserting the new filter, ensure the rubber or foam gasket seats evenly within the groove of the airbox housing. The gasket must lie completely flat without pinching, twisting, or folding. Gently press down on the edges of the filter frame to confirm it is fully seated. When closing the airbox cover, the securing clips or screws should engage smoothly; if you must apply excessive force to latch the clips, the filter may be misaligned or incorrectly sized. Stop, remove the cover, and recheck the alignment.
To maintain the integrity of your engine’s intake system, observe strict maintenance boundaries. Standard paper and dry synthetic filters are strictly single-use components. Never attempt to wash a standard paper filter with water or cleaning solvents, as moisture will cause the cellulose fibers to swell and permanently restrict airflow. Additionally, avoid using high-pressure compressed air to blow dust out of a dirty filter; while this may make the filter appear cleaner, the high pressure can easily create microscopic tears in the media, rendering it ineffective at trapping fine dust.
Recognize when a simple filter replacement is insufficient and professional intervention is required. If you discover cracks in the plastic airbox housing, damaged mounting brackets, or a torn rubber intake hose, these components must be replaced immediately to prevent unfiltered air from entering the engine. Furthermore, if you observe a heavy film of oil or dark soot inside the intake tube, or if the mass airflow sensor shows signs of contamination, do not attempt to clean these sensitive parts with aggressive household solvents. Seek the assistance of a qualified professional who can safely diagnose the source of the contamination and clean the system using specialized electronics cleaners.
Frequently Asked Questions (FAQ)
Can I use a universal or modified air filter on my Montero Gen 2?
Using a universal cone filter or an unapproved modified intake system on your vehicle carries significant mechanical risks. Universal filters often eliminate the protective factory airbox, exposing the intake to hot engine bay air and increasing the risk of water ingestion during heavy tropical downpours or flooded street crossings. Without a sealed, vehicle-specific housing, it is extremely difficult to achieve a reliable seal, which can allow unfiltered dust to enter the engine. This dust ingestion can rapidly erode the compressor wheel of a turbocharger and contaminate the mass airflow sensor, leading to poor engine performance and costly repairs. Avoid intake modifications unless they utilize a high-quality, vehicle-specific kit installed and tuned by a qualified professional.
How often should the engine air filter be replaced in dusty driving conditions?
While standard maintenance schedules recommend replacement based on fixed mileage intervals, driving in dusty environments—such as unpaved provincial roads, construction zones, or heavily polluted urban areas—requires condition-based replacement. Perform a visual inspection of your filter every few months. You can conduct a simple light test by holding a bright flashlight behind the filter media; if light cannot easily penetrate the pleats, or if you observe heavy particulate buildup, deep gray discoloration, or oil saturation, the filter has reached its capacity and must be replaced. Always refer to the severe driving conditions section of your owner’s manual for adjusted replacement intervals tailored to harsh environments.
Community discussion
Share your experience or ask a question. Comments are reviewed before publication.