
Fixing an exhaust leak or ticking noise at the muffler flange after an upgrade requires verifying the physical alignment of the entire exhaust system, replacing the single-use crush gasket with a new one matching the aftermarket pipe’s specifications, and tightening the flange nuts using a calibrated torque wrench in an even, progressive sequence. Neglecting these steps often leads to persistent leaks, as aftermarket systems rarely align perfectly without deliberate adjustment.
In the tropical climate of the Philippines, intense ambient heat, heavy monsoon rains, and high humidity accelerate thermal cycling and oxidation. These environmental factors make a secure, gas-tight seal at the muffler flange even more critical to prevent premature corrosion, exhaust gas bypass, and structural damage to your motorcycle or scooter.
Immediate Safety Checks and Symptom Identification
Working on an exhaust system carries inherent physical risks that require strict safety precautions before you begin any diagnostic work. Always allow the engine to cool down completely; exhaust pipes can reach temperatures exceeding 500°C, which will cause severe, instantaneous burns upon contact. Additionally, never run your engine to diagnose leaks inside an enclosed space like a residential garage or tight carport. Carbon monoxide is an odorless, toxic gas that can quickly accumulate to dangerous levels, so always conduct your troubleshooting in a well-ventilated outdoor area.
Products mentioned in this guide
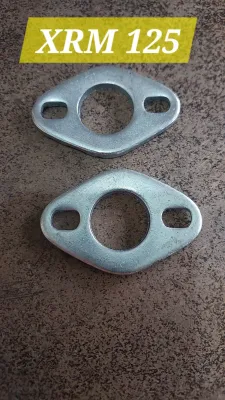
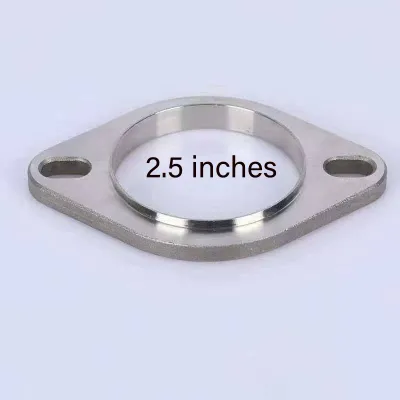
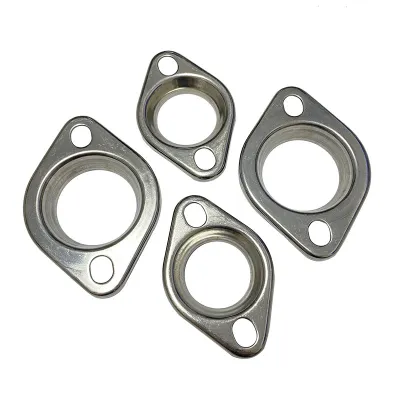
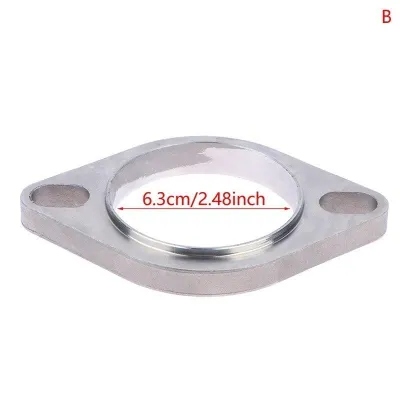
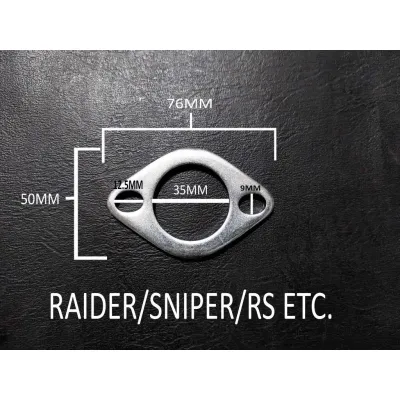
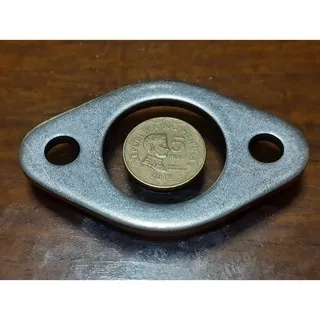
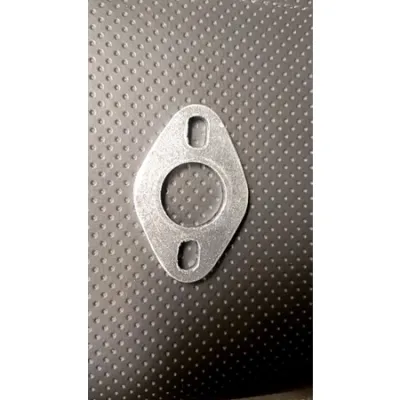
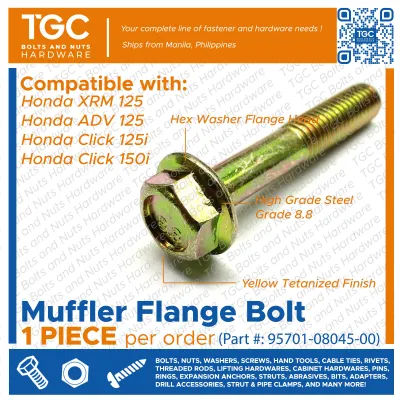
Prices are valid at publication and may change. Please refer to the product page for the latest price.
Identifying a leak at the muffler flange involves recognizing a specific set of auditory and physical symptoms. The most common sign is a distinct, sharp ticking or tapping sound that mimics the noise of unadjusted engine valves. This ticking directly corresponds to engine speed, accelerating in tempo and volume as the RPM rises and becoming particularly loud under acceleration. You may also notice a strong burning smell as superheated exhaust gases escape the joint and blow directly onto nearby plastic fairings, rubber hoses, or electrical wiring harnesses.
Physical indicators are often visible upon closer inspection of the exhaust joint. Look for fine, powdery black soot trails radiating outward from the flange connection, which serve as a clear map of the escaping gas path. Furthermore, because exhaust leaks disrupt the scavenging effect and backpressure required for optimal engine performance, you will likely experience a noticeable loss of low-end torque and sluggish throttle response during takeoffs on city streets.
It is important to distinguish a flange leak from other common exhaust noises before starting repairs. A flange leak produces a sharp, localized hiss or tick at the joint itself. In contrast, an internal muffler rattle typically sounds like a loose, metallic clinking inside the silencer canister, often caused by broken baffling or degraded packing material. A header leak occurs directly at the cylinder head exhaust port and is usually much louder, sharper, and more metallic than a leak further down the system at the muffler or mid-pipe flange.
Common Causes of Muffler Flange Leaks After an Exhaust Upgrade
Flange misalignment is a primary reason why newly installed slip-on or full exhaust systems leak. During installation, many riders make the mistake of forcing the exhaust pipe into position and fully tightening the flange nuts before securing the rear muffler brackets and mid-pipe hangers. This improper sequence puts immense physical stress on the connection, pulling the flange plate at an angle and preventing it from sitting flat against the mating surface.

Failure of the exhaust crush gasket, often referred to as a donut gasket, is another frequent culprit behind post-upgrade leaks. These gaskets are engineered to deform and crush a single time to fill the microscopic imperfections between the mating surfaces. Reusing an old, already-crushed gasket is a guaranteed way to cause a leak, as the metal has lost its elasticity and cannot seal a new connection. Additionally, installing a gasket backward or using a generic size that does not match the inner and outer diameter of your aftermarket muffler flange will allow high-pressure gases to bypass the seal.
Thin, low-grade aftermarket materials are highly susceptible to warped flange surfaces. When subjected to extreme heat cycling and uneven tightening forces, thin steel or aluminum flange plates can easily bend or bow. Once a flange is warped, it can no longer apply uniform clamping force across the gasket, leaving a permanent gap where gases can escape. This issue is often exacerbated by uneven torque distribution during the initial installation.
Finally, missing spacers or incorrect mounting hardware can prevent the flange from seating flush. Aftermarket exhaust systems often feature flange plates with different thicknesses than the original equipment manufacturer (OEM) components. If you attempt to reuse the stock bolts or studs without the spacers or washers supplied by the aftermarket manufacturer, the hardware may bottom out before the flange can apply adequate clamping pressure to the gasket.
Step-by-Step Troubleshooting and Repair Guide
Correcting a leaking muffler flange requires systematic disassembly, inspection, and precise reassembly. To complete this repair successfully, you will need basic hand tools, a wire brush, a calibrated torque wrench, and a brand-new replacement exhaust gasket designed specifically for your system.
Before loosening any bolts, always consult your specific motorcycle’s service manual and the aftermarket exhaust manufacturer’s instructions. These documents contain critical information regarding hardware requirements, routing, and exact torque specifications. If you find conflicting instructions or are unsure of product compatibility, stop and consult a qualified professional mechanic to avoid damaging your vehicle.
Inspecting the Flange, Gasket, and Hardware
Begin by unbolting the muffler flange and carefully pulling the joint apart to expose the sealing surfaces. Before cleaning anything, trace the black soot patterns around the joint; these carbon deposits will show you exactly where the seal failed and help you identify if a warped flange or misaligned pipe was the primary cause.
Next, remove the old crush gasket from the joint. Inspect it closely for flat spots, deep tears, or areas where it failed to compress evenly, which points to uneven tightening. Even if the old gasket looks relatively intact, discard it immediately, as attempting to reuse a deformed gasket will almost always result in a recurring leak.
Examine the mating surfaces on both the exhaust pipe and the receiving joint for physical damage. Use a straightedge tool to check if the flange plate is warped or bowed, and inspect the surfaces for deep scoring, rust, or old gasket material. Clean the area thoroughly with a wire brush to ensure a smooth, debris-free mating surface. Finally, inspect the exhaust studs or bolts for stripped, cross-threaded, or stretched threads, which can prevent the hardware from holding proper tension.
Realigning the Exhaust and Applying Proper Torque
To ensure a tension-free fit, use the “loose-fit” method during reassembly. Loosen all the mounting brackets, frame hangers, and mid-pipe joints along the entire length of the exhaust system. This step allows the individual pipes to shift and find their natural, unstressed alignment rather than being forced into a bind at the flange connection.
Insert the brand-new crush gasket into the clean joint, ensuring it sits completely flat and centered. Align the muffler flange over the studs and thread the nuts on by hand until they are finger-tight against the flange plate. This prevents cross-threading and ensures the flange is aligned correctly before any mechanical force is applied.
Using a calibrated torque wrench, tighten the flange nuts progressively and evenly. Alternate between the nuts in a star pattern or a back-and-forth sequence, turning each nut a few threads at a time to distribute the clamping force equally across the gasket. Tighten the hardware until you reach the exact torque value specified in your vehicle’s service manual or the aftermarket manufacturer’s guidelines. Never overtighten these nuts in an attempt to stop a leak, as doing so will warp the flange plate, stretch the threads, or snap the exhaust studs entirely.
Quick Diagnostic Guide for Post-Installation Symptoms
Use the following reference matrix to match your specific post-installation symptoms with their most likely mechanical causes and the necessary actions to resolve them safely.
| Symptom | Likely Cause | Action Required |
|---|---|---|
| Ticking noise is loud on cold start but fades or disappears as the engine warms up. | Minor gap at the flange; thermal expansion of the metal temporarily seals the leak. | Allow the engine to cool completely, then check and retighten the flange hardware to the specified torque. |
| Continuous loud ticking, popping, or backfiring under load that does not fade. | Major flange misalignment, a completely blown gasket, or a warped flange plate. | Disassemble the joint, inspect the flange for warp, install a new crush gasket, and realign using the loose-fit method. |
| Burning smell near the exhaust joint without an audible ticking sound. | Exhaust gases blowing directly onto fairings, wiring, or plastics; incorrect heat shield placement. | Inspect the flange seal and check the clearance of all nearby plastic and rubber components. Realign or add heat shielding. |
When to Stop and Seek Professional Help
While many exhaust alignment issues can be resolved at home, certain scenarios demand the expertise of a professional mechanic. If you encounter a stripped or broken exhaust stud that has snapped off flush inside the cylinder head, stop immediately. Attempting to extract a hardened steel stud from an aluminum cylinder head without specialized tools can easily ruin the engine casting, turning a minor issue into an expensive repair.
Additionally, if you discover that the cylinder head mating surface itself is severely gouged or warped, or if you find cracked welds on your new aftermarket exhaust pipe, do not attempt to fix them yourself. Professional machine shops have the precision equipment required to resurface mating joints or weld thin-walled exhaust tubing safely.
Avoid DIY drilling, helicoiling, or structural welding on critical exhaust components unless you have the proper training, tools, and experience. Incorrectly installed thread inserts or poor welds can compromise the structural integrity of your engine, cause permanent exhaust leaks, and void your aftermarket product warranties. In the Philippines, professional extraction or machining at a reputable local shop typically costs between ₱1,500 and ₱5,000, which is a worthwhile investment to protect your vehicle from permanent damage.
Preventing Future Flange Leaks and Exhaust Noises
Preventing future exhaust leaks starts with a commitment to using high-quality, single-use gaskets. Whenever you remove your exhaust system for routine maintenance, tire changes, or cleaning, always replace the crush gasket with a new OEM or equivalent unit. Attempting to save money by reusing an old gasket is highly likely to result in a leak, requiring you to repeat the entire disassembly process.
During reassembly, apply a thin layer of high-temperature anti-seize compound to the threads of the exhaust studs or bolts. This compound prevents the hardware from seizing or galling due to the extreme heat and high humidity typical of the tropical Philippine environment. Be exceptionally careful to keep the anti-seize compound on the threads only, avoiding any contact with the gasket mating surfaces, as foreign substances can degrade the gasket material and ruin the seal.
Finally, make it a habit to check the torque of your muffler flange hardware after the first few heat cycles of a new installation. The intense thermal expansion and contraction of the metal, combined with the initial settling of the new crush gasket, can cause the hardware to back off slightly. Once the engine has cooled down completely, verify that the nuts are still torqued to the manufacturer’s specifications to ensure a long-lasting, leak-free connection.
Frequently Asked Questions (FAQ)
This section addresses a common DIY misconception regarding the use of chemical sealants on mechanical exhaust joints.
Can I use high-temperature exhaust sealant on the muffler flange?
No, you should not use high-temperature exhaust sealant, silicone, or assembly paste on a muffler flange connection. Muffler flanges are engineered to rely entirely on the mechanical crush of a dedicated metal or graphite gasket to seal high-pressure, high-temperature exhaust gases.
Exhaust sealants and pastes are designed to seal low-pressure slip joints or patch minor cracks in solid pipes. When applied to a high-pressure flange joint, the sealant will quickly blow out under pressure, leaving a path for gases to escape. Furthermore, the presence of wet sealant can prevent the flange from clamping down evenly on the crush gasket, and the dried residue will make future disassembly and cleanup incredibly difficult.
Community discussion
Share your experience or ask a question. Comments are reviewed before publication.