
When sudden tropical downpours strike during the monsoon season, a clear windshield is your primary line of defense on the road. However, purchasing a new set of wiper blades often presents a confusing hurdle: a plastic bag filled with multiple small, oddly shaped plastic pieces known as wiper adapters. Finding the correct wiper adapter and installing it properly is essential to keep your wiper blades securely attached and functioning under heavy rainfall.
A wiper adapter is a small plastic or metal connector that bridges the gap between the universal wiper blade housing and your vehicle’s specific wiper arm. Because vehicle manufacturers use several different wiper arm designs to secure their factory blades, aftermarket wiper blade manufacturers include a variety of these adapters in their retail packaging. This modular system allows a single wiper blade model to fit dozens of different vehicle makes and models, provided you select and install the correct adapter.
Understanding Wiper Arm and Blade Connections
To successfully complete this maintenance task, you must understand how your vehicle’s wiper arm, the adapter, and the blade housing interact. The metal wiper arm extends from the vehicle’s wiper motor cowl and provides the mechanical force and spring tension required to keep the wiper blade pressed flat against the windshield glass. The wiper blade itself contains the rubber squeegee element that clears away water, dirt, and road grime. The wiper adapter serves as the critical mechanical interface that locks these two components together.
Products mentioned in this guide
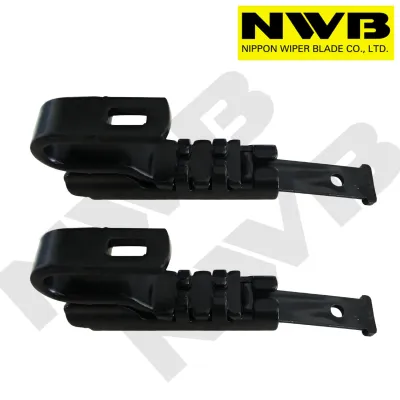
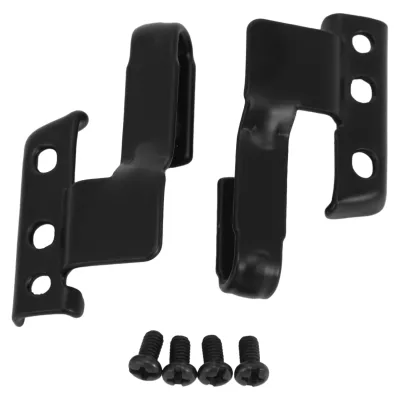
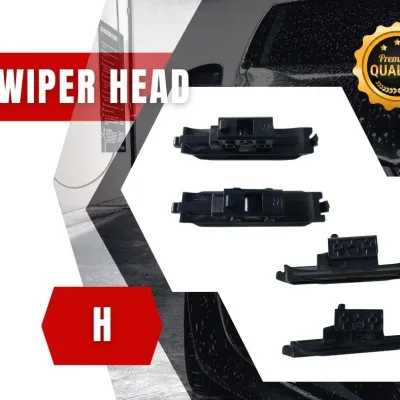

Prices are valid at publication and may change. Please refer to the product page for the latest price.
Compatibility is strictly dictated by the vehicle manufacturer’s wiper arm design, not by the brand or length of the replacement wiper blade you purchase. Even if a replacement blade is labeled as “universal,” it will not function without the specific adapter designed to match your vehicle’s arm type. Using an incorrect or poorly fitted adapter can lead to insufficient windshield contact, resulting in severe streaking or missed spots. In worse-case scenarios, an incorrect adapter can cause the wiper blade to detach entirely at high speeds or during heavy storms, leaving the bare metal wiper arm to scrape and permanently damage your windshield glass.
Before purchasing or installing any aftermarket wiper assembly, always verify your vehicle’s model, year, and original wiper interface by consulting your vehicle owner’s manual or the wiper manufacturer’s official application guide. Never assume compatibility based solely on a broad category term or visual similarity.
Tools and Safety Preparation
Working on your vehicle’s wiper system is a straightforward process, but it requires careful preparation to prevent costly accidental damage. Before you begin, gather a few essential items: a thick microfiber cloth or a heavily folded towel, clean work gloves to protect your hands from road grime and sharp metal edges, and your new wiper blade kit containing the assortment of plastic adapters.

The primary safety risk during this procedure is the spring-loaded metal wiper arm itself. When you remove the old wiper blade, the bare metal wiper arm remains raised in a vertical position. This arm is under significant spring tension; if it is accidentally bumped or triggered, it can snap back down toward the windshield with immense force. A bare metal arm striking the glass without a buffer will easily crack or shatter your windshield, resulting in an expensive repair bill.
To mitigate this risk, always place a thick, folded towel or a heavy microfiber cloth directly on the windshield glass beneath the wiper arm before you begin any disassembly. Keep this protective barrier in place throughout the entire process. If the arm slips from your hand while the blade is detached, the towel will absorb the impact and protect the glass. Additionally, keep a firm grip on the metal arm whenever you are manipulating the connection point.
Identifying Your Wiper Arm and Adapter Type
Identifying the exact connection style of your vehicle’s wiper arm is the most critical step in ensuring a secure installation. Begin by carefully lifting the wiper arm away from the windshield until it locks into its raised, vertical service position. If your vehicle’s hood obstructs the wiper arms from lifting fully, consult your vehicle owner’s manual to activate the “wiper service mode,” which typically parks the wipers in an upright position on the glass where they can be lifted safely.
Once the arm is raised and secured, use a clean cloth to wipe away accumulated road grime, dirt, and environmental debris from the connection joint. In tropical climates like the Philippines, wiper joints frequently accumulate fine dust, tree sap, and dried salt residue, which can obscure locking tabs and small part markings. Cleaning this area thoroughly ensures you have clear visibility of the arm’s physical shape, locking mechanisms, and any small release buttons.
Inspecting the Connection Point
Examine the connection point where the wiper arm meets the current blade housing. You are looking for specific physical characteristics that define how the arm secures the blade. Pay close attention to the shape of the very end of the metal arm. It may terminate in a curved hook, a straight metal rod with a small protruding pin on the side, or a flat, square-ended bracket featuring a small locking tab or a push-button release mechanism.
If the old wiper blade is still attached to the arm, observe how its current adapter interfaces with the metal arm. Note where the locking tabs click into place and how the plastic body fills the void inside the arm’s connection bracket. However, remember that the metal wiper arm itself is the ultimate source of truth. Aftermarket blades may use slightly different adapter shapes than the original factory parts to achieve the same secure fit, so focus on matching the physical dimensions and locking points of the metal arm.
Matching Common Adapter Types in the Philippines
Vehicles on Philippine roads feature a diverse mix of Japanese, Korean, European, and American designs, meaning you are likely to encounter one of several common wiper arm configurations.
- J-Hook (or U-Hook): This is the most common standard connection type, especially on older or Asian-brand passenger cars and utility vehicles. The metal arm ends in a distinct curve resembling the letter "J" or "U." These hooks typically come in two standard sizes: 9×3 mm or 9×4 mm. You must verify these dimensions against the new blade manufacturer's adapter sizing guide, as a 9×3 mm hook will feel loose and unstable on a 9×4 mm adapter.
- Side Pin: Common on many European and select American vehicles, this style features a small cylindrical metal pin protruding horizontally from the side of the wiper arm near the tip. The adapter must slide onto this pin and lock into place with a small retaining clip or tab.
- Push-Button: This modern design features a flat, square-ended metal arm with a square button on the top or side surface. The adapter slides directly into the arm's collar until the spring-loaded button pops up through a matching hole in the adapter, locking it securely.
- Bayonet: This classic connection consists of a flat, straight metal arm that slides directly into the adapter channel. It is secured by a small locking tab on the adapter that clicks into a small hole or notch on the top of the metal arm.
Before proceeding, compare your cleaned metal wiper arm against the diagrams provided in the new wiper blade’s instruction manual to confirm which adapter letter or number corresponds to your specific arm style.
Removing the Old Wiper Blade Safely
With your protective towel firmly in place on the windshield, you can proceed to remove the old wiper blade. The removal process depends entirely on the connection style you identified in the previous step. For a standard J-Hook arm, look for a small plastic release tab on the underside of the plastic adapter joint. Press and hold this tab downward while sliding the entire wiper blade assembly downward toward the base of the wiper arm. Once the blade slides out of the curve of the hook, gently tilt it and pull it free from the arm.
For push-button or side-pin mechanisms, locate the release button or squeeze the small locking clips on the sides of the adapter. Press the button firmly while pulling the wiper blade away from the arm. If the connection is stiff due to age, heat exposure, or accumulated road grime, do not force or hammer the components. Instead, apply steady, firm pressure while gently rocking the blade back and forth to break the seal of dirt.
Throughout this entire removal process, maintain a firm, uninterrupted grip on the metal wiper arm with your non-dominant hand. Never let go of the arm while the blade is detached, as the spring tension can cause it to snap down instantly. Once the old blade is free, you can slide the old adapter out of the old wiper blade housing if you wish to compare its shape with the new adapters in your kit. However, immediately place the bare metal arm back down onto the protective towel on the windshield; do not leave it standing upright unattended.
Installing the Correct Adapter and New Wiper Blade
Open your new wiper blade package and locate the adapter kit. Select the plastic adapter that matches your vehicle’s arm type based on your visual inspection and the manufacturer’s compatibility chart.
First, you must assemble the selected adapter to the new wiper blade housing. Align the adapter with the central pivot point of the new blade. Depending on the brand, you will need to snap, slide, or clip the adapter into the blade’s central housing. Apply firm, even pressure until you hear or feel a distinct, solid “click.” This click indicates that the adapter’s retention tabs have fully engaged with the blade housing. If the adapter feels loose or wobbles, remove it and verify that you have aligned it correctly according to the manufacturer’s instruction sheet.
Next, lift the metal wiper arm off the protective towel once more, keeping a secure grip on it. Align the newly assembled wiper blade and adapter with the end of the wiper arm. Slide the adapter into or onto the wiper arm connection point. For J-Hooks, slide the adapter upward into the curve of the hook until the locking tab clicks into place. For push-buttons or side-pins, slide the adapter into the arm receiver until the button or pin snaps home.
Always consult the specific instruction sheet included in your wiper blade packaging, as locking mechanisms and assembly steps can vary significantly between brands. Once the blade is installed, perform a crucial safety check: grip the plastic adapter housing and give the wiper blade a gentle but firm tug away from the arm. The blade must remain locked in place. If there is any play, slippage, or if the blade slides off the arm, disassemble the components and recheck the adapter selection and alignment.
Testing and Verifying the Installation
Once both wiper blades have been successfully installed and verified with a physical tug test, carefully and gently lower the wiper arms back down onto the windshield glass. Remove the protective microfiber cloths or towels from the windshield and store them safely.
Before driving your vehicle, especially in wet weather, you must test the operation of the new wipers to ensure they are fully functional and secure. Never test new wiper blades on a dry windshield. Running rubber squeegees over dry, dusty glass creates high friction that can damage the delicate rubber edge, scratch the glass, or twist the newly installed adapters out of alignment. Instead, sit in the driver’s seat and activate your vehicle’s windshield washer fluid system to thoroughly wet the glass.
Turn on the wipers at a low speed first, observing their movement from inside the cabin. Look for the following indicators of a successful installation:
- Smooth, quiet sweeps: The blades should glide across the glass without any loud chattering, squeaking, or jumping.
- Complete water clearance: The rubber elements should make consistent contact across the entire sweep radius, leaving no unwiped patches or heavy streaks.
- Stable connections: Watch the connection joints closely to ensure there is no visible wobbling or shifting as the wipers change direction at the ends of their sweep.
If you notice the blades lifting off the glass at higher speeds, or if they fail to wipe cleanly, park the vehicle in a safe location and turn off the ignition. Re-inspect the installation by verifying that the adapter is fully seated in the arm and that the arm’s spring tension is pulling the blade flat against the glass. Additionally, verify that the blade lengths match your vehicle’s specifications, as installing oversized blades can cause them to collide or lift off the curved edges of the windshield.
Frequently Asked Questions (FAQ)
What should I do if none of the included adapters fit my wiper arm?
If none of the adapters in your universal kit fit your vehicle’s wiper arm, do not attempt to force a near-match or modify the plastic adapters with tools, as this compromises road safety. First, consult your vehicle’s owner manual or check online databases using your specific vehicle identification number (VIN) to verify your exact wiper arm specifications. If your vehicle uses a highly specialized or proprietary connection, return the universal kit to the retailer and purchase a direct-fit, vehicle-specific wiper blade set that is pre-assembled with the correct factory-style connector.
Can I reuse the adapter from my old wiper blade?
Reusing an old plastic adapter on a new wiper blade is highly discouraged and generally unsafe. Over time, automotive plastics degrade due to constant exposure to intense tropical heat, ultraviolet (UV) radiation, and environmental pollutants, making them brittle and prone to cracking under stress. Furthermore, locking tabs and internal tolerances wear down with use, and adapters are rarely interchangeable between different wiper blade brands due to proprietary housing designs. Always use the fresh, new adapters provided in your replacement kit to ensure a reliable and secure connection on the road.
Community discussion
Share your experience or ask a question. Comments are reviewed before publication.