
To protect your vehicle and ensure reliable stopping power, you must regularly inspect your brake pads and brake master cylinder. Early self-diagnosis involves checking the thickness of your brake pads through the wheel spokes, verifying the level and color of the fluid in your brake master cylinder reservoir, and testing how the brake pedal responds under foot pressure. Catching wear and hydraulic issues early prevents complete braking system failures on the road.
Why Early Brake Inspection Prevents Safety Failures
Your vehicle’s braking system relies on a precise combination of mechanical friction and hydraulic pressure to bring you to a safe stop. The brake pads provide the friction by clamping against the spinning rotors, while the brake master cylinder acts as the heart of the hydraulic system, generating the pressure needed to apply that friction. Because these components work in tandem, a failure in either can compromise your ability to slow down.
Operating a vehicle with compromised brakes poses an immediate safety hazard. A gradual loss of braking efficiency often goes unnoticed until an emergency stop is required. Regular visual and functional self-diagnosis helps identify minor issues—such as slowly wearing pads or contaminated fluid—before they escalate into dangerous failures. While this guide covers visual and functional self-diagnosis, internal hydraulic repairs or component replacements require professional assessment.
Products mentioned in this guide
![[Fast Delivery] Nissin Brake Master Left and Right Set E2 E3 B22 Universal](https://img.lazcdn.com/g/p/5fa2ab1a7f61c4f3a4a886e2c3ae9f86.png_400x400q80.png_.webp)
![[Fast Delivery] Universal Nissin Brake Master Left and Right Set E2 E3 B22 for HONDAVARIO150 CLICK150](https://img.lazcdn.com/g/p/3e56a52fb4766f292778afc14dc2a66b.jpg_400x400q80.jpg_.webp)
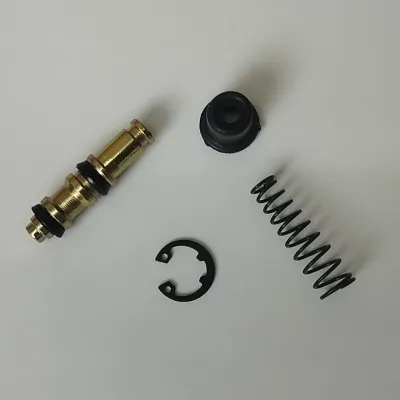
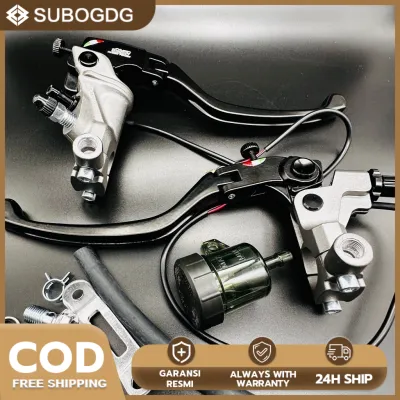
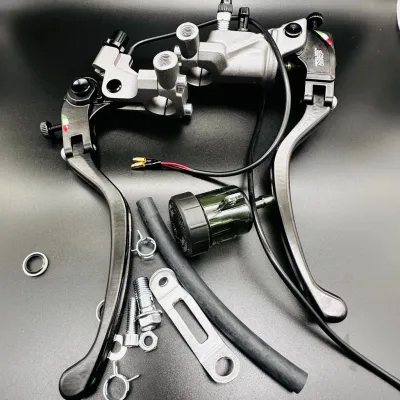
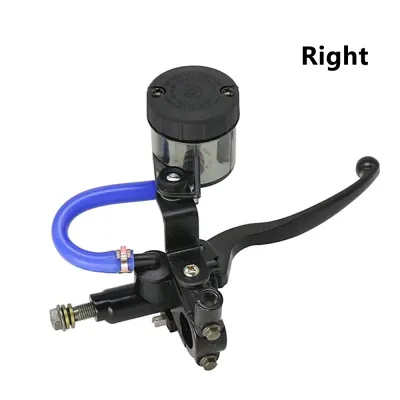
![UNIVERSAL REAR BRAKE MASTER PUMP [CHARCOAL] 01BP002Z](https://img.lazcdn.com/g/p/4e6dc7fdede77cbe98b34df9981ab84c.jpg_400x400q80.jpg_.webp)
Prices are valid at publication and may change. Please refer to the product page for the latest price.
How to Visually and Audibly Check Brake Pad Wear
Before performing any physical inspection, you must establish a safe working environment. Park your vehicle on a flat, level surface, turn off the engine, engage the parking brake fully, and place wheel chocks behind the tires to prevent rolling. Never place your body under the vehicle or inside the wheel well unless it is securely supported by rated jack stands.

To check your brake pads visually without removing the wheels, look directly through the spokes of your alloy wheels. You will see the brake caliper clamped over the shiny, circular brake rotor. Inside the caliper, look for the brake pad backing plate and the dark friction material pressed against the rotor surface. To determine if the pads are still safe, compare the remaining thickness of the friction material to the specifications in your vehicle owner’s manual. While many sources suggest a generic minimum thickness, always refer to your manufacturer’s specific threshold to ensure compliance with your vehicle’s design.
Your ears can also alert you to advanced brake pad wear. Modern brake pads often feature small metal tabs called wear indicators. When the friction material wears down to a critical level, these tabs make contact with the rotor, producing a high-pitched squealing or chirping sound when the brakes are applied. If you hear a harsh, metallic grinding noise, the friction material has worn away completely, resulting in metal-on-metal contact. This condition severely reduces stopping power and rapidly destroys the brake rotors.
While inspecting the pads, take a close look at the surface of the brake rotor itself. A healthy rotor should have a relatively smooth, uniform surface. If you observe deep circular grooves, scoring, or excessive rust, the surface is unevenly worn. If your visual inspection reveals pads that are at or below the manual’s specified threshold, or if grinding noises are heard, you must stop driving and seek professional replacement immediately.
Inspecting the Brake Master Cylinder and Fluid Condition
The brake master cylinder is typically located under the hood, mounted on the brake booster near the firewall on the driver’s side of the engine bay. Atop this metal cylinder sits a translucent plastic reservoir filled with brake fluid, allowing you to check the fluid level from the outside without exposing the system to external contaminants.
To check the fluid level, look at the side of the translucent reservoir to find the molded “MIN” and “MAX” lines. The fluid level should sit comfortably between these two marks, ideally closer to the maximum line. If the fluid level is near or below the minimum mark, it indicates either a leak in the hydraulic system or that your brake pads are significantly worn. As the pads wear down, the caliper pistons remain extended further out, which draws more fluid down from the reservoir into the lines.
Next, evaluate the color and clarity of the fluid. Healthy brake fluid is clear with a light amber or yellow tint. Over time, brake fluid degrades as it absorbs moisture and accumulates microscopic debris, turning dark, murky, or cloudy. In tropical and highly humid climates, such as the Philippines, brake fluid absorbs moisture from the air at an accelerated rate. This moisture lowers the boiling point of the fluid, which can cause the fluid to vaporize under heavy braking conditions—such as navigating steep descents in mountainous regions or enduring stop-and-go traffic—resulting in sudden brake fade. Do not guess the condition of your fluid based on color alone; always adhere strictly to the manufacturer’s recommended fluid flush intervals.
Carefully examine the exterior of the brake master cylinder, the reservoir cap, the connecting hydraulic lines, and the front of the brake booster for any signs of wetness, dampness, or crusty residue. Any visible fluid around these areas suggests an external leak, which compromises hydraulic pressure and introduces air into the system.
You must observe strict safety boundaries when dealing with brake fluid. Avoid opening the reservoir cap unnecessarily. Brake fluid is highly hygroscopic, meaning it rapidly absorbs moisture from the ambient air, which degrades its performance. Additionally, brake fluid is highly toxic to human skin and extremely corrosive to vehicle paint. If you must open the cap to inspect or service the system, thoroughly clean the entire area around the cap first to prevent dirt from falling inside. Always refer to your vehicle’s manual or the reservoir cap itself to identify the exact fluid specification required (such as DOT 3 or DOT 4), and never mix different fluid types, as chemical incompatibilities can destroy the internal seals of your brake master cylinder.
Testing Brake Pedal Feel for Hydraulic Issues
You can diagnose several critical hydraulic and mechanical issues by performing simple, controlled tests of the brake pedal’s physical response. Start with a stationary test while the vehicle is safely parked. With the engine turned off, pump the brake pedal several times. The pedal should feel progressively firmer with each pump until it becomes very stiff. If the pedal remains soft or spongy even after pumping, there is likely air trapped in the hydraulic lines.
Next, keep your foot pressed firmly on the brake pedal and start the engine. You should feel the pedal drop slightly as the engine vacuum activates the brake booster to assist your foot pressure. With the engine running, maintain steady, firm pressure on the pedal for at least twenty to thirty seconds. The pedal should hold its position firmly. If the pedal slowly and steadily sinks toward the floorboard under constant pressure, this is a classic symptom of an internal leak within the brake master cylinder, where fluid is bypassing the internal rubber cups and seals, or a physical leak in the brake lines. Conversely, if the pedal is rock-hard and requires extreme physical effort to depress when the engine is running, the brake booster itself may have failed.
If the stationary tests are successful, conduct a low-speed driving test in a safe, flat, and completely empty area, such as an unoccupied parking lot. Accelerate slowly to around 15 to 20 km/h and apply the brakes gently. Pay close attention to how the vehicle behaves. If the vehicle pulls noticeably to one side during braking, it suggests a stuck caliper piston or highly uneven pad wear. If you feel a distinct vibration or pulsation through the brake pedal or the steering wheel, it typically indicates warped brake rotors. Any delayed response or excessive pedal travel before the brakes begin to grab points to a serious hydraulic issue.
If your pedal sinks to the floor, feels excessively spongy, or if the red brake warning light on your dashboard illuminates, do not attempt to drive the vehicle on public roads. These symptoms indicate a critical compromise in your hydraulic system that could lead to complete brake failure. Immediately arrange to have the vehicle towed to a professional automotive repair shop for a comprehensive diagnosis.
Deciding Your Next Step: Monitor, Maintain, or Repair
Once you have completed your visual, auditory, and functional inspections, you must categorize your findings to determine the correct course of action. If your brake pads are well above the manufacturer’s minimum thickness, the brake master cylinder fluid is clear and filled to the correct level, and the pedal feels firm and responsive, you can safely continue monitoring your system during your routine weekly checks.
If your inspection reveals that the brake pads are approaching the manufacturer’s minimum thickness threshold, or if the brake fluid is dark but the system is otherwise performing normally, you should schedule routine maintenance. Plan to replace the pads or have the brake fluid flushed and replaced in accordance with your vehicle manufacturer’s specified service intervals.
You must seek urgent professional repair if you detect any severe symptoms. These include metallic grinding noises, visible fluid leaks around the brake master cylinder or calipers, a spongy or sinking brake pedal, or an active dashboard brake warning light. In these scenarios, the vehicle is not safe to operate and requires immediate professional attention.
Always respect the professional boundaries of braking system service. Tasks such as bleeding the hydraulic lines, replacing the brake master cylinder, rebuilding calipers, or machining brake rotors require specialized precision tools, proper disposal protocols for hazardous fluids, and advanced technical training. Attempting these procedures as a DIY project without the proper equipment and expertise can introduce air into the system or cause catastrophic component failure. Always verify your vehicle’s specific model, year, and component dimensions from your official vehicle documentation before purchasing any replacement parts, and prioritize your safety by trusting these critical repairs to certified technicians.
Frequently Asked Questions (FAQ)
How often should I check my brake pads and master cylinder fluid?
You should visually inspect your brake pads and check the brake master cylinder fluid level at least once a month, or every time you rotate your tires or change your engine oil. Additionally, always perform these checks before embarking on long road trips or driving through challenging terrain. Always defer to the specific inspection and service intervals outlined in your vehicle’s owner’s manual to ensure optimal safety and performance.
Can I just top up the brake fluid if it is low?
No, you should not simply top up the fluid without investigating the cause. Because the braking system is a sealed hydraulic circuit, brake fluid does not evaporate or consume itself during normal operation. A low fluid level is a direct indicator of either significantly worn brake pads—which forces more fluid into the caliper lines—or a physical leak in the system. Topping up the reservoir merely masks these underlying issues and can lead to dangerous fluid overflows when new, thicker pads are eventually installed. Seek a professional inspection to identify the root cause.
Is it safe to drive if the brake warning light is on but the pedal feels normal?
It is absolutely not safe to drive under these conditions. The dashboard brake warning light is triggered by critical safety sensors and can indicate dangerously low fluid levels, a severe pressure imbalance within the brake master cylinder, or an electronic fault in the anti-lock braking system (ABS). Even if the pedal feels normal at the moment, the system’s safety margins are compromised, and sudden brake failure could occur. Safely pull over, park the vehicle, and have it inspected or towed to a professional mechanic immediately.
Community discussion
Share your experience or ask a question. Comments are reviewed before publication.