
Installing a 70mai 4G hardwire kit is the most reliable way to unlock the full potential of your dashcam, enabling continuous 24/7 parking surveillance and real-time remote connectivity. Unlike standard cigarette lighter adapters that only supply power when the engine is running, a hardwire kit connects directly to your vehicle’s fuse box. This constant connection allows the dashcam to monitor your vehicle while parked, sending instant alerts to your smartphone via the 4G network if an impact is detected.
In the tropical climate of the Philippines, where intense heat and high humidity can accelerate car battery degradation, executing a safe and precise installation is paramount. A poorly wired kit can lead to a drained battery, leaving you stranded, or cause electrical faults in your vehicle’s wiring harness. By understanding how to select the correct fuses, route cables safely away from safety systems, and configure the low-voltage cutoff, you can enjoy peace of mind without compromising your vehicle’s electrical integrity.
Tools and Safety Preparations Before Wiring
Before handling your vehicle’s electrical components, gathering the correct tools is essential for a clean, safe, and professional installation. You will need a high-quality circuit tester or a digital multimeter to identify live circuits, a set of plastic trim removal tools to safely pry open interior panels without scratching them, and a crimping tool or pliers to secure wire connections. Additionally, prepare a collection of zip ties to secure loose wiring and prevent annoying rattles behind your dashboard.
Products mentioned in this guide


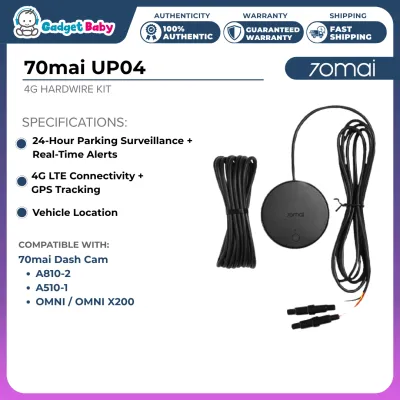
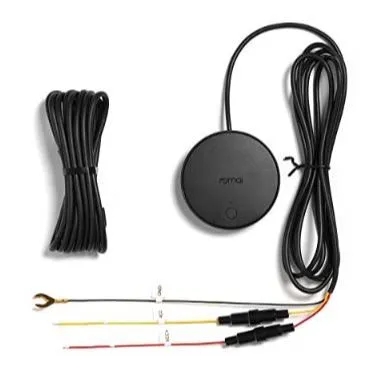
Prices are valid at publication and may change. Please refer to the product page for the latest price.
The most critical hardware component you must source is a set of fuse tap adapters, often referred to as “add-a-circuit” taps. These taps allow you to draw power from an existing fuse slot safely by creating a new, independently fused circuit. Because vehicle manufacturers use different fuse sizes, you must verify whether your vehicle’s fuse box utilizes physical profiles such as Mini, Micro2, Low-Profile Mini, or ATO/Regular fuses. Consult your vehicle’s owner manual to identify the exact fuse type before purchasing these adapters.
Safety must always be your top priority when working on automotive electrical systems. Before touching any fuses or wires, ensure the vehicle’s ignition is completely turned off and the key is removed from the ignition switch. If your vehicle manual recommends it, or if you are working near sensitive electronic modules, disconnect the negative terminal of your car battery to eliminate the risk of accidental short circuits. Always keep both the 70mai hardwire kit instruction sheet and your vehicle’s owner manual open and accessible throughout the process to cross-reference wiring diagrams and safety warnings.
Identifying the Correct Fuse Slots for Dashcam Power
The 70mai 4G hardwire kit relies on a three-wire connection system: a red wire for constant power (Battery/BAT), a yellow wire for switched power (Accessory/ACC), and a black wire for ground (GND). The constant power wire allows the dashcam to run when the engine is off, while the switched power wire signals the camera to transition between normal driving mode and parking surveillance mode. To find the correct slots for these wires, you must locate your vehicle’s passenger cabin fuse box, which is typically situated under the driver-side dashboard, behind the glove compartment, or near the kick panel.

To identify the correct slots, use a circuit tester or multimeter with the vehicle’s ignition completely turned off. Connect the tester’s ground clip to an unpainted metal part of the car chassis, then touch the probe to the exposed metal contacts on top of various fuses. For the constant power (BAT) connection, look for a fuse slot that registers electrical voltage even when the key is out of the ignition. Once you find a candidate, turn the ignition key to the ACC or ON position and then back to OFF to confirm that the power to this slot remains uninterrupted.
Next, to locate the switched power (ACC) slot, find a fuse that registers no voltage when the ignition is off, but lights up your circuit tester or registers voltage on your multimeter when the key is turned to the ACC or ON position. This circuit must lose power completely the moment you turn off the engine and remove the key. This clear distinction is what tells your dashcam exactly when you have parked your car and when you are driving.
When selecting slots for your fuse taps, you must strictly avoid safety-critical circuits. Never tap into fuses designated for airbags (SRS), anti-lock braking systems (ABS), engine control units (ECU), electronic power steering, or fuel pumps. Instead, look for low-risk, low-amperage accessory circuits such as those powering the cigarette lighter socket, the car radio, power outlets, or power mirrors. If your vehicle’s fuse box layout is highly complex, uses proprietary smart electronic modules, or lacks clearly identifiable accessory slots, stop the installation immediately and consult a qualified automotive electrician to avoid damaging your vehicle’s computer systems.
Routing the Cables and Establishing a Solid Ground
Once you have identified the target fuse slots, the next step is to route the hardwire kit’s cabling from the dashcam’s mounting position on the windshield down to the fuse box. Start by mounting your dashcam and plugging in the hardwire kit’s power connector. Gently tuck the cable into the gap between the headliner and the windshield using a plastic trim removal tool. Avoid using metal screwdrivers or sharp objects, as these can easily slice through the wire insulation or damage the headliner material.
As you bring the cable down from the roof to the dashboard, you will need to route it along the A-pillar. If your vehicle is equipped with side-curtain airbags housed inside the A-pillar, you must exercise extreme caution. Never run the cable directly across or over the airbag module, as this can prevent the airbag from deploying correctly during an accident or turn the cable into a dangerous projectile. Instead, carefully remove the A-pillar plastic trim cover and route the wire behind the airbag assembly, securing it tightly to the existing factory wiring harness using zip ties.
After routing the cable down to the fuse box area, you must establish a reliable ground (GND) connection for the black wire. Locate a factory-installed, unpainted metal bolt that is screwed directly into the vehicle’s metal chassis. Loosen this bolt, slip the U-shaped ground terminal of the black wire underneath, and tighten the bolt securely. Avoid using painted screws, plastic brackets, or dashboard framing elements, as these will not provide a clean electrical ground, leading to intermittent power loss, system resets, or failure to enter parking mode. You can verify a solid ground connection by checking for zero resistance between the bolt and a known chassis ground point using a multimeter.
Configuring Low-Voltage Cutoff and Testing Parking Mode
The 70mai 4G hardwire kit features a built-in low-voltage cutoff mechanism designed to protect your car battery from draining to a point where the engine cannot start. This is especially critical in the Philippines, where high ambient temperatures place additional stress on lead-acid batteries, reducing their overall lifespan and cranking efficiency. Before finalizing the installation, check the physical dip switches on the hardwire kit housing or access the companion smartphone app settings to configure the cutoff threshold. It is highly recommended to select a conservative threshold, such as 12.0V or 12.2V for a standard 12V battery system, to ensure your vehicle always has sufficient cranking power.
With the cutoff configured, you can now perform a comprehensive testing sequence to verify that both the physical wiring and the 4G remote features are functioning correctly. Reconnect your vehicle’s negative battery terminal if you disconnected it earlier. Turn the ignition key to the ON position; your dashcam should power up automatically and begin recording. Next, turn the engine off, remove the key, and step out of the vehicle.
Lock the doors and wait a few minutes for the vehicle’s accessory power delay to expire. Observe the dashcam’s status indicator or listen for its audio prompts to confirm that it successfully transitions into parking surveillance mode. Open the companion mobile application on your smartphone to test the 4G remote connectivity. Try accessing the live view or checking the vehicle’s GPS location to ensure the 4G module is receiving adequate signal and drawing power correctly from the constant BAT circuit. Monitor your vehicle’s starting reliability over the next few days, particularly if you leave the car parked for more than 24 hours, to ensure the battery remains healthy.
Final Verification and Troubleshooting Common Issues
Before putting all the plastic trim panels back in place, run through a final verification checklist to guarantee a flawless installation. Confirm that the dashcam powers on instantly when the ignition is turned on, switches seamlessly to parking mode when the ignition is turned off, and that no warning lights or error messages are illuminated on your vehicle’s instrument cluster. If everything functions as expected, use your zip ties to bundle any excess cabling neatly under the dashboard, ensuring no wires hang down near the brake, accelerator, or clutch pedals.
If you encounter issues during testing, systematic troubleshooting can help you identify the cause safely. If the dashcam fails to power on at all, double-check the seating of your fuse taps in the fuse box and ensure the fuses inside the taps are fully inserted and not blown. A loose or poorly positioned ground wire is another common culprit for complete power failure; try cleaning the metal contact area around the ground bolt to ensure a bare-metal connection.
If the dashcam works perfectly while driving but shuts down completely the moment you turn off the engine, the issue is likely related to the constant power (BAT) connection. Verify that the red wire is tapped into a fuse slot that truly provides continuous 12V power when the key is removed. Conversely, if the camera never enters parking mode and continues to record normally even when parked, the yellow ACC wire may be tapped into a constant power source instead of a switched one. If you experience persistent electrical anomalies, blown fuses, or dashboard warning lights, disconnect the hardwire kit immediately and seek professional assistance from a certified automotive technician.
Frequently Asked Questions (FAQ)
Will hardwiring a dashcam void my vehicle's warranty?
Properly hardwiring a dashcam using high-quality fuse taps typically does not void your entire vehicle warranty in the Philippines. Because fuse taps do not require you to splice, cut, or solder the vehicle’s original wiring harness, the installation is completely reversible and non-destructive. However, if an improper installation directly causes a short circuit, blows an electronic module, or damages the electrical system, the manufacturer or dealership may refuse to cover those specific repairs under warranty. To protect yourself, always use the correct fuse taps, avoid safety-critical circuits, and consult your dealership’s service advisor if you have concerns about their specific warranty policies.
What factors affect how long parking mode can run safely?
Several variables dictate how long your dashcam can actively monitor your vehicle in parking mode before the low-voltage cutoff triggers. The primary factor is the health and capacity of your car battery; an older battery or one weakened by the tropical heat of the Philippines will reach the cutoff threshold much faster than a brand-new battery. The frequency of events that trigger the camera—such as heavy foot traffic or passing vehicles causing motion alerts—also increases power consumption. Additionally, active 4G data transmission, such as uploading cloud backups or accessing live views remotely, draws more current than standard standby monitoring. To maximize standby time, ensure your battery is in good condition and adjust the camera’s motion sensitivity settings if parked in busy areas.
Community discussion
Share your experience or ask a question. Comments are reviewed before publication.