
Installing a car roof rack is a highly effective way to expand your vehicle’s cargo capacity, but doing it incorrectly can lead to expensive body damage or hazardous road conditions. To mount a roof rack safely, you must match the system precisely to your vehicle’s roof profile, prepare the surface to prevent paint abrasion, and use a calibrated torque wrench to secure all fasteners. Taking a methodical approach ensures your gear remains secure during long highway drives and sudden stops.
Before purchasing or installing any aftermarket roof rack, always consult your vehicle’s owner’s manual to verify its roof load capacity and approved mounting locations. If you are uncomfortable working with automotive fasteners, or if your vehicle requires complex drilling or modification, seek assistance from a qualified professional installer. Ensuring a correct fitment is the single most important step in protecting your vehicle’s structural integrity and maintaining road safety.
Identify Your Vehicle's Roof Type and Mounting Points
Every vehicle model features a specific roof design that dictates the type of roof rack system it can support. Before starting, you must identify which category your vehicle falls into. The most common configurations include bare roofs, raised side rails, flush side rails, and fixed factory mounting points.
Products mentioned in this guide
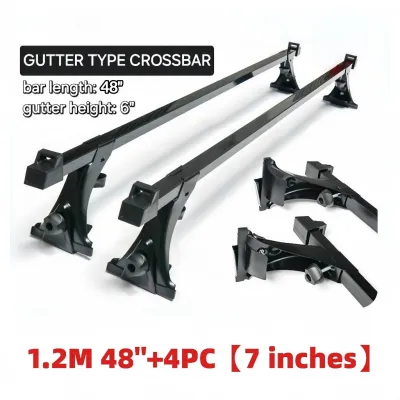
![[COD] SHPYHT Local delivery Ship within 24 hours Universal Crossbar Bracket Set For Cars With Gutter Clip To Gutter Type Brackets Luggage Roof Rack For Cars](https://img.lazcdn.com/g/p/e5b50f7e0e6974427ca8d8eda112338b.jpg_400x400q80.jpg_.webp)
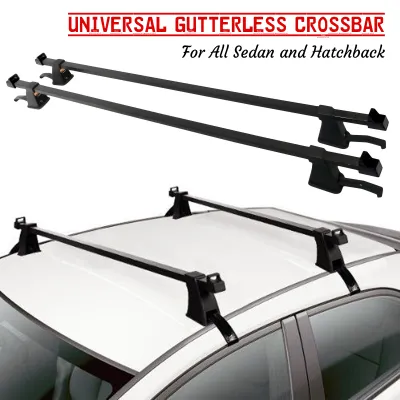
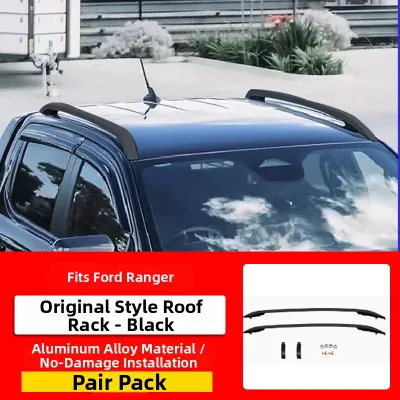
Prices are valid at publication and may change. Please refer to the product page for the latest price.
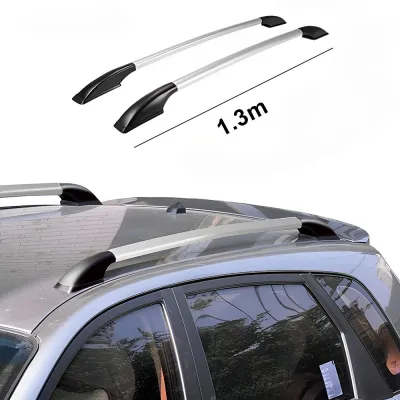
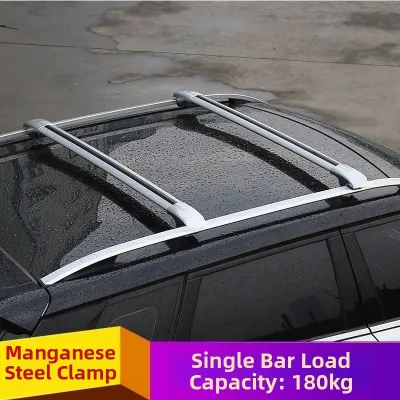
Bare roofs have no pre-installed rails or tracks. Systems designed for bare roofs utilize custom-fit metal clips that hook securely into the door jambs. Vehicles with raised side rails feature factory-installed bars running along the sides of the roof with a visible gap between the rail and the roof surface. Flush side rails also run front-to-back but sit directly against the roof without any clearance underneath. Finally, fixed-point systems utilize dedicated mounting threads hidden under small plastic covers on the roof ditch.
Using incorrect mounting hardware or attempting to force a universal fit can result in severe structural damage, water leaks inside the cabin, or complete detachment of the rack at highway speeds. Always consult both your vehicle owner’s manual and the roof rack manufacturer’s fit guide to verify compatibility. These documents specify the exact fit kits, foot packs, and maximum weight limits allowed for your specific model year.
Gather the Required Tools and Prepare the Vehicle
A successful installation relies on having the correct tools on hand and preparing the vehicle’s surface. Using the wrong tools can easily strip fasteners or lead to under-tightened components that may slip under load.

Gather a measuring tape, a microfiber cloth, a mild automotive cleaner authorized for paint use, and a calibrated torque wrench. While many roof rack kits include basic tensioning tools, a dedicated torque wrench allows you to meet the exact Newton-meter specifications required by the manufacturer.
Thoroughly clean the roof surface and all mounting areas before beginning. In tropical environments with high humidity, such as the Philippines, trapping dirt, sand, or salty road grime beneath rubber mounting pads can quickly scratch the clear coat and accelerate paint wear. Wash the area with a clean microfiber cloth and a paint-safe automotive shampoo, then dry it completely.
Park your vehicle on a flat, level surface in a well-lit area. Ensure all doors are open or closed exactly as specified by the rack’s instruction manual. This prevents misalignment when positioning door-jamb clips and allows you to work comfortably around the entire perimeter of the vehicle.
Step-by-Step Installation Process
Once your vehicle is clean and your tools are ready, you can begin the physical assembly. Working systematically prevents alignment errors and ensures the load is distributed evenly across the vehicle’s structural pillars.
Start by measuring and marking the correct placement for the front and rear crossbars. Refer to the manufacturer’s instructions for the exact “bar spread”—the distance between the front and rear bars. Use a measuring tape to measure from a fixed reference point, such as the edge of the windshield or the center pillar. You can temporarily mark these positions using low-tack masking tape to avoid scratching the paint.
Next, assemble the mounting feet or towers according to the instructions and place them loosely onto the designated mounting points. If your vehicle uses door-jamb clips, position the rubber pads carefully on the roof surface and let the clips hang into the open door frame. Do not tighten any bolts at this stage; keeping the hardware loose allows you to make necessary adjustments as you align the crossbars.
Slide or bolt the crossbars onto the towers. Ensure the bars are perfectly centered by measuring the overhang on both the left and right sides of the vehicle. The crossbars must sit square to the vehicle’s length and be oriented correctly for aerodynamics. Most modern aerodynamic bars feature a tapered wing shape, which must face forward to minimize wind resistance and noise.
With the rack fully aligned, begin the tightening sequence. Tighten the bolts gradually and evenly, alternating from the left side of the vehicle to the right side in a cross-pattern. This balanced approach prevents the rack from pulling to one side and ensures even pressure on the rubber pads. Use your torque wrench to tighten all fasteners to the exact specification listed in the manual. Stop immediately when the torque wrench clicks to avoid crushing the roof panel or stripping the threads.
Crucial Safety Checks and Post-Installation Testing
Before loading any cargo or heading out onto the road, you must perform a series of safety checks to verify the structural integrity of the installation. A loose rack poses an immediate danger to you and other motorists.
Begin with a physical shake test. Firmly grasp one of the crossbars near a mounting tower and attempt to shake the rack vigorously side-to-side and front-to-back. The entire vehicle should rock on its suspension; there should be absolutely no independent movement, play, or rattling within the roof rack assembly itself. If you feel any shifting, loosen the hardware, re-align the components, and re-torque the fasteners.
Conduct a thorough visual inspection of all contact points. Check that the rubber pads sit completely flat against the roof surface without any pinched edges or gaps. Ensure that no metal parts of the mounting feet or clips are in direct contact with the vehicle’s bare paint, as this will cause deep scratches and eventual rust.
Perform a brief test drive in a safe, low-speed area. Listen closely for any unusual wind noise, whistling, or rattling. While some wind noise is normal, loud whistling or metallic vibrations often indicate that a rubber strip is missing from the crossbar track, or that a mounting foot is not fully seated.
Finally, establish a regular re-tightening routine. Road vibrations and temperature changes can cause the mounting hardware to settle slightly after the initial installation. Re-check the torque of all bolts after driving the first 50 to 100 kilometers, and continue to inspect the tightness periodically, especially before long road trips.
Common Installation Mistakes to Avoid
Avoiding common pitfalls during the installation process will save you from costly body repairs and ensure the longevity of your roof rack system.
One of the most frequent mistakes is over-tightening the mounting bolts. Without a calibrated torque wrench, it is easy to apply too much force, which can warp the thin sheet metal of your vehicle’s roof, crack the plastic components of the mounting towers, or strip the internal threads. Always trust the torque specifications rather than relying on feel.
Another critical error is ignoring the vehicle’s weight limits. You must distinguish between the dynamic weight limit (the maximum load when the vehicle is moving) and the static weight limit (the maximum load when the vehicle is parked, which is highly relevant for rooftop tents). Exceeding these limits can compromise vehicle handling, increase braking distances, and damage the roof structure. Remember to factor in the weight of the roof rack itself when calculating your total cargo weight.
Neglecting security features is also a common oversight. Always install the lock cores if they are included or available for your system, and keep the locking mechanisms engaged. This not only prevents the theft of your expensive rack and accessories but also ensures that the outer covers of the towers remain securely attached while driving.
Lastly, avoid leaving the roof rack on your vehicle indefinitely without maintenance. In tropical climates, moisture, salt air, and debris can accumulate under the rubber pads over time. This trapped moisture can degrade the clear coat and lead to corrosion. Remove the rack periodically to clean the roof thoroughly and inspect the rubber and metal components for signs of wear or degradation.
Frequently Asked Questions (FAQ)
Will installing a roof rack void my car's warranty?
Properly installing an aftermarket roof rack using approved mounting points and adhering to the manufacturer’s weight limits will generally not void your vehicle’s warranty. Under standard consumer protection guidelines, a manufacturer cannot void a warranty unless they can prove that the aftermarket accessory directly caused the damage. However, any structural damage, paint scratches, or water leaks resulting from incorrect installation, overloading, or using non-approved hardware will not be covered under warranty. If you have concerns, consult your local dealership for specific policy details.
How do I prevent wind noise after installing the crossbars?
To minimize wind noise, first verify that the crossbars are installed in the correct aerodynamic orientation. Most modern wing-shaped bars must have the thicker, rounded edge facing forward. Ensure that all rubber infill strips are fully pressed into the top and bottom tracks of the crossbars, as open slots are the primary cause of whistling. If noise persists, you can install an aerodynamic wind fairing to redirect airflow over the rack, or adjust the spacing of the crossbars slightly to alter the wind patterns around your roofline.
Can I take my car through an automatic car wash with the roof rack installed?
It is highly recommended to remove your roof rack before entering an automatic car wash that uses overhead brushes, heavy cloth strips, or high-pressure mechanical arms. These cleaning mechanisms can easily catch on the crossbars, towers, or mounting clips, leading to severe structural damage to both the rack and your vehicle’s roof. If you prefer to keep the rack installed, opt for hand washing or touchless automatic car washes that use only water sprays and air dryers, ensuring the high-pressure nozzles do not target the mounting feet directly.
Community discussion
Share your experience or ask a question. Comments are reviewed before publication.