
Upgrading the exhaust system of the Euro Sport 110 is a common modification among riders looking to optimize engine efficiency and achieve a deeper, more resonant exhaust note. The chicken pipe design has gained significant popularity because it blends a relatively stock appearance with an unrestricted internal flow path, making it a staple in the local motorcycle community. Successfully mounting this aftermarket exhaust requires precise alignment, proper sealing at the cylinder head, and secure bracket positioning to prevent exhaust leaks and structural failure.
This guide outlines the complete installation process, from removing the factory components to verifying the final fitment on your motorcycle. By following systematic steps, you can ensure that the installation remains durable, gas-tight, and safe for daily road use.
Essential Tools and Pre-Installation Safety
Before beginning any mechanical work on your Euro Sport 110, assembling the correct tools is crucial to prevent stripped bolts or damaged components. You will need a metric socket set (specifically containing 10mm, 12mm, and 14mm sockets), a set of combination wrenches, a flathead screwdriver, and a high-quality penetrating oil. If your specific chicken pipe model utilizes a slip-on design with retaining springs, a spring puller tool will make the installation of the tension springs significantly easier and safer.
Products mentioned in this guide
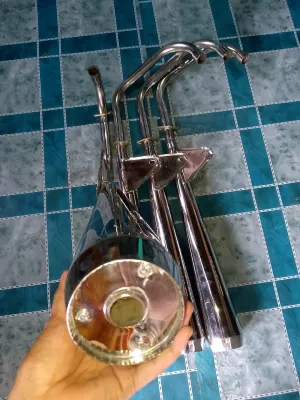
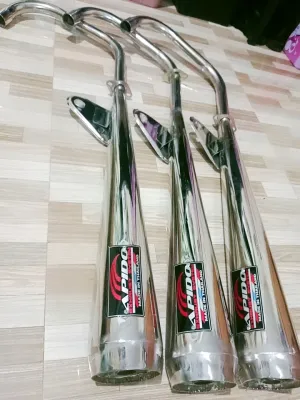
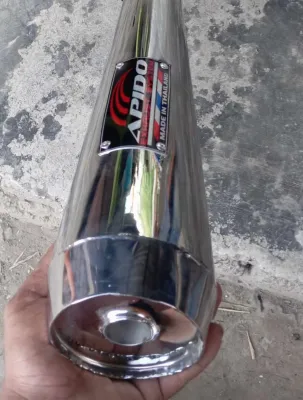
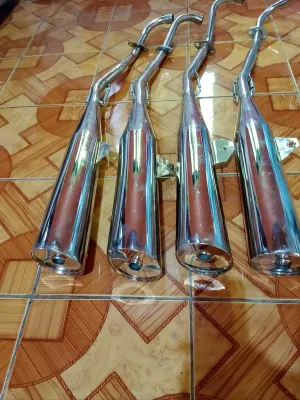
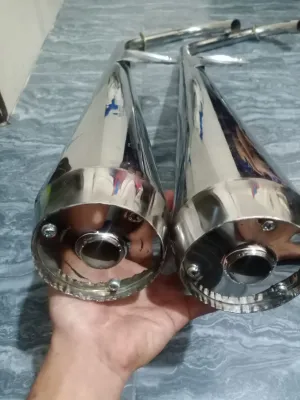
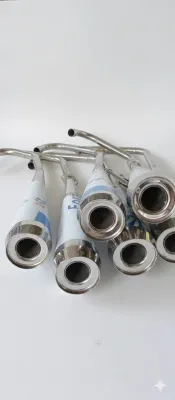
Prices are valid at publication and may change. Please refer to the product page for the latest price.
Working on a motorcycle exhaust system carries an inherent risk of severe thermal burns. Always ensure that the engine and the entire exhaust assembly have cooled down completely to room temperature before touching any fasteners. Even a short ride can heat the cylinder head and header pipe to temperatures exceeding several hundred degrees Celsius, which can cause immediate injury upon contact.
To maintain stability during the installation process, position the motorcycle on its center stand on a flat, level concrete surface. If a center stand is not available, utilize a secure rear paddock stand to keep the bike upright and stable. Elevating the rear of the motorcycle also provides better physical access to the lower frame mounting points and the swingarm clearance areas.
Personal protective equipment is highly recommended for this task. Wear safety glasses to protect your eyes from falling road debris, rust flakes, and penetrating spray when working underneath the chassis. Additionally, wearing mechanic gloves will protect your hands from sharp metal edges, hot surfaces, and accidental slippage when breaking loose stubborn fasteners.
Modifying your vehicle’s exhaust system can alter its performance, emissions, and noise levels. Always refer to the Euro Sport 110 original-vehicle service manual and the documentation provided by your aftermarket exhaust manufacturer before proceeding. If you are unfamiliar with basic motorcycle mechanics, or if the instructions provided with your aftermarket exhaust conflict with your vehicle’s layout, stop immediately and consult a qualified professional motorcycle mechanic.
Step-by-Step Removal of the Stock Exhaust
To begin the removal process, inspect the exhaust flange nuts at the cylinder head and the mounting bolts on the frame. If your Euro Sport 110 has been exposed to tropical humidity, rain, or road grime, these fasteners may have accumulated rust. Apply a generous amount of penetrating oil to the header studs and the muffler bracket bolts, allowing it to soak for at least ten to fifteen minutes to ease removal and prevent thread damage.

Locate the mounting bolts securing the stock muffler to the passenger footpeg bracket or frame hanger. Using the appropriate socket or wrench, loosen these bolts but do not remove them entirely yet. Keeping them loosely threaded supports the weight of the exhaust assembly while you work on the header pipe, preventing the heavy muffler from sagging and putting destructive leverage on the delicate cylinder head studs.
Move to the front of the engine to access the header pipe nuts at the cylinder head exhaust port. Carefully loosen the two nuts using a socket wrench with an extension. Apply steady, even pressure; using sudden force or an oversized breaker bar can easily snap the exhaust studs, resulting in a costly and difficult repair process. Once the header nuts are removed, carefully support the weight of the entire exhaust pipe while removing the remaining frame mounting bolts, then gently lower the assembly away from the motorcycle.
With the stock exhaust removed, look inside the cylinder head exhaust port to locate the old copper crush gasket. This gasket is designed to deform under pressure to create a gas-tight seal, meaning it cannot be reused. Use a plastic scraper or a soft brass wire brush to carefully pry out the old gasket and clean any carbon deposits or debris from the mating surface. Avoid using steel scrapers or screwdrivers, as they can easily gouge the soft aluminum of the cylinder head, creating a permanent pathway for exhaust leaks.
Fitting the Chicken Pipe: Header, Gaskets, and Mounts
Seating the Header Pipe and Exhaust Gasket
Achieving a perfect seal at the engine exhaust port is critical to prevent hot exhaust gases from escaping, which can cause engine hesitation, popping on deceleration, and potential damage to surrounding components. Insert a brand-new, high-quality copper exhaust gasket directly into the cleaned cylinder head port. Ensure it sits flat and centered within the recess to prevent it from shifting or pinching during the installation of the header.
Carefully maneuver the header section of the chicken pipe into position, sliding the mounting flange over the two cylinder head studs. Because chicken pipes often feature custom bends designed to maximize ground clearance and flow, you may need to gently rotate and angle the pipe to clear the engine casing, frame downtubes, and the front footpeg assembly. Do not force or hammer the pipe if it encounters resistance; instead, re-evaluate the angle of entry and check for any physical obstructions.
Once the flange is seated against the new gasket, thread the exhaust nuts onto the studs by hand. Hand-threading ensures that the threads are properly aligned and prevents cross-threading, which can ruin the studs. Using a torque wrench, tighten the nuts gradually and evenly, alternating between the two sides to apply balanced pressure across the gasket. Refer to the manufacturer’s torque specifications, taking care not to over-torque, which can crush the gasket excessively or snap the mounting studs.
Aligning the Muffler and Securing the Brackets
With the header pipe loosely secured at the cylinder head, align the muffler section of the chicken pipe with the mounting point on the motorcycle’s frame or passenger footpeg bracket. Many aftermarket chicken pipes are designed with a sliding bracket or adjustable hanger to accommodate slight manufacturing variances. Adjust the position of the hanger so that the mounting holes align naturally without forcing the exhaust pipe into an unnatural bend, which would introduce constant structural stress.
To isolate the exhaust system from engine vibrations and prevent the mounting brackets from cracking over time, always use rubber isolators or rubber-lined metal clamps. Place a rubber washer or bushing on both sides of the frame bracket before inserting the mounting bolt. This dampening layer absorbs the high-frequency vibrations characteristic of single-cylinder engines, significantly extending the lifespan of both the exhaust and the frame mounting tabs.
Before tightening any of the mounting bolts completely, conduct a thorough clearance check around the entire length of the exhaust system. Verify that there is adequate space between the chicken pipe and the rear brake pedal throughout its full range of motion. Ensure that the passenger footpegs can fold and unfold without striking the muffler, and confirm that the rear shock absorber and swingarm have sufficient clearance during suspension compression. Once you have verified all clearances, tighten the frame mounting bolts followed by the final tightening of the header nuts.
Post-Install Verification and Philippines Legal Guidelines
After completing the physical installation, it is essential to perform a comprehensive leak test and clearance verification before riding. Start the engine and let it idle. While keeping your hands a safe distance away from the hot metal, pass your hand near the cylinder head exhaust port and the slip-on joints to feel for any escaping air currents. Listen closely for a distinct ticking or popping sound, which is a primary indicator of an exhaust leak. If a leak is detected, shut off the engine, allow it to cool, and verify that the gasket is seated correctly and the flange nuts are tightened evenly.
Monitor the physical clearance between the newly installed chicken pipe and the motorcycle’s bodywork. Because aftermarket exhausts often route differently than stock units, they may sit closer to the plastic side covers, fairings, or the rear tire. The high operating temperatures of the exhaust can easily melt plastic body panels or damage tire rubber if clearances are insufficient. If necessary, install adhesive-backed heat shielding material on the inside of adjacent plastic panels to protect them from radiant heat.
Riders in the Philippines must carefully navigate the regulatory environment when installing aftermarket exhausts like chicken pipes. Under the guidelines enforced by the Land Transportation Office (LTO) and various local government units (LGUs), modifications to a motorcycle’s exhaust system are subject to strict noise limits. The standard limit is typically set at 99 decibels when tested at a specific distance and engine speed, though local municipal ordinances may enforce even lower thresholds or ban modified exhausts entirely in residential zones.
To remain compliant and avoid apprehension at roadside checkpoints, ensure that your chicken pipe is equipped with a functional, high-quality silencer or baffle. Many chicken pipes are sold with removable silencer cores; keeping this baffle installed is critical for reducing decibel levels to street-legal limits. Additionally, verify that the exhaust modification does not compromise safety or emissions compliance, and carry any manufacturer certifications or documentation that prove the pipe meets local standards where applicable.
Frequently Asked Questions (FAQ)
Do I need to tune or rejet the carburetor after installation?
Yes, installing a high-flow chicken pipe typically reduces exhaust backpressure and increases airflow, which can cause the engine to run lean. To prevent overheating, engine hesitation, or flat spots in acceleration, inspect your spark plug color after a short test ride; a dry, white insulator indicates a lean condition. You may need to adjust the carburetor’s air-fuel mixture screw or install slightly larger main and pilot jets to restore the correct fuel ratio.
Is a chicken pipe street-legal for daily commuting in the Philippines?
A chicken pipe is only street-legal if its noise output remains within the LTO-mandated limit of 99 decibels and it complies with local LGU noise ordinances. Open-pipe configurations or removing the internal baffle will likely result in noise levels that exceed legal limits, making the motorcycle subject to fines and impoundment at checkpoints. For daily commuting, always use a baffled or silenced version to ensure compliance with local regulations.
Community discussion
Share your experience or ask a question. Comments are reviewed before publication.