
Installing a dashcam using your car’s cigarette lighter socket is one of the most straightforward and non-invasive ways to protect yourself on the road. This method requires no splicing of wires or complex fuse box tapping, making it an ideal weekend project for any car owner. However, achieving a clean, professional look while ensuring the installation is completely safe requires a systematic approach to mounting and cable routing.
In tropical environments like the Philippines, where high cabin temperatures and intense humidity can challenge adhesive mounts and electrical connections, taking a few extra precautions during setup is essential. A poorly routed cable can obstruct your view, interfere with your vehicle’s airbags, or dangle loose, creating a dangerous distraction while driving. By following a structured process, you can secure your dashcam, hide the wires neatly behind your car’s interior trim, and ensure reliable operation every time you start your engine.
Preparation and Safety Checks Before Installation
Before you begin routing cables or mounting hardware, unbox your dashcam kit and verify that all components are present. A standard kit typically includes the camera unit, a power adapter designed for a cigarette lighter socket, a mounting bracket (either suction cup or adhesive), and sometimes a small trim prying tool. Read the manufacturer’s installation manual thoroughly to understand the specific power requirements and mounting recommendations for your model.
Products mentioned in this guide
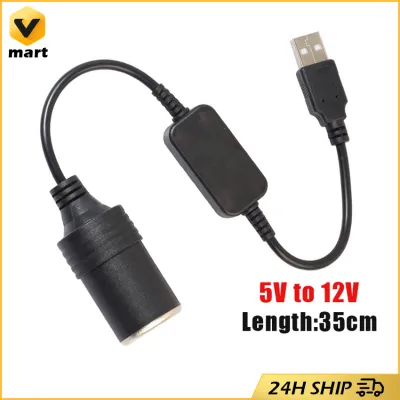
Prices are valid at publication and may change. Please refer to the product page for the latest price.
Next, consult your vehicle’s owner’s manual to verify the electrical specifications of your cigarette lighter socket, which is often labeled as an auxiliary power outlet. Most passenger cars operate on a 12-volt system, but some larger utility vehicles or trucks use a 24-volt system. You must ensure that your dashcam’s power adapter is compatible with your vehicle’s voltage to prevent electrical damage or blown fuses.
Additionally, use your vehicle’s manual to determine how the power outlet behaves when the ignition is turned off. Some vehicles cut power to the socket immediately when the key is removed, while others keep the outlet live continuously. Knowing this behavior beforehand helps you plan whether you need to manually unplug the camera to avoid draining your battery.
Finally, prepare the windshield surface where the camera will be mounted. Tropical humidity and heat can cause suction cups or adhesive pads to fail if the glass is dirty or greasy. Clean the designated area thoroughly with a high-quality glass cleaner, wipe it dry with a microfiber cloth, and allow it to air dry completely before proceeding.
Mounting the Dashcam for an Unobstructed View
Selecting the correct mounting position is critical for both legal compliance and optimal video capture. In many jurisdictions, including the Philippines, traffic safety regulations prohibit placing objects on the windshield that obstruct the driver’s direct line of sight. The ideal location is typically directly behind or adjacent to the rearview mirror, where the camera can capture a wide, centered view of the road without entering your field of vision.

Hold the dashcam in the proposed spot without removing the adhesive backing or engaging the suction cup. Sit in the driver’s seat and adjust your normal driving position to verify that the camera body is hidden from your view by the rearview mirror. Ensure that the lens has a clear path through the sweep of your windshield wipers so that rain or road grime does not block the recorded image during wet weather.
Once you have confirmed the perfect spot, prepare to attach the mount. If your kit uses an adhesive mount, peel off the protective film and press the bracket firmly against the clean glass for at least thirty seconds. For suction mounts, press the cup firmly against the glass and engage the locking lever. If you are using an adhesive mount in a hot climate, it is highly recommended to let the adhesive cure for several hours—or even a full day—before hanging the heavy camera unit on it.
With the mount securely attached, slide the dashcam into place and adjust the camera angle temporarily. Most dashcams feature a rotating joint that allows you to tilt the lens up or down. Aim for a balance where the horizon is positioned roughly in the middle of the frame, ensuring that you capture both the road ahead and traffic signals above, while minimizing the amount of car hood visible in the shot.
Routing the Power Cable Cleanly and Safely
A professional-looking installation hides the power cable completely within the vehicle’s interior panels. Start by plugging the cable into the dashcam’s power port, leaving just enough slack so that the cable does not pull on the connector or strain the port. Gently tuck the cable into the gap between the headliner and the windshield, working your way from the center of the windshield toward the passenger side of the vehicle.
As you reach the corner of the windshield, you will need to route the cable down the A-pillar, which is the structural pillar on either side of the windshield. This step requires extreme caution because many modern vehicles house side-curtain airbags inside the A-pillar trim. Routing a cable directly across or in front of an airbag cover can prevent the airbag from deploying correctly in an accident, or turn the cable into a dangerous projectile inside the cabin.
To route the cable safely, consult your vehicle’s manual to locate the precise boundaries of the side-curtain airbags. If your vehicle is equipped with A-pillar airbags, you must route the cable behind the airbag module, securing it along the existing factory wiring harness using zip ties. Never run the cable loosely over the airbag fabric. If you are uncomfortable removing the A-pillar trim or working around safety restraint systems, seek assistance from a qualified automotive technician before proceeding.
Once the cable is safely past the A-pillar, run it down the side of the dashboard, hiding it behind the rubber weatherstripping of the door frame. Guide the cable underneath the glove box and behind the lower dashboard trim panels. Use adhesive wire clips or zip ties to secure the cable firmly beneath the dash, ensuring it is completely clear of the passenger’s footwell, the steering column, the gear shifter, and the foot pedals. A loose wire dangling near the driver’s feet is a severe safety hazard that can interfere with braking or acceleration.
Connecting to the Cigarette Lighter Socket
With the power cable neatly routed to the center console, you are ready to make the final connection. Insert the dashcam’s power adapter into the cigarette lighter socket, pressing it firmly until it seats securely. A loose connection can cause the dashcam to power cycle repeatedly when driving over bumps or rough roads, which can corrupt video files and damage the memory card.
If you have excess cable length near the console, do not leave it bunched up around the gear shifter or handbrake. Gather the slack neatly, coil it, and secure it with a zip tie or hook-and-loop strap. Tuck this secured bundle behind the plastic trim of the center console or underneath the passenger side carpet where it will not be kicked or disturbed.
It is vital to understand how your vehicle’s electrical system manages power to the cigarette lighter socket. In many vehicles, the socket is switched, meaning it only receives power when the ignition key is turned to the “ACC” (accessory) or “ON” position. In other vehicles, the socket is unswitched and remains live even when the engine is off and the keys are removed.
If your vehicle has an unswitched socket, a plugged-in dashcam will continue to draw power from the car battery indefinitely. Over a weekend or during periods of inactivity, this continuous draw can drain your battery to the point where the engine will not start. If you discover your socket is always live, you must manually unplug the adapter every time you park the car, or consider upgrading to a dedicated hardwire kit equipped with an automatic low-voltage cutoff.
Testing the Setup and Final Adjustments
Before hitting the road, conduct a thorough test of your newly installed dashcam. Insert a high-quality, high-endurance microSD card into the camera, as standard memory cards can quickly fail under the constant write cycles of a dashcam. Turn your vehicle’s ignition key to the “ON” position or start the engine to verify that the dashcam powers up automatically.
Observe the camera’s screen or connect to its mobile application to view the live feed. Check that the horizon is level and that the camera is capturing a balanced view of both the left and right sides of the road. Adjust the lens tilt so that the hood of your car occupies no more than the bottom twenty percent of the frame; this ensures the camera’s auto-exposure sensor calibrates for the road and sky conditions rather than the reflective surface of your hood.
Next, turn off the engine and observe the dashcam’s behavior. If your cigarette lighter socket is switched, the camera should save its current recording and shut down gracefully within a few seconds. If it remains powered on, double-check your vehicle’s power behavior and plan your power-management routine accordingly.
Perform a final physical inspection of the entire installation path. Lightly tap the trim panels and headliner where the cable is tucked to ensure there are no loose sections that will rattle or vibrate while driving. Verify that all doors open and close smoothly without pinching the cable, and that the passenger-side glove box operates without catching on any wires.
Frequently Asked Questions (FAQ)
Will the dashcam drain my car battery if left plugged in?
Whether a dashcam drains your battery depends entirely on whether your car’s cigarette lighter socket remains powered when the engine is turned off. You can easily test this by plugging in the dashcam adapter, turning off the engine, removing the key, and locking the doors. If the LED indicator light on the adapter or the dashcam screen stays illuminated after several minutes, your socket is continuously powered.
If your socket is continuously powered, leaving the dashcam plugged in for extended periods can drain your car battery. To prevent a dead battery, you must manually unplug the adapter from the socket every time you park your vehicle for more than a few hours. Alternatively, you can have a professional install a hardwire kit with a built-in low-voltage protection module, which automatically cuts power to the camera if the battery voltage drops below a safe threshold.
Can I use a splitter if my cigarette lighter socket is already in use?
Yes, you can use a high-quality cigarette lighter socket splitter if you need to power other accessories like a phone charger or GPS unit alongside your dashcam. However, you must first verify the maximum amperage rating of your vehicle’s socket, which is typically 10 amps or 15 amps (refer to your vehicle’s fuse box diagram or manual). Calculate the combined power draw of all connected devices to ensure they do not exceed this limit.
When choosing a splitter, select a reputable model that features built-in fuse protection and heavy-duty wiring to handle the electrical load safely. High-quality splitters typically cost around ₱500 to ₱1,200 in local automotive accessory shops. Avoid cheap, unbranded splitters that lack safety certifications, as they can overheat, melt, or cause electrical shorts in your vehicle’s wiring. If you find yourself running multiple high-draw accessories, consider having a professional installer add dedicated auxiliary power outlets to distribute the electrical load safely.

Community discussion
Share your experience or ask a question. Comments are reviewed before publication.