
Installing a handbrake cover is a practical way to protect your vehicle’s interior from wear, improve your grip, and add a personalized touch to your cabin. However, a rushed or improper installation can easily scratch the original plastic or leather lever, or worse, interfere with the critical mechanical operation of your emergency brake. To complete this upgrade safely, you must verify the cover’s compatibility with your specific vehicle model, prepare the surface thoroughly, and apply patient, precise fitting techniques. By avoiding excessive force and prioritizing the mechanical clearance of the lever, you can achieve a secure, professional-looking fit that preserves both your car’s interior value and its safety systems.
Preparing Your Vehicle and the Handbrake Cover
Before attempting to fit any accessory over your emergency brake, you must verify that the cover is fully compatible with your vehicle’s specific make, model, and year. Handbrake levers vary significantly across different car manufacturers; some are thick and cylindrical, while others feature tapered, ergonomic shapes or integrated leather boots. Check the manufacturer’s product label and specifications to confirm the cover matches your lever’s exact dimensions, length, and button placement. Never assume a cover will fit simply because it is labeled as a universal accessory, as an oversized or undersized cover can slip during use or block the release mechanism.
Once compatibility is confirmed, prepare the handbrake lever by cleaning it thoroughly. In tropical climates like the Philippines, high humidity and heat can cause sweat, oils, dust, and grime to accumulate rapidly on interior touchpoints. If you slide a new cover over a dirty lever, these trapped abrasive particles can act like sandpaper, permanently scratching the original finish underneath. Use a clean microfiber cloth and a mild, interior-safe automotive cleaner that is explicitly authorized for your lever’s material, whether it is textured plastic, vinyl, or genuine leather. Wipe down the entire surface of the lever, including the underside and around the release button, and allow it to dry completely before proceeding.
Products mentioned in this guide

![[Local] iriisy Universal Car PU Leather Gears Handbrake Cover Shift Lever Cover Collars Handbrake Cover Hand Brake Cover Anti-Skid Auto Parking Brake](https://img.lazcdn.com/g/p/02e5c2b40113488574ee11537a286cde.jpg_400x400q80.jpg_.webp)

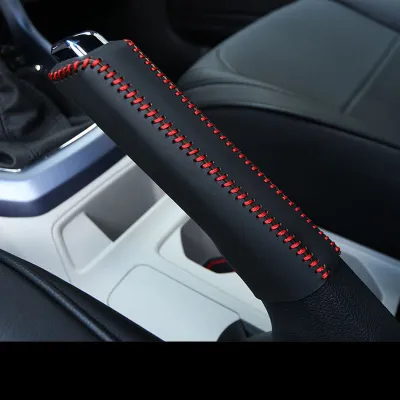
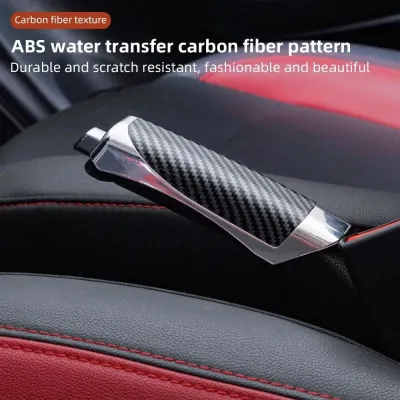
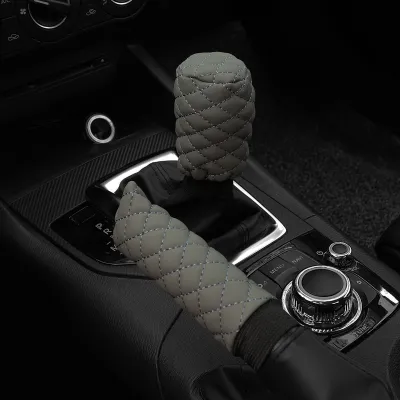
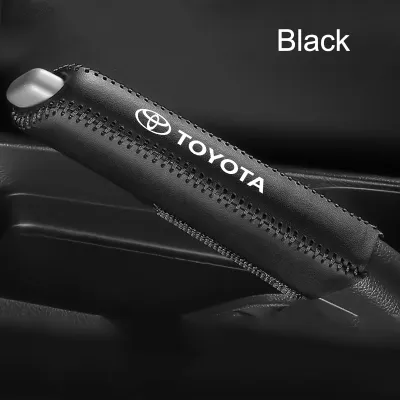
Prices are valid at publication and may change. Please refer to the product page for the latest price.
Gather all necessary tools and materials in advance to ensure a smooth installation process. Depending on the type of cover you have selected, you may need clean microfiber cloths, low-tack protective tape (if recommended by the cover manufacturer to shield delicate finishes), and any specific fastening tools or lacing needles included in the product kit. Work in a well-lit, ventilated area with the vehicle parked safely on a flat surface, the engine turned off, and the wheels securely choked if you need to temporarily disengage the handbrake during the fitting process.
Step-by-Step Installation Process
Every handbrake cover has its own unique design, material composition, and fastening method, making it essential to read and follow the specific product manual provided by the manufacturer. Before beginning, understand the safety boundaries of your vehicle’s braking system: the handbrake is a primary safety device, and the cover must never obstruct its mechanical travel or prevent the release button from functioning. If at any point during the installation you encounter extreme resistance, or if the cover appears to pinch the moving parts of the lever, stop immediately, remove the cover, and re-evaluate the fit. For complex installations or if you are unsure about vehicle compatibility, consult your vehicle’s documentation or seek assistance from a qualified professional.

Installing Slip-On or Stretchable Fabric Covers
Slip-on covers made from elastic fabrics, neoprene, or flexible silicone are popular for their simplicity, but they require careful handling to avoid tearing the material or straining the lever. Begin by aligning the top opening of the cover with the tip of the handbrake lever, making sure the cutout for the release button is oriented correctly. Gently stretch the material over the tip, using the pads of your fingers rather than your fingernails to pull the cover downward. Work the material down the lever incrementally, moving from side to side to distribute the tension evenly and prevent the cover from bunching up.
As you slide the cover down, pay close attention to the handbrake release button and the pivot mechanism at the base. Do not pull aggressively on the cover if it catches on the button; instead, use a gentle wiggling motion to guide the material over the obstruction. Ensure that any seams, patterns, or grip textures align perfectly with the shape of the lever. Twisting the cover while it is under tension can apply uneven pressure to the underlying plastic trim, potentially loosening the original housing or causing the cover to sit crookedly.
It is vital to recognize when to stop and remove the cover. If the material resists your efforts, bunches up excessively, or requires extreme force to pass over the widest section of the lever, do not attempt to force it. Forcing a tight, non-compliant cover can bend the internal lever mechanism, crack the surrounding plastic console, or tear the cover itself. If the fit is too tight, verify the dimensions again; you may need a different size or a more flexible material suitable for your vehicle’s specific lever profile.
Installing Wrap-Around or Snap-Fit Leather Covers
Structured covers made from leather, synthetic leather, or heavy-duty vinyl often feature wrap-around designs that secure with laces, stitching, or metal snaps. Because these materials are less pliable and may have rough inner linings, they present a higher risk of scratching the original lever during installation. To protect the original finish, consider applying a layer of low-tack, manufacturer-approved protective tape or a thin, protective microfiber barrier over the lever before positioning the cover, especially if the inner lining feels abrasive.
Position the cover over the lever, aligning the pre-punched lacing holes or snap fasteners along the underside or side of the handle, depending on the design. If your cover requires lacing or stitching, begin threading the supplied cord or thread according to the manufacturer’s instructions, typically starting from the top near the release button and working your way down to the base. Maintain even, moderate tension on the laces as you progress; pulling too hard can tear the leather eyelets, while leaving them too loose will cause the cover to twist and slide during daily use.
When securing snaps or tucking excess material into the edges of the handbrake boot, avoid using sharp metal tools like screwdrivers or knives, which can easily slip and gouge the leather or scratch the center console. Instead, use a plastic trim removal tool or the blunt edge of a plastic card to gently tuck the edges. Be extremely careful around the ratchet and pivot points at the base of the lever; never apply unapproved adhesives, double-sided tapes, or glues to secure the cover, as these can migrate into the mechanical components, gum up the ratchet teeth, and compromise the safety of your emergency brake.
Securing the Cover and Avoiding Common Mistakes
Once the cover is fully installed, you must verify that it sits securely and does not interfere with any functional parts of the vehicle. Inspect the area around the handbrake release button at the tip of the lever. The cover must not overlap, pinch, or restrict the button’s movement; you must be able to depress the button fully and smoothly without any extra effort. Additionally, check the clearance between the covered lever and the surrounding center console base when the handbrake is fully lowered and fully engaged. The cover should not rub against the plastic trim, as this can cause wear over time and prevent the lever from resting in its fully disengaged position.
Several common installation mistakes can lead to vehicle damage or safety hazards. The most critical error is using permanent adhesives, such as superglue or heavy-duty contact cement, to stop a loose cover from sliding. These adhesives can permanently ruin the original lever’s finish, emit harmful fumes in a hot cabin, and seep into the internal spring and button mechanism, locking the handbrake in place. Another mistake is cutting or modifying the cover with scissors or knives to force a fit; this compromises the structural integrity of the accessory and can lead to sudden tearing while you are operating the brake.
If you notice the cover shifting, twisting, or slipping during daily driving, do not attempt to secure it with makeshift bindings like rubber bands, zip ties, or household tape. A slipping cover is a safety hazard, as it can reduce your grip during an emergency or jam the release button. If the cover does not stay in place on its own, it is likely the wrong size or shape for your vehicle. The safest course of action is to remove the ill-fitting cover immediately and replace it with a high-quality, model-specific unit that matches your vehicle’s exact specifications.
Post-Installation Checks and Maintenance
Before driving your vehicle on public roads, perform a series of functional checks to ensure the handbrake operates flawlessly with the new cover installed. Park your vehicle in a safe, level area, such as a flat driveway or garage, away from traffic. Engage and release the handbrake multiple times, paying close attention to the tactile feedback. You should feel the distinct clicks of the ratchet teeth engaging securely, and the lever should hold its position firmly when pulled up. When you press the release button and lower the lever, it must return completely to its baseline position without sticking or catching on the cover.
Regularly inspect the cover during your routine vehicle maintenance. Look for signs of premature wear, such as loose stitching, fraying edges, or cracking material, which can occur quickly in hot and humid tropical environments. Ensure that the cover has not stretched out over time or shifted forward, which could slowly begin to obstruct the release button. If you notice any interference with the center console trim or if the cover begins to feel loose, adjust its position or tighten the laces immediately to maintain safe operation.
Proper cleaning is essential to prevent dirt and grit from accumulating underneath the cover, where it can act as an abrasive against the original lever. Follow the care instructions on the cover’s material label. For fabric or silicone covers, this may involve removing the cover periodically to wash it with mild soap and water. For leather covers, use a dedicated leather cleaner and conditioner to keep the material supple and prevent it from drying out and cracking under intense sunlight. Always ensure both the cover and the original lever are completely dry before reassembling them to prevent moisture from being trapped, which can lead to mold growth or damage to the underlying materials.
Frequently Asked Questions (FAQ)
Will a handbrake cover affect the braking performance or safety?
A properly installed handbrake cover only alters the exterior grip surface of the lever and will not affect the mechanical braking performance, cable tension, or hydraulic systems of your vehicle. However, safety can be compromised if the cover is poorly fitted, oversized, or improperly installed. If the cover blocks the release button from depressing fully, prevents the lever from being pulled up to its necessary engagement height, or stops the lever from returning to its fully disengaged position, it poses a serious safety risk. Always ensure the cover allows for the complete, unobstructed range of motion of the handbrake mechanism before operating the vehicle.
How do I remove a stuck handbrake cover without scratching the lever?
Removing a tight, aged, or stubborn handbrake cover requires patience to avoid damaging the original finish underneath. If the cover is made of leather or fabric with laces or stitching, the safest method is to carefully cut the threads using a seam ripper or small thread snips, taking care to keep the sharp edges pointed away from the original lever. For tight rubber, silicone, or vinyl slip-on covers, you can apply gentle, controlled heat from a handheld hairdryer on a low setting to soften the material and make it more pliable. Keep the hairdryer moving constantly to avoid overheating or melting the plastic trim. Once warmed, gently roll the cover back on itself from the base upward, rather than pulling forcefully.
Can I use a universal handbrake cover on any car model?
While many aftermarket covers are marketed as universal, they do not fit every vehicle model perfectly. Car manufacturers design handbrake levers with unique lengths, thicknesses, contours, and button configurations to match their specific interior layouts. A universal cover may be too loose on a slim lever, causing it to slip dangerously during use, or too tight on a thick lever, making installation impossible without damaging the components. Always measure your handbrake lever’s length and circumference, and check the button clearance against the product’s detailed dimensions before purchasing. For the best fit and safety, look for covers designed specifically for your vehicle’s make and model.
Community discussion
Share your experience or ask a question. Comments are reviewed before publication.