
Installing a customized acrylic panel or accessory on your scooter is an excellent way to elevate its aesthetics while shielding vulnerable factory components. To install a Mio Soulty acrylic cover without damaging the body panels, you must perform a meticulous dry fit, protect the surrounding fairings with automotive masking tape, and secure all fasteners hand-tight without overtightening. Taking a rushed approach often leads to spiderweb cracks in the acrylic or stripped threads on your scooter’s plastic mounting tabs.
The Yamaha Mio Soulty remains a highly popular automatic scooter in the Philippines, celebrated for its sharp lines and agile handling on busy city streets. Because it is a daily commuter, its body panels are subjected to intense tropical heat, heavy monsoon rains, and constant road vibrations. When adding aftermarket upgrades like a mio soulty acrylic cover, understanding how to handle both the rigid acrylic material and the flexible plastic fairings is essential to achieving a clean, professional finish.
Before starting any installation or modification, always consult the manufacturer’s documentation for the specific acrylic accessory and refer to your Yamaha Mio Soulty owner’s manual. Verify that the accessory does not block essential lighting, compromise road safety, or violate local land transportation regulations. If the instructions provided with your accessory conflict with your motorcycle’s original manual, prioritize the vehicle manufacturer’s guidelines or seek professional assistance.
Products mentioned in this guide
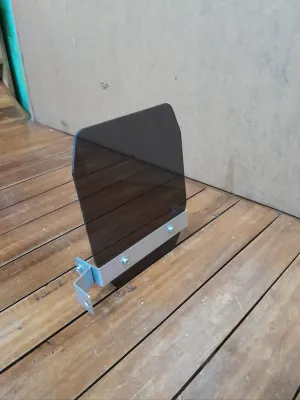
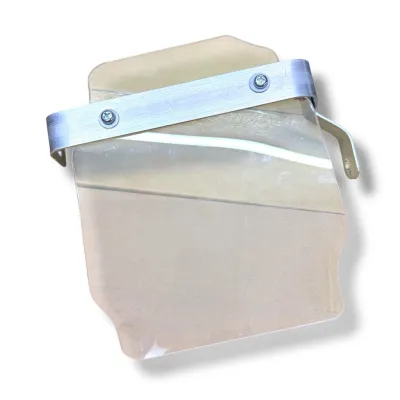

Prices are valid at publication and may change. Please refer to the product page for the latest price.
Essential Tools and Materials for a Scratch-Free Installation
Working on delicate painted fairings requires specialized preparation to prevent unsightly scratches and swirl marks. Using the wrong tools or skipping protective barriers can ruin the glossy finish of your Mio Soulty before the accessory is even mounted. Having the proper materials on hand ensures a seamless workflow and protects your investment.
To begin, secure a roll of high-quality automotive masking tape or painter’s tape. This tape acts as a temporary shield for the painted edges of your scooter’s body panels, absorbing minor impacts and preventing tool slips from scraping the clear coat. Avoid using heavy-duty duct tape or packaging tape, as these leave behind a stubborn adhesive residue that can damage the paint when peeled off.
For cleaning, prepare a mild motorcycle-specific wash, clean water, and several plush, high-GSM microfiber cloths. Standard household rags or paper towels contain coarse fibers that can trap grit and micro-scratch both the paint and the highly sensitive acrylic surface. A dedicated motorcycle wash safely lifts oils, road grime, and wax without leaving a film that could interfere with adhesives.
Assembling the right tools before starting prevents interruptions. Plastic trim removal tools are highly recommended for gently prying open panel gaps or aligning tabs, as they will not gouge plastic fairings like metal screwdrivers do. You will also need the exact hand tools specified by your accessory kit, which typically include a set of hex keys (Allen wrenches) or screwdrivers.
Japanese motorcycles like the Yamaha Mio Soulty often utilize Japanese Industrial Standard (JIS) screws rather than standard Phillips screws. Using a standard Phillips screwdriver on a JIS screw can easily strip the head, making future removal extremely difficult. Always check the tool requirements in the acrylic cover manufacturer’s instructions and your owner’s manual before beginning to ensure a perfect tool-to-fastener match.
Preparing the Mio Soulty and Protecting the Body Panels
Proper surface preparation is the foundation of any successful accessory installation. In the tropical climate of the Philippines, motorcycles are constantly exposed to airborne dust, exhaust soot, and humidity, which form a stubborn layer of grime on the fairings. Attempting to mount an accessory over this layer will result in poor adhesive bonding and can trap abrasive particles that grind into the paint over time.

Begin by thoroughly washing the specific area of the body panels where the acrylic cover will be installed. Use your mild motorcycle wash and a clean microfiber cloth to gently agitate the surface, paying close attention to recessed channels and panel seams where dirt accumulates. Rinse the area completely with clean water and dry it thoroughly with a fresh microfiber cloth.
Once the surface is dry, perform a degreasing step if your acrylic cover utilizes adhesive tape. Wipe the area down with a pre-paint prep solvent or a diluted isopropyl alcohol solution that is safe for automotive plastics, as recommended by the accessory manufacturer. This step removes any residual waxes, silicones, or detailing sprays that would otherwise prevent the adhesive from forming a permanent bond.
Next, apply automotive masking tape along the edges of the body panels adjacent to the installation zone. Carefully lay the tape over the seams and wrap it slightly around the edges where the acrylic cover will rest. Additionally, place a small square of masking tape directly over and around any factory screw holes that will be used, then use a clean tool to gently pierce the tape only at the screw opening. This creates a protective collar that shields the surrounding paint from accidental tool slips.
Once the protective tape is applied, perform a “dry fit” or test-fitting of the acrylic cover. Carefully place the cover over the body panels without removing any adhesive backings or inserting any screws. This allows you to inspect the alignment, check for even panel gaps, and ensure that the cover does not pinch any underlying wiring or interfere with moving parts like the steering column or suspension.
This dry-fit stage serves as a critical stop condition. If the acrylic cover does not align naturally with the factory lines of your Mio Soulty, or if you have to apply physical force to bend it into position, stop immediately. Acrylic is a rigid polymer that does not tolerate forced bending; attempting to secure a misaligned cover will inevitably lead to stress cracking. Verify that you have the correct accessory designed specifically for your Mio Soulty’s model year before proceeding any further.
Step-by-Step Installation of the Mio Soulty Acrylic Cover
Once you have confirmed a perfect dry fit and protected the surrounding paint, you are ready to proceed with the physical installation. This process requires a delicate touch and a systematic approach to ensure that the rigid acrylic material is secured evenly without introducing structural stress.
Aligning and Positioning the Cover
Achieving perfect symmetry is the first step in the mounting process. To keep the cover from shifting while you work, use small pieces of automotive masking tape as temporary hinges. Position the acrylic cover precisely over the mounting area, then apply two or three strips of tape along one side, securing half of each strip to the cover and the other half to the protected body panel.
This temporary hinge setup allows you to swing the cover open and closed while maintaining its exact alignment. Swing the cover down to verify that the pre-drilled holes in the acrylic line up perfectly with the motorcycle’s factory mounting points or screw holes. If the alignment is slightly off, adjust the tape hinges until the holes are centered.
If your mio soulty acrylic cover relies on double-sided adhesive tape for mounting, use the hinge mechanism to your advantage. Swing the cover open like a door, then carefully peel away the protective backing film from the adhesive strips. Using the tape hinges as a guide, slowly swing the cover back down into its final position, ensuring that the adhesive makes contact all at once rather than sliding across the paint.
Securing the Fasteners or Adhesive
The method you use to secure the cover depends entirely on whether the accessory is designed to be screw-mounted or adhesive-mounted. Both methods require strict adherence to safety boundaries to prevent cracking the brittle acrylic or stripping the soft plastic threads of the scooter’s fairings.
For screw-mounted covers, always thread every fastener by hand first. Insert the screws through the acrylic and turn them clockwise with your fingers for several rotations to ensure the threads are engaging cleanly. Never use an electric drill, impact driver, or power tool for this task, as the uncontrolled torque will instantly strip the plastic mounting tabs or shatter the acrylic.
Once all screws are hand-threaded, tighten them using a manual screwdriver in an alternating diagonal sequence. This method distributes the physical pressure evenly across the face of the acrylic cover, preventing localized stress concentrations. Tighten each screw gradually, moving back and forth across the cover rather than tightening one screw completely before moving to the next.
Establish a strict safety boundary: stop tightening the moment the screw head makes snug contact with the acrylic surface. Acrylic expands and contracts slightly with temperature fluctuations, especially when parked under the hot sun. Overtightening deprives the material of this natural movement, leading to immediate or delayed stress fractures radiating from the screw holes.
For adhesive-mounted covers, apply firm, even pressure across the entire bonded area using a clean microfiber cloth to protect the surface from finger oils. Avoid concentrating heavy pressure on a single point, which can flex and crack the cover. Allow the adhesive to cure completely in a dry, shaded environment according to the manufacturer’s specified wait times before riding the motorcycle or exposing it to water.
If at any point during the tightening or pressing process you hear a faint clicking sound, notice the acrylic beginning to bow, or see white stress marks forming around the mounting points, stop immediately. Back off the fasteners or release pressure, inspect the alignment, and verify that there is no debris trapped underneath causing an uneven load.
Post-Installation Inspection and Acrylic Maintenance
After successfully securing the cover, a thorough post-installation check ensures that your motorcycle remains completely safe to ride and that the new accessory will perform reliably over time. Taking a few minutes to inspect your work prevents unexpected issues on the road.
Begin with a visual and physical inspection of the installed cover. Gently tap the edges of the acrylic to check for any play or rattling, which indicates loose fasteners or poor adhesive contact. Inspect the perimeter to ensure there are no gaps where rainwater, road splash, or wash water could pool, as trapped moisture can degrade double-sided adhesives and lead to corrosion of underlying metal components.
Verify that the newly installed cover does not obstruct any safety-critical components. Ensure that headlights, signal lights, and tail lights remain fully visible from all required angles, and that the cover does not block essential cooling vents or impede the movement of the handlebars. Once you are satisfied with the fit and safety, carefully peel away the protective masking tape from the body panels, pulling it back slowly at a shallow angle to avoid lifting the edges of the newly mounted cover.
Maintaining your mio soulty acrylic cover requires specific care to preserve its optical clarity and prevent premature aging. Acrylic is highly susceptible to chemical degradation and physical scratching. Never use household glass cleaners, ammonia-based sprays, gasoline, kerosene, or harsh solvents on the cover, as these chemicals break down the polymer chains, causing the plastic to cloud, yellow, or develop micro-cracks known as crazing.
When washing your scooter, treat the acrylic cover with the same care as your helmet visor. Use only a dedicated plastic cleaner or a mild motorcycle soap solution paired with a clean, high-GSM microfiber cloth. Gently wipe the surface in straight, linear motions rather than circular patterns, which can create unsightly swirl marks under direct sunlight. Always rinse away any loose grit with clean water before wiping to avoid dragging abrasive particles across the sensitive surface.
Frequently Asked Questions (FAQ)
Can I install the acrylic cover myself, or do I need a mechanic?
Most cosmetic acrylic covers for the Mio Soulty are designed as straightforward DIY projects that can be completed safely at home using basic hand tools. As long as you follow the proper preparation steps, protect your paint, and handle the fasteners with care, you do not need professional mechanical assistance.
However, a clear safety boundary exists if the installation requires removing major structural body panels, drilling new holes into the motorcycle’s frame, or modifying the electrical system. If your accessory involves splicing wires or altering the factory lighting harnesses, consult a qualified motorcycle mechanic to prevent electrical faults, short circuits, or voiding your vehicle’s warranty.
What should I do if the acrylic cover doesn't fit the Mio Soulty panels perfectly?
If you encounter fitment issues during the dry-fit stage, never attempt to force, bend, or drill new holes into the acrylic or your scooter’s body panels to make it fit. Forcing a rigid acrylic sheet to conform to an incorrect shape introduces severe physical stress that will cause the cover to crack or shatter while riding.
Start by verifying the exact model year and specific variant of your Yamaha Mio Soulty. Manufacturers occasionally make subtle changes to fairing shapes and mounting point locations between production runs, meaning a cover designed for one model year may not fit another. If you confirm that you have the correct part but it remains poorly molded or warped, stop the installation and contact the seller or manufacturer to arrange for a replacement.
Community discussion
Share your experience or ask a question. Comments are reviewed before publication.