
Installing a MIVV exhaust pipe on your motorcycle is a highly rewarding upgrade that enhances both the acoustic profile and the performance of your machine. To do it properly, you must follow a systematic process: prepare a stable workspace, safely remove the stock exhaust, fit the new MIVV components with fresh crush gaskets, sequentially torque all fasteners to the manufacturer’s specifications, and perform a thorough heat-cycle leak check. While many riders can complete this installation at home with standard metric tools, always verify your specific motorcycle model, year, and road legality before beginning. If you are uncomfortable with mechanical disassembly or if your motorcycle features complex electronics, consulting a qualified professional mechanic is highly recommended to ensure road safety and preserve your warranty.
Preparation and Safety Boundaries
Working on a motorcycle exhaust system requires strict adherence to safety protocols to prevent personal injury and mechanical damage. The absolute first rule of exhaust installation is to ensure the engine and the entire stock exhaust system are completely cold to the touch. A motorcycle that has been running even for a few minutes can reach temperatures high enough to cause severe third-degree burns instantly. In the tropical climate of the Philippines, where ambient temperatures are high, engines take longer to cool down. It is best to let the motorcycle sit overnight or wait at least several hours in a shaded, well-ventilated area before beginning any disassembly.
Stabilizing the motorcycle is the next critical step. Never rely solely on the side stand, as the physical force required to loosen stubborn, rusted bolts can easily tip the bike over. Place the motorcycle on a secure rear paddock stand or a sturdy center stand on a flat, level concrete surface to keep the bike upright, relieve suspension tension, and provide clear access to both sides.
Products mentioned in this guide
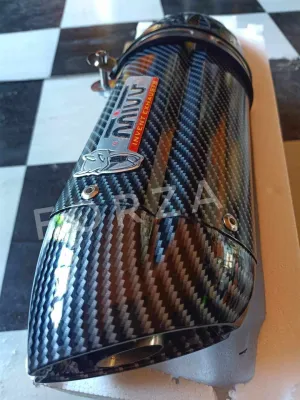
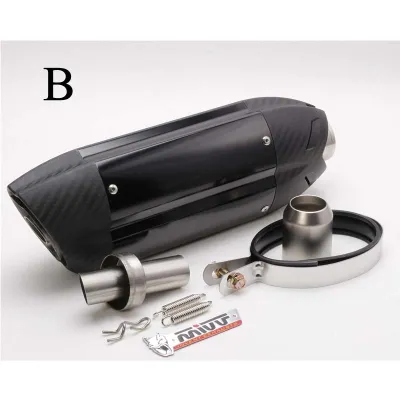
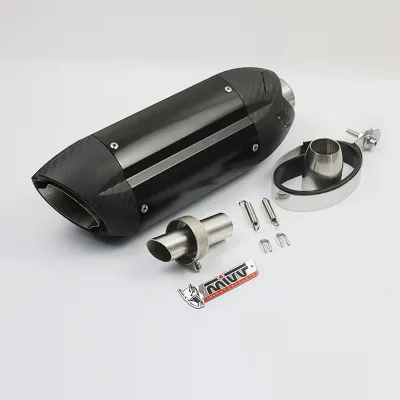
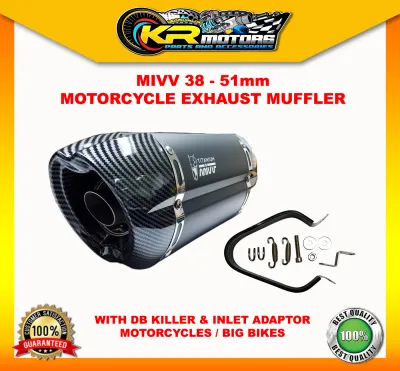
Prices are valid at publication and may change. Please refer to the product page for the latest price.
Gathering the correct tools beforehand prevents interruptions and minimizes the risk of stripping delicate fasteners. You will typically need a metric socket set (8mm to 17mm), high-quality Allen keys, socket extensions, a spring puller tool, and a calibrated torque wrench. A torque wrench is non-negotiable; guessing the tightness of cylinder head studs or frame mounts frequently leads to stripped threads or exhaust leaks. Keep a can of high-quality penetrating oil, clean shop towels, and protective gloves nearby to facilitate a smooth workflow.
Before loosening a single bolt, thoroughly review the installation diagram provided with your MIVV exhaust pipe and cross-reference it with your motorcycle manufacturer’s official service manual. Every motorcycle model has unique mounting points, clearance requirements, and structural interfaces. Never assume that an exhaust designed for one model year will fit another without verifying the exact manufacturer part numbers and compatibility. Finally, ensure you have a brand-new set of OEM-spec exhaust crush gaskets ready, as reusing old, compressed gaskets is the primary cause of post-installation leaks.
Removing the Stock Exhaust System
Removing the original equipment manufacturer (OEM) exhaust system must be approached systematically to avoid scratching the swingarm, frame, or bodywork. Begin by removing any body panels, heat shields, or passenger footpeg brackets that obstruct access to the mounts. Keep a labeled tray nearby to organize all fasteners, spacers, and brackets, as some may be reused with the new MIVV system. Take photos of the stock routing before disassembly for reference.

Before unbolting the main structure, disconnect any electronic sensors integrated into the exhaust. If your motorcycle has an oxygen (O2) sensor, carefully unscrew it using a specialized flare nut wrench to avoid twisting the delicate wiring harness. For models with an exhaust servo, follow the service manual to disconnect the cables safely without forcing the actuator motor, which can trigger dashboard error codes. Secure all disconnected wiring out of the way.
Next, loosen the muffler clamp that connects the silencer to the mid-pipe, but do not remove the bolts entirely. Support the muffler’s weight using an adjustable jack or a soft block of wood. Removing the mounting bolts while the heavy OEM muffler hangs unsupported can cause it to drop suddenly, stripping the frame’s aluminum threads or gouging the swingarm. Once supported, remove the hanger bolts and slide the muffler off.
The most challenging phase of removal is unbolting the header or mid-pipe from the engine cylinder head. Because these fasteners undergo extreme heat cycles and are constantly exposed to road grime, water, and salt air—especially in coastal regions of the Philippines—they are highly susceptible to corrosion and seizing. Spray the cylinder head studs and nuts generously with penetrating oil and let it soak for at least 15 to 30 minutes. When loosening, apply steady, even pressure using a well-fitting six-point socket. If a nut feels seized, do not use excessive force, as this can easily snap the studs inside the engine block, resulting in an expensive machine-shop repair. Once all nuts are removed, slide the header off the studs and carefully extract the old copper or composite crush gaskets from the cylinder head ports using a non-marring pick. Clean the exhaust ports thoroughly with a soft brass wire brush to remove any carbon buildup, ensuring a clean mating surface for the new installation.
Fitting the MIVV Exhaust and Gasket Replacement
Installing your new MIVV exhaust pipe requires precision to ensure a gas-tight seal and prevent structural stress. The absolute first rule of reassembly is to install brand-new exhaust crush gaskets into the cylinder head ports. These gaskets deform under pressure to seal microscopic gaps between the pipe and the cylinder head. Reusing old gaskets leads to hot exhaust leaks that can damage surrounding plastics and lean out your engine’s air-fuel ratio.
Carefully press the new crush gaskets into the clean cylinder head ports. If they do not stay in place, you can apply a very thin smear of high-temperature copper grease to the back of the gasket to hold it temporarily against the port. Next, align the MIVV header pipe or mid-pipe with the mounting studs. It is critical to hand-thread all flange nuts and mounting bolts initially. Do not use any hand tools or sockets at this stage. Hand-threading ensures that the threads are properly engaged and eliminates the risk of cross-threading the delicate studs on the aluminum cylinder head.
Once the headers are loosely in position, slide the MIVV mid-pipe and muffler onto the assembly. Depending on your specific MIVV model, you may need to install mounting springs, rubber-lined metal straps, or bracket spacers. If your kit uses spring connectors, use a proper spring-puller tool to stretch the springs onto the retaining hooks. Avoid using pliers, which can easily slip, scratch the premium finish of your new exhaust, or cause personal injury if the spring snaps back. If your MIVV silencer uses a carbon fiber or stainless steel mounting strap, ensure the protective rubber insert is seated perfectly flat against the inside of the strap to prevent metal-on-metal vibration.
During this entire fitting process, leave every single clamp, bracket bolt, and header nut slightly loose. This “loose-fit” state is essential because it allows the entire exhaust system to self-align naturally under its own weight. If you tighten one section completely before fitting the rest, you will introduce mechanical tension into the system. This tension can lead to alignment issues, clearance problems, and eventually, stress fractures in the metal welds due to engine vibration. Perform a thorough visual check along the entire length of the exhaust: ensure there is adequate clearance (typically at least 10mm to 15mm) between the pipe and the rear shock absorber, swingarm, brake lines, wiring harnesses, and plastic fairings.
Final Tightening and Torque Verification
With the MIVV exhaust system self-aligned and clearances verified, proceed to the final tightening sequence. Tightening must start at the engine cylinder head and work systematically backward toward the rear muffler hanger. This allows the flanges to seat flat against the new crush gaskets and prevents binding. Tightening the rear brackets first would lock the system prematurely, preventing the header flanges from sealing flush against the engine block.
Use a calibrated torque wrench to tighten the cylinder head nuts. Do not guess these values. Refer directly to your motorcycle’s official service manual for the exact torque specifications, which are typically measured in Newton-meters (Nm) or foot-pounds (ft-lbs). Tighten the header nuts in an alternating, progressive pattern—similar to tightening lug nuts on a car wheel. For example, on a multi-cylinder bike, tighten each nut to half the specified torque first, then make a final pass to reach the full torque value. This ensures even pressure across the crush gasket, creating a reliable, leak-free seal.
Once the headers are secured, move backward to tighten the mid-pipe clamps, spring joins, and finally, the main muffler bracket. When tightening the muffler hanger bolt, pay close attention to the rubber isolator bushings. Ensure they are seated correctly in the bracket and are not pinched, twisted, or over-compressed. The rubber is designed to absorb high-frequency engine vibrations; over-tightening the hanger bolt can crush the rubber, transferring harsh vibrations directly to the frame and potentially cracking the exhaust mount over time.
Be extremely cautious when handling stainless steel, titanium, or carbon fiber components. Titanium and stainless steel fasteners can easily gall or seize if tightened too quickly or without proper lubrication. If specified by the MIVV instructions, apply a small amount of anti-seize compound to the bolt threads. Never exceed the recommended torque limits, as excessive force can easily snap titanium bolts or crush delicate carbon fiber mounting brackets. Once the entire sequence is complete, take a few minutes to double-check every single fastener with your torque wrench to ensure nothing was missed during the progressive tightening process.
Post-Installation Checks and Leak Testing
Before starting your motorcycle, perform a final visual inspection. Wipe down the entire MIVV exhaust pipe—especially stainless steel, titanium, or carbon fiber surfaces—using a clean microfiber cloth sprayed with isopropyl alcohol. Any fingerprint oils, grease, or lubricants left on the metal will bake permanently into the finish once the exhaust heats up, leaving unsightly stains. Ensure your hands are clean before touching the pipes.
Move the rear suspension through its travel by pushing down firmly on the rear of the bike, or have an assistant sit on it, to verify that the exhaust maintains safe clearance from the swingarm, rear tire, and brake caliper under full compression. Once cleared, move the motorcycle to a highly ventilated outdoor area. Do not start the bike inside a closed garage due to the rapid buildup of toxic carbon monoxide gas. Start the engine and let it idle smoothly; do not rev the engine immediately.
As the engine idles, conduct a thorough leak test. Listen closely to the cylinder head connection and the mid-pipe joints. Any hissing, sharp ticking, or popping noises indicate an exhaust leak, meaning a gasket is not seated correctly or a clamp is loose. To verify, carefully pass your bare hand around the joints from a safe distance of a few inches to feel for any pulsating air escapes. Be extremely cautious, as the exhaust pipes heat up rapidly and can cause severe burns within seconds. Alternatively, you can spray a small amount of soapy water onto the joints while the exhaust is still cool and look for expanding bubbles, though you must wipe the soapy residue off immediately afterward to prevent staining.
Allow the engine to run until it reaches normal operating temperature, letting the metal expand fully. It is completely normal to see a small amount of wispy white smoke and smell a burning chemical odor during this initial heat cycle. This is simply the manufacturing oils, anti-seize compounds, and protective coatings inside the new MIVV pipe burning off. However, if you notice heavy, dark smoke or if the smell persists after 10 to 15 minutes of riding, shut down the engine immediately and inspect for touching wires or plastic components. Once the engine has cooled down completely to ambient temperature, perform a final check: re-torque all header nuts and mounting bolts, as the thermal expansion and initial vibration will cause the components to settle, often loosening the fasteners slightly.
Frequently Asked Questions (FAQ)
Do I need to remap the ECU after installing a MIVV exhaust?
Whether you need to remap your motorcycle’s Engine Control Unit (ECU) depends entirely on the type of MIVV exhaust system you have installed. If you have fitted a simple slip-on muffler (which replaces only the rear silencer while retaining the stock header pipes and catalytic converter), an ECU remap is generally not required. Slip-on exhausts do not significantly alter the engine’s overall airflow or backpressure, meaning the stock ECU can easily adjust the air-fuel ratio within its factory parameters.
However, if you have installed a full MIVV exhaust system (which replaces the entire exhaust tract from the cylinder head backward) or removed the catalytic converter, a professional ECU remap or an aftermarket fuel controller is highly recommended. Full systems dramatically increase exhaust gas flow and reduce backpressure, which typically causes the engine to run lean (too much air, not enough fuel). Running a lean air-fuel mixture can lead to engine overheating, severe popping on deceleration, poor throttle response, and potential long-term damage to your valves and piston crowns. Always consult the specific MIVV product documentation and your motorcycle manufacturer’s guidelines to determine the safest configuration for your machine.
Can I reuse the stock exhaust gaskets if they look undamaged?
No, you should never reuse stock exhaust gaskets, regardless of how clean or undamaged they appear to the naked eye. Exhaust gaskets—particularly the crush-style gaskets made of copper or layered composite materials—are designed for single-use application. When you tighten the header flange nuts during the initial factory installation, these gaskets physically deform and crush to fill the microscopic gaps and imperfections between the steel exhaust pipe and the aluminum cylinder head port.
Once a crush gasket has been compressed, it loses its elasticity and structural memory. If you attempt to reuse it with your new MIVV exhaust, the gasket will not be able to compress any further to accommodate the slightly different alignment and mounting shape of the aftermarket pipe. This inevitably results in exhaust leaks, which not only produce an annoying ticking sound but also allow cold air to be sucked back into the exhaust port during deceleration. This cold air introduction can cause backfiring, erratic idling, and inaccurate O2 sensor readings, which will negatively affect your engine’s fueling and performance. Always invest in a brand-new set of gaskets for every exhaust installation.
Community discussion
Share your experience or ask a question. Comments are reviewed before publication.