
Installing a motorcycle muffler gasket correctly requires meticulous surface preparation, precise component alignment, and even torque application. When upgrading or modifying an exhaust system, this small component serves as the critical seal between the header pipe and the muffler. A flawless installation prevents hot exhaust gases from escaping prematurely, which keeps the engine running efficiently and ensures the motorcycle complies with local noise regulations.
Why a Perfect Muffler Gasket Seal Prevents Leaks and Fines
The junction where the header pipe meets the mid-pipe or muffler slip-on is a high-pressure, high-temperature zone. The muffler gasket fills the microscopic imperfections between these metal surfaces. Without a tight seal, exhaust gases escape before passing through the baffles and catalytic converter. This bypass results in a sharp, loud, and raspy exhaust note that easily exceeds legal limits. In the Philippines, where law enforcement and local government units (LGUs) actively monitor noise levels on public roads, an exhaust leak can quickly lead to expensive fines and confiscated license plates.
Furthermore, modern motorcycle engines rely on precise exhaust backpressure to optimize the scavenging process—where exiting exhaust pulses help pull the next fresh air-fuel charge into the combustion chamber. A leak disrupts this pressure wave, causing a loss of low-end torque, popping on deceleration, and a lean fuel mixture. In the tropical heat of the Philippines, a lean-running engine runs significantly hotter, risking accelerated wear. Additionally, escaping gases can reach temperatures exceeding 500°C, easily melting nearby plastic fairings, wiring harnesses, or rear shock absorbers during slow-moving traffic in Manila or Cebu.
Products mentioned in this guide
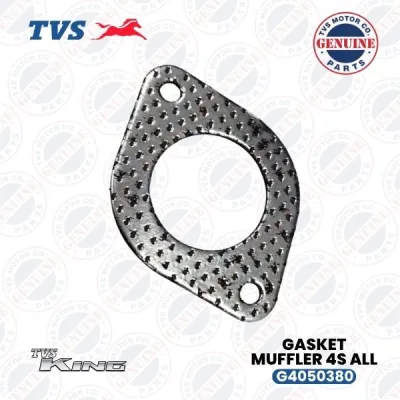
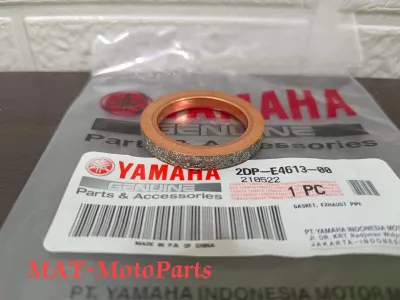
Prices are valid at publication and may change. Please refer to the product page for the latest price.
Essential Tools and Materials for Gasket Installation
Before starting, gather the correct tools to prevent damaging delicate exhaust components. You will need:

- Socket set and combination wrenches: Typically 8mm, 10mm, 12mm, or 14mm, depending on your motorcycle model.
- Torque wrench: Crucial for applying the exact clamping force specified by the manufacturer without stripping threads.
- Brass wire brush: Softer than steel, a brass brush removes carbon buildup without deeply gouging aluminum or stainless steel flanges.
- Brake cleaner or aerosol degreaser: Use only according to the product label instructions. Ensure it is safe for metal surfaces and keep it clear of painted fairings, rubber seals, or plastic covers.
- Penetrating oil: Highly recommended for loosening heat-cycled, rusted exhaust bolts common in humid, coastal, or rainy Philippine environments.
Never assume a gasket fits based on a generic category term. You must verify your vehicle’s model, year, exhaust interface type, mounting position, and exact dimensions against the motorcycle’s official service manual or the aftermarket exhaust manufacturer’s documentation before purchasing. Gaskets come in various materials—such as soft copper crush washers, flexible graphite sleeves, or multi-layer steel (MLS)—each requiring specific handling and torque limits.
Step-by-Step Guide to Installing the Muffler Gasket
Modifying an exhaust system requires patience. Forcing components together or rushing the process will inevitably lead to a poor seal. Always refer to your original-vehicle service manual for specific disassembly instructions. If you are uncomfortable working with exhaust systems, seek a qualified motorcycle mechanic to perform the installation.
1. Removing the Old Exhaust and Gasket
Park the motorcycle on a level surface, preferably on its center stand, and allow the engine and exhaust system to cool down completely. Touching a hot exhaust can cause severe burns, and attempting to loosen hot bolts increases the risk of stripping the threads in the aluminum engine block or exhaust flange.
Apply penetrating oil to all mounting bolts and clamp screws, letting it soak for several minutes to ease removal. Carefully unbolt the muffler mounting brackets and the clamp securing the slip-on joint to the header pipe. Gently wiggle the muffler backward to slide it off the header.
Once the muffler is removed, locate the old gasket. It may be wedged inside the muffler inlet or crushed onto the header pipe outlet. Use a non-marring picking tool or a flathead screwdriver to carefully pry the old gasket out. Work slowly to avoid gouging, scratching, or scoring the metal mating surfaces. Any deep scratches created during extraction will act as pathways for escaping exhaust gas, rendering the new gasket less effective.
2. Preparing the Mating Surfaces
A clean surface is paramount for a gas-tight seal. Spray a small amount of brake cleaner onto a clean rag and wipe down the inner mating surface of the muffler inlet and the outer surface of the header pipe. Use your brass wire brush to gently scrub away stubborn carbon deposits, rust, or leftover adhesive.
Ensure the cleaner is fully evaporated before proceeding, and always follow the safety instructions on the solvent’s label, working in a well-ventilated area. Once clean, inspect the metal surfaces. Look closely for warping, deep pitting, or cracks around the flange and clamping areas.
If you notice that the header flange is bent, severely warped, or has deep pits that a gasket cannot realistically bridge, stop the installation immediately. Forcing a clamp onto a warped flange will deform the new gasket and fail to seal. Consult a professional machinist to resurface the flange, or replace the damaged exhaust component before attempting to install the new gasket.
3. Positioning and Installing the New Gasket
Examine your new gasket to identify its correct orientation. Some gaskets are directional, featuring stepped edges, beveled profiles, or asymmetric designs meant to seat in a specific direction. Installing a directional gasket backward will prevent the exhaust pipes from sliding together completely and will cause a leak.
Gently slide the new gasket into the muffler inlet or over the header pipe flange, depending on the exhaust design. It should fit snugly without requiring excessive force. If the gasket is a graphite sleeve, handle it with extreme care; graphite is brittle and can easily crack or crumble if bent or forced.
Never apply generic RTV silicone, household adhesives, or unapproved sealants to the gasket unless the gasket or exhaust manufacturer’s instructions explicitly demand it. Most high-quality gaskets are designed to expand and seal mechanically under heat and pressure. Unapproved sealants can degrade rapidly under extreme exhaust temperatures, leaving gaps that cause immediate leaks, or they can make removing the gasket in the future extremely difficult.
4. Reattaching the Muffler and Torquing Bolts
Carefully align the muffler with the header pipe and the motorcycle’s frame mounting brackets. Slide the joint together smoothly. Ensure the pipes are aligned straight; forcing the muffler at an angle puts undue stress on the joint, which will pinch and ruin the gasket.
Hand-thread all mounting bolts, frame bolts, and joint clamps first. This prevents cross-threading, which can ruin the threads on your frame or clamps. Do not tighten any single bolt fully while others are loose.
Using your torque wrench, tighten the bolts in a gradual, alternating crisscross pattern. This ensures that even clamping pressure is applied across the gasket, allowing it to compress uniformly. Strictly adhere to the torque specifications detailed in your motorcycle’s service manual or the aftermarket exhaust manual. Over-tightening can crush graphite gaskets completely, strip the threads, or crack the exhaust flange, while under-tightening will allow the joint to vibrate loose under normal riding conditions.
How to Verify the Seal and Check for Exhaust Leaks
Once everything is bolted down to specification, perform a thorough visual check. Ensure the muffler is aligned straight, the clamp is positioned correctly over the gasket area, and there are no visible gaps or uneven spacing around the joint.
To perform a physical leak test, prepare a mild solution of liquid dish soap and water in a spray bottle or cup. While the exhaust system is still completely cold, spray or brush the soapy water directly onto the joint where the gasket is housed. Start the motorcycle’s engine and let it idle.
Observe the soapy joint closely. If there is a leak, escaping exhaust gases will rapidly blow bubbles in the soapy solution. If you see bubbles forming, turn off the engine immediately. If no bubbles appear, let the engine warm up slightly and listen closely for any unusual ticking, popping, or hissing sounds near the joint, which are classic signs of a minor exhaust leak.
Exhaust pipes heat up within seconds of starting the engine. Never touch any part of the exhaust system during or immediately after testing, and keep your hands, loose clothing, and hair clear of moving engine parts, such as the drive chain or cooling fan. If you detected a leak, allow the system to cool completely before attempting to adjust or re-torque the bolts.
Navigating Motorcycle Noise Regulations and Compliance
While a perfectly installed muffler gasket ensures that no gas escapes before reaching the muffler, the aftermarket exhaust itself must comply with local laws. In the Philippines, motorcycle noise emissions are highly regulated to maintain peace and safety on public roads.
The Land Transportation Office (LTO) and the Department of Environment and Natural Resources (DENR) enforce strict decibel limits for motorcycles. Under current guidelines, exhaust systems must not exceed specified noise thresholds. Installing a loud “open pipe” or removing the inner silencer (dB killer) violates these regulations, regardless of how well your muffler gasket is sealed.
When selecting an aftermarket exhaust, verify that it features clear compliance markings or decibel ratings that align with Philippine laws. Keep in mind that unauthorized exhaust modifications can lead to failed vehicle registration inspections at LTO offices, void your motorcycle’s factory warranty, or even complicate insurance claims in the event of an accident. Ensuring your exhaust system is both legally compliant and mechanically sealed protects you from costly traffic fines and keeps your motorcycle running at peak efficiency.
Frequently Asked Questions (FAQ)
Can I reuse an old muffler gasket if it looks fine?
No, you should not reuse an old muffler gasket. Most muffler gaskets, especially those made of graphite or copper, are designed to deform and crush during their initial installation to fill the microscopic gaps between the metal surfaces. Once they have been heat-cycled and compressed, they lose their elasticity and cannot rebound to create a reliable seal a second time. Reusing an old gasket almost always results in immediate exhaust leaks, increased noise, and wasted effort.
Do I need to use exhaust sealant with a new gasket?
In most cases, no. Modern, high-quality muffler gaskets are engineered to seal mechanically through precise fitment and compression. Applying high-temperature exhaust paste or silicone sealant is generally unnecessary and can actually cause issues. Unapproved sealants can act as a lubricant during installation, causing the gasket to slip out of its designated seat when you tighten the clamp. Additionally, cured sealant can make future exhaust disassembly and gasket replacement extremely difficult. Only use sealant if it is explicitly recommended by the gasket or exhaust manufacturer’s instructions.
Community discussion
Share your experience or ask a question. Comments are reviewed before publication.