
Installing an aftermarket muffler tip on your Yamaha Mio i 125 is a popular cosmetic upgrade that adds a customized touch to your scooter. This modification allows you to personalize your ride without the high cost or legal complications of a full exhaust system replacement. Properly installing this accessory requires precise measurement of the stock pipe, thorough surface preparation, and secure fastening to prevent the tip from rattling loose on bumpy roads.
By taking a systematic approach, you can achieve a clean, professional finish that preserves the performance of your stock exhaust. This guide outlines the essential pre-installation checks, necessary tools, step-by-step installation procedures, and critical maintenance tips tailored for riders in the Philippines.
Pre-Installation Checks: Compatibility and Safety
Before purchasing or installing any aftermarket accessory, you must verify compatibility with your specific scooter. The Yamaha Mio i 125 stock exhaust pipe has a specific outer diameter (OD) that requires a matching inner diameter (ID) on the muffler tip. Do not rely solely on generic online product listings that claim a universal fit for all scooters. Instead, use a pair of digital or vernier calipers to measure the exact outer diameter of your stock pipe’s exit point, as minor differences in manufacturing years can affect this measurement.
Products mentioned in this guide
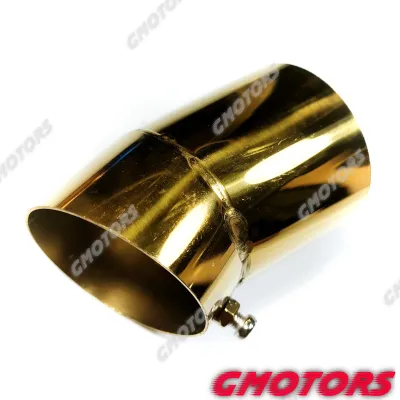
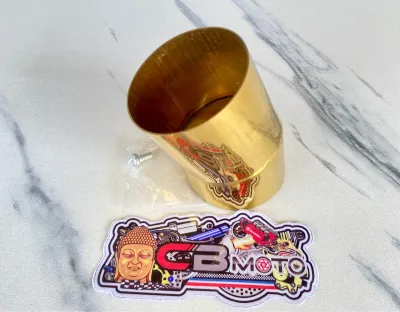
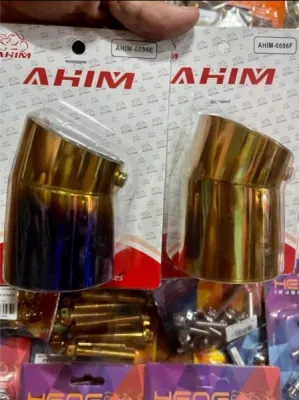
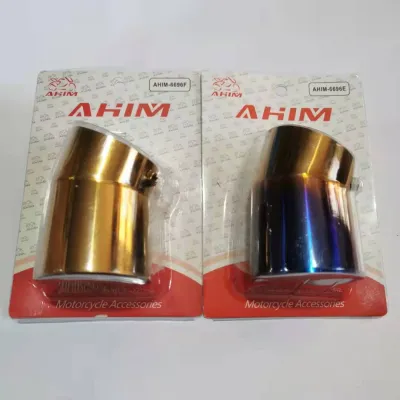
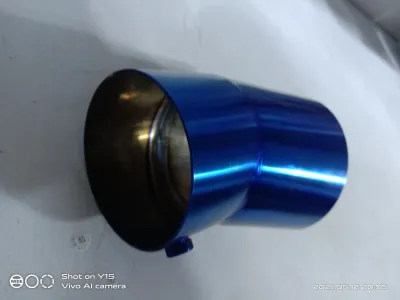
Prices are valid at publication and may change. Please refer to the product page for the latest price.
Next, identify the mounting mechanism of your chosen muffler tip. Most aftermarket tips use one of three designs: clamp-on, bolt-on, or slip-on. Clamp-on styles use an external metal band that tightens around the joint, bolt-on versions utilize integrated set screws that press directly against the stock pipe, and slip-on designs may require drilling into the stock pipe to secure the tip with rivets or sheet metal screws. Ensure the mounting style you select is compatible with the thickness and shape of your stock exhaust pipe.
Safety is paramount when working on any motorcycle exhaust system. You must ensure the engine has been turned off and the exhaust pipe is completely cold to the touch. Exhaust systems reach extremely high operating temperatures during operation; attempting to work on a warm pipe poses a severe burn risk. Furthermore, applying cold cleaning agents or handling hot metal can cause thermal shock, potentially warping or cracking the exhaust components.
Finally, perform a visual clearance check before committing to the installation. Hold the new muffler tip against the end of the stock pipe and inspect the surrounding components. There must be adequate clearance between the tip and the rear tire, the swingarm, the rear shock absorber, and the plastic body panels or exhaust guards of your Mio i 125. The rear suspension compresses significantly when carrying a passenger or navigating uneven roads, so you must account for this movement to prevent the tip from contacting moving parts or melting nearby plastics.
Tools and Materials Required
Having the correct tools on hand before you begin ensures a smooth installation and prevents damage to your scooter’s stock components. Gather the following items:

- Measuring Tools: Digital or vernier calipers to verify the pipe and tip diameters.
- Basic Hand Tools: A socket set, open-ended wrenches, Allen (hex) keys, or screwdrivers, depending on the fasteners provided with your muffler tip.
- Cleaning Supplies: A wire brush or fine-grit sandpaper (such as 400-grit), a clean microfiber cloth, and a dedicated brake cleaner or isopropyl alcohol to prep the surface. Always check the labels of your cleaning agents to ensure they are safe for raw metal surfaces.
- Assembly Aids: A high-temperature copper-based anti-seize compound to protect the fastener threads from heat-induced seizing, and an optional high-temperature exhaust sealant if your specific tip manufacturer recommends it.
- Safety Gear: Protective gloves and safety glasses, especially if you need to clean rust or drill holes.
Step-by-Step Muffler Tip Installation
Preparing the Exhaust Pipe
A secure installation depends heavily on the condition of the mating surface. Over time, the stock exhaust pipe of your Mio i 125 accumulates road grime, carbon deposits, and light surface rust due to exposure to moisture and heat. If you slide a new tip over a dirty pipe, the debris will prevent a flush fit, increase the risk of the tip slipping off, and trap moisture that accelerates hidden corrosion.
Begin by scrubbing the outer surface of the stock pipe’s tip with a wire brush or fine-grit sandpaper. Gently remove all traces of rust, crusty carbon buildup, and baked-on road debris until you expose clean, smooth metal. Once the physical debris is cleared, spray a small amount of brake cleaner or isopropyl alcohol onto a clean microfiber cloth and wipe down the pipe. This removes oily residues and fine dust. Allow the metal to dry completely before proceeding.
Fitting and Securing the Muffler Tip
With the stock pipe clean and dry, you can now fit the muffler tip. Carefully slide the tip onto the end of the stock exhaust pipe. Push it forward until it sits flush against the designated stopping point or reaches the desired depth. Before tightening any hardware, step back to ensure the tip is straight and perfectly aligned with the longitudinal centerline of your motorcycle. A crooked tip not only looks unprofessional but can also misdirect exhaust gases.
For clamp-on or bolt-on designs, insert the mounting hardware into the designated holes. Always thread the bolts or set screws by hand for the first few turns. This simple step prevents cross-threading, which can ruin the threads of your new accessory. If your tip utilizes set screws that press directly onto the stock pipe, you may want to mark the contact points, slide the tip off, and file a tiny flat spot on the stock pipe to give the screws a more secure surface to bite into.
For slip-on designs that require rivets or screws, you must drill pilot holes into the stock exhaust pipe. Align the tip, mark the hole locations, and remove the tip. Use a center punch to mark the spots to prevent the drill bit from walking. When drilling, use extreme caution and low drill speeds to prevent metal shavings from falling inside the exhaust pipe. You can place a small magnet near the drill site or use a vacuum cleaner to capture the metal debris immediately. If you are uncomfortable drilling into your stock exhaust pipe, stop the installation and consult a qualified professional mechanic.
If the manufacturer of your muffler tip specifies the use of a high-temperature exhaust sealant, apply a thin, even bead around the mating surface of the stock pipe before sliding the tip on. Be careful not to use excessive sealant, as the excess will squeeze out and create an unsightly mess that is difficult to clean once cured.
Final Tightening and Alignment
Once all fasteners are hand-threaded and the alignment is verified, you can begin the final tightening process. If your muffler tip uses multiple bolts or set screws, do not tighten one completely before moving to the next. Instead, tighten them incrementally in a crisscross or alternating pattern. This distributes the clamping pressure evenly around the circumference of the pipe, preventing the tip from shifting out of alignment.
Avoid the temptation to overtighten the fasteners. Applying excessive torque can easily strip the threads on aluminum aftermarket tips, snap small bolts, or even deform and crush the stock exhaust pipe of your Mio i 125. If you are using a torque wrench, refer to the accessory manufacturer’s instructions for the exact torque specifications.
After tightening, take a final look at the assembly from both the rear and side profiles of the scooter. Ensure the tip is straight, level, and sits at an aesthetically pleasing angle that complements the lines of the Mio i 125’s bodywork.
Post-Installation Verification and Safety Checks
Before taking your scooter out for a ride, you must conduct a series of post-installation checks to ensure safety and reliability. Start the engine and let your Mio i 125 idle in a well-ventilated area. Place your hand near—but not touching—the connection point between the stock pipe and the new tip. Feel for any escaping air, which indicates an exhaust leak. Listen closely for any rattling, vibration, or unusual hissing sounds. If you detect a leak or rattle, turn off the engine, let the system cool completely, and check the tightness of the fasteners or the application of the sealant.
Next, verify the physical clearances under simulated load. Sit on the scooter and bounce gently to compress the rear suspension. If possible, have a friend observe the clearance between the muffler tip, the rear tire, and the rear shock absorber during this compression. There must be no contact whatsoever. Even a minor touch under load can damage your tire or cause the muffler tip to break off.
Additionally, observe the direction of the exhaust gas flow. The tip must direct the hot exhaust gases away from any plastic body panels, the rear turn signals, wiring harnesses, and the passenger’s footpeg area. Directing hot gases onto plastic surfaces will quickly melt them, creating a costly repair bill and potential safety hazards.
Finally, once the engine has been turned off and the exhaust has cooled down completely, perform a physical tug test. Grasp the muffler tip firmly (using a clean cloth to avoid leaving oil from your hands) and try to wiggle it. It should feel completely solid, with zero play or movement. If the tip moves even slightly, the fasteners must be re-evaluated and tightened securely before you ride.
Maintenance and Noise Compliance in the Philippines
The tropical climate in the Philippines presents unique challenges for motorcycle maintenance. High humidity, heavy seasonal rainfall, and salt-laden air in coastal regions can rapidly accelerate corrosion on aftermarket accessories, particularly if they are made of lower-grade metals or chrome-plated steel. To keep your muffler tip looking pristine, wash it regularly with mild motorcycle soap and clean water. Avoid using harsh acidic cleaners or abrasive scrubbing pads, which can scratch the finish and strip away protective coatings. After washing, dry the tip thoroughly with a clean microfiber cloth.
It is also critical to understand the legal boundaries regarding exhaust modifications in the Philippines. A muffler tip is designed strictly as a cosmetic enhancement. It does not alter the internal baffles, silencer, or overall flow of the exhaust system. Therefore, it should not increase the decibel level of your scooter.
Under the regulations enforced by the Land Transportation Office (LTO) and the Department of Environment and Natural Resources (DENR), modifying a motorcycle’s exhaust system to exceed standard noise limits is illegal and subject to heavy fines or confiscation. Modifying the actual muffler internals, removing the silencer, or installing an aftermarket tip that acts as an amplifier violates these environmental and traffic laws. By keeping your stock exhaust system intact and simply adding a compliant, properly fitted cosmetic tip, you can enjoy an upgraded look while remaining fully compliant with local road laws.
Frequently Asked Questions (FAQ)
Will installing a muffler tip change my Mio i 125's engine performance?
No. A cosmetic clamp-on or slip-on muffler tip does not alter the internal structure, backpressure, or flow rate of your stock exhaust system. Because the engine’s backpressure remains unchanged, there is no impact on fuel economy, power output, or engine performance. You do not need to perform any fuel mapping, ECU tuning, or carburetor adjustments after installing a standard cosmetic tip.
Can I use a universal muffler tip on my stock exhaust?
Yes, you can use a universal muffler tip, but you must verify the physical dimensions before purchasing. Measure the outer diameter of your Mio i 125’s stock exhaust pipe and compare it to the inner diameter of the universal tip. The tip must fit snugly over the pipe without excessive gaps. Additionally, ensure the universal mounting brackets or screws do not interfere with the scooter’s swingarm, tire, or body panels.
How do I prevent the muffler tip bolts from seizing over time?
Because the exhaust system undergoes extreme heating and cooling cycles, the metal fasteners can easily oxidize and seize, making future removal extremely difficult. To prevent this, apply a thin layer of copper-based or high-temperature anti-seize compound to the threads of the bolts or set screws before installing them. This compound acts as a barrier, protecting the threads from thermal fusing and corrosion.
Community discussion
Share your experience or ask a question. Comments are reviewed before publication.