
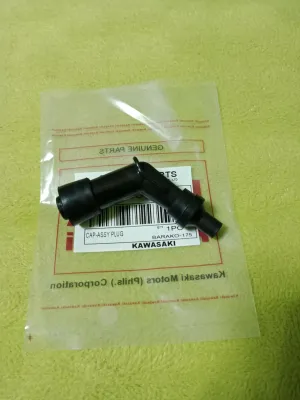
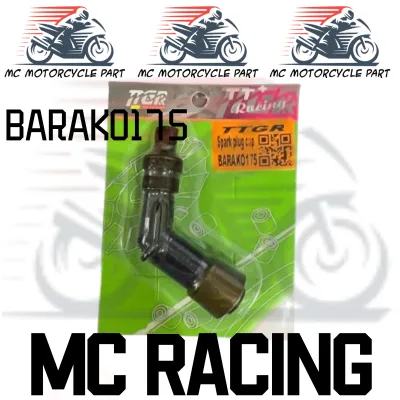
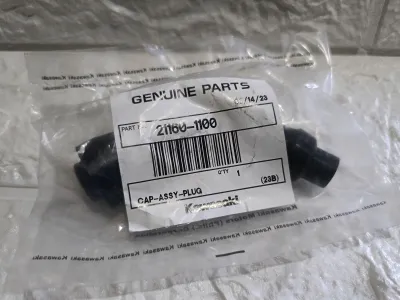
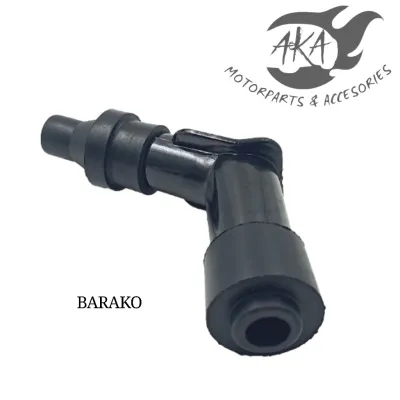
To properly install a new spark plug cap on your Kawasaki Barako, you must carefully disconnect the old cap from the spark plug terminal, unscrew it counterclockwise from the high-tension ignition wire, and then screw the new cap clockwise onto the wire before pressing it firmly onto the spark plug until it clicks into place. This straightforward maintenance task is essential for keeping your motorcycle’s ignition system fully weather-tight. Because the spark plug cap acts as the primary shield against moisture and road debris, ensuring a proper installation prevents engine misfires, poor fuel economy, and sudden stalling during heavy downpours or humid commutes.
Why a Secure Spark Plug Cap Matters for Your Barako
The spark plug cap, often referred to as the plug boot or cover, plays a vital role in your motorcycle’s electrical system. Its primary job is to deliver tens of thousands of volts of electrical energy from the ignition coil to the spark plug terminal without letting that current escape. At the same time, it acts as a physical barrier, sealing the spark plug well and preventing external contaminants from disrupting the electrical connection. Without a tight, secure cap, the high-voltage current can easily find an alternative path to the engine block, resulting in a weak spark or a complete lack of ignition.
In the Philippines, the Kawasaki Barako is a legendary workhorse, widely used for tricycles, heavy-duty deliveries, and daily commuting. This means the motorcycle is routinely subjected to harsh operating environments, including intense tropical heat, high humidity, thick road dust, and severe monsoon rains. When navigating flooded streets or riding through sudden afternoon downpours, water can easily splash onto the engine cylinder head. If your spark plug cap is loose, cracked, or poorly sealed, moisture will seep into the connection, grounding out the electrical current and causing your engine to sputter, lose power, or stall completely in the middle of traffic.
Products mentioned in this guide
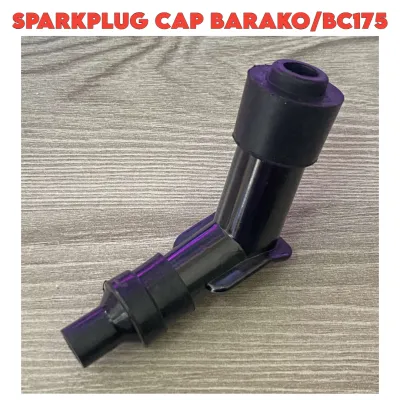

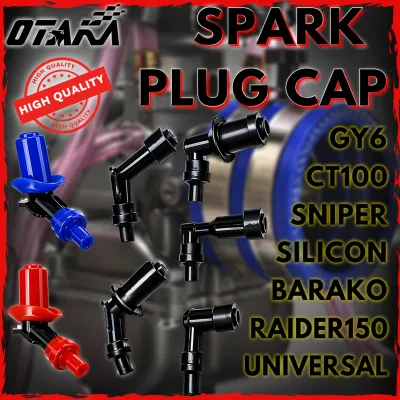
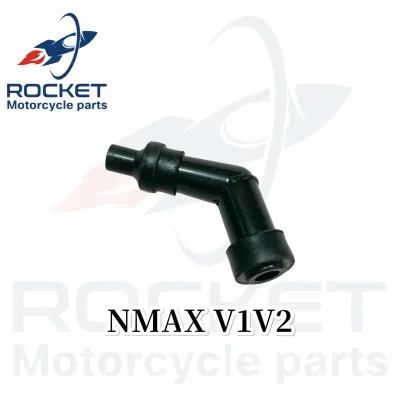
Prices are valid at publication and may change. Please refer to the product page for the latest price.
Neglecting a worn-out spark plug cap or failing to install a replacement correctly can lead to several performance issues. A weak or inconsistent connection at the spark plug terminal causes incomplete combustion, which manifests as engine misfires, rough idling, and a noticeable drop in fuel efficiency. Over time, the unburnt fuel can degrade your engine oil and foul the spark plug itself. Furthermore, electrical arcing—where the spark jumps from a damaged cap directly to the engine head—can damage your ignition coil and other electrical components, leading to expensive repairs that could have been easily avoided with a simple, timely cap replacement.
Tools and Materials for a Safe Replacement
Before starting the replacement process, gather the necessary tools and materials to ensure a smooth and efficient job. Having everything ready beforehand prevents unnecessary delays and helps you perform the installation cleanly.

- A New Spark Plug Cap: Ensure you purchase an OEM or high-quality compatible spark plug cap specifically designed for your Kawasaki Barako model. Check your owner's manual or consult a reputable motorcycle parts dealer to verify the correct resistance value (typically 5k ohms) and physical dimensions, as using an incorrect cap can affect ignition performance and radio frequency interference.
- Dielectric Grease: This specialized silicone-based grease is highly recommended for sealing out moisture, preventing corrosion, and making future removal much easier. It does not conduct electricity, so it should be applied to the rubber seals and ceramic insulator rather than directly on the metal contact points.
- Clean Microfiber Cloths or Shop Rags: You will need these to wipe away dirt, grease, and moisture from around the spark plug well and the high-tension wire before you begin working.
- Basic Hand Tools: While you generally do not need heavy tools to replace the cap itself, a standard spark plug socket wrench is useful if you plan to inspect, clean, or replace the spark plug at the same time. A pair of sharp wire cutters is also helpful if the end of your ignition wire needs to be trimmed.
Always prioritize safety when working on your motorcycle’s electrical system. Ensure the engine is completely cool to the touch to avoid painful burns from the cylinder head or exhaust pipe. Turn the ignition key to the “off” position and remove it from the switch, or disconnect the negative terminal of the battery to completely eliminate the risk of accidental electrical shock. If you are uncomfortable working with high-voltage ignition components, do not hesitate to seek the assistance of a qualified professional motorcycle mechanic.
How to Remove the Old Cap Without Damaging the Ignition Wire
Removing the old spark plug cap requires a gentle, deliberate approach. The high-tension (HT) lead connecting the ignition coil to the cap contains a delicate core that can easily stretch, tear, or separate from its internal terminals if subjected to excessive pulling force.
To begin, use a clean microfiber cloth to thoroughly wipe down the area surrounding the spark plug and the base of the ignition wire. Removing accumulated road grime, dust, and oil prevents these contaminants from falling into the spark plug well or entering the combustion chamber if you decide to remove the plug itself. A clean workspace also gives you a much better grip on the components, reducing the likelihood of your hands slipping during the process.
Next, locate the correct grip point on the spark plug cap. You must identify the hard rubber or rigid plastic section of the boot that sits directly over the spark plug terminal. Never grab or pull on the thin, flexible ignition wire itself. Pulling on the wire can break the internal copper or carbon strands, ruining the entire high-tension lead and requiring a much more complex and expensive ignition coil replacement.
To detach the cap from the spark plug, firmly pinch the rigid boot with your fingers. Gently twist the boot back and forth a few degrees to break any moisture seal or heat-bonding that has formed between the rubber boot and the ceramic body of the spark plug. Once the seal is broken, pull the cap straight upward and away from the spark plug terminal. Avoid pulling at an angle, as this can bend the spark plug’s threaded terminal or crack the fragile ceramic insulator.
Once the cap is free from the spark plug, you must disconnect it from the high-tension lead. On the Kawasaki Barako, the spark plug cap is typically threaded onto the ignition wire. To remove it, hold the high-tension wire firmly with one hand near the boot connection, and use your other hand to rotate the spark plug cap counterclockwise. Continue unscrewing the cap until it detaches completely from the wire. If the cap feels completely stuck or refuses to turn, stop and inspect the connection rather than applying brute force, which could tear the outer insulation of the ignition wire.
After successfully removing the old cap, carefully inspect the exposed end of the high-tension ignition wire. Look closely at the copper core inside the insulation; if you notice green corrosion, rust, or frayed wire strands, the electrical conductivity will be severely compromised. To fix this, use a pair of sharp wire cutters to trim approximately 5mm to 10mm off the end of the wire. This exposes fresh, clean copper strands, ensuring a perfect electrical connection for your new spark plug cap.
Installing the New Spark Plug Cap for a Weather-Tight Seal
With the old cap removed and the ignition wire prepared, you can proceed to install the new spark plug cap. Proper installation ensures a low-resistance electrical path and a robust, weather-tight seal that can withstand the most demanding tropical riding conditions.
Start by preparing the connection points. Take your clean cloth and wipe the spark plug’s ceramic insulator and metal terminal to remove any remaining dust or film. Next, apply a very thin layer of dielectric grease to the inside of the rubber boots on both ends of the new spark plug cap—the end that connects to the ignition wire and the end that fits over the spark plug. This grease acts as a barrier against water intrusion and prevents the rubber from bonding to the ceramic insulator over time due to engine heat, making future maintenance much easier.
To attach the new cap to the high-tension lead, insert the clean end of the ignition wire into the collar of the new spark plug cap. Push the wire in firmly until it contacts the internal threaded spike. While holding the wire steady, rotate the spark plug cap clockwise to screw it onto the wire. You will feel the internal spike threading into the copper core of the wire. Continue turning until the cap is snug and cannot be turned further by hand. Be careful not to overtighten, as this can strip the threads in the soft copper core. Ensure the rubber sealing grommet on the wire is pushed firmly over the collar of the cap to seal out water.
Now, align the spark plug cap directly over the spark plug terminal. It is critical to keep the cap aligned straight to prevent bending or damaging the internal metal contact spring inside the boot. If the cap is pushed on at an angle, the internal clip may fail to seat correctly, leading to a loose connection and subsequent electrical arcing.
Push the spark plug cap straight down onto the spark plug terminal with firm, steady pressure. As you push, pay close attention to the tactile feedback; you must feel or hear a distinct “click” or a sudden increase in resistance. This sensation indicates that the internal metal spring clip has successfully snapped over the threaded terminal of the spark plug, establishing a secure electrical connection.
To verify that the installation is successful, perform a gentle tug test. Grip the rigid body of the spark plug cap—again, never pull the wire—and give it a light upward tug. The cap should remain firmly locked in place on the spark plug. If it slides off easily without resistance, push it down again with more force, or check if the spark plug terminal nut is missing or loose. Finally, use a clean rag to wipe away any excess dielectric grease that may have squeezed out during the installation, as exposed grease can attract road dust and debris over time.
Testing the Ignition Connection Before You Ride
Before hitting the road or returning your Kawasaki Barako to daily service, it is essential to test the new connection to ensure the ignition system is functioning perfectly. This verification step helps you catch any installation errors in the safety of your driveway.
If you disconnected the negative battery terminal or removed any engine side covers for better access, carefully reinstall them now. Double-check that no tools, rags, or loose wires are left near the engine cylinder head or hot exhaust components.
Insert the ignition key, turn it to the “on” position, and start your motorcycle. The engine should start quickly and settle into a smooth, consistent idle. Listen closely to the engine’s rhythm; there should be no sputtering, hesitation, or sudden drops in RPM. If the engine idles roughly or struggles to stay running, turn off the ignition immediately and verify that the spark plug cap is fully seated and that the high-tension wire is securely threaded into the cap.
Once the engine has warmed up slightly, gently rev the throttle to increase the engine speed. This increases the electrical demand on the ignition system. The engine should respond instantly and rev smoothly without any flat spots or misfires, confirming that the new spark plug cap can handle the high-voltage load under acceleration.
For a final, thorough check, park your motorcycle in a dimly lit garage or wait until dusk to perform a visual and auditory inspection. With the engine idling, look closely at the spark plug cap and the high-tension wire. Check for any visible blue sparks jumping from the boot to the engine cylinder head, which indicates electrical arcing. Listen carefully for any distinct snapping or clicking sounds, which are telltale signs of high-voltage leakage. If the area remains dark and quiet, your new spark plug cap is perfectly sealed and ready for the road.
Frequently Asked Questions (FAQ)
Can I reuse the old spark plug cap if it looks intact?
While a spark plug cap might look perfectly fine on the outside, a visual inspection alone is not enough to guarantee its performance. Over time, the constant heat cycles of the engine and exposure to tropical humidity cause the rubber seals to harden, lose their elasticity, and develop microscopic cracks. Furthermore, the internal metal spring clip can stretch and lose its gripping tension, while the internal resistor can degrade, leading to high electrical resistance. If the rubber feels stiff, if the cap does not click tightly onto the spark plug, or if you are experiencing intermittent misfires in wet weather, it is highly recommended to replace the cap rather than trying to reuse it.
What are the symptoms of a damaged ignition wire from improper removal?
If the high-tension ignition wire was pulled or yanked during removal, the internal copper or carbon core can easily break or separate from the terminal pin inside the coil or cap. This damage is often hidden beneath the outer rubber insulation, making it hard to see. The most common symptoms of a damaged ignition wire include intermittent engine misfires that become more severe when riding over bumps, a noticeable loss of engine power, poor throttle response, and difficulty starting the motorcycle. In severe cases, the engine may refuse to start at all, or it may stall abruptly when exposed to high humidity or rain, as the electrical current leaks through the damaged insulation instead of reaching the spark plug.
Community discussion
Share your experience or ask a question. Comments are reviewed before publication.