
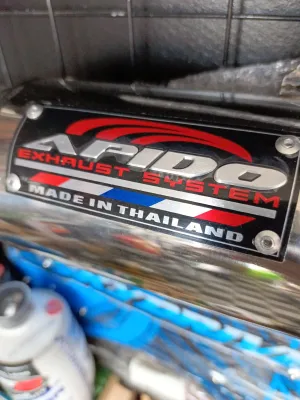
Upgrading your motorcycle’s exhaust system is one of the most common modifications for riders looking to customize their machine’s performance and aesthetic. However, installing an aftermarket canister apido on a Yamaha motorcycle often comes with a major challenge: managing the sheer volume of the exhaust note. While a deeper tone is highly desirable, an excessively loud, raspy exhaust can lead to driver fatigue, neighborhood complaints, and costly fines from local traffic enforcers like the Land Transportation Office (LTO) in the Philippines. Fortunately, achieving a street-friendly sound is entirely possible through proper installation techniques, high-quality sealing materials, and effective sound-dampening accessories.
To achieve a balanced, deep tone that remains within the legal decibel limits, the installation must focus on preventing exhaust leaks and utilizing proper baffling. A successful setup requires a methodical approach to mounting, sealing the header joint, securing the slip-on connections, and maintaining the internal packing of the silencer. By following the correct mechanical steps, you can enjoy the aesthetic and weight-saving benefits of your aftermarket setup without turning your daily commute into an acoustic nuisance.
Essential Tools and Sealing Materials for a Quiet Install
Before beginning the installation process, gathering the correct tools and high-quality sealing materials is essential. Using improper tools can strip delicate fasteners on your Yamaha engine, while skipping critical sealing components will inevitably lead to exhaust leaks that produce a loud, popping noise.
Products mentioned in this guide
Prices are valid at publication and may change. Please refer to the product page for the latest price.
Basic Hand Tools You will need a set of metric sockets and a matching ratchet (typically 8mm, 10mm, 12mm, and 14mm) to handle the various bracket bolts and header nuts. A set of open-ended metric wrenches is highly useful for accessing tight spaces around the cylinder head. Additionally, high-quality hex keys are required to secure the mounting straps and the bolts on the aftermarket canister.
Torque Wrench A precision torque wrench is highly recommended for this project. The exhaust studs on Yamaha cylinder heads are made of relatively soft steel or aluminum, and overtightening the header nuts can easily strip the threads or snap the studs entirely. Tightening these fasteners to the exact manufacturer specifications ensures a secure, leak-free seal without risking expensive engine damage.
New Exhaust Gasket Never reuse an old exhaust gasket. The copper or multi-layer steel gasket located at the cylinder head exhaust port is designed to crush and deform to create a perfect, airtight seal when first tightened. Once compressed, it loses its elasticity. Reusing a compressed gasket is the primary cause of minor exhaust leaks, which manifest as an annoying, high-pitched ticking sound. Purchase a brand-new, high-quality copper gasket compatible with your specific Yamaha model before starting.
High-Temperature Anti-Seize and Sealants Applying a thin layer of copper-based high-temperature anti-seize compound to the exhaust stud threads prevents the nuts from seizing or galling due to the extreme heat cycles of the engine. For the slip-on joints of the exhaust pipe, a tube of high-temperature silicone exhaust sealant (rated for at least 300°C) is invaluable for filling minor gaps between the mid-pipe and the canister inlet.
The Db Killer (Silencer Baffle) Ensure you have a compatible db killer or silencer insert. This metal baffle fits inside the outlet of the canister, restricting the direct exit of exhaust gases to break up sound waves and reduce overall decibels. If your aftermarket setup did not come with one pre-installed, purchase a compatible insert separately before attempting to ride on public streets.
Safely Removing the Stock Yamaha Exhaust
Removing the original equipment manufacturer (OEM) exhaust system requires patience to avoid damaging the motorcycle’s frame, bodywork, or engine components.

Safety Boundaries and Preparation Always park the motorcycle on a flat, level surface using the center stand to ensure maximum stability. The entire engine and exhaust system must be completely cool to the touch before you begin working. Exhaust pipes retain extreme heat long after the engine is turned off, and attempting to remove a hot system can result in severe skin burns. Work in a well-ventilated area, and wear protective eyewear to shield your eyes from falling rust, dirt, or carbon deposits.
Disconnecting Sensors and Bodywork If your Yamaha model features an electronic fuel injection (EFI) system, locate the oxygen (O2) sensor threaded into the header pipe or mid-pipe. Carefully trace the wire back to its plastic connector and unplug it before attempting to unscrew the sensor. Unscrewing the sensor while it is still plugged in will twist and ruin the delicate internal wiring. Next, remove any lower fairings, engine cowls, or passenger footpeg brackets that obstruct your path. Use plastic trim removal tools to avoid scratching or cracking the painted body panels.
Unbolting the System Begin by loosening the exhaust header nuts at the cylinder head. Do not remove them completely yet; simply back them off a few turns. Next, support the weight of the heavy OEM muffler with one hand while removing the main mounting bolts on the frame or passenger footpeg bracket. Supporting the muffler prevents the heavy assembly from sagging, which can put immense bending stress on the delicate cylinder head studs. Once the frame bolts are removed, carefully back off the header nuts completely and slide the entire exhaust system away from the motorcycle.
Inspecting the Exhaust Port With the stock system removed, immediately inspect the cylinder head exhaust port. Use a plastic or brass pick to gently pry out the old exhaust gasket, which is often crushed flat and stuck inside the port recess. Be extremely careful not to scratch the aluminum mating surface of the cylinder head. Check the area for any excessive black carbon buildup, oily residue, or physical damage to the studs, and wipe the port clean with a lint-free cloth.
Step-by-Step Installation of the Canister Apido
Installing your new aftermarket system requires a systematic approach to ensure proper alignment, structural integrity, and an airtight seal. Please note that modifying your motorcycle’s exhaust system can alter engine backpressure, emissions, and road legality. If you are unsure of your mechanical skills, seek assistance from a qualified professional technician. Always check your specific vehicle documentation and original-manufacturer instructions before proceeding.
Preparing the Mating Surface and Gasket Ensure the exhaust port is entirely clean and free of debris. Take your brand-new copper exhaust gasket and press it firmly into the cylinder head recess. If the gasket keeps falling out due to gravity, apply a tiny dab of high-temperature grease to the back of the gasket to temporarily stick it to the aluminum port. The grease will safely burn off once the engine starts.
Mounting the Header Pipe Apply a very thin coat of high-temperature anti-seize to the exhaust studs. Carefully slide the new aftermarket header pipe flange onto the studs. Thread the exhaust nuts onto the studs by hand. It is critical to spin them at least three to four full turns using only your fingers to ensure they are not cross-threading. Never use an impact wrench or a socket ratchet to start these nuts, as stripping the cylinder head threads is a highly complex and expensive repair.
Aligning the Mid-Pipe and Canister If your aftermarket system consists of multiple pieces, slide the mid-pipe onto the header. Apply a thin, even bead of high-temperature exhaust sealant to the slip-joint connection to prevent minor leaks. Next, slide the canister apido onto the mid-pipe. Wrap the mounting strap around the canister and align it with the motorcycle’s frame mounting point. Insert the mounting bolt by hand, keeping it loose. Keeping all joints finger-tight at this stage allows the components to align naturally, preventing unwanted tension or binding in the system.
The Tightening Sequence Once the entire system is properly aligned and clearing all body panels, begin the final tightening sequence. Start at the cylinder head. Tighten the header nuts gradually and evenly, alternating between the two nuts to compress the copper gasket uniformly. Use your torque wrench to tighten these nuts to the manufacturer’s specified torque rating, which is typically between 15 and 20 Newton-meters (Nm) for small-displacement Yamaha engines. Once the header is secure, tighten the mid-pipe clamps, and finally, torque the main canister mounting bracket bolt on the frame.
Reconnecting the O2 Sensor Carefully thread the O2 sensor back into the new header pipe port, taking care not to twist the wire. Tighten it securely using an open-ended wrench. Reconnect the electrical wiring harness, ensuring the wire is routed neatly and secured with zip ties away from any hot exhaust surfaces or moving parts like the rear suspension or swingarm.
Key Techniques to Keep the Sound Street-Friendly
An aftermarket exhaust does not have to be obnoxiously loud to perform well. Implementing specific sound-dampening techniques during and after the installation will keep your exhaust note deep, smooth, and respectful of local noise ordinances.
Securing the Db Killer The single most effective tool for sound reduction is the db killer. This removable baffle physically disrupts the high-velocity exhaust gas pulses, reducing the harsh, high-frequency crackle of the engine. Ensure the db killer is fully inserted into the rear of the canister. Secure it using a high-quality stainless steel screw or rivet. If using a screw, apply a drop of high-temperature threadlocker to the threads. The constant vibration of the exhaust can easily loosen unsecured screws, causing the baffle to blow out while riding.
Eliminating Header Leaks Many riders mistake the sound of a bad exhaust leak for the natural sound of an aftermarket pipe. A leak at the cylinder head joint allows high-pressure combustion noise to escape directly into the air before passing through the canister’s muffling elements. This results in a highly metallic, raspy ticking or clacking sound. Ensuring a perfect seal with a brand-new copper gasket and tightening the header nuts to the correct torque is the absolute foundation of a quiet, deep exhaust note.
Sealing Slip-Joint Connections Slip-on style exhausts rely on a tight metal-to-metal fit between the pipes. However, manufacturing tolerances can leave tiny gaps that allow exhaust gases and sound waves to escape. Applying high-temperature silicone exhaust sealant to these joints before assembly creates a flexible, airtight barrier. This simple step eliminates minor leaks and prevents the annoying popping sound that often occurs when decelerating or letting off the throttle.
Verifying and Repacking the Canister The sound-dampening qualities of an aftermarket canister rely heavily on the acoustic packing material wrapped around its inner perforated core. Budget canisters or older, worn-out units may have thin, loose, or degraded fiberglass packing. If your exhaust note sounds hollow or excessively loud, consider repacking the canister. This involves drilling out the end-cap rivets, pulling out the core, wrapping it tightly with high-density ceramic wool or high-quality fiberglass exhaust matting, and securing it with new stainless steel rivets. High-density packing absorbs high-frequency noise waves, leaving you with a much quieter, deeper rumble.
Final Inspections and Sound Verification
Before taking your modified Yamaha out for a long ride, perform a series of thorough visual and auditory checks to ensure safety and compliance.
Visual Clearance Verification Exhaust pipes expand and move slightly due to thermal expansion and engine vibration. Inspect the entire length of the installed system, ensuring there is a clearance of at least 15 to 20 millimeters from any plastic body panels, rubber hoses, brake lines, and the rear shock absorber. Extreme heat radiating from the pipe can easily melt nearby plastics or compromise the safety of your rear braking system.
The Cold Start Leak Test Start the engine while the motorcycle is still on its center stand. Let it idle gently without revving. Carefully pass your hand near the cylinder head joint and the mid-pipe slip joints, keeping a safe distance of a few inches to avoid burning yourself. Feel for any distinct puffs of warm air escaping from the joints. Listen closely for any sharp ticking, hissing, or popping sounds. If you detect a leak, shut off the engine immediately, let it cool, and adjust the tightening or add more sealant.
Real-World Volume Assessment Once you are confident there are no leaks, gently rev the engine in neutral to evaluate the overall volume and tone. The sound should be a controlled, deep bass rumble rather than a sharp, piercing bark. Finally, perform a low-speed test ride around a quiet, enclosed area. Pay close attention to how the exhaust sounds under load and deceleration. Check for any unusual metallic vibrations or rattling, which could indicate a loose bracket, heat shield, or an improperly secured db killer.
Frequently Asked Questions (FAQ)
Will an aftermarket canister void my Yamaha warranty?
Installing an aftermarket exhaust system generally voids the manufacturer’s warranty on the original exhaust components. It can also void the warranty on engine-related parts if a failure is directly linked to the modification, such as running too lean due to increased airflow without adjusting the fuel-injection system. Always consult your local authorized Yamaha dealer to understand their specific warranty policies before performing any modifications.
How do I know if my exhaust gasket is leaking?
A leaking exhaust gasket typically produces a distinct, rhythmic ticking or tapping sound that increases in speed and volume as the engine RPM rises. Other common symptoms include a noticeable loss of low-end engine torque, excessive popping or backfiring when you let off the throttle, and the visible buildup of black carbon soot around the cylinder head exhaust port.
Community discussion
Share your experience or ask a question. Comments are reviewed before publication.