
Achieving a distinct turbo sound for motorcycle setups is a popular modification for riders who want their bikes to stand out on the road. While a genuine turbocharger sound—characterized by a high-pitched compressor spool and the sharp hiss of a blow-off valve—requires a complex, forced-induction system, you can simulate this acoustic profile on a naturally aspirated engine. This is typically achieved by installing a high-flow aftermarket exhaust system combined with a specialized exhaust whistle, often called a turbo flute. By choosing the right components and installing them correctly, you can dramatically alter your motorcycle’s acoustic signature.
Before purchasing any parts, it is essential to understand that modifying a motorcycle’s exhaust system affects more than just its sound. Changes in exhaust backpressure directly impact engine performance, fuel efficiency, and operating temperatures. Consequently, any modification must be approached with a clear understanding of your specific motorcycle model, its mechanical limits, and local road safety regulations. This guide provides a comprehensive overview of how to safely swap your exhaust system and install a sound-modifying whistle to achieve that coveted turbo-like tone.
Understanding the "Turbo Sound" on a Motorcycle
To set realistic expectations, it is important to distinguish between a mechanically functional turbocharger and an acoustic simulation. A real turbocharger uses exhaust gases to spin a turbine, which forces more air into the combustion chamber to increase horsepower. The characteristic high-pitched whine is the sound of the turbine spinning at speeds exceeding 100,000 RPM, while the famous “pssh” sound occurs when the blow-off valve releases excess pressure during gear shifts. Because installing a functional turbocharger on a small-displacement motorcycle is highly complex, expensive, and requires extensive engine reinforcement, most riders opt for cosmetic and acoustic alternatives.
Products mentioned in this guide
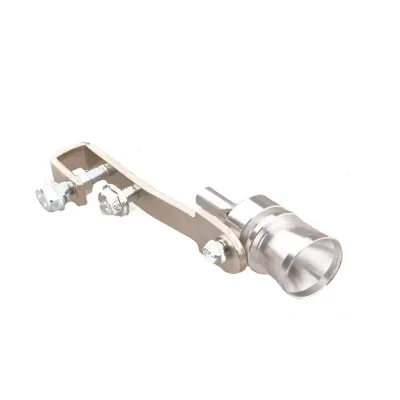
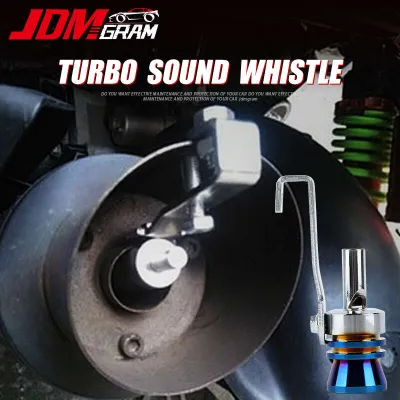

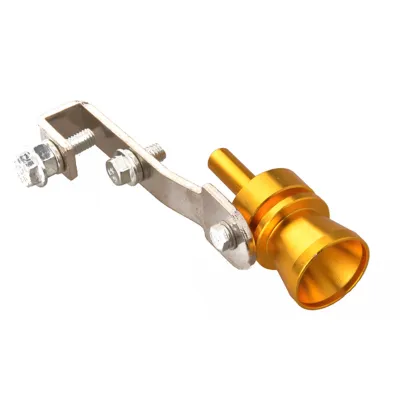
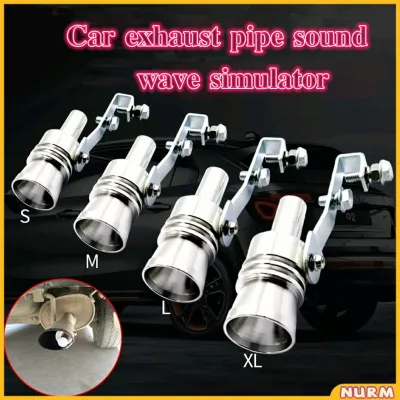
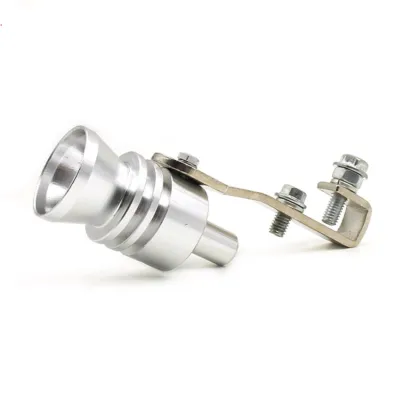
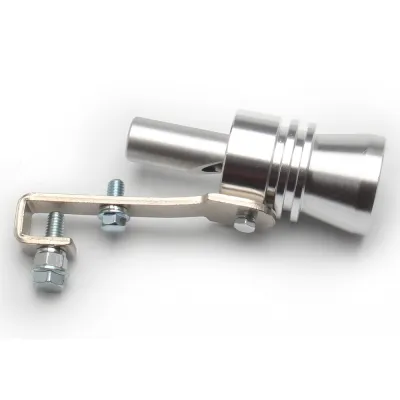
Prices are valid at publication and may change. Please refer to the product page for the latest price.
An aftermarket exhaust system changes the sound profile of your motorcycle by modifying how exhaust gases flow and resonate. A slip-on muffler replaces only the rear portion of the exhaust, retaining the factory header pipes and catalytic converter. While a slip-on is easy to install and alters the exhaust note to be deeper or throatier, it rarely produces the high-pitched whistle associated with a turbo.
In contrast, a full exhaust system replaces everything from the cylinder head’s exhaust port to the tailpipe tip. By eliminating restrictive factory baffles and optimizing pipe diameters, a full system increases exhaust gas velocity, creating a crisper, louder sound. When paired with an exhaust whistle—a small aluminum accessory inserted into the tailpipe—the escaping gases are forced through a narrow, tuned aperture, generating a high-frequency whistling sound that mimics a spooling turbocharger under acceleration.
Tools and Safety Gear for Exhaust Installation
Performing an exhaust swap requires a specific set of hand tools to ensure components are removed and installed without damaging the motorcycle. Before beginning, gather a metric socket set (typically covering 8mm to 14mm sizes), a set of combination wrenches, and Allen keys. A calibrated torque wrench is highly recommended to tighten header bolts to the manufacturer’s exact specifications, preventing stripped threads or loose fittings. Additionally, keep a can of high-quality penetrating oil nearby to help loosen stubborn, heat-cycled fasteners.

Personal safety is paramount when working on any motorized vehicle. Always wear eye protection to shield your eyes from falling rust, dirt, and carbon debris when working underneath the chassis. Heavy-duty, heat-resistant work gloves are also essential to protect your hands from sharp metal edges and accidental slips.
Never attempt to work on an exhaust system immediately after riding. In the tropical climate of the Philippines, motorcycle engines and exhaust pipes reach extreme temperatures and retain heat for a long time. Allow the motorcycle to cool completely in a shaded, well-ventilated area for at least two hours before touching any components. If you are unfamiliar with basic mechanical tools or feel uncomfortable performing these modifications, always consult a qualified professional mechanic to handle the installation.
Step-by-Step Guide to Swapping Your Exhaust
Replacing a factory exhaust system requires patience and precision. Ensuring that each component is aligned correctly prevents exhaust leaks and structural stress on the engine block.
Removing the Stock Exhaust System
To begin, place the motorcycle on a stable, level surface, utilizing a center stand or a secure paddock stand to keep the bike completely upright. Locate the mounting points where the exhaust system connects to the frame and the engine cylinder head. Apply a generous amount of penetrating oil to the cylinder head flange nuts and frame mounting bolts, allowing it to soak for at least 15 to 30 minutes to break down rust and road grime.
Next, carefully remove any protective heat shields, plastic fairings, or passenger footpeg brackets that block access to the exhaust mounts. Using the correct size socket, slowly loosen the flange nuts at the cylinder head. Avoid applying sudden, excessive force; heat-cycled studs can easily snap off inside the engine block, resulting in a costly and difficult repair.
Once the cylinder head nuts are loose, support the weight of the muffler with one hand or a soft block while removing the main frame mounting bolts. This prevents the heavy stock exhaust from falling suddenly, which could bend the cylinder head studs or scratch the motorcycle’s swingarm and bodywork. Gently wiggle the entire exhaust assembly free and set it aside.
Mounting the New Aftermarket Exhaust
With the old exhaust removed, inspect the exhaust port on the cylinder head. Use a clean, lint-free cloth to wipe away any accumulated carbon deposits, and carefully pry out the old exhaust gasket. Always install a brand-new copper or composite crush gasket; reusing an old, compressed gasket is a primary cause of exhaust leaks, which can ruin the tone of your new system and degrade engine performance.
Align the new aftermarket header pipe with the cylinder head exhaust port, ensuring it sits perfectly flush against the new gasket. Thread the flange nuts onto the studs by hand for several turns. Hand-threading is a critical safety step to prevent cross-threading, which can destroy the threads on the engine block.
Next, loosely attach the middle and rear mounting brackets of the exhaust system to the motorcycle’s frame. Leave these bolts slightly loose to allow for minor adjustments as you align the pipes. Using a calibrated torque wrench, tighten the cylinder head flange nuts to the exact torque specifications specified in your motorcycle’s service manual. Tighten these nuts in a progressive, alternating diagonal pattern to ensure the gasket is crushed evenly. Finally, tighten the frame mounting bolts fully, ensuring that any rubber vibration isolators are properly seated to prevent metal-on-metal wear.
Adding an Exhaust Whistle for the Turbo Effect
To achieve the specific turbo sound for motorcycle setups, you can install an exhaust whistle (often called a turbo flute) into the tailpipe of your new aftermarket exhaust. These devices operate on the principle of a whistle, where a portion of the escaping exhaust gas is channeled through a narrow, tuned chamber. As the engine RPM increases, the velocity of the exhaust gas rises, forcing air through the whistle’s nozzle to create a high-frequency sound that closely resembles a turbocharger’s spool.
To install the whistle, select a size that matches the inner diameter of your aftermarket exhaust tip. Insert the whistle into the tailpipe with the wider, trumpet-shaped opening facing inward toward the engine. Secure the whistle’s mounting bracket against the inner wall of the tailpipe tip using the provided set screws.
Because motorcycles experience significant vibration, apply a high-temperature thread-locking compound to the set screws to prevent them from loosening over time. For a more permanent and secure installation, some riders choose to have a professional welder apply a small tack weld to hold the bracket in place. Once secured, you can adjust the internal valve or slide mechanism on the whistle to tune the pitch. The simulated turbo sound will be most noticeable under heavy acceleration when exhaust gas pressure is at its peak, as well as during sudden deceleration.
Post-Installation Checks and Engine Tuning
After completing the physical installation, move the motorcycle to a well-ventilated outdoor area for initial testing. Start the engine and let it idle. Carefully listen around the cylinder head flange and exhaust pipe joints for any rapid ticking or puffing sounds, which indicate an exhaust leak. You can also carefully pass your hand near the joints—without touching the hot metal—to feel for escaping gas. If you detect a leak, shut off the engine, let it cool completely, and re-torque the fasteners.
Upgrading to a freer-flowing aftermarket exhaust reduces backpressure, which alters the engine’s air-fuel ratio (AFR). Because the engine can expel exhaust gases more quickly, it naturally draws in more air, often causing the engine to run lean (too much air, not enough fuel). A lean-running engine operates at significantly higher temperatures, which can lead to valve damage, piston wear, and flat spots in acceleration.
In the Philippines, where motorcycles regularly idle in heavy traffic under high ambient temperatures, managing engine heat is vital for longevity. If you have installed a full exhaust system, adjusting the fueling is highly recommended. For carbureted motorcycles, this involves installing larger carburetor jets. For modern fuel-injected motorcycles, installing an aftermarket fuel controller or obtaining an ECU remap from a qualified tuning shop is necessary to restore the correct air-fuel balance and protect your engine.
Navigating LTO Regulations and Safety Compliance
Before riding your modified motorcycle on public roads, it is crucial to understand the legal regulations enforced by the Land Transportation Office (LTO) and local government units in the Philippines. The LTO maintains strict guidelines regarding vehicle modifications and noise limits. Under current regulations, motorcycle exhaust systems must not exceed specified decibel limits, which are typically enforced at 99 decibels when tested under standardized conditions.
Operating a motorcycle with an excessively loud exhaust, a straight-pipe system with no baffles, or a removed catalytic converter can result in heavy fines, roadside apprehension, and the confiscation of non-compliant exhaust parts. Additionally, your motorcycle may fail the mandatory inspections at private emission testing centers or the Motor Vehicle Inspection System (MVIS) during annual registration renewal.
To minimize legal risks, choose an aftermarket exhaust that includes a removable silencer (dB-killer) to keep noise levels within legal limits during daily commutes. Be aware that modifying your exhaust system can void your motorcycle’s manufacturer warranty. It is highly recommended to keep your original factory exhaust in clean storage so you can easily reinstall it for official inspections or if you need to return the vehicle to its original condition.
Frequently Asked Questions (FAQ)
Will an exhaust whistle damage my motorcycle engine?
An exhaust whistle introduces a minimal restriction to the exhaust flow to generate its sound, which creates a slight amount of additional backpressure. On a healthy, properly tuned engine, this minor restriction will not cause damage. However, you must ensure the whistle is sized correctly for your exhaust pipe diameter. A whistle that is too large or poorly secured could block the exhaust path entirely, leading to a loss of power, overheating, or the whistle blowing out of the tailpipe.
Do I need to remap my ECU after installing a slip-on exhaust?
If you are only installing a basic slip-on muffler that retains the factory header pipe and catalytic converter, the stock ECU can usually adjust the fueling within its pre-programmed limits, meaning a remap is not strictly necessary. However, if you install a full exhaust system that removes the catalytic converter or significantly alters the exhaust flow, the engine will likely run lean. In this scenario, an ECU remap or a fuel controller is highly recommended to protect your engine from running too hot and to optimize power delivery.
Community discussion
Share your experience or ask a question. Comments are reviewed before publication.