
Installing an aftermarket muffler pipe for rusi royal 125 can enhance your motorcycle’s exhaust note, improve aesthetic appeal, and potentially offer slight weight savings. However, riding on public roads in the Philippines requires strict adherence to local laws, specifically those enforced by the Land Transportation Office (LTO). Operating a motorcycle with an illegally modified exhaust system can result in steep fines, roadside apprehension, and failure during your annual registration renewal.
To successfully upgrade your exhaust system without getting flagged at checkpoints, you must select a compliant aftermarket pipe and execute a precise installation. This process involves understanding the legal decibel limits, gathering the correct tools, replacing worn seals, and verifying that the final setup remains within the bounds of national noise standards.
Understanding LTO Noise Regulations for Modified Exhausts
The Land Transportation Office (LTO) maintains strict guidelines regarding motorcycle exhaust modifications to curb noise pollution on public roads. Under current regulations, specifically referencing Joint Administrative Order (JAO) No. 2014-01, operating a motor vehicle with an exceptionally loud, modified, or open muffler is a punishable offense. The national standard sets the maximum allowable noise level for motorcycles at 99 decibels (dB), measured at a specific distance, angle, and engine speed.
Products mentioned in this guide
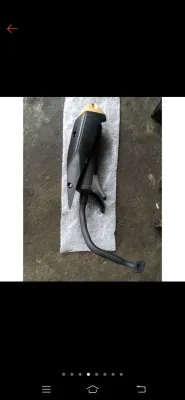
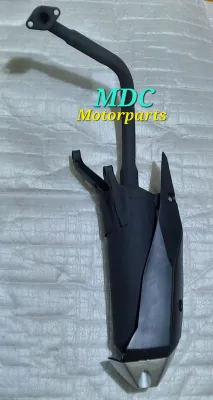
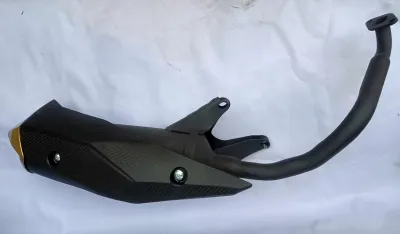
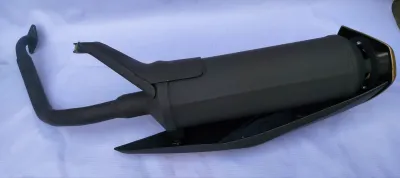
Prices are valid at publication and may change. Please refer to the product page for the latest price.
Straight pipes, open pipes, and systems with completely removed or modified baffles are strictly prohibited because they easily exceed this 99 dB limit. When shopping for an aftermarket muffler pipe for rusi royal 125, look for products that are explicitly labeled as street-legal or those that come equipped with a removable or adjustable decibel killer (dB killer). A high-quality dB killer acts as an internal baffle, restricting gas flow just enough to suppress high-frequency sound waves and keep the exhaust volume within legal limits.
It is highly recommended to retain your motorcycle’s original stock exhaust system even after installing an aftermarket upgrade. Keep the stock pipe safely stored in your garage. You may need to reinstall it for the annual Motor Vehicle Inspection System (MVIS) evaluation or if you plan to travel through specific municipalities in the Philippines that enforce local ordinances with even lower noise thresholds than the national LTO standard.
Tools and Materials Needed for the Installation
Before beginning the installation, gather all necessary tools and safety equipment. Having the correct gear on hand ensures a smooth workflow, prevents damage to your motorcycle’s engine studs, and protects you from physical injury.

- Hand Tools: A complete socket wrench set (typically requiring 10mm, 12mm, and 14mm sockets), a torque wrench, a set of Allen (hex) keys, and a spring puller tool (often supplied with aftermarket slip-on exhausts).
- Consumables: A brand-new copper exhaust gasket (crush ring) compatible with the Rusi Royal 125 engine port, high-temperature anti-seize compound, and isopropyl rubbing alcohol.
- Safety and Support Gear: Heat-resistant work gloves, safety glasses, and a sturdy paddock stand or your motorcycle's built-in center stand.
Using a new exhaust gasket is a mandatory step for any exhaust replacement. Exhaust gaskets are designed to crush and deform to create a gas-tight seal when first tightened; a used gasket will not seal properly a second time, leading to exhaust leaks that can affect engine performance and increase noise.
Step-by-Step Guide to Installing the Muffler Pipe
Replacing the exhaust system on the Rusi Royal 125 is a straightforward mechanical task, but it requires patience and attention to detail. Follow these steps carefully to ensure a secure, leak-free fit.
Removing the Stock Exhaust System
First, place your Rusi Royal 125 on its center stand on flat, level ground to ensure the motorcycle is completely stable. Allow the engine and the entire exhaust system to cool down completely before touching any components. Attempting to work on a hot engine can result in severe skin burns and increases the risk of stripping the threaded steel studs on the aluminum cylinder head.
Locate the mounting points of the stock exhaust. You may need to temporarily loosen or remove adjacent components, such as the right-side passenger footpeg assembly or decorative plastic side covers, to gain unobstructed access to the exhaust mounting brackets. Spray a small amount of penetrating oil onto the cylinder head exhaust flange nuts and the frame mounting bolts, especially if your motorcycle has been exposed to rain or high humidity, which can cause rust.
Using a socket wrench, carefully loosen the two flange nuts securing the exhaust header to the engine cylinder head. Turn them slowly to avoid snapping the exhaust studs. Once the header nuts are loose, support the weight of the muffler canister with one hand while removing the main mounting bolts that secure the exhaust to the motorcycle’s frame. Gently slide the entire stock exhaust system away from the engine port and set it aside. Use a small pick tool to extract the old, compressed copper gasket from inside the cylinder head exhaust port, taking care not to scratch the soft aluminum mating surface.
Fitting and Securing the Aftermarket Muffler
Take your new copper exhaust gasket and press it firmly into the clean cylinder head exhaust port. If the gasket keeps falling out, you can apply a tiny dab of general-purpose grease to the back of the gasket to hold it temporarily in place; the grease will harmlessly burn off once the engine starts.
Align the header portion of your aftermarket muffler pipe for rusi royal 125 with the exhaust port. Carefully slide the exhaust flange over the threaded cylinder head studs. If your aftermarket system is a multi-piece design (consisting of a separate header pipe and a slip-on canister), install the header pipe first without fully tightening it. This allows for slight adjustments during alignment.
Thread the cylinder head flange nuts onto the studs by hand. Always start threading by hand for at least three to four full turns to ensure the threads are properly aligned and to prevent cross-threading, which can ruin the engine block. Next, align the rear mounting bracket of the muffler canister with the motorcycle’s frame or passenger footpeg hanger. Insert the mounting bolts by hand.
Once all fasteners are hand-tightened and the exhaust is properly aligned without binding, use a torque wrench to tighten the cylinder head flange nuts. Tighten them in an alternating pattern, turning each nut a little bit at a time to ensure even pressure across the gasket. Tighten these nuts to the manufacturer’s specified torque setting (typically between 15 to 20 Newton-meters, though you should verify this in your product documentation). Finally, tighten the rear frame mounting bolts securely.
If your aftermarket exhaust uses tension springs to join the header pipe to the canister, use your spring puller tool to stretch and hook the springs onto the designated tabs. Wipe down the entire length of the new stainless steel or alloy exhaust pipe with a microfiber cloth sprayed with isopropyl rubbing alcohol. Removing finger oils, grease, and dirt before starting the engine is crucial; otherwise, these oils will burn permanently into the metal, leaving unsightly, dark stains when the pipe heats up.
Checking for Leaks and Clearance
Start the engine and let it idle on the center stand. Do not rev the engine immediately. Lean down and listen closely near the cylinder head exhaust port and any slip-on joints. Listen for a distinct hissing, popping, or ticking sound, which indicates an exhaust leak.
You can also carefully wave your hand a few centimeters away from the joints (without making direct contact with the hot metal) to feel for escaping exhaust pulses. Alternatively, spray a small amount of soapy water onto the joints; if bubbles continuously form and pop, you have a leak. If a leak is detected, turn off the engine, let it cool, and check that the gasket is seated correctly and that the flange nuts are evenly torqued.
While the engine is idling, conduct a thorough visual inspection of the clearance around the new exhaust pipe. Ensure there is adequate space (at least 15 to 20 millimeters) between the hot metal surfaces and sensitive motorcycle components. Check the clearance near the rear tire, the swingarm, the rear brake lines, electrical wiring harnesses, and plastic body panels. Extreme heat radiating from an improperly positioned exhaust can melt plastics, degrade brake fluid, or damage tires over time.
Verifying Noise Compliance and Road Readiness
Once the physical installation is complete, you must verify that your motorcycle’s noise level complies with LTO standards before riding on public roads. Relying solely on your ears to judge volume is highly subjective and risky, as what sounds moderate to you may still exceed legal limits.
To perform a basic noise check, you can use a dedicated decibel meter or download a calibrated sound level meter application on your smartphone. While smartphone apps are not as precise as professional-grade equipment, they provide a helpful baseline. To replicate the official LTO testing procedure:
- Position the decibel meter at a 45-degree angle relative to the exhaust outlet.
- Place the meter exactly 0.5 meters (50 centimeters) away from the tip of the muffler, level with the exhaust opening.
- Ensure you are in an open, outdoor space away from walls or structures that could reflect sound waves and distort the reading.
- With the motorcycle in neutral, start the engine and hold the throttle steady at approximately 2,000 to 2,500 RPM (or half of the engine's maximum rated RPM if specified by local guidelines).
If the meter reads above 99 dB, your current setup is non-compliant. To remedy this, you must adjust or reinstall the dB killer. Ensure the baffle is securely fastened inside the exhaust tip using its mounting screw, and consider applying a drop of high-temperature thread-locking compound to the screw to prevent it from vibrating loose while riding. If the noise level remains too high even with the dB killer installed, the aftermarket muffler may lack sufficient internal packing material, or it may not be suitable for street use in the Philippines.
Always carry your motorcycle’s registration documents (OR/CR) and ensure that your aftermarket exhaust does not feature highly conspicuous, illegal modifications like bypass valves or manual sound adjusters. Keeping your setup clean, secure, and properly baffled will ensure a hassle-free experience at roadside checkpoints.
Frequently Asked Questions (FAQ)
Will installing an aftermarket muffler void my Rusi Royal 125 warranty?
Yes, installing an aftermarket muffler can void the manufacturer’s warranty on your Rusi Royal 125, particularly for components related to the engine, fuel injection system, and emissions control. Motorcycle manufacturers generally specify that any unauthorized modification to the intake or exhaust systems voids coverage for associated mechanical failures. Before proceeding with the installation, consult your local Rusi dealer or carefully read your warranty booklet to understand the specific terms and limitations.
Can I use a straight pipe or remove the baffle to make it louder?
No, you should not use a straight pipe or remove the internal baffle. Doing so directly violates LTO noise regulations and local municipal ordinances across the Philippines. Operating a motorcycle with an open or unbaffled exhaust guarantees apprehension at law enforcement checkpoints, resulting in significant fines (often starting at ₱15,000 under JAO 2014-01 for some violations), the potential confiscation of your aftermarket pipe, and unnecessary noise pollution in your community.
Do I need to register my modified exhaust with the LTO?
You do not need to register an individual aftermarket muffler as a separate item with the LTO. However, your motorcycle must successfully pass the comprehensive Motor Vehicle Inspection System (MVIS) testing—which includes strict emissions and decibel checks—whenever you renew your annual vehicle registration. If your aftermarket exhaust fails the decibel limit or emission standards during this inspection, you will be required to reinstall your stock exhaust system before your registration renewal can be approved.
Community discussion
Share your experience or ask a question. Comments are reviewed before publication.