
Installing an aftermarket pipe exhaust muffler on your motorcycle is a practical way to customize its sound, alter its power delivery, and reduce overall weight. While the physical process of swapping a muffler is a manageable task for many riders, it requires careful preparation, precision, and a clear understanding of your motorcycle’s mechanical limits. Before purchasing any aftermarket components, it is critical to recognize that exhaust modifications directly affect engine performance, emissions, and road legality. If you lack the proper tools, mechanical experience, or confidence to perform these steps safely, you should always consult a qualified professional motorcycle mechanic to handle the installation.
Pre-Installation Checks and Tool Preparation
Before turning a single wrench, you must verify the exact compatibility of your new pipe exhaust muffler. Do not rely on generic category terms or “universal fit” labels, as minor variations in pipe diameter, mounting bracket positions, and sensor bungs can make an exhaust incompatible with your machine. Check the manufacturer’s documentation to ensure the part is engineered specifically for your motorcycle’s make, model, model year, and engine displacement.
In the Philippines, road legality is a major consideration for any exhaust modification. The Land Transportation Office (LTO) and local government units enforce strict noise limits, typically capped at 99 decibels (dB) measured at a specific distance and engine RPM. Installing a muffler that exceeds these limits or removes emissions-control devices like catalytic converters can result in heavy fines, failed registration inspections, or impoundment. Always check local ordinances and national regulations to ensure your chosen component is fully street-legal before proceeding.
Products mentioned in this guide
![[ Big Promotion ] Universal New Arrival Motorcycle Exhaust Muffler Tail Pipe with silencer db killer](https://img.lazcdn.com/g/p/421b1335345bb049ea2e29989375fd07.jpg_400x400q80.jpg_.webp)
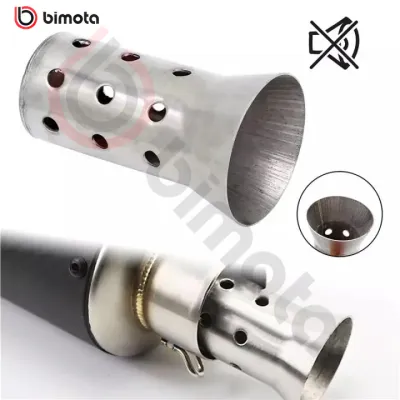
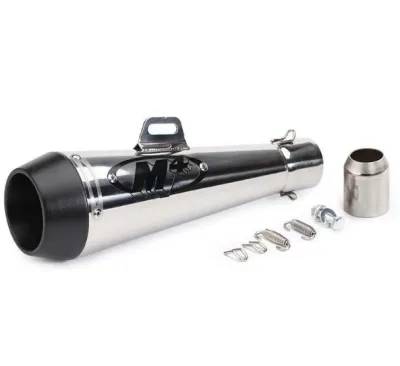
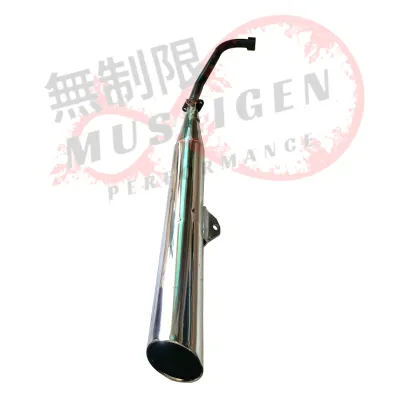
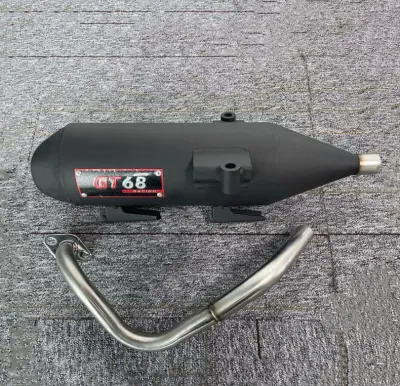
Prices are valid at publication and may change. Please refer to the product page for the latest price.
Working on a recently ridden motorcycle poses severe burn risks. Exhaust pipes retain intense heat long after the engine is turned off. Park the motorcycle on a flat, stable surface—preferably using a center stand or paddock stand—and allow the engine, header pipes, and muffler to cool completely to room temperature before starting your work.
Gathering the correct tools beforehand prevents interruptions and minimizes the risk of damaging your hardware. You will need a basic socket set, open-ended wrenches, a calibrated torque wrench, safety glasses, and a high-quality penetrating oil to loosen stubborn fasteners. Crucially, obtain a brand-new exhaust crush gasket designed for your specific engine header or mid-pipe joint. Never attempt this installation without consulting your motorcycle’s official factory service manual, which contains crucial mounting diagrams, step-by-step disassembly instructions, and exact torque specifications.
Removing the Stock Exhaust System
Motorcycle exhaust systems are constantly exposed to extreme heat cycles, road grime, and, in tropical climates like the Philippines, high humidity and salt air. This harsh environment causes exhaust flange nuts and mounting bolts to corrode and seize over time. To prevent breaking these critical fasteners, apply a generous amount of penetrating oil to all exhaust studs, nuts, and bracket bolts several hours before you begin disassembly. Allow the oil to penetrate the threads to dissolve rust and carbon buildup.

When you are ready to unbolt the system, never let the heavy stock muffler hang unsupported. As you loosen the final mounting bracket bolts, the weight of the exhaust can suddenly drop, bending the header studs, cracking the engine head casting, or damaging nearby brake lines, swingarms, and fairings. Always support the weight of the muffler with one hand or secure it with a mechanical jack or soft tie-downs before removing the final retaining hardware.
Carefully back off the exhaust flange nuts at the engine cylinder head, then remove the chassis mounting bolts. Gently slide the stock muffler assembly backward off the header pipe or mid-pipe joint. If the connection is tight, use a gentle twisting motion rather than forceful prying, which can deform the thin-walled metal pipes.
Once the old muffler is removed, locate the old exhaust crush gasket inside the exhaust port or mid-pipe coupling. These gaskets are made of soft copper or composite materials designed to deform and create a gas-tight seal when compressed. Because they deform permanently upon installation, they cannot be reused. Extract the old gasket carefully using a non-marring pick, and discard it. Attempting to reuse a crushed gasket will almost certainly result in immediate exhaust leaks, which can cause engine popping, loss of backpressure, and localized overheating.
Before proceeding, inspect the header pipe mating surface, exhaust port, and mounting studs. Look for carbon deposits, rust, or thread damage on the studs. If you discover stripped threads, bent studs, or severe corrosion that prevents nuts from spinning smoothly, stop immediately. Do not attempt to force the installation; instead, consult a professional mechanic to repair or replace the damaged engine studs.
Step-by-Step Installation of the Aftermarket Pipe Exhaust Muffler
Begin the installation by inserting your new, correct-sized exhaust crush gasket into the header pipe port or the designated mid-pipe recess. Ensure the gasket sits completely flush and centered. If the gasket keeps falling out during assembly, you can apply a tiny dab of high-temperature grease to hold it temporarily in place; the grease will harmlessly burn off once the engine starts.
Carefully align and slide the new aftermarket pipe exhaust muffler onto the header pipe. It should seat fully and evenly without requiring excessive force. If you encounter resistance, double-check that the pipe diameters match and that there are no burrs or obstructions inside the slip-joint. Forcing the pipes together at an angle can deform the metal, scratch the finish, or create a permanent gap that will leak exhaust gases.
With the muffler in place, hand-thread the exhaust flange nuts and mounting bracket bolts. Hand-threading is a critical step that prevents cross-threading, which can easily ruin the soft aluminum threads of the engine head or the steel threads of the frame. Spin the nuts and bolts in by hand until they are snug against the mounting surfaces before using any wrenches.
Before tightening any fasteners, check the physical alignment of the entire exhaust tract. Verify that the muffler maintains adequate ground clearance and does not contact critical moving or heat-sensitive components. Ensure there is a safe gap between the exhaust and the rear shock absorber, brake lines, drive chain, swingarm, passenger footpegs, and plastic fairings. A misaligned exhaust can rub against these parts, leading to melted plastics, worn brake hoses, or structural damage over time.
Once alignment is verified, tighten the flange nuts gradually and evenly using a crisscross pattern. This technique ensures that the new crush gasket compresses uniformly, preventing localized gaps and leaks. Never use an impact wrench or rely on guesswork; instead, use a calibrated torque wrench to tighten all fasteners to the exact torque specifications listed in your motorcycle’s service manual or the aftermarket manufacturer’s instructions. Over-tightening can easily snap the exhaust studs or strip the engine block threads.
Finally, secure the main mounting bracket to the motorcycle’s frame. Ensure that the bracket aligns naturally with its mounting point without requiring you to pull or twist the exhaust pipe into position. Forcing a misaligned bracket into place introduces constant lateral stress into the exhaust system, which can lead to stress cracks in the welds or header pipes under the influence of engine vibrations.
Post-Installation Verification and Leak Testing
Before starting the engine, perform a final, comprehensive visual clearance check. Pay close attention to how the exhaust system might interact with the motorcycle under load. Keep in mind that the rear suspension compresses during riding, which brings the swingarm, rear tire, and brake calipers closer to the muffler. Ensure that even at full suspension travel, no components will contact the hot exhaust pipe.
Roll the motorcycle to a well-ventilated outdoor area—never run an engine inside a closed garage due to the immediate danger of carbon monoxide poisoning. Start the engine and allow it to idle smoothly. Do not rev the engine immediately; let it gradually reach its normal operating temperature so the metal components can expand and settle.
As the engine idles, listen closely to the joint connections. An exhaust leak typically produces a distinct, rhythmic hissing, popping, or ticking sound near the cylinder head or mid-pipe slip-joints. These sounds are often more pronounced when the engine is cold.
To safely pinpoint minor leaks without risking burns, wear heavy leather mechanic’s gloves and hold your hand a safe distance (about 5 to 10 centimeters) away from the joints to feel for escaping pulses of hot air. Alternatively, you can observe the joints for any immediate soot patterns or apply a small amount of soapy water to the cool joints before starting the engine; escaping exhaust gases will create visible bubbles at the leak site. If you detect a leak, shut off the engine, let it cool completely, and verify that the fasteners are torqued evenly and the gasket is seated correctly.
During this initial run, check the motorcycle for any unusual vibrations or rattling noises coming from the mounting brackets or heat shields. Keep an eye on the instrument cluster to ensure no new warning lights, such as the engine check light, appear on the dashboard.
Common Mistakes and Tuning Considerations
One of the most frequent errors during exhaust installation is over-tightening the flange nuts. Because exhaust studs are subjected to extreme heat cycles, they become brittle over time. Applying excessive torque can easily snap the stud off flush with the cylinder head, a costly mistake that often requires removing the engine head to drill out the broken bolt. Always rely on a torque wrench and adhere strictly to the manufacturer’s torque limits.
Another critical factor is fuel tuning. Factory motorcycles are tuned to run at a specific air-fuel ratio optimized for the restrictive stock exhaust system. Installing a free-flowing aftermarket pipe exhaust muffler reduces exhaust backpressure and increases airflow through the engine. While this can improve performance, it often causes the engine to run lean (too much air, too little fuel). A lean-running engine runs significantly hotter, which can lead to spark plug damage, burnt valves, and eventual engine failure. To prevent this, you may need to perform fuel mapping, install a fuel controller, or have the engine control unit (ECU) professionally tuned by an authorized service center.
When assembling the mounting hardware, applying a thin smear of high-temperature copper anti-seize compound to the bolt threads can make future removal much easier. However, you must keep this compound strictly away from the exhaust gasket mating surfaces and slip-joint interiors, as it can interfere with the physical seal and cause leaks.
Finally, do not discard your stock exhaust system, original mounting hardware, or heat shields. Store them safely in a dry place. You may need to temporarily reinstall the factory exhaust to comply with future registration inspections, clear strict local noise checkpoints, preserve warranty coverage, or restore the motorcycle to its original condition if you decide to sell it.
Community discussion
Share your experience or ask a question. Comments are reviewed before publication.