
Installing LED ambient lighting strips is one of the most accessible ways to personalize your vehicle’s cabin, creating a modern, custom atmosphere that enhances night driving. Achieving a clean, professional-looking installation requires a systematic approach: preparing the surfaces, planning a hidden wiring path that avoids critical safety systems, mounting the strips securely, and connecting them to a safe, switched power source. In tropical climates like the Philippines, high humidity and intense cabin heat require extra attention to adhesive preparation and wire routing to ensure the installation remains secure over time. While many basic kits are designed for straightforward DIY setup, any electrical modification demands careful attention to your vehicle’s specific electrical limits and safety boundaries.
Preparation and Safety Checks Before Installation
Before handling any electrical components, you must verify that your chosen LED kit is fully compatible with your vehicle’s electrical system. Most passenger cars operate on a 12-volt direct current (DC) system, which matches the standard voltage of most aftermarket LED kits, but you must verify this specification in both your vehicle’s owner’s manual and the LED kit’s documentation. Read the manufacturer’s manual completely to understand the power draw, fuse ratings, and specific wiring requirements of your kit.
Next, locate your vehicle’s interior fuse box, which is typically situated under the driver’s side dashboard, behind a removable panel near the steering column, or inside the passenger-side glove compartment. Consult your vehicle’s manual to identify an unused or non-critical accessory (switched) fuse slot, such as the one designated for the accessory outlet or cigarette lighter. Avoid tapping into critical safety fuses, including those for the airbags, anti-lock braking system (ABS), or engine control unit (ECU).
Products mentioned in this guide
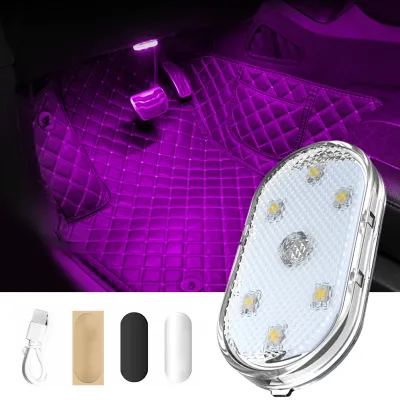
24,820 Lazada user ratings
Adds a cozy atmosphere to my car, Versatile light for various uses, Convenient USB rechargeable design, Great emergency light for unexpected…Read full reviewShow less
Adds a cozy atmosphere to my car, Versatile light for various uses, Convenient USB rechargeable design, Great emergency light for unexpected situations, Impressive battery life, Easy to install and use, Perfect for car interior decoration, Love the automatic sensor function,
Compatibility:sakto lang Durability:matibay Siya matagal malobat Brightness:sobrang Ganda niyaBlaine Riga, Sindika Makishi, Shimikan Dasarov…Read full reviewShow less
Compatibility:sakto lang Durability:matibay Siya matagal malobat Brightness:sobrang Ganda niyaBlaine Riga, Sindika Makishi, Shimikan Dasarovnikov. Versatile light for various uses, Great emergency light for unexpected situations,
Its brightness is very high, and it is very bright when it is turned on during the day. It can be installed in the car or at home, and can b…Read full reviewShow less
Its brightness is very high, and it is very bright when it is turned on during the day. It can be installed in the car or at home, and can be removed at any time. Going to buy some more colored ones for decoration.
Quality:great Appearance:great Performance:great fast delivery, secured and naka bubble wrap. complete accessories.. masubukan din sa loob n…Read full reviewShow less
Quality:great Appearance:great Performance:great fast delivery, secured and naka bubble wrap. complete accessories.. masubukan din sa loob ng sasakyan. 👍👌🙏
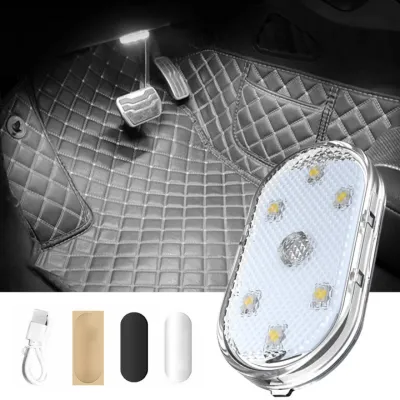
2,296 Lazada user ratings
Nice and complete items received... Fast shipping and delivery... Well wrapped and packed... Definitely will order again soon if the items w…Read full reviewShow less
Nice and complete items received... Fast shipping and delivery... Well wrapped and packed... Definitely will order again soon if the items will perform well and last long... Thank you 😊😘😉
nung una akala q mlaki. maliit lng pla, cute size 😊. pro ok nmn, mliwanag. at ang kgndahan rechargeable ska khit saan pwde ikabit o idikit. …Read full reviewShow less
nung una akala q mlaki. maliit lng pla, cute size 😊. pro ok nmn, mliwanag. at ang kgndahan rechargeable ska khit saan pwde ikabit o idikit. thank u seller, rider & lazada
Compatibility:ok Durability:ok Brightness:okThe MOGEE brand ensures high quality.,....................
thank you,dilivered it in a good condition,dko alam kung pano patayun..😂tap lang pala ng matagal...
Prices are valid at publication and may change. Please refer to the product page for the latest price.
Gather all necessary tools before starting the installation to prevent interruptions. You will need plastic trim removal pry tools to safely lift interior panels without scratching the plastic, microfiber cloths, high-purity isopropyl alcohol (70% or higher) for surface cleaning, zip ties for securing loose wires, and electrical tape. If you plan to hardwire the system, have an add-a-circuit fuse tap, wire strippers, and a crimping tool ready.
To eliminate the risk of short circuits, electrical shock, or damage to your car’s sensitive electronic control modules, disconnect the negative battery terminal before touching any wiring. Loosen the nut on the negative terminal clamp using a wrench, slide the clamp off the post, and tuck it securely away from the battery to prevent accidental contact during the installation process.
Planning Strip Placement and Safe Wiring Routes
A successful installation relies on a layout that looks seamless during the day and provides balanced, indirect illumination at night. Ideal mounting zones include the footwells under the front seats, the lower edge of the dashboard, and along the natural seams of the door panels or center console. Avoid placing the LED strips in direct line of sight; instead, position them so the light reflects off the floorboards or lower panels, creating a soft, diffused glow.

Safety must be your absolute priority when planning the layout. You must strictly avoid mounting LED strips or routing wires across airbag deployment zones, such as the side curtain areas or the lower dashboard where knee airbags are housed. Ensure that no wires or components interfere with the steering column’s movement or the driver’s pedal area. A loose wire drooping onto the accelerator or brake pedal poses an immediate and severe driving hazard.
Plan a hidden routing path that utilizes existing gaps in the vehicle’s interior trim. Wires can be tucked behind plastic console panels, run under the edge of the carpeting, or routed through rubber door grommets for a completely hidden look. Avoid routing wires over sharp metal brackets, moving seat rails, or areas where they will be pinched, stretched, or exposed to excessive heat.
Decide on a secure, hidden location for the LED control module, such as behind the lower dashboard trim or inside the center console. The module must be positioned where it is protected from moisture and physical impact, yet remains accessible if you need to press a physical pairing button, replace an inline fuse, or point an infrared remote control.
Surface Preparation and Mounting the LED Strips
The high humidity and elevated cabin temperatures common in tropical regions can quickly degrade low-quality adhesives, causing LED strips to sag or fall off. To prevent this, thorough surface preparation is essential. Clean every planned mounting surface using a clean microfiber cloth dampened with isopropyl alcohol to remove dust, body oils, and residual dashboard dressings or vinyl protectants.
Allow the cleaned surfaces to dry completely for several minutes before attempting to mount the strips. Avoid using household glass cleaners or general-purpose surface sprays, as these often leave behind a thin, slick residue that prevents the adhesive backing from bonding properly to the plastic or vinyl trim.
Once the surface is dry, peel a small section of the adhesive backing from the LED strip. Press the strip firmly onto the prepared surface, applying consistent pressure along its entire length for at least thirty seconds to activate the pressure-sensitive adhesive. For areas with textured plastics or curved surfaces where adhesive alone may struggle, use the mounting clips or brackets included in your kit, securing them with small screws or automotive-grade double-sided acrylic foam tape.
When positioning the strips around corners or transitions, be careful not to bend them at sharp angles. LED strips contain delicate internal circuitry that can easily crack if bent too aggressively; always follow the manufacturer’s instructions regarding the minimum bend radius and only cut or flex the strips at designated markings.
Routing Wires and Connecting to a Power Source
With the strips mounted, route the power cables back to the central control module. Use your plastic trim pry tools to gently lift the edges of the console or door panels, tucking the wires neatly out of sight. Secure the wires at regular intervals using zip ties or adhesive wire clips to prevent them from rattling against the plastic panels while driving or shifting over time.
To connect the system to power, you have two primary options depending on your kit’s design. The simplest and most reversible method is plugging the power adapter directly into the vehicle’s 12V accessory socket (cigarette lighter). For a cleaner, hardwired look, use an add-a-circuit fuse tap (typically costing around ₱150 to ₱300 at local auto supply shops) to connect the positive wire to the switched accessory fuse slot you identified earlier in the preparation phase. Connect the ground wire to a clean, unpainted metal bolt on the vehicle’s chassis.
Ensure all electrical connections are fully insulated with heat-shrink tubing or high-quality electrical tape to prevent short circuits. Keep all wiring clear of heat sources, such as the heater core or climate control ducting, and ensure there is enough slack near moving parts like seat adjustment tracks so the wires are not pulled taut when the seats are adjusted.
If your vehicle uses a complex CAN bus electrical system, or if the installation instructions require splicing directly into the factory wiring harness, stop the installation immediately. Modern automotive electrical systems are highly sensitive to voltage changes, and improper splicing can trigger warning lights or damage expensive control units. In these cases, consult a qualified automotive electrician to complete the wiring safely.
Testing the System and Reassembling the Interior
Before snapping your vehicle’s trim panels back into place, you must verify that the entire system functions correctly. Reconnect the negative battery terminal and tighten the clamp securely. Turn the vehicle’s ignition key to the accessory (ACC) or run position to supply power to the newly installed lighting system.
Cycle through all the colors, brightness levels, and lighting modes using the kit’s remote control or smartphone application. Check that all strips illuminate evenly, that there are no flickering sections, and that the control module responds promptly to commands from the driver’s seat. If any strip fails to light up, turn off the ignition, disconnect the battery, and verify all wiring connections before proceeding.
Once you have confirmed the system is fully functional, turn off the ignition and begin securing the remaining loose components. Use zip ties to bundle any excess wire length neatly, securing the bundle behind the dashboard or under the seats where it cannot be seen or stepped on. Mount the control module securely using double-sided tape or zip ties to prevent it from rattling against the interior panels.
Carefully snap the plastic trim panels, door cards, and dashboard pieces back into their original positions, ensuring that no wires or LED strips are pinched or crushed by the retaining clips. Perform a final visual inspection of the cabin in daylight to ensure all wires are completely hidden, the strips are aligned straight, and the interior looks completely stock when the lights are turned off.
Frequently Asked Questions (FAQ)
Will installing LED ambient lights drain my car battery?
If your LED ambient lights are connected to a switched power source, such as an accessory fuse or a 12V socket that turns off with the ignition, they will not drain your battery when the car is parked. However, if you hardwire the system to a constant power source that remains active when the engine is off, the lights will continue to draw current. Over time, this continuous draw can deplete your battery, especially if the vehicle is left parked for several days. Always check your kit’s manual for standby power consumption and ensure the power source cuts off when the key is removed.
Are interior LED light strips legal for road use?
In the Philippines, interior ambient lighting is generally legal for road use as long as it does not distract the driver, impair outward visibility, or confuse other motorists. To remain compliant with local road safety guidelines, avoid using flashing, strobing, or excessively bright settings while driving at night. Additionally, you must never display flashing red and blue lights, as these are strictly reserved for emergency vehicles and law enforcement. Keep the illumination soft, indirect, and focused downward toward the footwells to ensure a safe and distraction-free driving environment.
How do I remove the LED strips without damaging the dashboard?
To remove adhesive-backed LED strips without damaging your vehicle’s interior trim, use a hairdryer or a heat gun on a low setting to gently warm the adhesive. The heat softens the glue, allowing you to peel the strip away slowly and smoothly. Avoid pulling the strip forcefully, as this can tear soft-touch dashboard plastics, vinyl, or leather surfaces. Once the strip is removed, clean any remaining sticky residue using a plastic pry tool and an automotive-safe adhesive remover, verifying on a small, hidden area first to ensure it does not discolor your trim.
Community discussion
Share your experience or ask a question. Comments are reviewed before publication.